Nintendo 64 (N64) RGB SCART video output using THS7374 amp

I recently bought an Open Source Scan Converter, or OSSC, primarily to make PlayStation 1 games look better on my display. After seeing how well RGB looked on the PS1, I had to try it on other consoles.

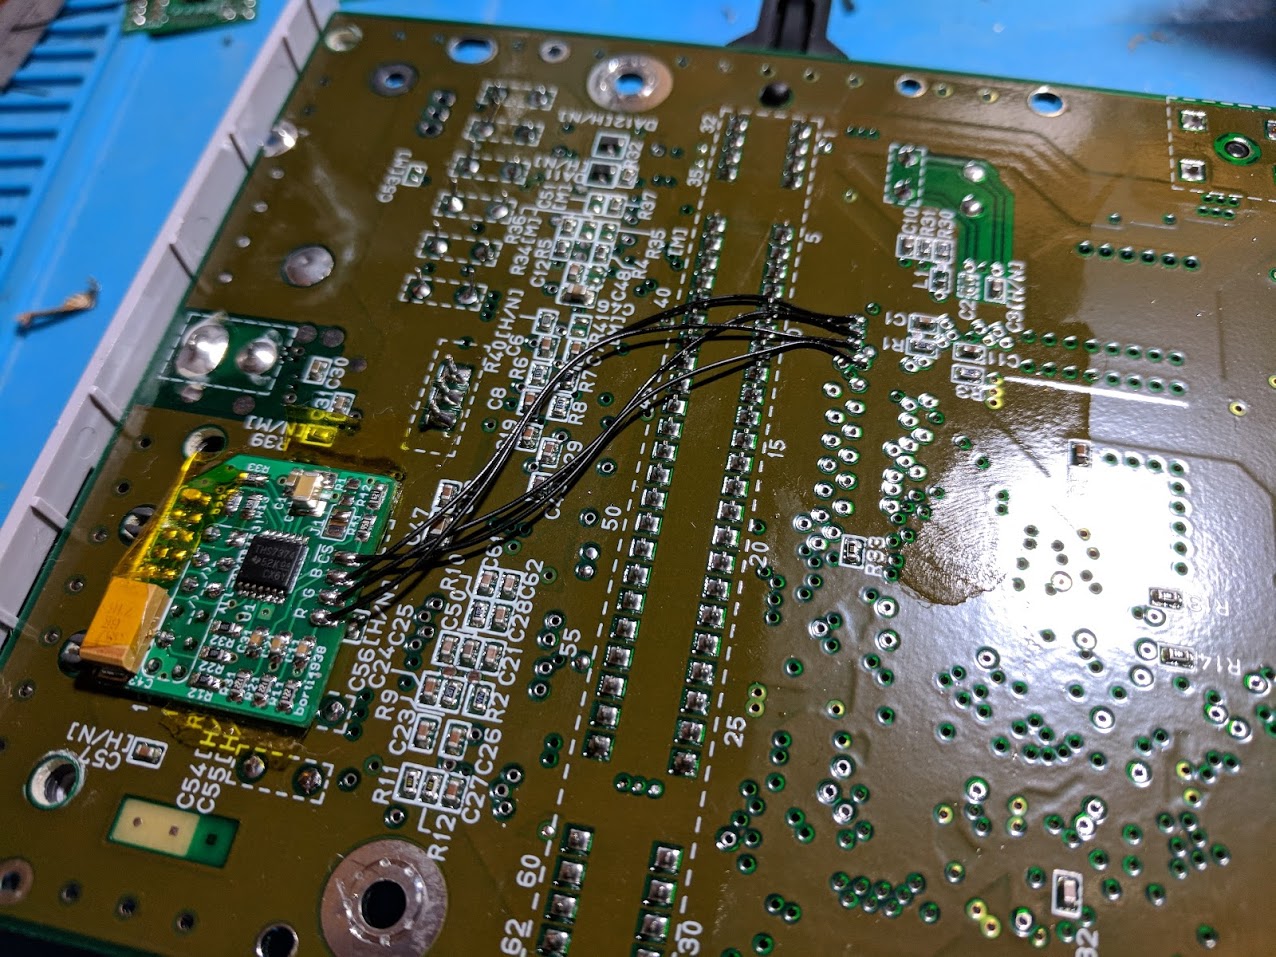
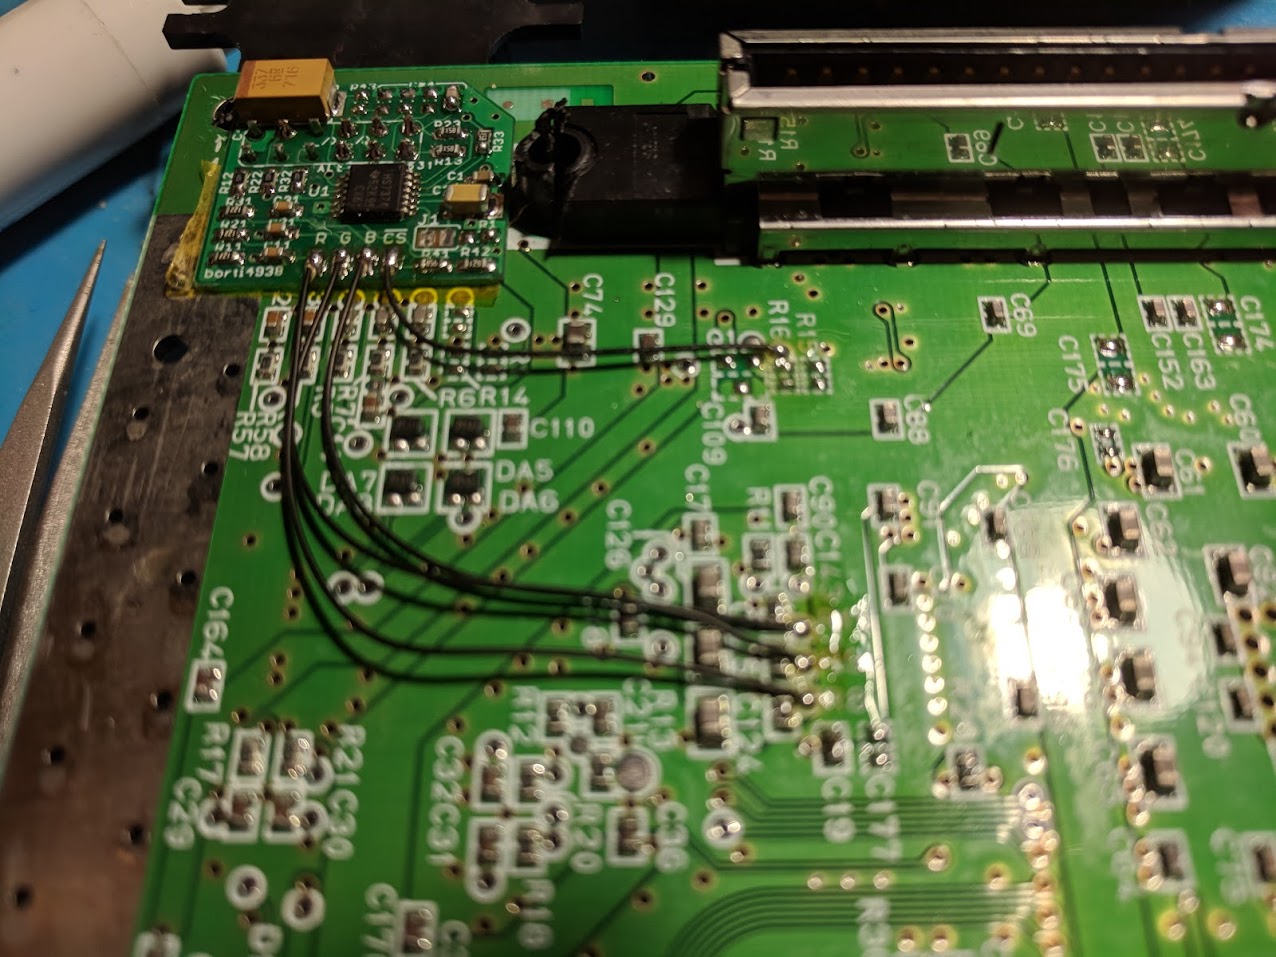
I already owned a Nintendo 64 and was using S-Video for video output, which is better than composite, but not great. When I installed the THS7374 amplifier into my SNES Jr. I bought an extra amplifier so I could do the same mod to my Nintendo 64. That’s what this guide covers, getting RGB SCART video output from the Nintendo 64. [Read More]

SNES Jr. (SNS-101) RGB SCART video output using THS7374 amp

I recently bought an Open Source Scan Converter, or OSSC, primarily to make PlayStation 1 games look better on my display. After seeing how well RGB looked on the PS1, I had to try it on other consoles.

I ended up buying an SNES Jr. (SNS-101) for the improved visual quality from the 1-CHIP board design. The biggest downside of the original SNES Mini is that it doesn’t output RGB SCART out of the box, so I installed an THS7374 based amplifier, which is what this guide covers.

What is RGB video?

In the United States most older video game consoles used either RF or composite video (coaxial cable like what you get cable TV out of, or the yellow/red/white cables) to output video onto a TV. These video output options are passable on a CRT television, but on a digital HDTV it can look quite bad. [Read More]

PM-41 (2) PSone MM3 modchip installation (PIC12F629)

In April I wrote a post about installing an MM3 modchip into my PSone with the original PM-41 board. I have also written a post about installing an MM3 modchip into my SCPH-7501 with the PU-22 board. This is a similar post, but covering the final revision of the PS1, the PM-41 (2) board.

Before I begin I’ll give you a little bit of background information. I purchased eleven PSone consoles on eBay with the goal of installing MM3 modchips, and reselling them for a decent profit. Out of the eleven consoles eight were the older PM-41 board design, and three were the newer PM-41 (2) board. [Read More]

SCPH-7501 PlayStation 1 MM3 modchip installation (PU-22 NTSC board)

In April I wrote a post on how to install a MM3 modchip into a PM-41 NTSC PSone console. This is a similar post, but covering anSCPH-7501 PlayStation 1 MM3 modchip installation. An MM3 modchip allows the PlayStation to boot directly to game backups burned to CDs.

MM3 modchips also allow you to run games from other regions. You can buy an MM3 chip for not a whole lot of money, they’re around $4-10. Cost primarily depending on how long you want to wait for your chip. Buying a chip from China is cheaper, but takes longer to arrive. I purchased my chip from a US seller on eBay preprogrammed and prewired for $8 shipped. [Read More]

CECH-2001A PS3 slim custom firmware installation with Teensy

In March I wrote a post about installing custom firmware onto a CECHA01 PS3 fat, and a CECH-2101A PS3 slim. This post goes into more detail on the same custom firmware installation process with a CECH-2001A PS3 slim console.

What is custom firmware, what is it used for, and what are the installation requirements

This section is a brief overview of the custom firmware background information I wrote about in my last PS3 custom firmware post. Custom firmware allows the PS3 to run homebrew software. With custom firmware a PS3 can do many things, including:

  • Create and run game backups.
  • Run emulators for other consoles.
  • Monitor temperatures, and control fan speeds.

Custom firmware installation requires a system that is running firmware 3.55 or earlier. This is because the encryption system on version 3.55 was cracked, allowing custom firmware updates to be seen as official software updates on consoles. Sony patched this issue in the next firmware release, and nothing released since has been hacked. [Read More]