PM-41 (2) PSone MM3 modchip installation (PIC12F629)
In April I wrote a post about installing an MM3 modchip into my PSone with the original PM-41 board. I have also written a post about installing an MM3 modchip into my SCPH-7501 with the PU-22 board. This is a similar post, but covering the final revision of the PS1, the PM-41 (2) board.
Before I begin I’ll give you a little bit of background information. I purchased eleven PSone consoles on eBay with the goal of installing MM3 modchips, and reselling them for a decent profit. Out of the eleven consoles eight were the older PM-41 board design, and three were the newer PM-41 (2) board.
Installing the modchip onto the PM-41 was easy enough, since I had already done it once. The PM-41 (2) on the other hand was tricky. I couldn’t find any working installation diagrams for the board layout. All of them showed only four or six points, and none of them worked. I was eventually able to get a working installation by combining those PM-41 (2) diagrams with the older PM-41 diagram.
What you’ll need
Here’s a list of things you’ll need to install a MM3 modchip into your PSone. Depending on where you buy your MM3 modchip, you might not need the 30 AWG wire.
- PM-41 (2) PlayStation
- A programmed MM3 modchip for American consoles
- 30 AWG wire
- Soldering iron
- Solder
This time around I actually programmed my own modchip using a more modern PIC12F629 chip, and a PicKit3 programmer. I’ve started to sell these modchips on eBay. Programming your own chips is a good way to save money if you are modding lots of consoles.
Installing the MM3 modchip

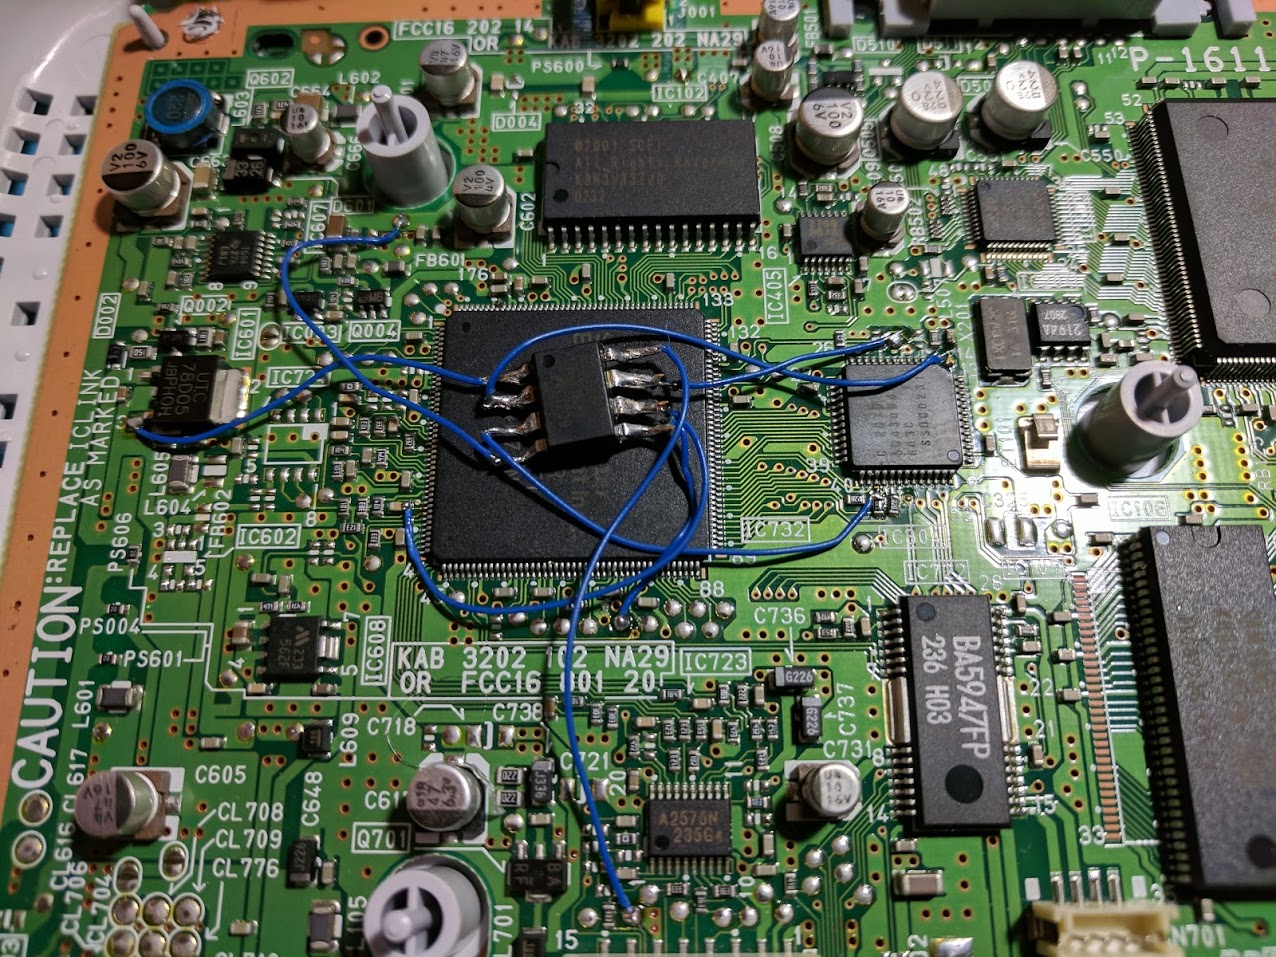
The actual PSone MM3 modchip installation is pretty straightforward. You’ll need to solder wires to eight points on the top of the console’s motherboard based on the diagram above of the motherboard. The diagram also shows the chip, and the pin numbers are labeled along with the points on the board.
I started by heating up each of the eight points and applying a little bit of solder, which makes soldering the wire much easier. I then flattened the modchip’s pins so it would sit more flush with the rest of the board. The PM-41 (2) board has a chip that isn’t very tall, which the modchip can sit on top of.
After preparing the chip, and the points on the board, you can begin soldering the wires. I went through each of the pins in order from one to eight. Make your wires are short as possible, and avoid stripping off too much insulation, since it will melt when soldered.
Some of the points can be kind of tricky, so here are some tips:
- #2 – This is the first tricky pin, it’s the top right leg on that chip. I find it easiest to solder the wire to either the top of the leg, or the right side. Be careful not to bridge solder between two legs.
- #3 – This is another tricky pin. Avoid applying too much pressure, or taking too much time, when dealing with the resistor. You want to solder the wire to the far edge of the middle resistor. If you knock any of them out of place, you can carefully use tweezers to put it back into place.
- #6 – This is the final tricky pin. Treat it the same as pin #3, but this time solder to the right side of the capacitor. It is less cramped, so I find it easier to work with.
Putting your console back together
With all of the wires soldered, you can put your console back together. Before you do this I would recommend doing a couple of things to help protect your installation.
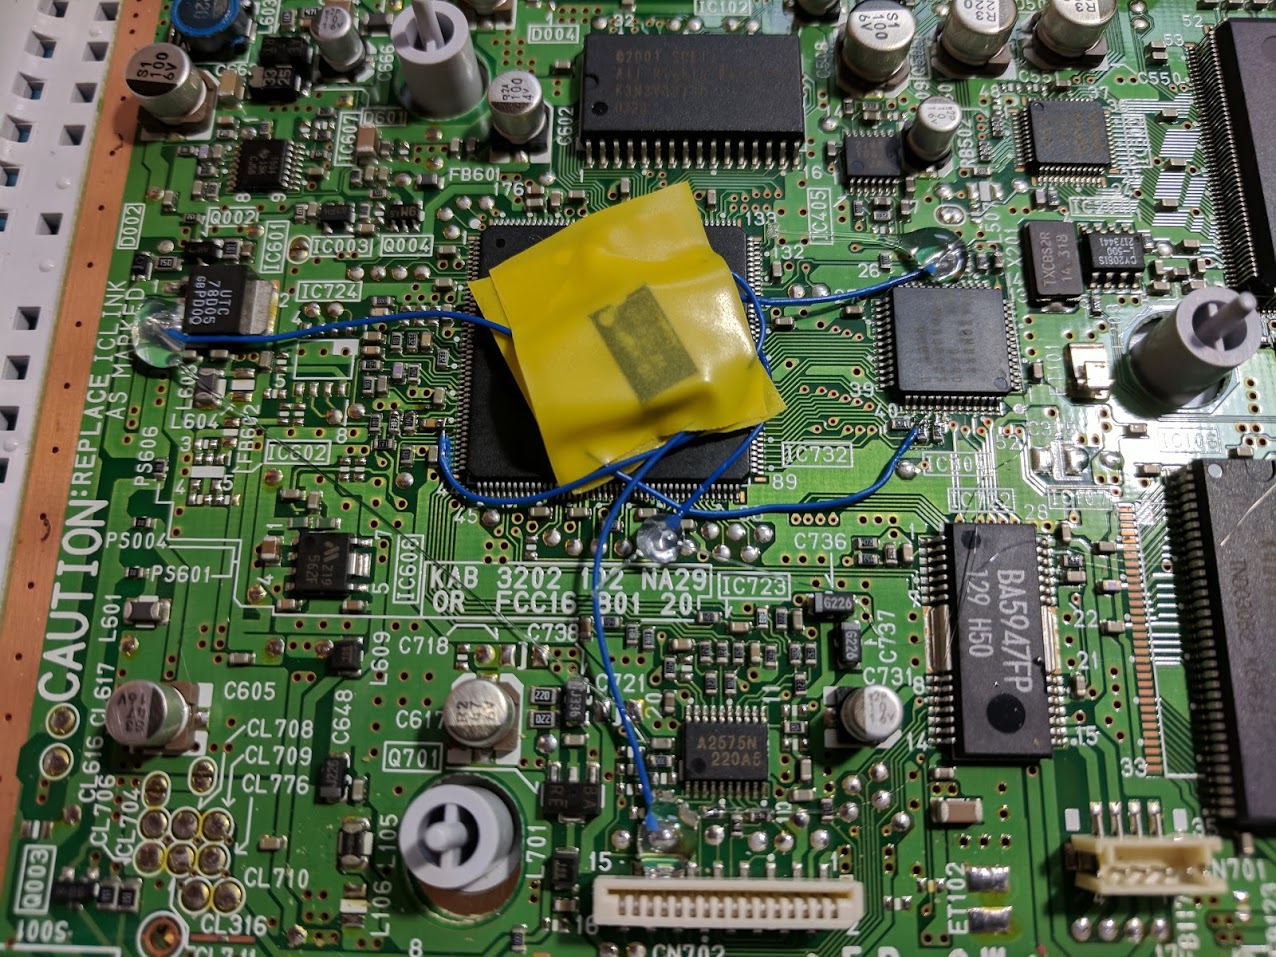
First use electrical tape to cover all of the pins of the modchip. You don’t want these pins touching anything on the board, or the metal shield that goes on top of the board. I find it easiest to slide a piece underneath the chip, and then put another piece on top.
Next, I’d recommend applying a little bit of hot glue to all of the points you soldered to. This isn’t completely necessary, but it does make the connections more robust, especially if you plan to move your console around a lot (or ship it somewhere). Just use a quick little dab at each point you soldered to.
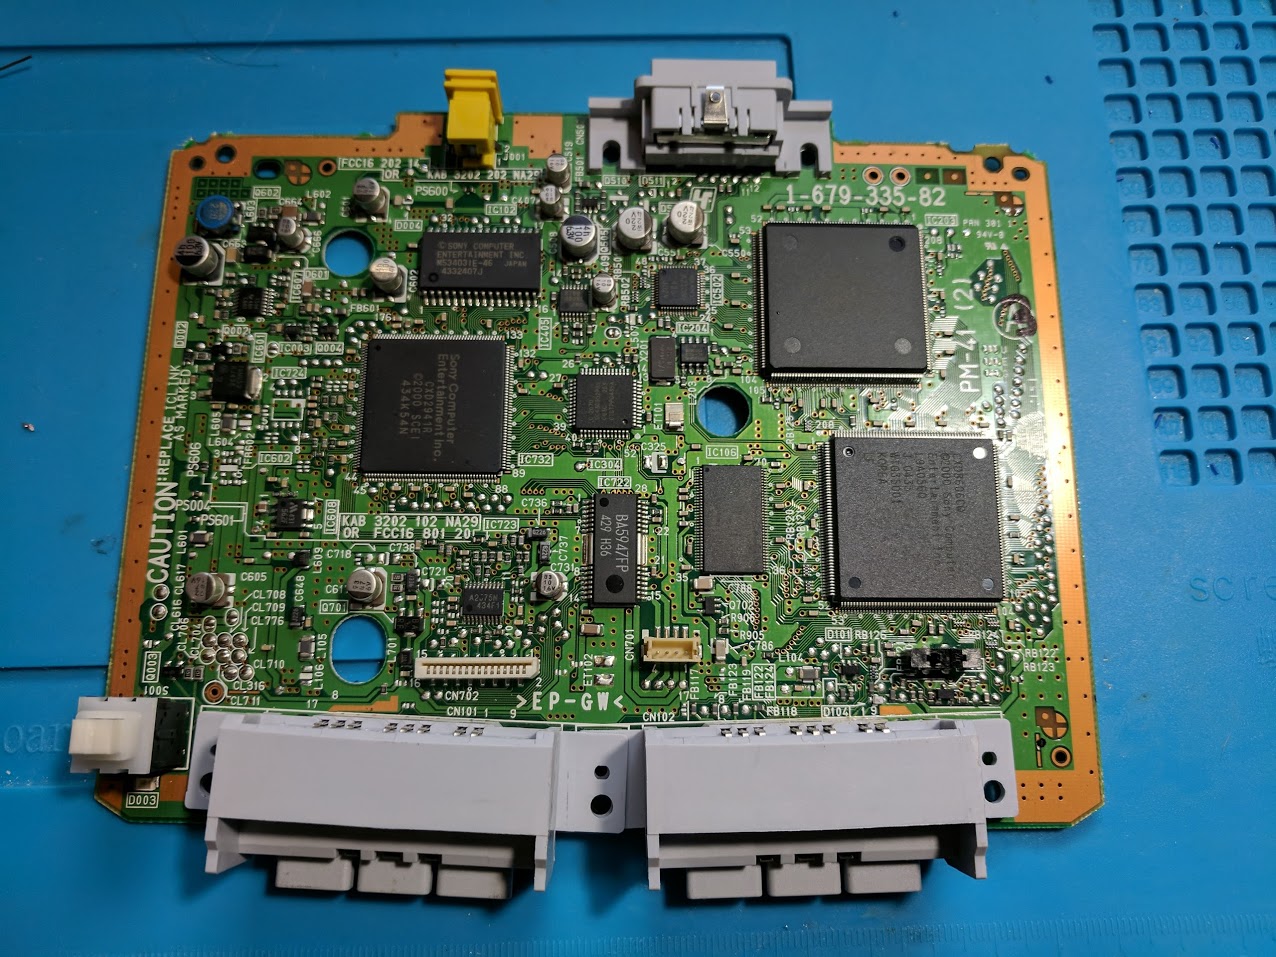
You should now be able to put the board back into the console’s shell, and then put the metal shield back on top. It should fit together just like it did without the modchip.
Conclusion
It took me a long time to figure out how to wire an MM3 modchip to the PM-41 (2) boards, but once I figured out the wiring, the process of installing the modchip was very easy. I have now installed modchips into twelve PS1 consoles.
The modchip works fairly well. If you have issues starting up a game backup you most likely either burned the game incorrectly, or didn’t install the modchip correctly. I recommend buring your games at 8x speed (or as slow as your drive can go) using the .cue files in ImgBurn.
You may also run into an issue where the console sometimes asks you to insert a PlayStation format disc. If you ever run into this issue just try restarting the console. MM3 modchips aren’t perfect, and can sometimes fail to boot. It could also mean your laser is going bad if it is more frequent.
If you want a PSone that has an MM3 modchip, but don’t want to deal with installing it yourself, then you can purchase a premodded PSone from my eBay store.