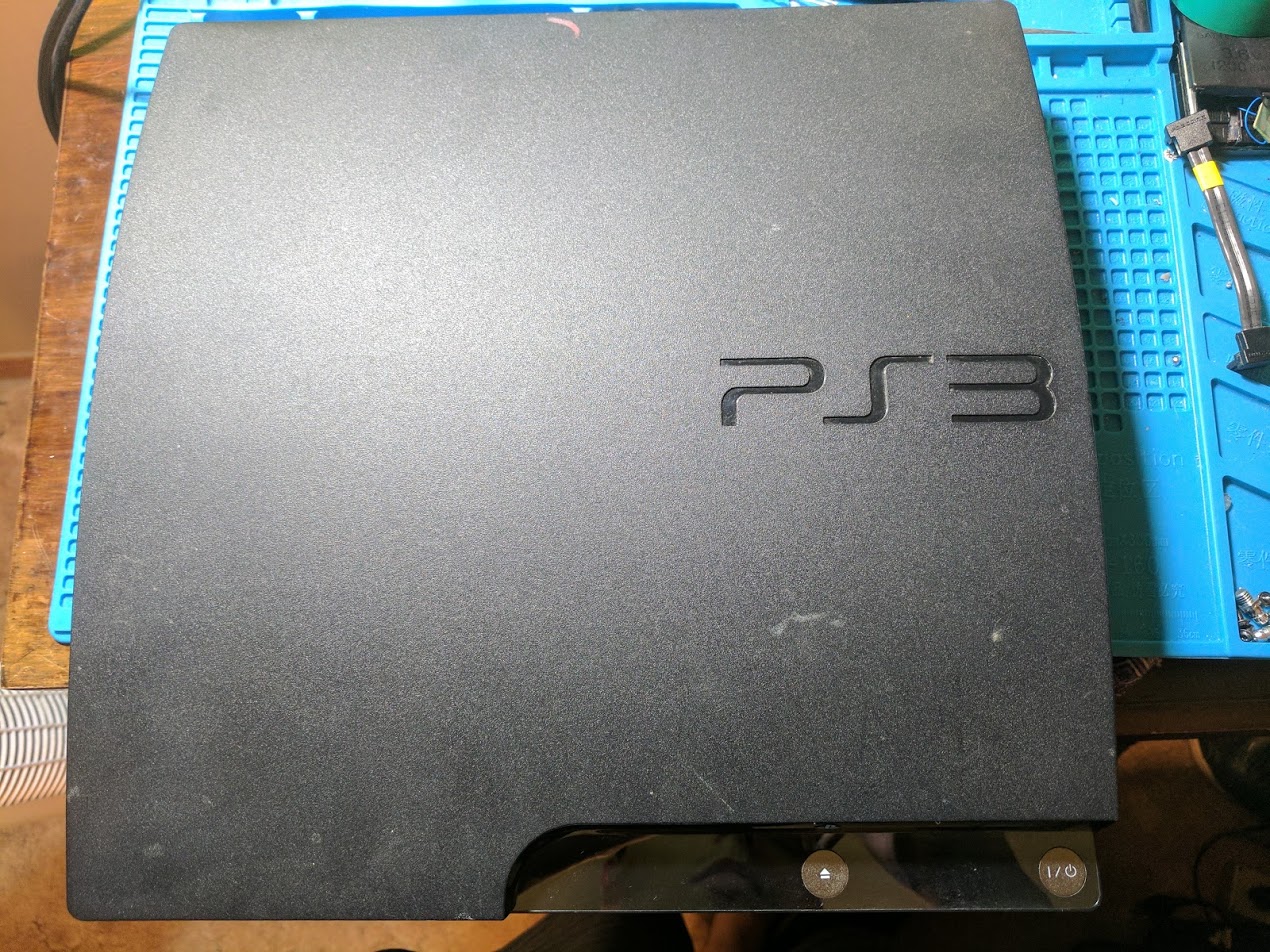
CECH-2001A PS3 slim custom firmware installation with Teensy
In March I wrote a post about installing custom firmware onto a CECHA01 PS3 fat, and a CECH-2101A PS3 slim. This post goes into more detail on the same custom firmware installation process with a CECH-2001A PS3 slim console.
What is custom firmware, what is it used for, and what are the installation requirements
This section is a brief overview of the custom firmware background information I wrote about in my last PS3 custom firmware post. Custom firmware allows the PS3 to run homebrew software. With custom firmware a PS3 can do many things, including:
- Create and run game backups.
- Run emulators for other consoles.
- Monitor temperatures, and control fan speeds.
Custom firmware installation requires a system that is running firmware 3.55 or earlier. This is because the encryption system on version 3.55 was cracked, allowing custom firmware updates to be seen as official software updates on consoles. Sony patched this issue in the next firmware release, and nothing released since has been hacked.
Because of the 3.55 firmware requirement not all PS3 consoles can run custom firmware. In general all fat systems are downgradable, while most slims are, and no super slims are. There is a more detailed list on the PS3 developer wiki, look at the downgradable min praxis column (needs to be 3.55 or lower for custom firmware) that corresponds to your model number. You can find the model number on the sticker on the back of your system., it should begin in CECH.
Custom firmware installation process overview, and what you’ll need
Now that you are familiar with PS3 custom firmware, I can give you an overview on how it is installed, and provide you with a list of things you’ll need.
If your console is running firmware 3.55 or earlier already, then you can ignore most of this guide and skip down to step five. All you need to do is upgrade your console to firmware 3.55, and then install the custom firmware as an update file.
Running anything after firmware 3.55 means you will need to patch your system. This involves dumping the NOR firmware chip, patching the firmware dump, and then flashing the patched firmware file. With the patched firmware you will be able to install the custom firmware using a custom firmware update file.
Here’s what you’ll need:
- Soldering iron, I use a Hakko FX-888D
- Solder
- 30AWG wire wrapping wire
- Teensy 2.0++
- A USB flash drive
To use the Teensy you need to follow the 3.3V Teensy conversion guide. This is also how the PS3’s NOR chip will be powered when dumping the NOR. The Teensy I bought from AliExpress came with the voltage regulator.
Step 1: Preparing the Teensy and PS3 motherboard for a NOR dump
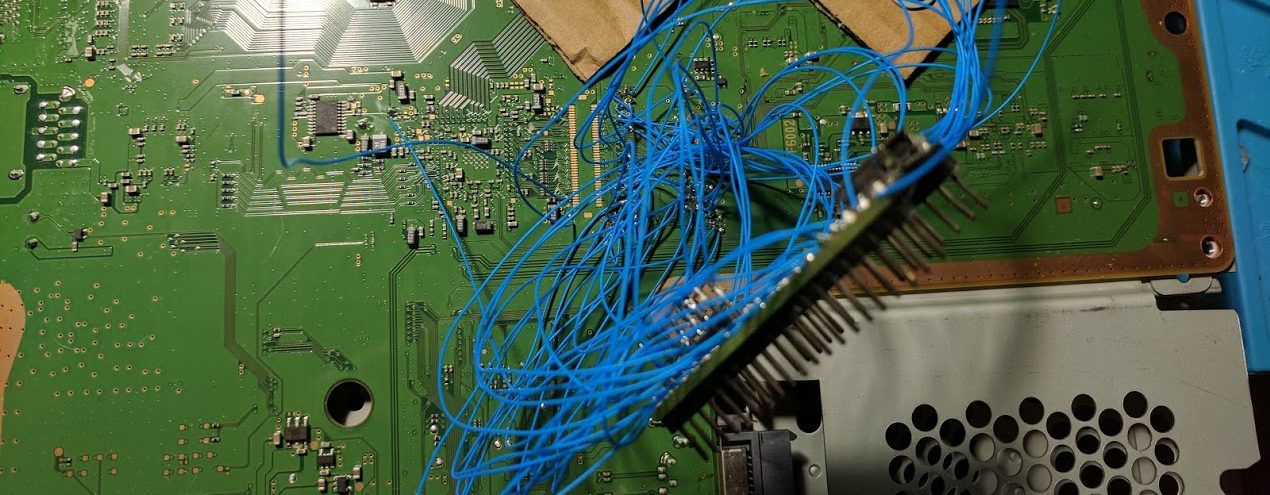
The hardest step is first. You’re going to need to solder somewhere around 50 wires from your Teensy to your PS3’s motherboard. The good news is that the points you will be soldering to are just a bunch of round pads. They aren’t huge pads, but they are pretty easy to solder to.
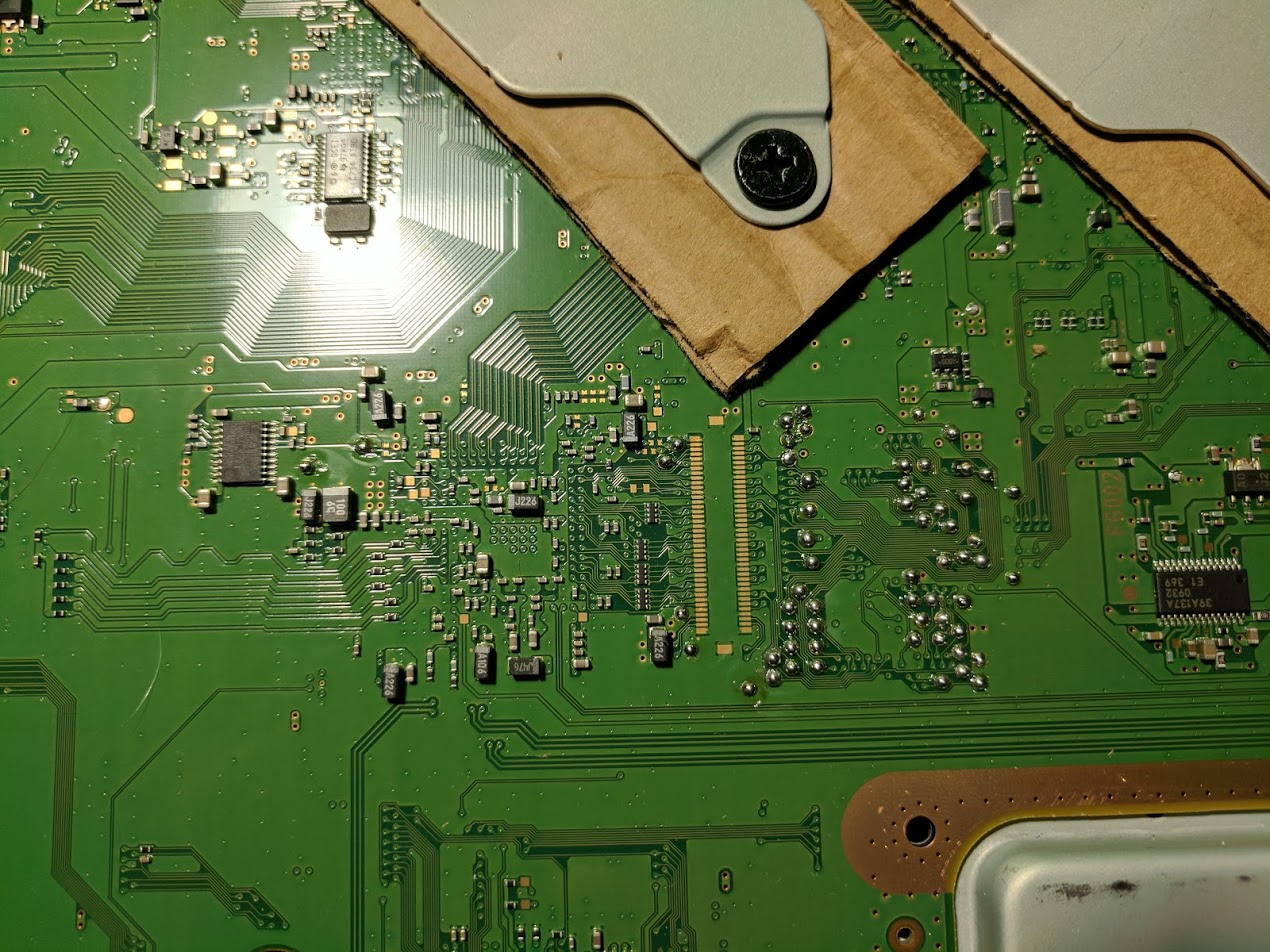
On the CECH-2001A all of the points are on the bottom of the PS3’s motherboard. I recommend taking apart your PS3 right up until after you remove the bottom metal shield. Then you can put the heatsink brackets back into place with some cardboard in between the metal brackets and the board. The cardboard prevents the brackets from shorting out anything on the board. Keeping the heatsinks on is important because when we write to the NOR chip in the fourth step the PS3 needs to be powered on.
With the bottom of the board exposed you should be able to see the pads. I recommend heating up each pad, and applying a small amount of solder. Tinned pads are much easier to solder to.
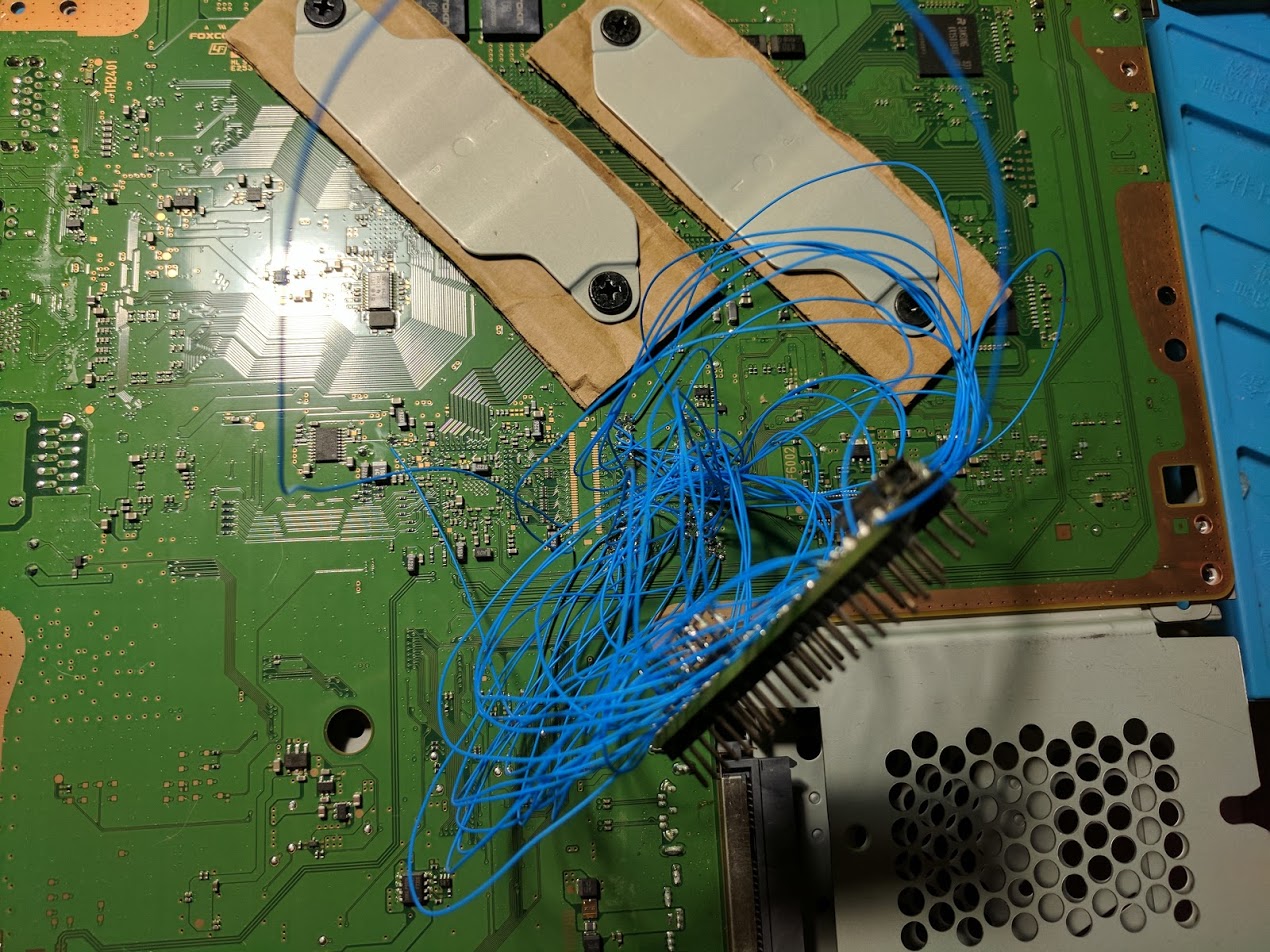
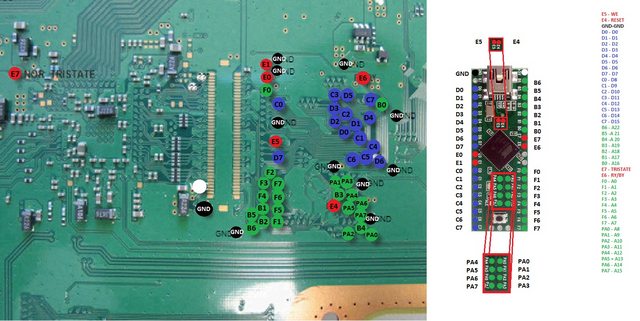
With the pads tinned you can begin to solder each wire to the board using the diagram below. I already had a Teensy with wires attached from the last PS3 I installed custom firmware on, so I didn’t have to cut and strip each wire. If you plan on hacking multiple PS3’s I recommend keeping the wires attached to the Teensy since it definitely speeds up the soldering process.
I have a separate page that has some soldering tips, but here are a few things to keep in mind:
- Keep your wires as short as possible. Six to eight inches is about the right length.
- I already mentioned this, but applying solder to all of the pads before you start is important.
- Use thicker gauge wire, or multiple wires, for ground and power lines.
Step 2: Dumping the PS3 NOR
Once you have soldered your Teensy to your PS3 you can dump the NOR chip that holds the firmware. To do this we will be using a program called NORway. NORway is a Python program that interfaces with the Teensy. You can find the program on GitHub, along with some instructions. Read the instructions, or leave a comment, if you have any problems while installing the software. I have forked the repository in case the original one goes down or changes.
NORway requires you to install Python 2.7, and PySerial 2.5. You will also need to flash your Teensy with NORway.hex using the Teensy Loader program, and also install Teensy serial drivers. The NORway program can be downloaded here.
You may also want to read this guide. It includes information on the PS3 Downgrade Tool that bundles a lot of the required software into a single package, with a nice interface.
If you installed everything correctly, you should be able to run the NORway.py program to check your connection with the NOR chip using this command:
python NORway.py COMx
Replace COMx with the name of your Teensy’s serial port in your Windows Device Manager. Below is what your output should look like. In particular you should see something listed in the NOR chip manufacturer, and NOR chip type fields. If you see the word “unknown” in either of those lines then your wiring is bad.
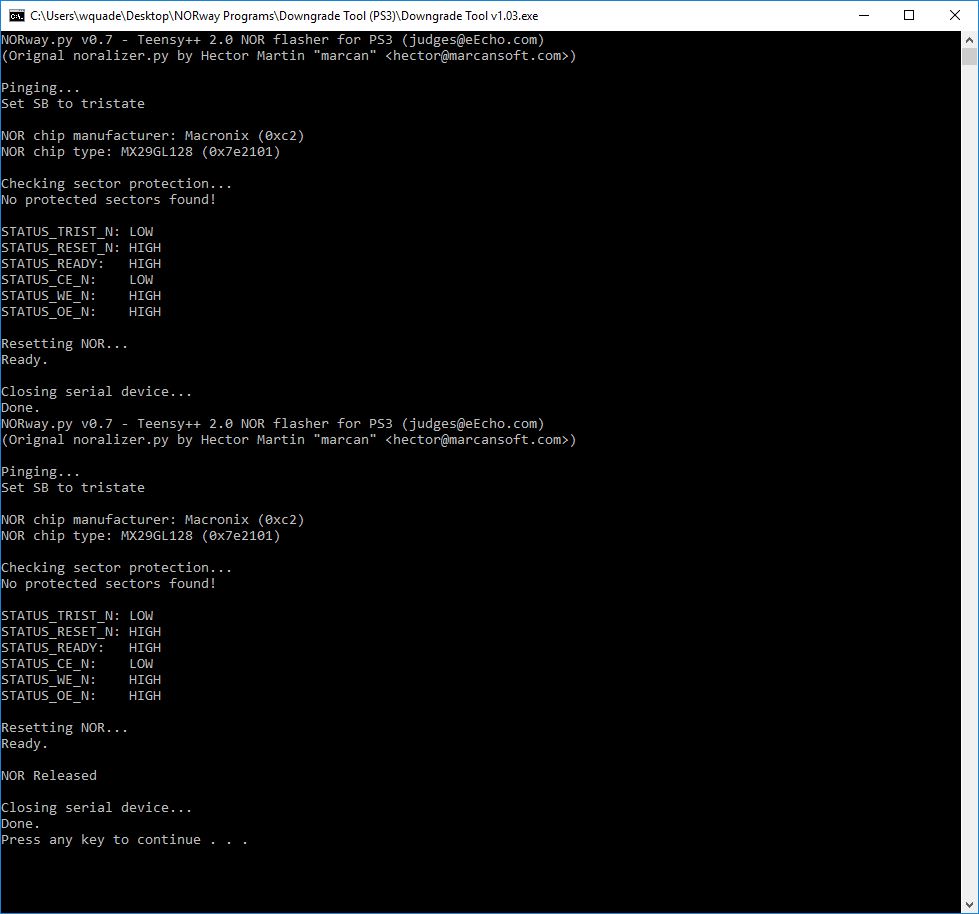
If you get a valid output, you can dump your NOR using the command below:
python NORway.py COMx dump nor1.bin
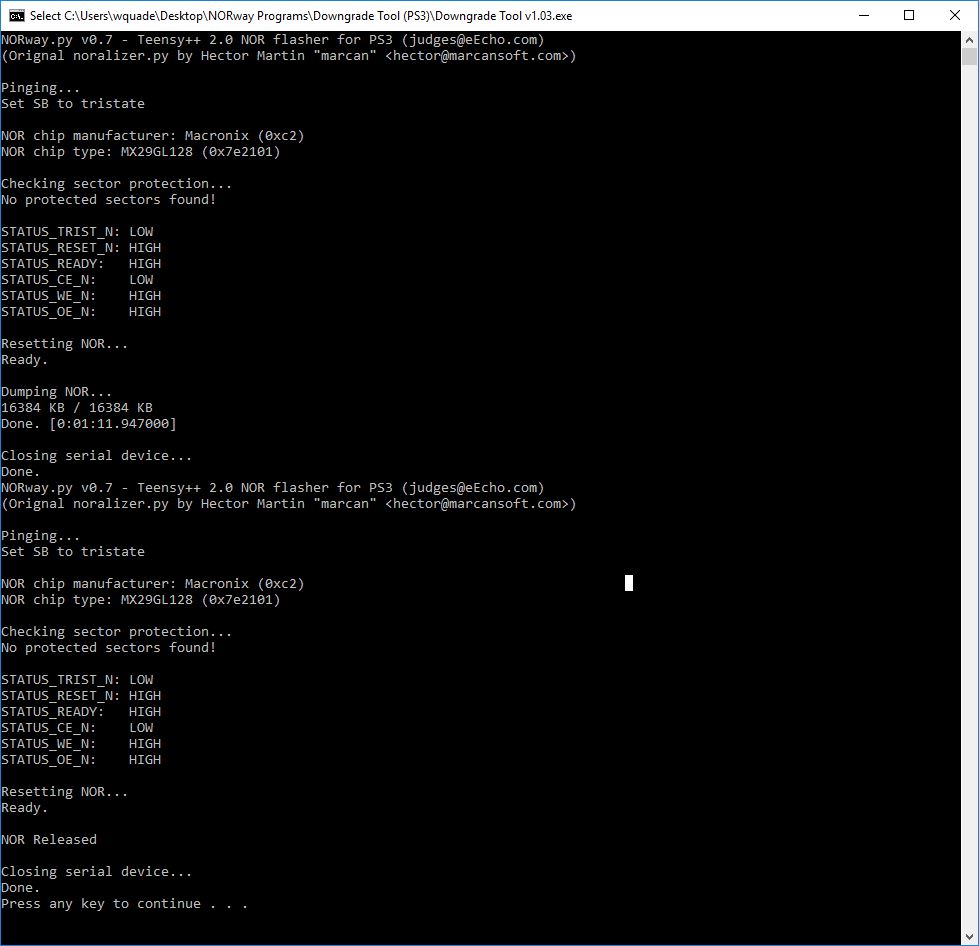
You should get an output similar to what is displayed below. The program will slowly go through and read each megabyte of data inside of the 16MB chip. Once it has finished, run it again, but this time with nor2.bin as your file name:
python NORway.py COMx dump nor2.bin
Two dumps is needed because you need to compare them to make sure you have a valid dump. If the two dumps are different then you have at least one bad dump.
Step 3: Patching the PS3 NOR
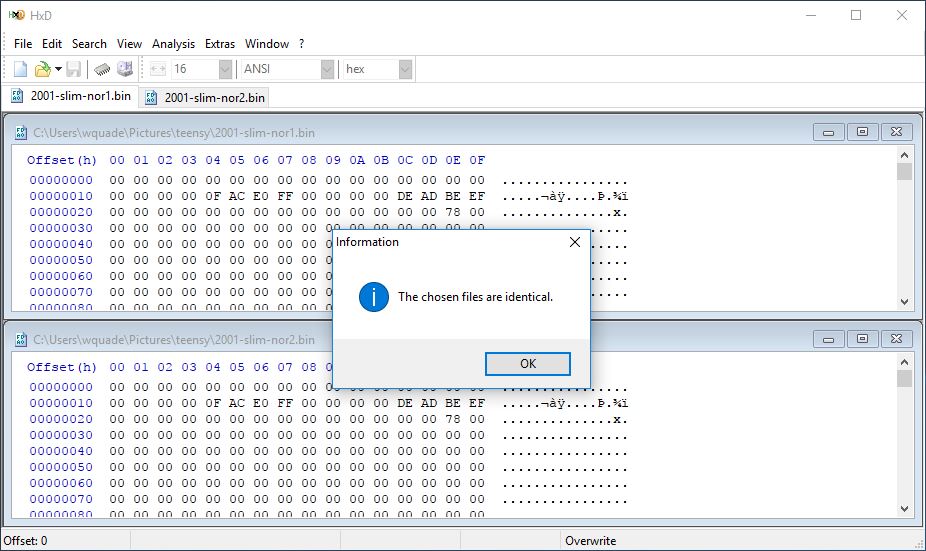
Once you have two NOR dumps, you will want to compare them to check for differences. To do this you can use a program called HxD. There is an item in the menus at Analysis -> File Compare where you can select both dumps as inputs. If your dumps are the same you’ll get an output like the one above.
To patch the NOR file I recommend using a program called PS3 Dump Checker. This program checks your NOR file, and patches it if it’s valid. That way you know you have a valid dump before you flash it back to your console.
There are a lot of outdated versions of PS3 Dump Checker out there which give false negatives for NOR dumps. You can get the latest version from GitHub. You can also find the program source in the developer’s repository.
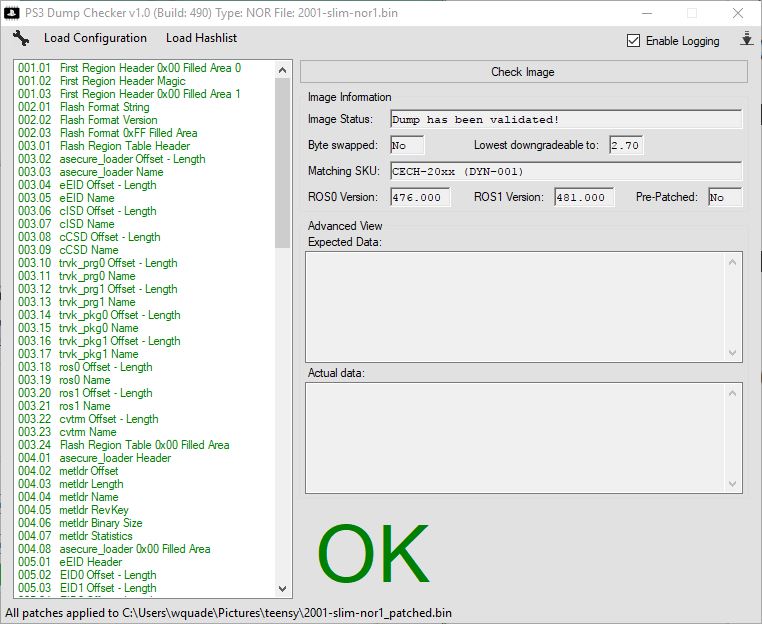
To use the program drag one of your NAND dumps to the program’s window. If everything was successful you’ll get an OK message like the one in the image above.The program automatically creates a new file in the same location as your input dump file, but with “_patched” appended to the end. This is the file you need to flash in the next step.
If you get any errors about a BAD dump, you might need to go back to the first step and check your wiring again. There’s also a chance that the program is giving you a false negative and you actually have a good dump.
Step 4: Flashing the patched PS3 NOR
Now that you have a valid patched NOR dump you will want to flash it back to your PS3. This is done using the same NORway program that was used in the second step for making the NOR dumps.
Begin by connecting the power supply, power socket, and power button board to your PS3. Then carefully plug in your PS3, and turn it on using the power button. This will power the NOR chip. For some reason this isn’t needed when reading the NOR, but is when writing to the NOR, at least from my experience. I found that with the PS3 not powered on the flashing would work, but would fail the verification step.
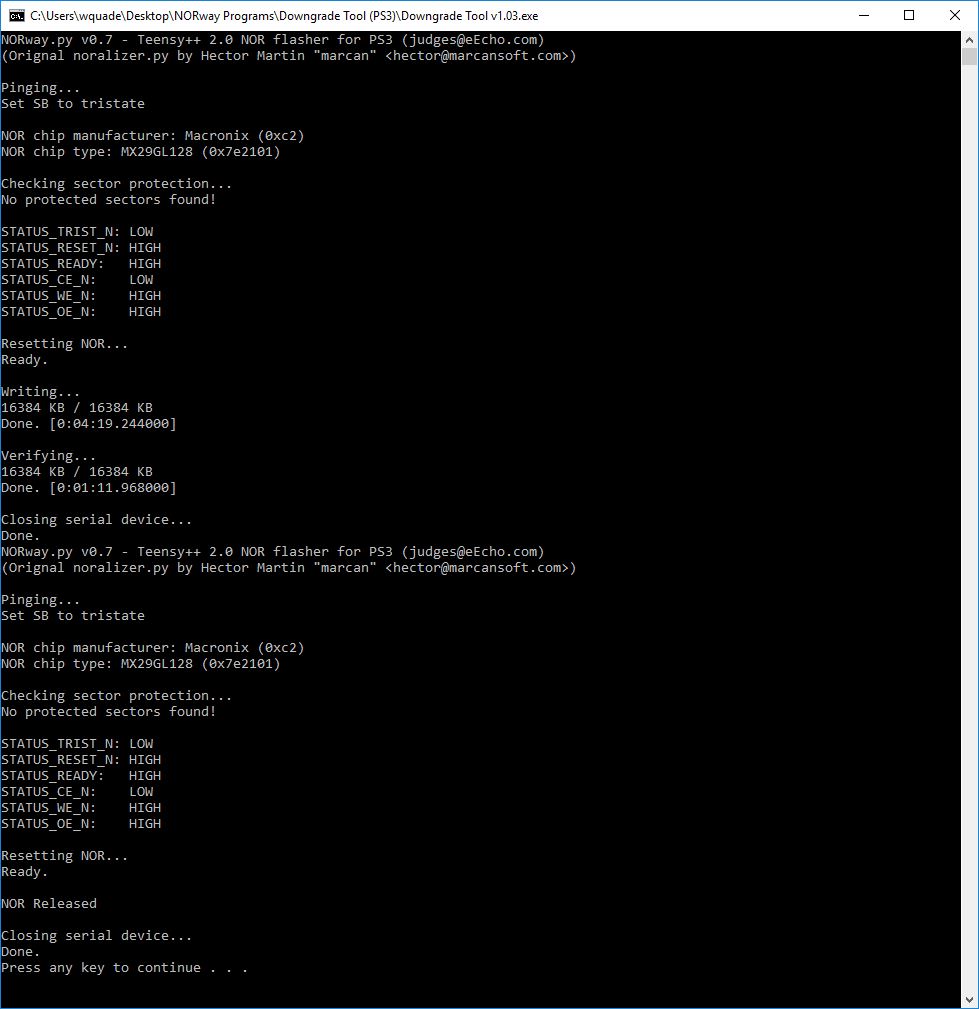
With the PS3 powered up you can plug your Teensy back into your computer, and run the following command to write the patched NOR dump to the PS3.
python NORway.py COMx write nor1_patched.bin
Just like before you’ll need to replace COMx with the serial port you are using, and nor1_patched.bin with the name of your patched NOR dump file from the previous step. You should get an output similar to the one above.
Step 5: Custom firmware installation

Once you have flashed your patched NOR dump to your PS3 you can install the custom firmware. The good news is that this is a really easy step compared to the others. It’s as simple as installing a software update using a USB flash drive.
Start by desoldering the Teensy from the board, and putting your PS3 back together. Then hook your PS3 back up to your TV, and start it. While your PS3 boots you can setup the flash drive with the update file.
Download a PS3 custom firmware of your choice. I have been using REBUG which generally seems to be what most people use as of the writing of this post. I recommend the REX edition of whatever the latest firmware is.
You should end up with a .PUP file. You’ll want to format a flash drive as a FAT32 drive, and then put the .PUP file at the following location:
F:\PS3\UPDATE\PS3UPDAT.PUP
Where F: is the letter of your drive. You’ll need to create the PS3 and UPDATE folders, and possibly rename the .PUP file to PS3UPDAT.
Note: It is very important that you don’t have any discs in your system, and that you don’t select update from Internet. If you accidentally update using the disc, or the Internet, you’ll have to repeat the whole process over from the first step.
Plug the flash drive into your PS3, and then go to the update section of the menu, and select update from storage media. It will take a while to install, but once it has finished installing you should be running custom firmware.
Conclusion
If you followed all of the steps above correctly you should now have a CECH-2001A PS3 with custom firmware. You can now run homebrew, emulators, game backups, and more. This post doesn’t cover the installation of software like REBUG Toolbox, Multiman, Webman, or PSNPatch.
I found the whole process to be a lot easier the second time around since I already knew what I was doing. It only took a little over an hour to do. A PS3 running custom firmware is a lot more valuable to me than an RGH 360 since it can still play online for free using PSNPatch.
This Reddit wiki page also has more information on the PS3 custom firmware installation.
[…] I have written another post going into more detail on custom firmware installation using a Teensy on a CECH-2001A PS3 […]