Adding an HDMI port to the PS2 fat
In March I added an HDMI port to my original Xbox. This is a similar post covering the process of adding an HDMI port to the PS2 fat. The PS2 has a multi AV output port which supports composite, component, RGB SCART, S-Video, and even RF. These options were fine for 2000, but they don’t work very well with modern HDTVs. Adding an HDMI port allows the PS2 to output video directly to a modern HDTV or computer monitor.
Things you’ll need
Here’s a list of items that you’ll need for adding an HDMI port to your PS2 fat.
- A multimeter.
- A PS2 fat console.
- A small component to HDMI converter. I used this model, which is cheap, and has an upscaler built in.
- A soldering iron and solder.
- Some small diameter wires, I used the wires inside of a CAT5e Ethernet cable.
- A Dremel, or other tool to cut the case.
- A small HDMI extension cable.
- A hot glue gun.
- A 5V voltage buck converter.
- Kapton tape.
You may want to research other component to HDMI converters. The model I bought is cheap, and works, but you might want something better. Cheap converters can add additional latency, and not make a perfect conversion. I didn’t personally notice any additional latency, or color problems with the model I bought, but your mileage may vary.
If you are just playing PS2 games, then you might not need an upscaler. An upscaler is useful when playing PS1 games because the 240p video output signal from PS1 games isn’t compatible with all modern TVs.
Preparing the PS2 motherboard
Begin by taking apart your console. You’ll need to completely remove the motherboard so that you can access the solder points for the video connector underneath the board. There are guides on how to disassemble the PS2 if you haven’t done this step before.
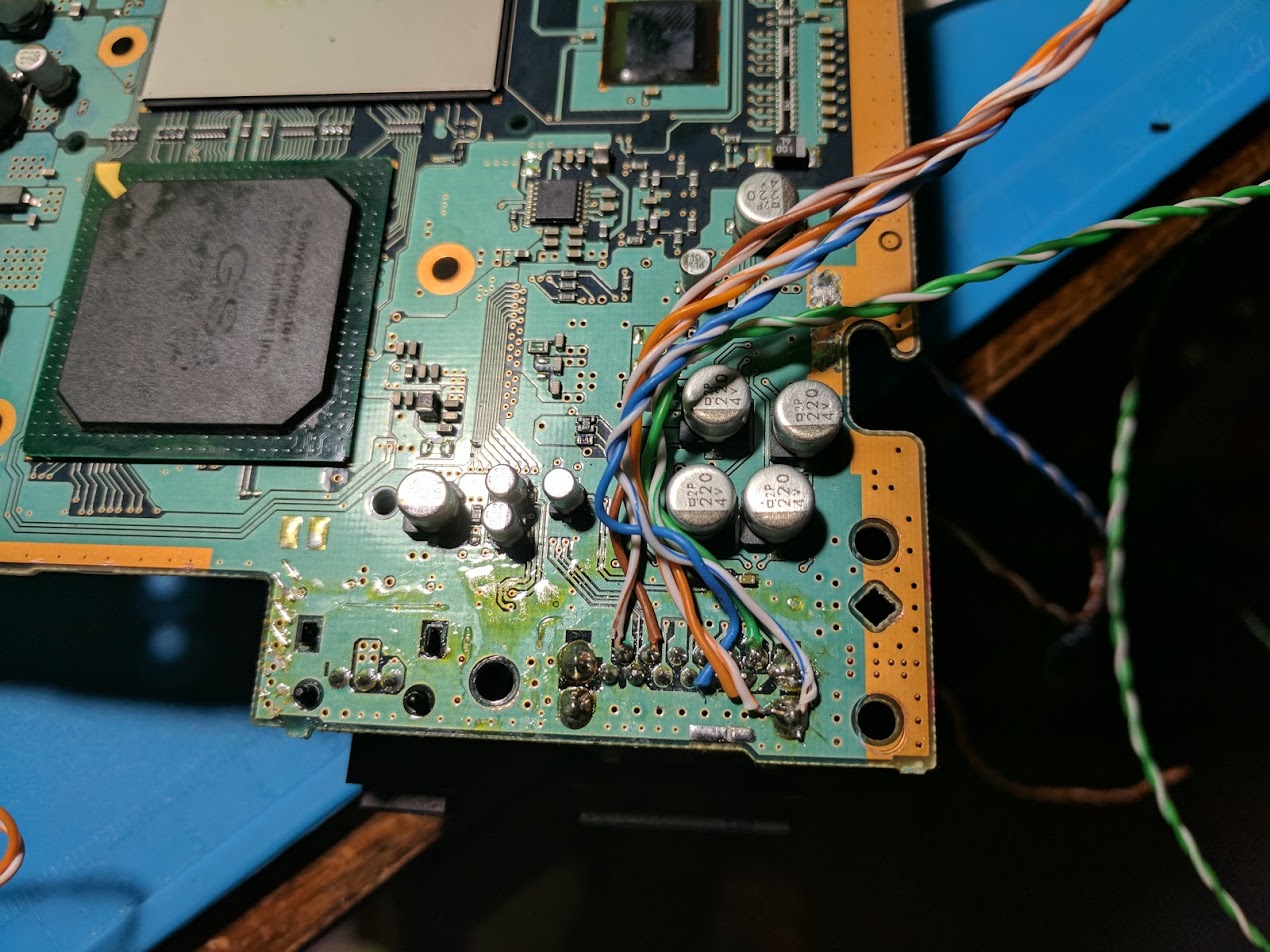
There is a set of twelve solder points right underneath the video output port on the back of the console. You will need to solder a minimum of six wires to these pins. In my case I wired up another pair of wires to extra ground pins, which isn’t completely necessary.
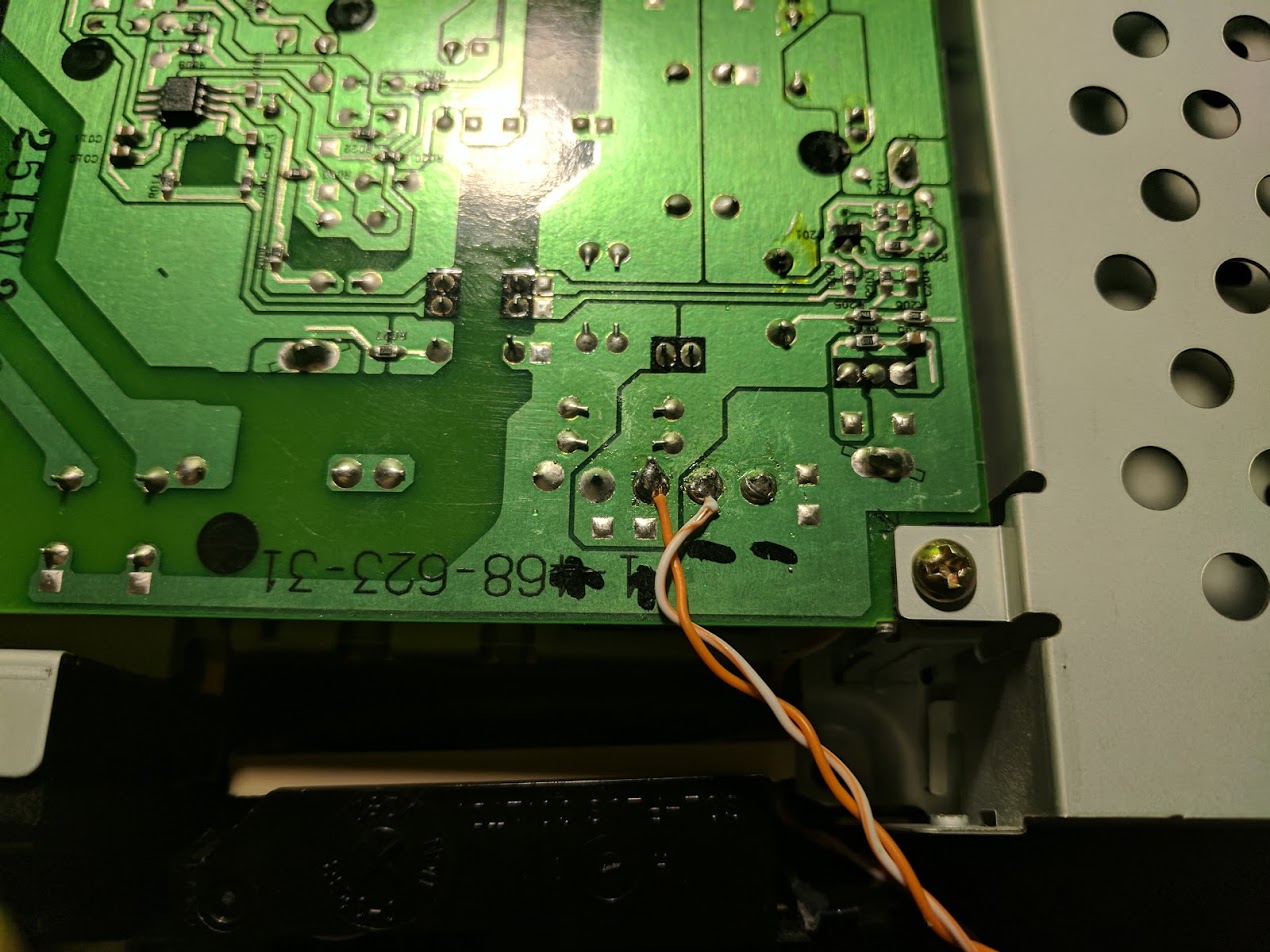

Additionally you will need to connect power wires to power the component converter. In my case I connected a pair of wires from the power supply to a cheap LM2596 based buck converter.The buck converter converts the 12V power supply voltage to the 5V that the component converter requires. I didn’t use any of the 5V points on the board because of how much power the converter uses (the power supply it came with is rated at 2A). The buck needs to be adjusted to output 5V using the small potentiometer screw.

I have provided a schematic of where you should connect your wires, and a picture of the final result. A “-” is a ground point, left and right are the left and right audio channels, and R/G/B correspond to Pr/Y/Pb respectively. Here are some tips that may be useful.
- Heating up the existing solder points, and adding a little bit of extra solder will make attaching wires easier.
- Using the correct gauge wire will make the process easier. CAT5e wires seem to be about right.
- Make sure you cut the wires extra long so that you have extra wire to work with when connecting them to the converter box.
- Plan how you want the wires to get to the other side of the board before attaching them to the board.
- I covered the areas I worked on with Kapton tape to prevent the solder points from making contact with the metal shielding.
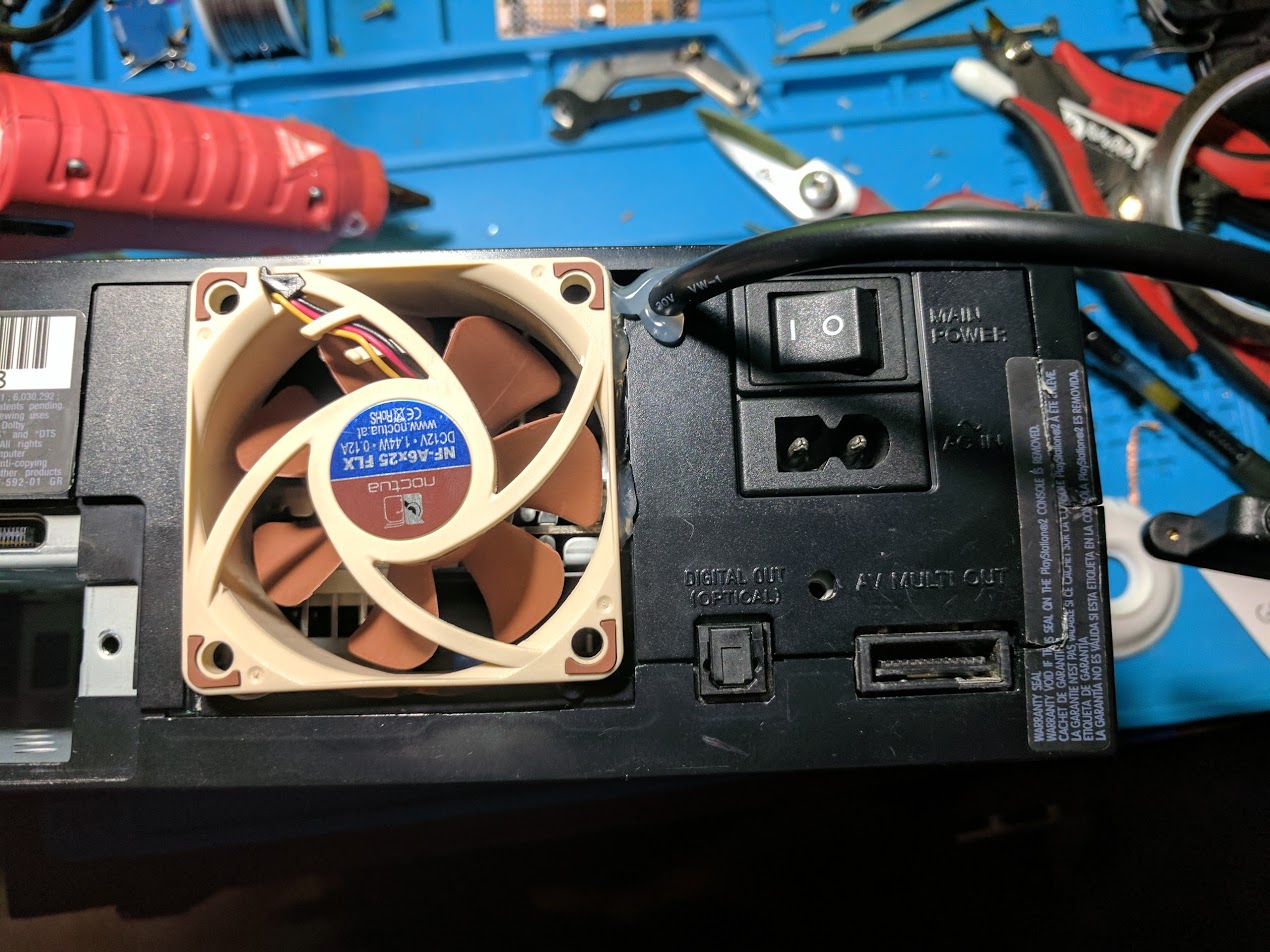
Preparing the PS2 case
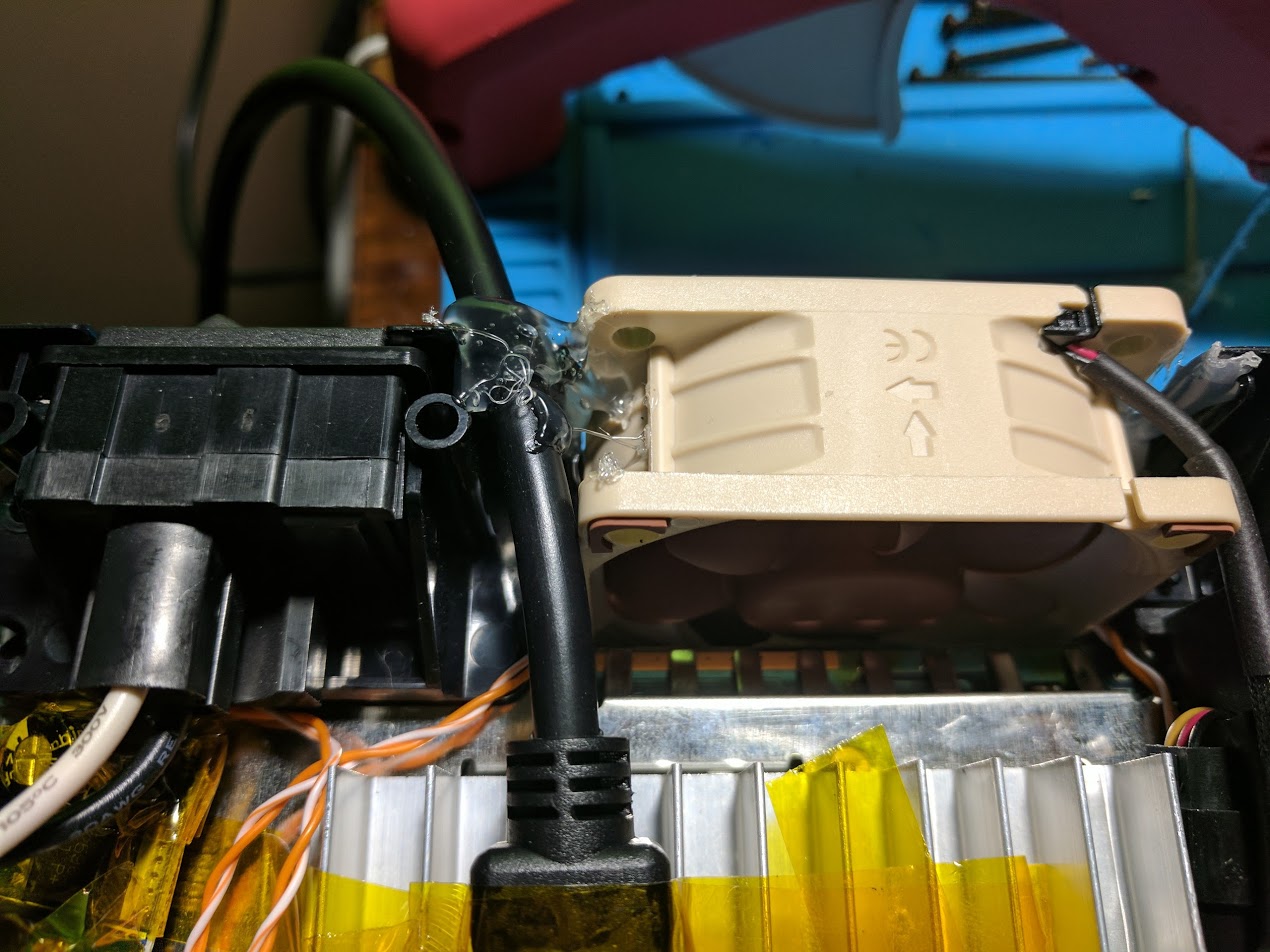
Since I had previously installed an aftermarket 60mm fan inside my PS2 there wasn’t a whole lot of extra room inside. I ended up cutting a very small hole into the back of the case in between the power switch and the fan.
I used a short HDMI extension cable to connect the converter box inside to an HDMI port outside of the console. Using an extension cable requires only a small cable sized hole instead of a larger HDMI port sized hole.
Preparing the component converter
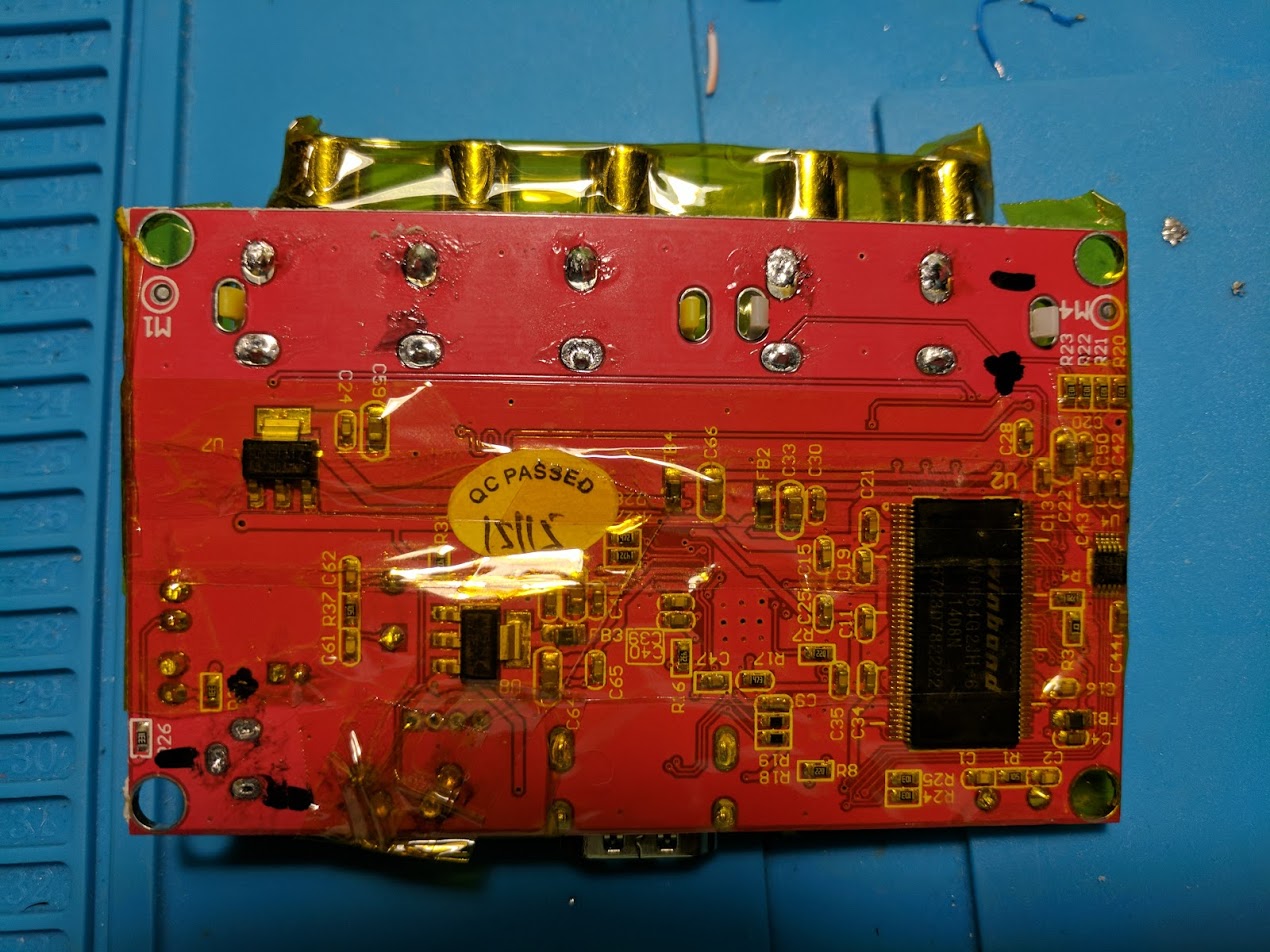
First take apart the converter box. Mine had four screws underneath the four rubber feet. You should now have access to the board that was inside of the casing. You should then be able to locate the solder points for the component cable jacks, and the DC power port input.
You’ll want to use a multimeter to determine which solder points correspond to which parts of the jacks. In my case the outer part of the jacks are ground, and they correspond to the solder points closer to the edge of the board. The points towards the inner side of the board are for the positive voltage signals. I labeled my converter with that information.
I also ended up removing some of the larger components on the board. These include the DC power jack, the power LEDs, and the resolution toggle button. You might also want to consider removing the component jacks to save even more space.
Connecting the PS2 to the component converter
Now that you have prepared the PS2 and the component converter you can connect them together. This is pretty straightforward. All you have to do is solder the six or eight wires from the AV port to the corresponding solder points on the converter. You will also need to connect the two power wires to power the converter.
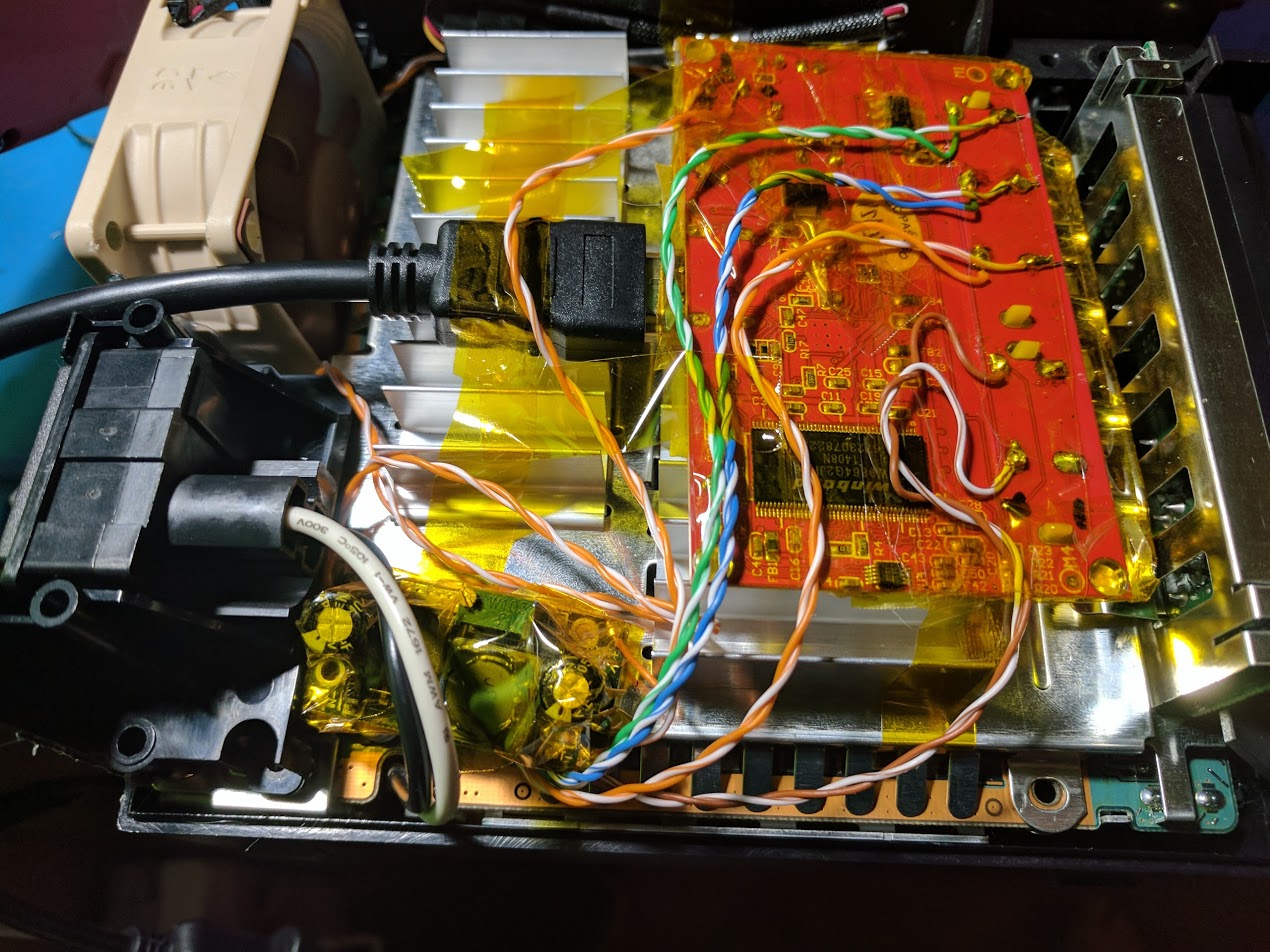
Make your wires as short as possible. I taped all around the component converter to prevent it from making electrical contact with any part of the PS2. I then taped the converter box to the top of the heatsink where there was just barely enough room for it to fit.
Results
You should now be able to power up your PS2 console and connect it directly to an HDTV through HDMI. I was able to get better image quality through the internal component cable wiring than through cheap aftermarket component cables, but you may get different results depending on how you wire everything. Additionally, I didn’t notice any additional latency while going through the HDMI to component converter.
This mod is a great way to make the PS2 a more modern console that is more convenient to connect to modern HDTVs. For around $25 and a bit of time you should be able to add an HDMI port to your PS2.
I did a similar mod to my original Xbox for anyone interested.
Final thoughts
One problem with this design is that the component converter is always powered on, even when the console is powered off. I discuss this power problem in relation to a fan in my post on upgrading the PS2 fan.
Modding consoles to output HDMI through a component to HDMI converter box does work, but not perfect. Some other older consoles have been modified to output HDMI video directly from the digital video signals inside of the consoles, instead of being converted from digital to analog, and then back to digital.
These console mods are the ideal way to output HDMI video. Nintendo consoles like the GameCube, N64, and SNES have all been modified to output HDMI directly from digital signals. Sadly I haven’t found any similar mods for Sony consoles like the PS1 and PS2.
However, I have found schematics for some models of the PS1 and PS2, and they include information about how the digital video signals are connected within the console. Making a direct HDMI video output mod for the PS1 and PS2 is something I’m interested in doing in the future once I have the equipment, like an oscilloscope, and time, to look into it further. For now a component to HDMI converter is a decent option.
So essentially, you’re hardmodding in an analogue-to-digital converter box? If it works, it works, but it seems like an awkward workaround. The PS2 internally encodes all its video digitally, then there’s a DAC that turns it into an analogue signal. So with this mod, it’s going System -> Digital Video -> DAC -> Analogue (Component) -> ADC -> HDMI Surely there’s a way to bypass the DAC and just go System -> Digital Video -> HDMI? It would completely eliminate analogue quality loss and would take out a fair amount of latency, too. I don’t know the exact wiring inside… Read more »
Taking the digital video signal from the PS2 and converting it directly to HDMI is possible but hasn’t been done yet. I’ve been looking into doing this using the same FPGA used for some of the GameCube to HDMI mods (Pluto-IIx HDMI) but haven’t had the time to really get into it (I’d do the PS1 first since the video chip on the PS1 is easier to solder to). The direct digital video out would most likely require soldering to many small points on the legs of some of the chips on the board. So for the time being this… Read more »
I noticed that the converter box you posted a link of says hdmi to component, is the one you used for the xbox the correct one?
It looks like the product changed on Amazon for some reason. I updated the link to something that matches what I bought (component/YPbPr to HDMI).
Would this assembly fit in the HD bay?
Yes, I believe it would.
Do you have any screenshots of the results? Is it noticeably different from just plugging component cables into the box?
I didn’t take any screenshots of the output. It’s noticeably better than the cheap component cables I was using before, but worse than the official component cables through an OSSC that I use now.
On a side note, I was debating doing something similar (but wasn’t sure if it was worth it.) I was looking at the schematics of the PS2 and saw that there are luma and chroma pins leading out from the digital video encoder. My thoughts were to lead that to the S-Video side of a converter. Since S-Video is analog, however, I don’t know if that would even work. What are your thoughts on that?
That would also work, but if you putting in the effort you might as well go with component to get the best signal out of the system.
Well, my curiosity is focused on the fact that I would think it would be better since it comes from the digital encoder, but I’m a bit new to this.
Generally Y/Pb/Pr component video is going to have a better image than S-Video. Having three video lines instead of just two allows component video to transfer more video information, resulting in better picture.
One last question: do you think the cables you use now (without the OSSC) provide a better picture than the HDMI solution you gave here? If so, do you have a link to the cables?
It really depends on how your TV handles the console’s video signal over component. In most cases the video quality will be about the same.
I use genuine Sony PS3 component cables, but the genuine Sony PS2 cables work just as well. You can also use HD Retrovision PS2/PS3 component cables which are actually even better than the Sony ones (and can be purchased brand new for $30, which is less than what the average used Sony cable would cost).
Thanks! Hadn’t considered HD Retrovision
Sorry to bother you again, but I was curious about your thoughts concerning the POUND HDMI cable as opposed to the HD Retrovision component cables. I’ve heard a lot of back and forth about it, but haven’t been able to find a side by side comparison.
The HD Retrovision cables are definitely better. I don’t have the Pound cable but it’s basically just a cheap component cable that’s connected directly to a component to HDMI converter inline.
Thanks!
Actually I have all the current Pound HDMI Cables OG Xbox, DreamCast, Playstation 1&2 cable, And The Super Nintendo cable as well I am very happy with the Quality of the Cables.
What is the best solution available today?
Do you know if retrogamingcables is better than HD Retrovision?
https://www.retrogamingcables.co.uk/sony-av-accessories/PlayStation-2-3-RGB-SCART-CABLES
Thank you
HD Retrovision or genuine Sony component cables would give you the best video output currently. There is a PS2 HDMI solution being developed by the people who make the PS1Digital, but no news on when it’ll be ready or anything.