SCPH-39001 PS2 fan upgrade
While my PS2 fat console isn’t even close to as loud as my PS3 fat, the fan inside still makes enough noise to be annoying in game. This post covers the process of upgrading the fan inside of my PS2 fat to a standard 60mm computer fan.
Things you’ll need
Here’s a short list of things you’ll need to upgrade your PS2’s fan.
- PS2 fat console
- 60mm fan, I used a Noctua NF-A6
- Tools to cut plastic, like a Dremel
- Hot glue gun
- Soldering iron
PS2 fat stock cooling system overview
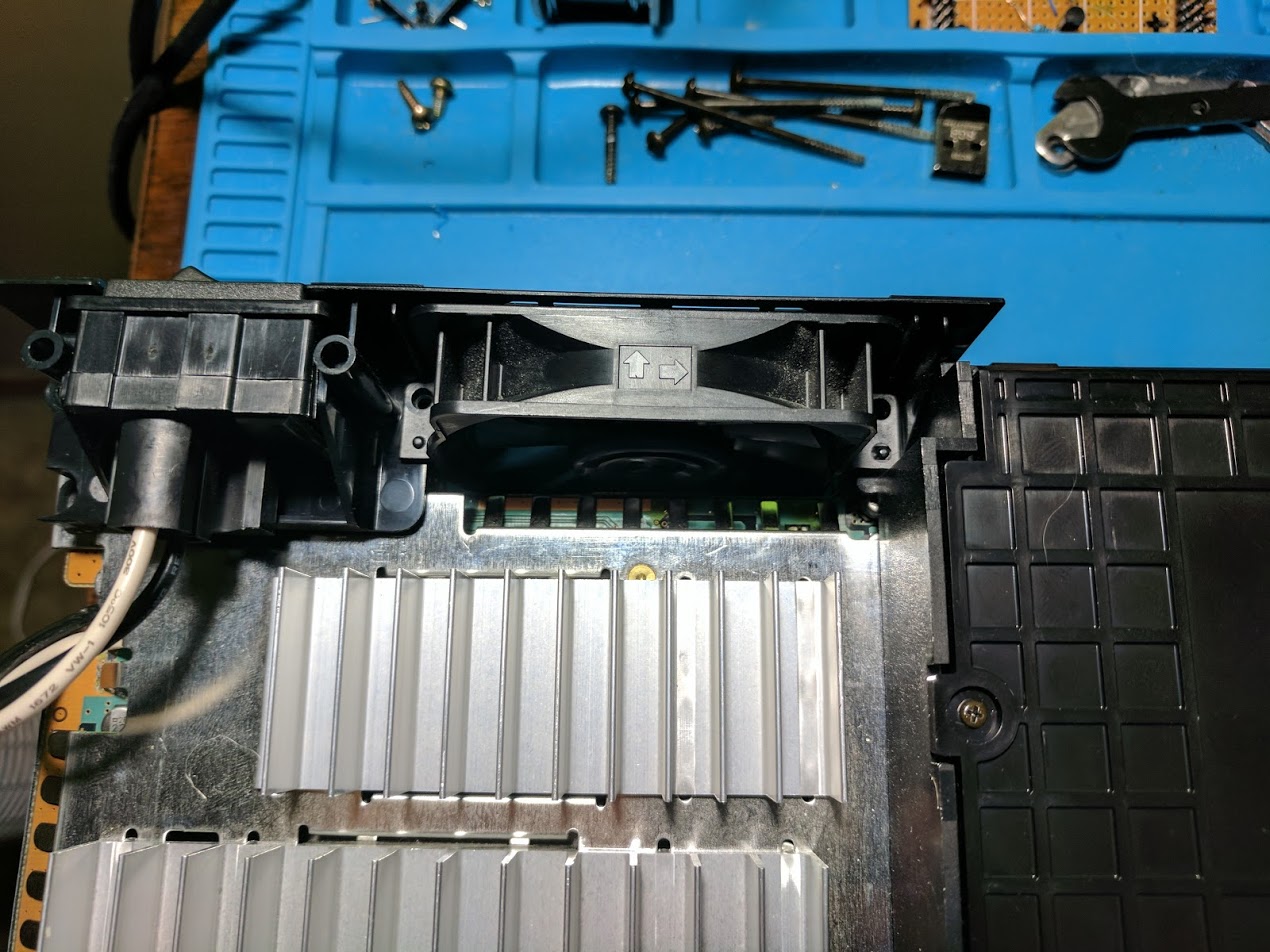
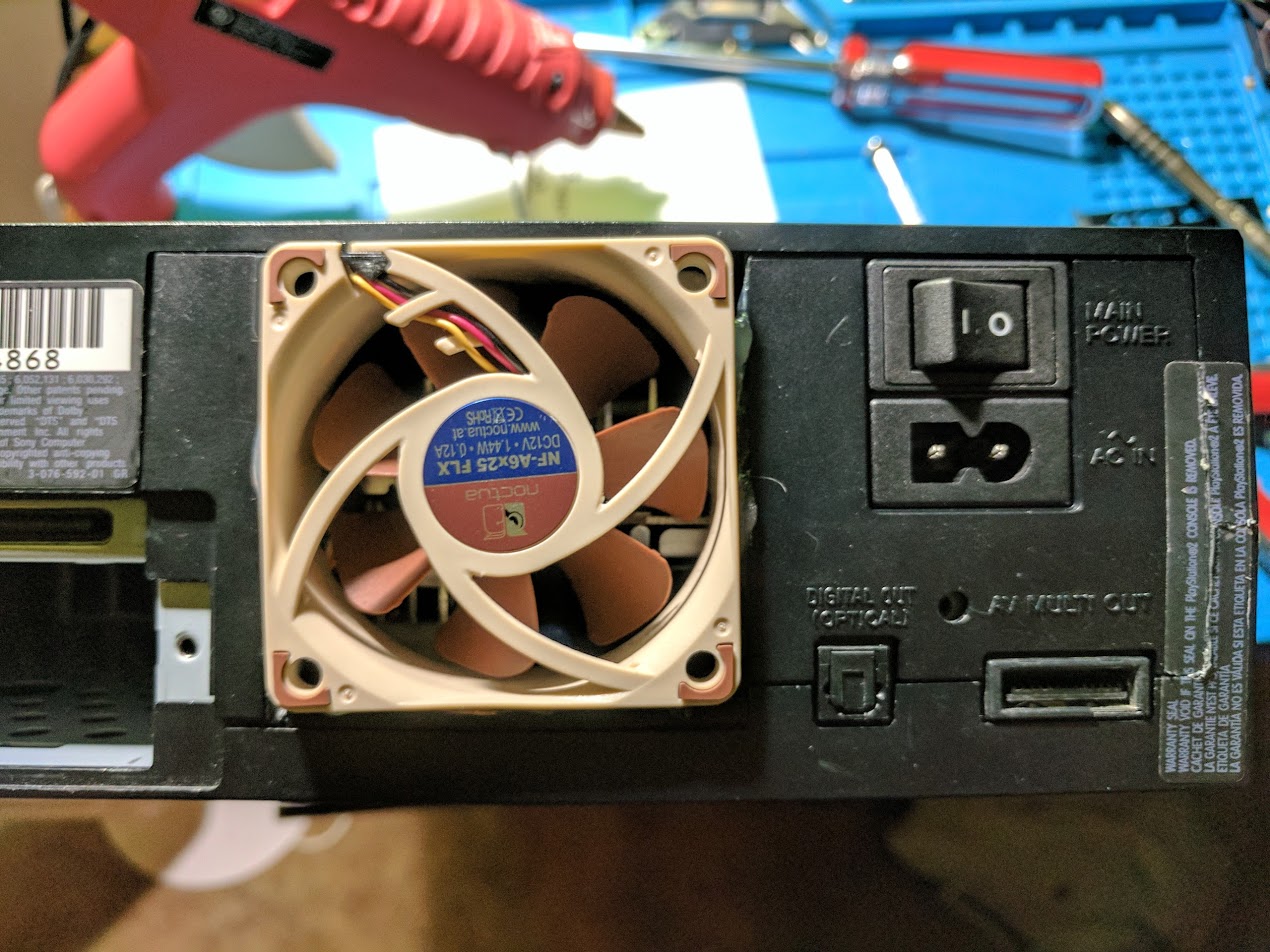
The PS2 fat has a pretty simple cooling system design. There is a single slim 60mm fan in the back that sucks air in from the vents on the front. The air goes through the power supply and heatsink fins, and out the back of the system. The fan does a pretty good job of keeping the console cool. My PS2 does get warm, but I haven’t ever had it overheat.
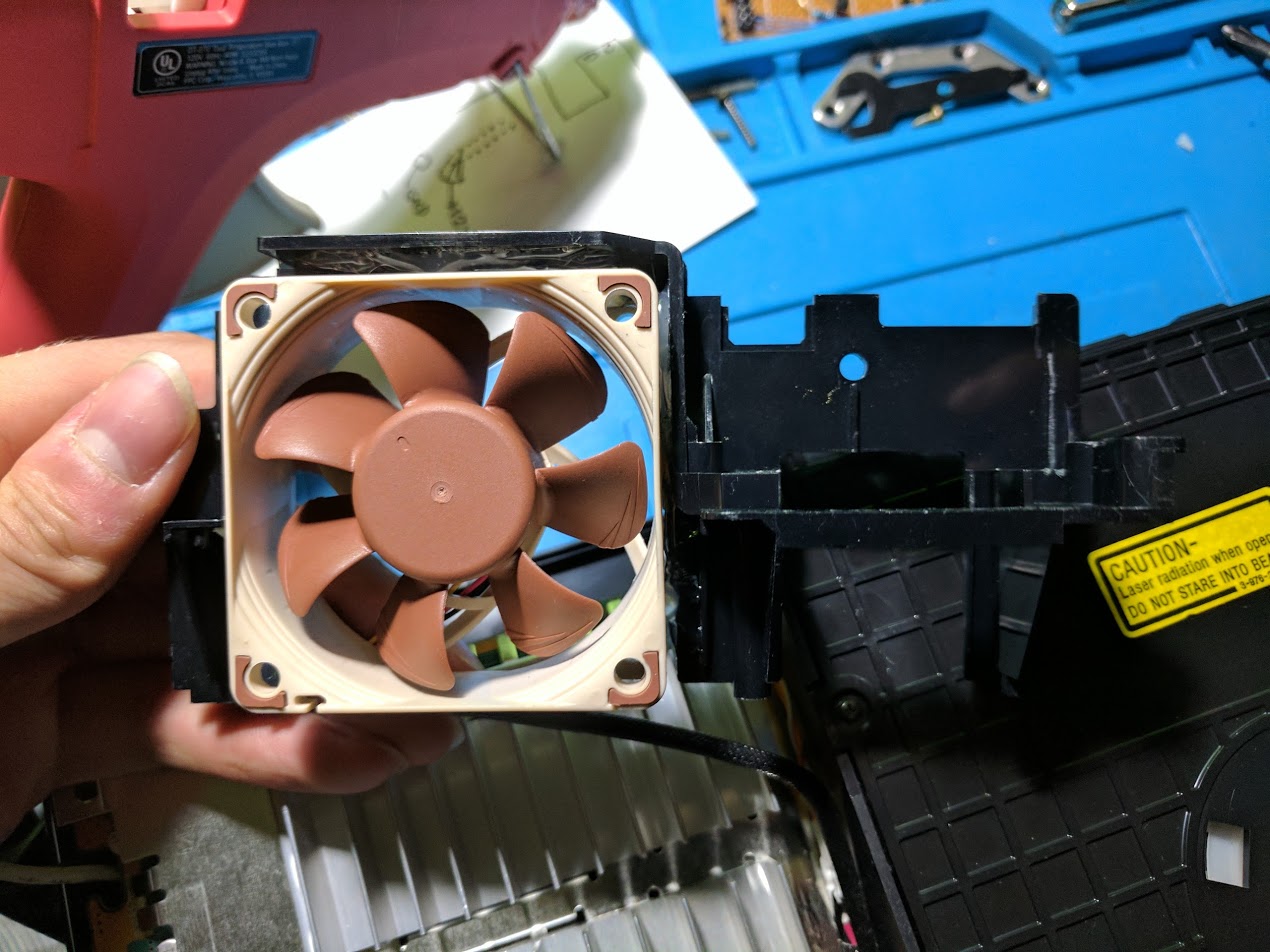
To silence the PS2 I needed to find and install a fan that can pull at least an equivalent amount of air through the system quietly. I chose the Noctua NF-A6, because I installed a similar Noctua 80mm fan in my original Xbox and have had good results. If you want to avoid modifying the fan mounting bracket you’ll want to find a 60mm fan with a depth of 15mm or less.
Modifying the fan mounting bracket
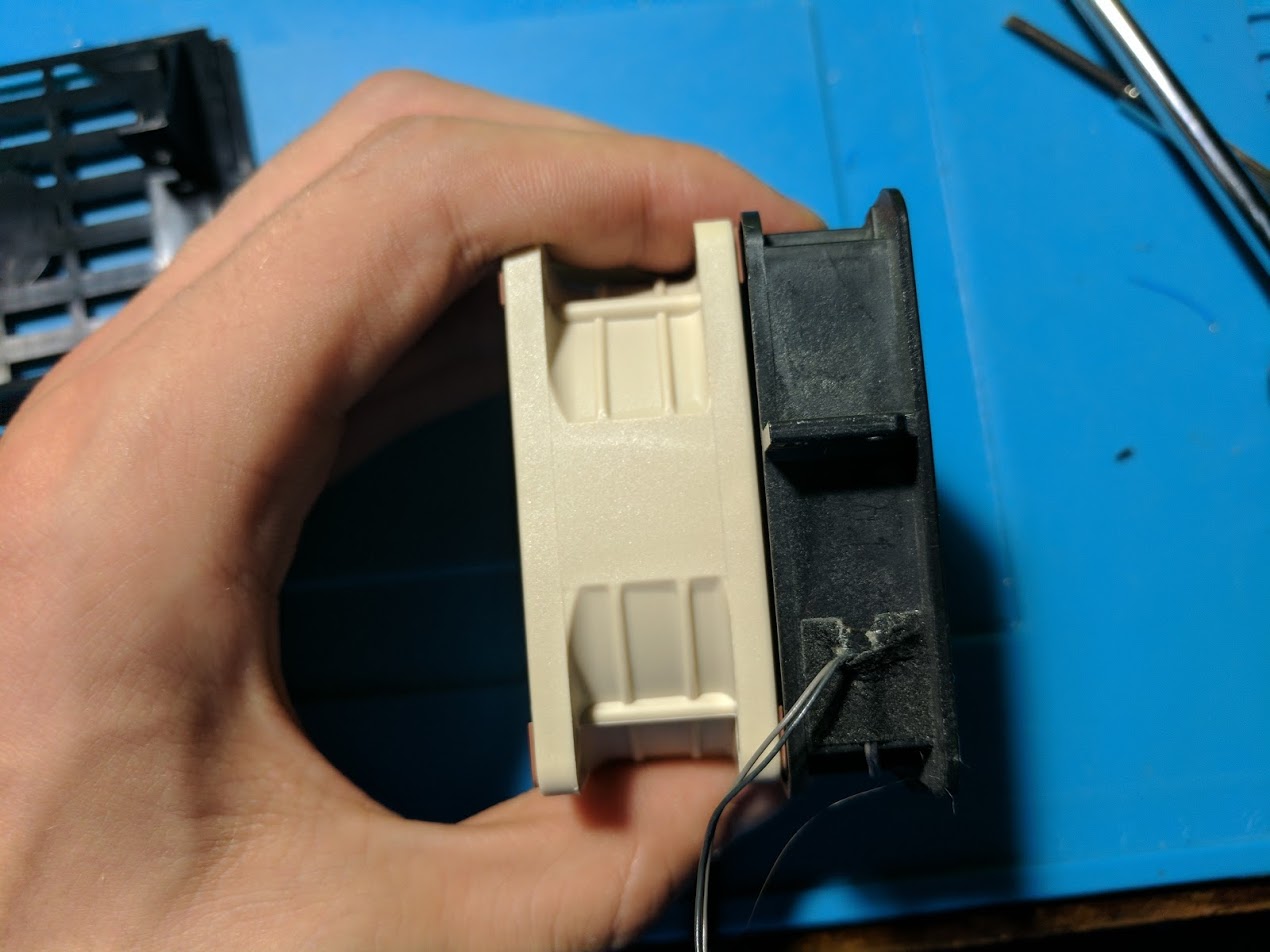
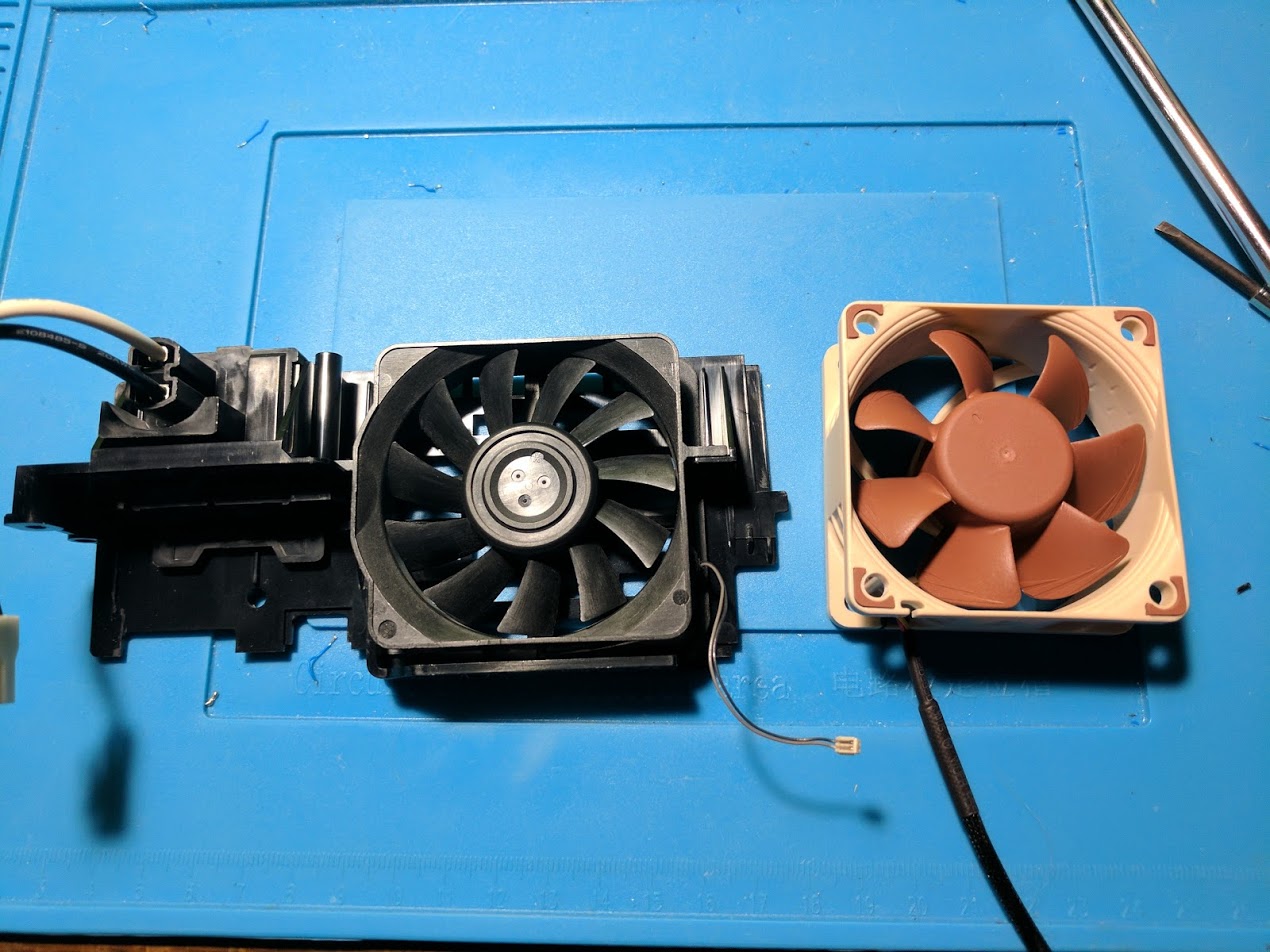
The stock PS2 fan mounts to a plastic bracket along with the power socket. Since the stock fan is 15mm deep and the new Noctua NF-A6 fan I’m installing is 25mm deep, I’ll need to do some fan mounting bracket modifications. The separate bracket is easy to modify, and easy to replace if something goes wrong.
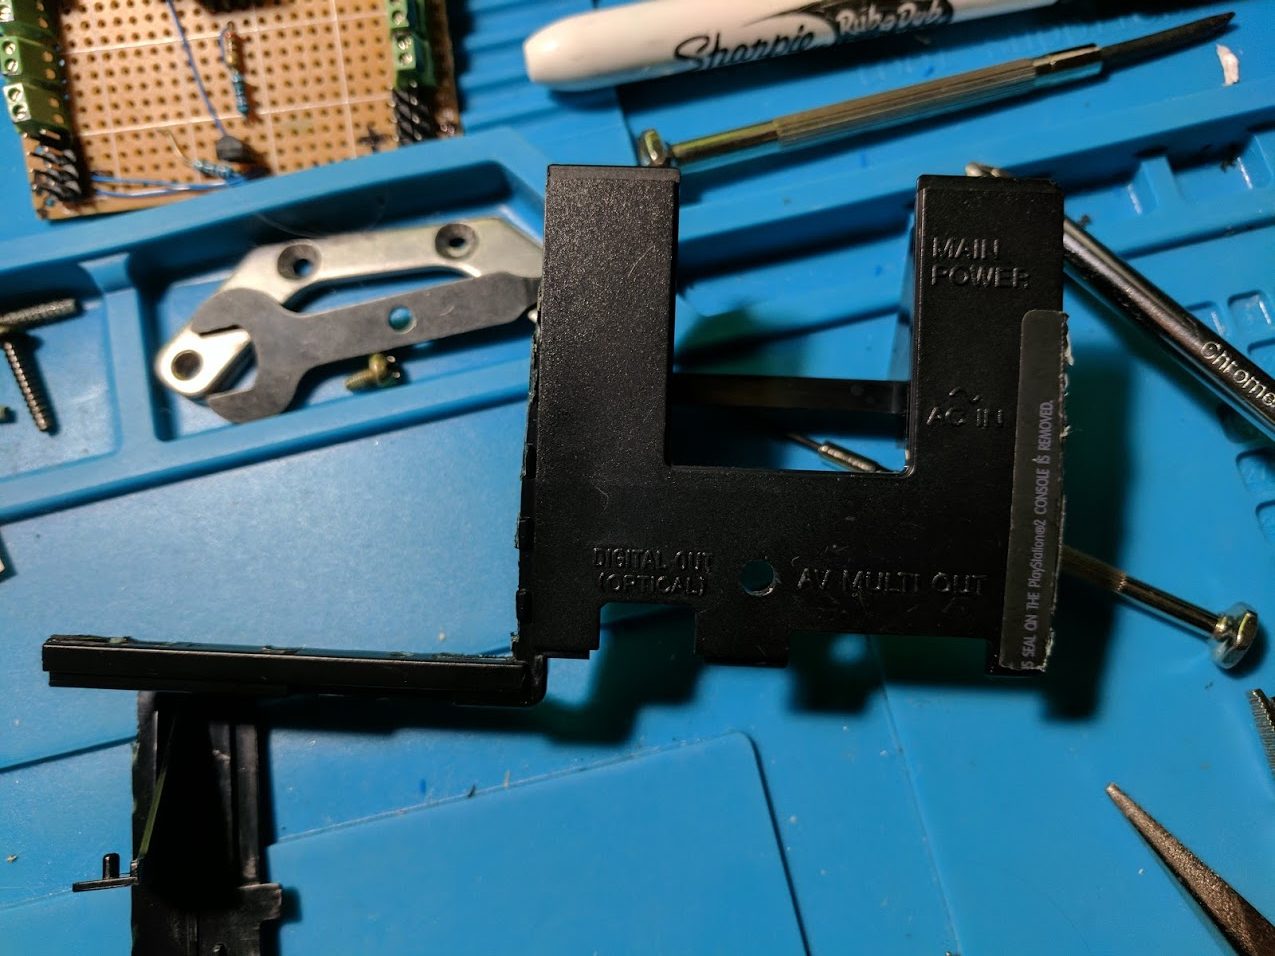
For the fan to fit it had to stick out the back of the case a bit. I started by cutting out the plastic grill vents. With the vents removed the plastic fan bracket broke into two pieces. I glued both pieces together with the fan in between using hot glue.
It doesn’t look the best, but it does fit back into the case just as well as the fan bracket with the stock fan.
Modifying the fan power connector
Powering the fan is fairly tricky. The Noctua NF-A6 is officially a 12V fan, so I started by looking for a 12V power source. I found that all of the 12V lines are always powered on when the console is plugged in, and I didn’t want the fan always running.
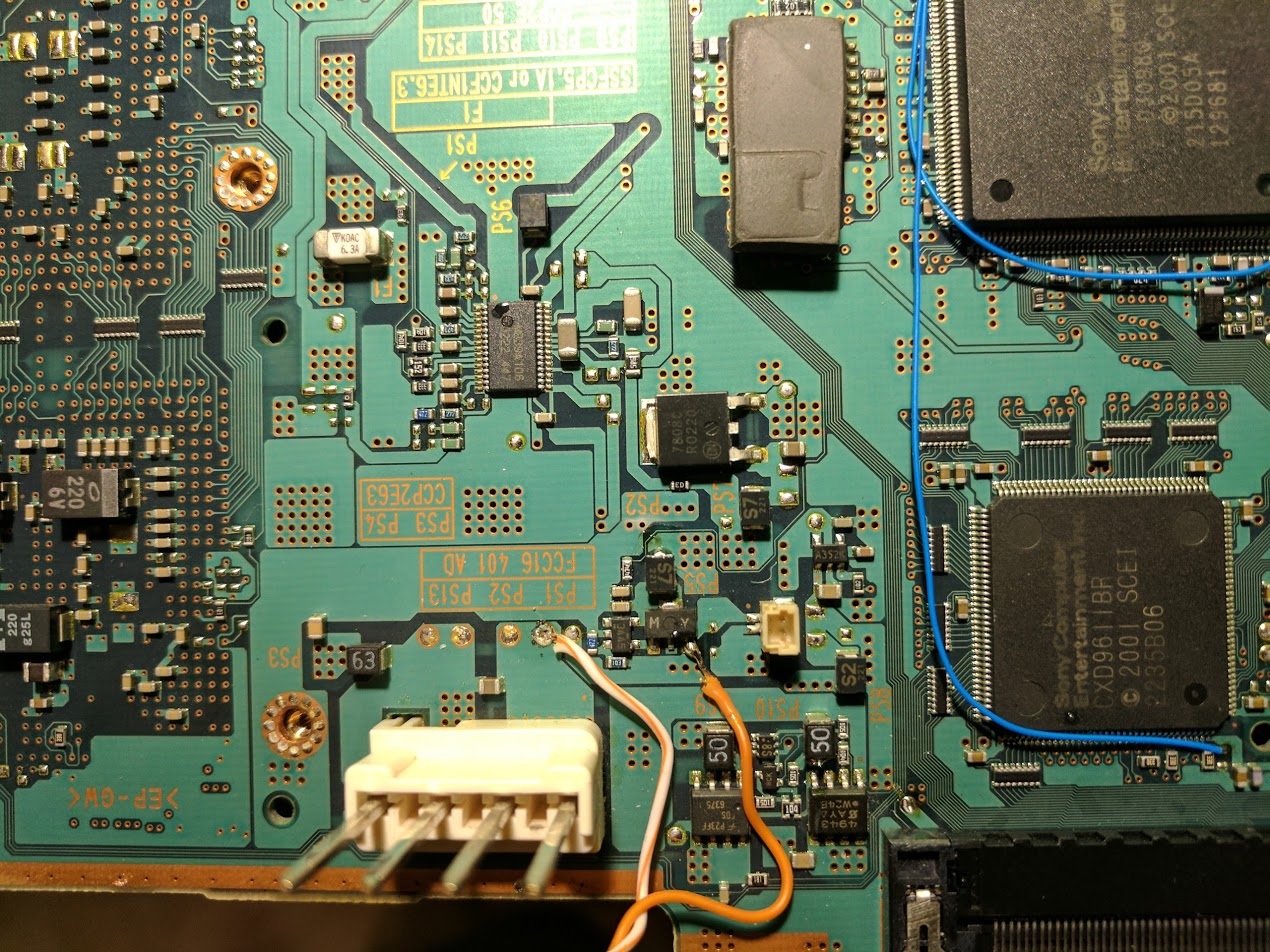
I spent quite a bit of time experimenting with different points on the board using schematics I found online without any luck. Eventually I ended up just wiring the fan to the old fan connector, which doesn’t provide as much voltage. The stock fan port provides anywhere from around 5V to around 8V of power, which isn’t 12V, but is roughly equivalent to the Noctua fan with low noise adapters installed. The image above is wired to the fan connector using alternate points, orange is for the positive voltage, and white is for ground.
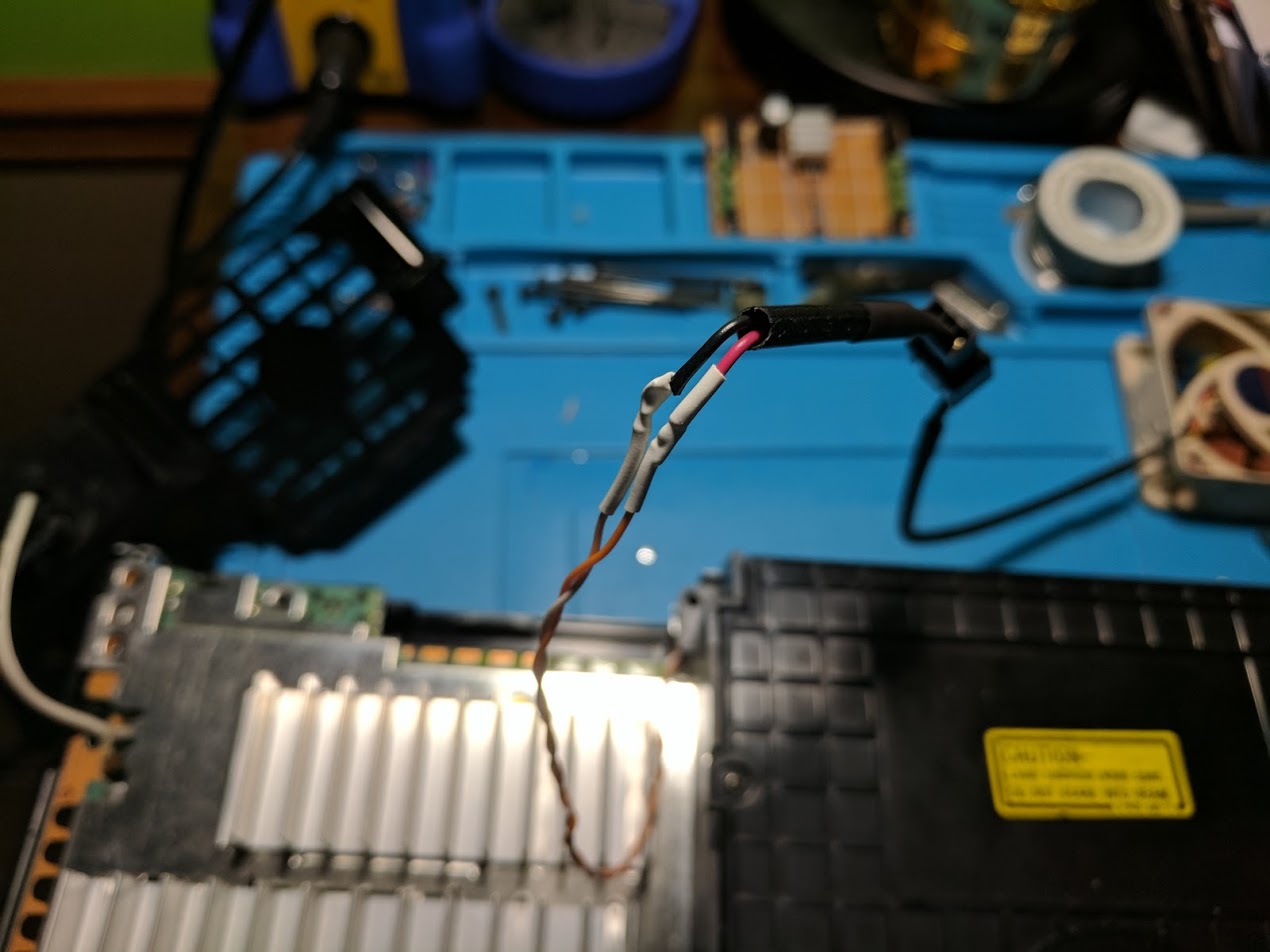
I wired those two wires to one of the fan extension cables provided with the Noctua fan, so that I could easily connect and disconnect the fan. You can see the wires connected to the fan in the image above.
I’d like to mention that there are two possible solutions for this fan power problem. The first solution would be to use the hard drive expansion bay pins. There are pins on the expansion bay that provide 12V to the hard drive, but only when the system is powered on. I tried this and didn’t get 12V, but you might have better luck.
Another solution would be to wire up a transistor to something that is only powered on when the system is on. This could be the fan connector, or the green power LED. The transistor would cut off the 12V power to the fan when the system is off.
Putting everything back together
Now that you have modified the fan mounting bracket to fit the new fan, and wired the fan to the PS2’s motherboard, you can put your console back together. If you did everything right you should be able to put it back together just like you took it apart.
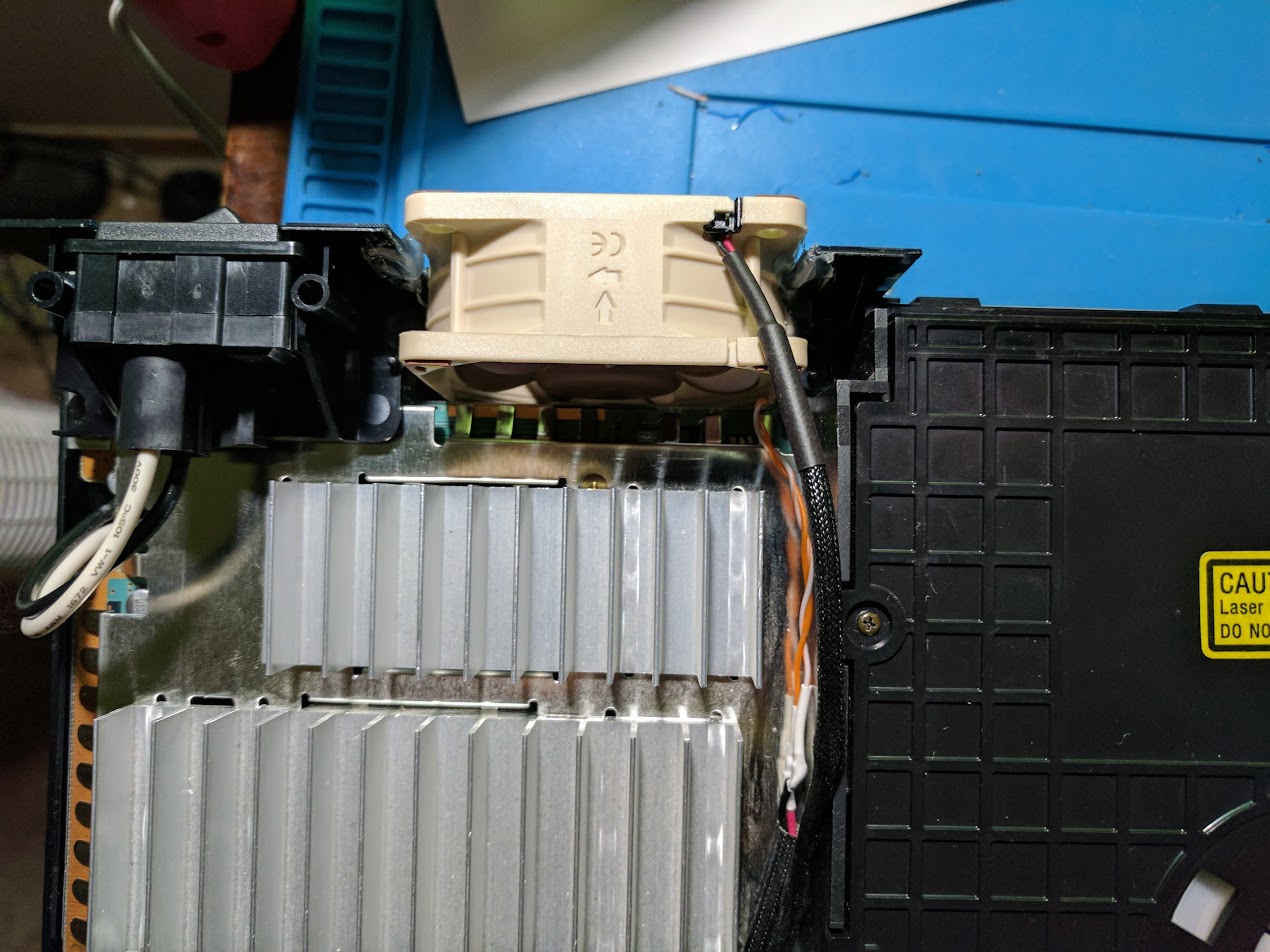
Above is an image of the fan installed before I put the top cover back onto the console. Below is an image of what the fan looks like once the top cover is back in place.
Conclusion
This mod was a success. I was able to upgrade the fan in my fat PS2 to something more silent. It isn’t the prettiest mod, since it sticks out the back of the console, but it seems to be functional. Even though the fan doesn’t have 12V, I haven’t had any issues with my PS2 overheating since upgrading the fan.
It’s easier to replace it with a fan from a 50001, which are silent. No modding needed.
Thanks, William. Your guide was like a bible for me for a last few days when I got into modding my 39003. I wasn’t follow this literally though and kind of paid for this. Instead of Noctua I used Deepcool XFAN 60 which is kind of cheap and basic 60x12mm 12v case fan. I soldered the original fan connector to it, connected, and it worked, but in 2 of 10 starts the fan stood still. It’s no deal, I don’t want my console to randomly overheat. Obviously, 5-8v isnt enough for this 12v fan. Trying to work this around I… Read more »
My mod was a success too. I used a 5v version of Noctua NF-A6x25 and it worked. It has enough current from the native fan port. Now the fan starts 100% of times. All I had to do is to solder an omnijoint connector to an old fan connector left from original fan and cut the back piece of the PS2 case. The fan packaging had scotchloks but I didn’t used them. They would make the wiring look clunky and I don’t have much space inside the case. I cut the back piece just by its grill and used 2-sided… Read more »
Hi, my fan slot was broke when i tried to remove the fan. I try to solder 2 wires on the pads where slot was, and the fan not work, i think the fuse died. If i do the same scheme of this tutorial, the fan can work again?
[…] One problem with this design is that the component converter is always powered on, even when the console is powered off. I discuss this power problem in relation to a fan in my post on upgrading the PS2 fan. […]
Would it be ok to use a 60mm 5V fan or would it be noisier?
Running a fan at 5V is usually quieter. You should be able to solder the fan to the 5V pin on the USB connector for power.
Thank you!
Hi!
I just finished this mod myself today and the ps2 is so quiet now its almost scary.
Have you run into any issues since doing the mod?
What temp do you have indoors?
Does your ps2 have alot of space around it?
I haven’t had any issues with the system, but I also don’t play it for more than a couple hours at a time. Temps indoors are ~75 F. The front and back vents on the console aren’t being blocked by anything.
I was wondering if you could post some diagrams with markings to indicate where to solder? Any updates on the best places to solder the points to would be appreciated as well. Thanks!
This picture shows where I soldered the fan to:
Thanks but I was thinking of a diagram with all the points where I could solder to 12 Volts to provide enough power to the fan. I don’t mind if the fan runs at full speed all the time when on since it will be much quieter than the stock fan anyway. I’ll be using the PS2 for playing several long marathons, so I want the cooling to be reliable, too.
If you can provide diagrams for the 12V connections, I would appreciate it.
You can get 12V directly from the power supply. The striped wire in my picture is the ground, and then the two pads on the opposite side are 11V.
Thanks, I got it to work now. I appreciate the help!
Willian, my ps2 fan is not working. I have tested other ps2, it was ok. What would it be? Do you know it?
Check the fuses near the fan connector.
PS5 fuse?
I think that might be the one. You might as well just test all of them in that area though.
Hi William. I have a PS2 SCPH 50004 V9 and the fan doesnt work. I opened the console and take out the fan, and i connect it to a 4,5V petaca battery to check, and it runs. I also check the fuses on the board and aparently all are ok. Fan connector its ok too, but still doesnt work. What more i can check or i can try to do? The Ps2 also have a matrix chip installed.
Did you check all of the fuses on the board? It may be worth probing the fan connector to see if you get voltage.
Hey, my PS2 fan’s connector just snapped (50001 V10 GH-026) (It had the warranty seal closed until I opened it just yesterday) and I was wondering if there was a way to fix it or get the fan running without it, like soldering the wires to a specific point.
You can solder the fan wires to the pads that the connector was connected to or resolder the connector (assuming that the pads didn’t lift off of the board).
Nice guide, I have fat 35001 model with a v4 motherboard, I was changing the fan over but I think I tripped a fuse, I’ve looked all over for a PS5 fuse but I cant find one, do you think you could help?
Fuse locations: https://www.ps2-home.com/forum/viewtopic.php?t=2779
Bonjour la famille j’aimerai savoir si c’est possible de ramenée ma console PS2 Fast sur 12 Volt