NB Miata project – Cosmetic modifications after six months
In my last post I covered the various performance modifications I have done to my NB Miata during my first six months of ownership. I didn’t do anything too crazy, but still managed to improve the experience of my car. Things like an exhaust and intake for sound, along with engine mounts, tires, and chassis bracing to improve the driving feel of the car.
This post covers NB Miata cosmetic mods that I have done to my car during the first six months of ownership. I explain what I did, why I did it, and what my experiences were with various different mods.
Fender replacement
When I purchased my Miata the passenger side fender was dented in at the front. It wasn’t that big of a deal, but I wanted to get it fixed. I ended up just purchasing a new replacement fender for pretty cheap instead of trying to bend out that dent.
The replacement fender was painted in some sort of black primer so I needed to paint it. I used several layers of primer, several layers of color, and several layers of 2K clear coat. The end result was actually pretty good. There were two things that stood out compared to the original fender.
One of the issues was that the color coat didn’t quite match the color of the original paint. Both the color and the metallic texture just aren’t quite the same. I believe that one of the issues is that the rattle can paint just wasn’t going on thick enough to replicate the OEM look. The difference in color and finish is really obvious under certain lighting conditions, especially close up. Under other lighting conditions from a little ways away the fender paint matches pretty well.
The other issue was that the original Miata paint has a slightly different texture on the lower part of the panels on the sides. It’s a more rubbery type of paint to help prevent rock chips. This realistically isn’t something that most people are going to notice.
Overall I was happy with the results. I planned to wrap the car eventually so the exact color match wasn’t critical, I was mostly just aiming for something that looked decent, and wasn’t dented or anything. The fitment was perfect, and it was super easy to replace the fender. I didn’t even need to remove the headlights and front bumper like some instructions suggest.
Changing the color
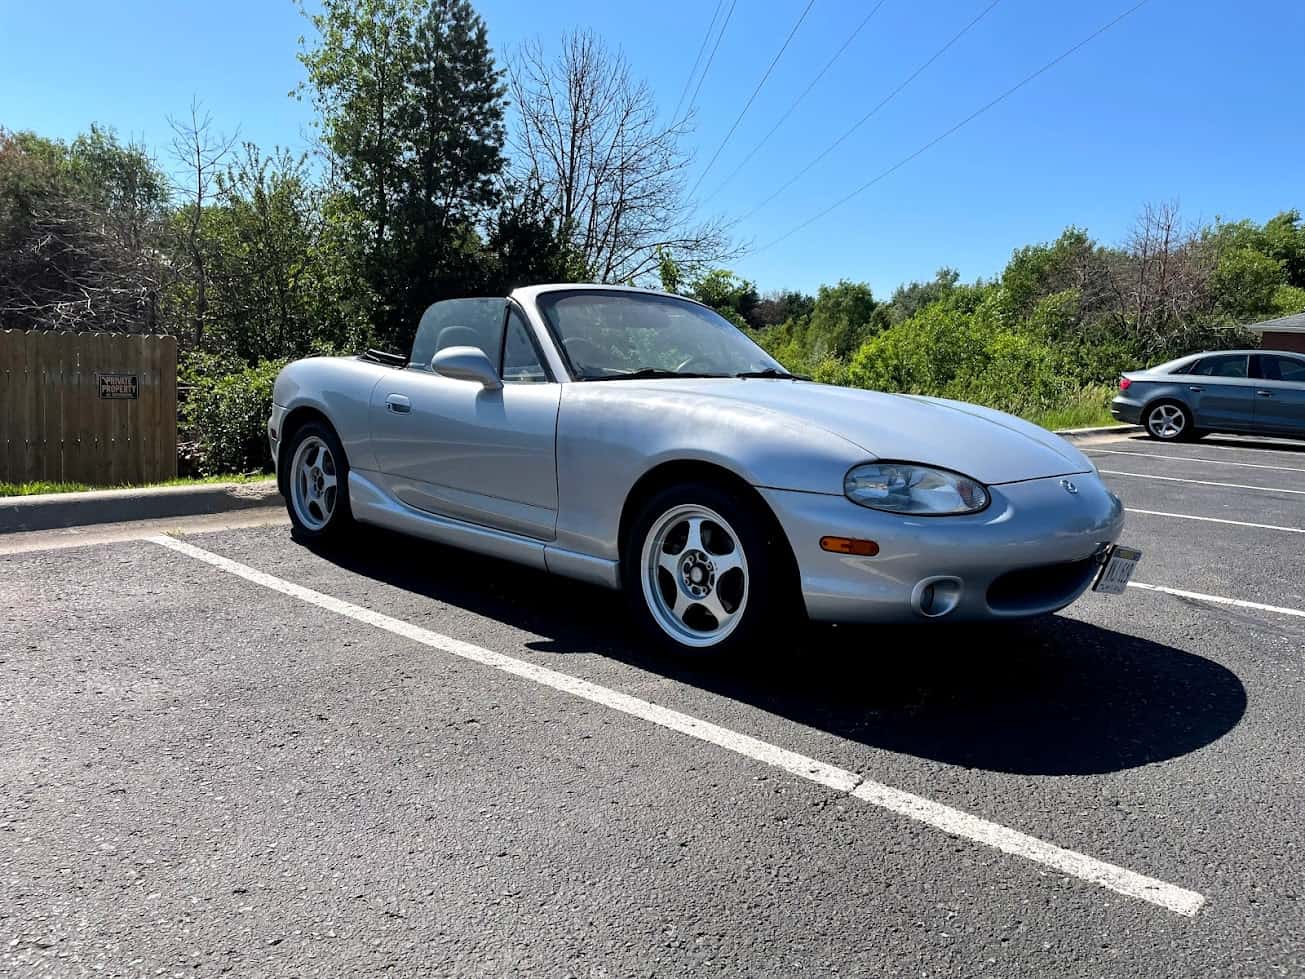
When I purchased my Miata I wasn’t really looking for one color in particular, I was more interested in the overall condition and price of the car. There also weren’t that many options for cars nearby. So it sort of made sense that I ended up with the most common NB color, silver. I did like the color, but I sort of wanted something more interesting.
There are several ways to change the color of a car. I chose to go with wrap, and decided I wanted to try wrapping it myself.
- Painting – This is a permanent change of color. It costs the most (at least for a good paint job), and requires a lot of time and work to get painted correctly. It can also devalue a car to people who are looking for an original unmodified car.
- Plasti-dipping – This is a temporary color change that involves spraying the car with a rubberized paint film that can be removed later. It’s cheap and easy, but tends not to look the best, and tends not to offer the same glossy finish as paint.
- Wrapping – This is a sort of middle ground. It’s temporary, requires a decent amount of money if you are paying someone to do it, but provides a finish that’s nearly as good as paint.
Choosing a color was difficult, there are just so many wrap color options. I pretty much immediately ruled out standard colors like shades of white, black, silver, and gray, those are boring and on most cars on the road today. Red was also ruled out (it’s probably the most popular color here after the monotone colors). I thought about blues, yellows, and oranges, but eventually settled on a sort of medium yellow.
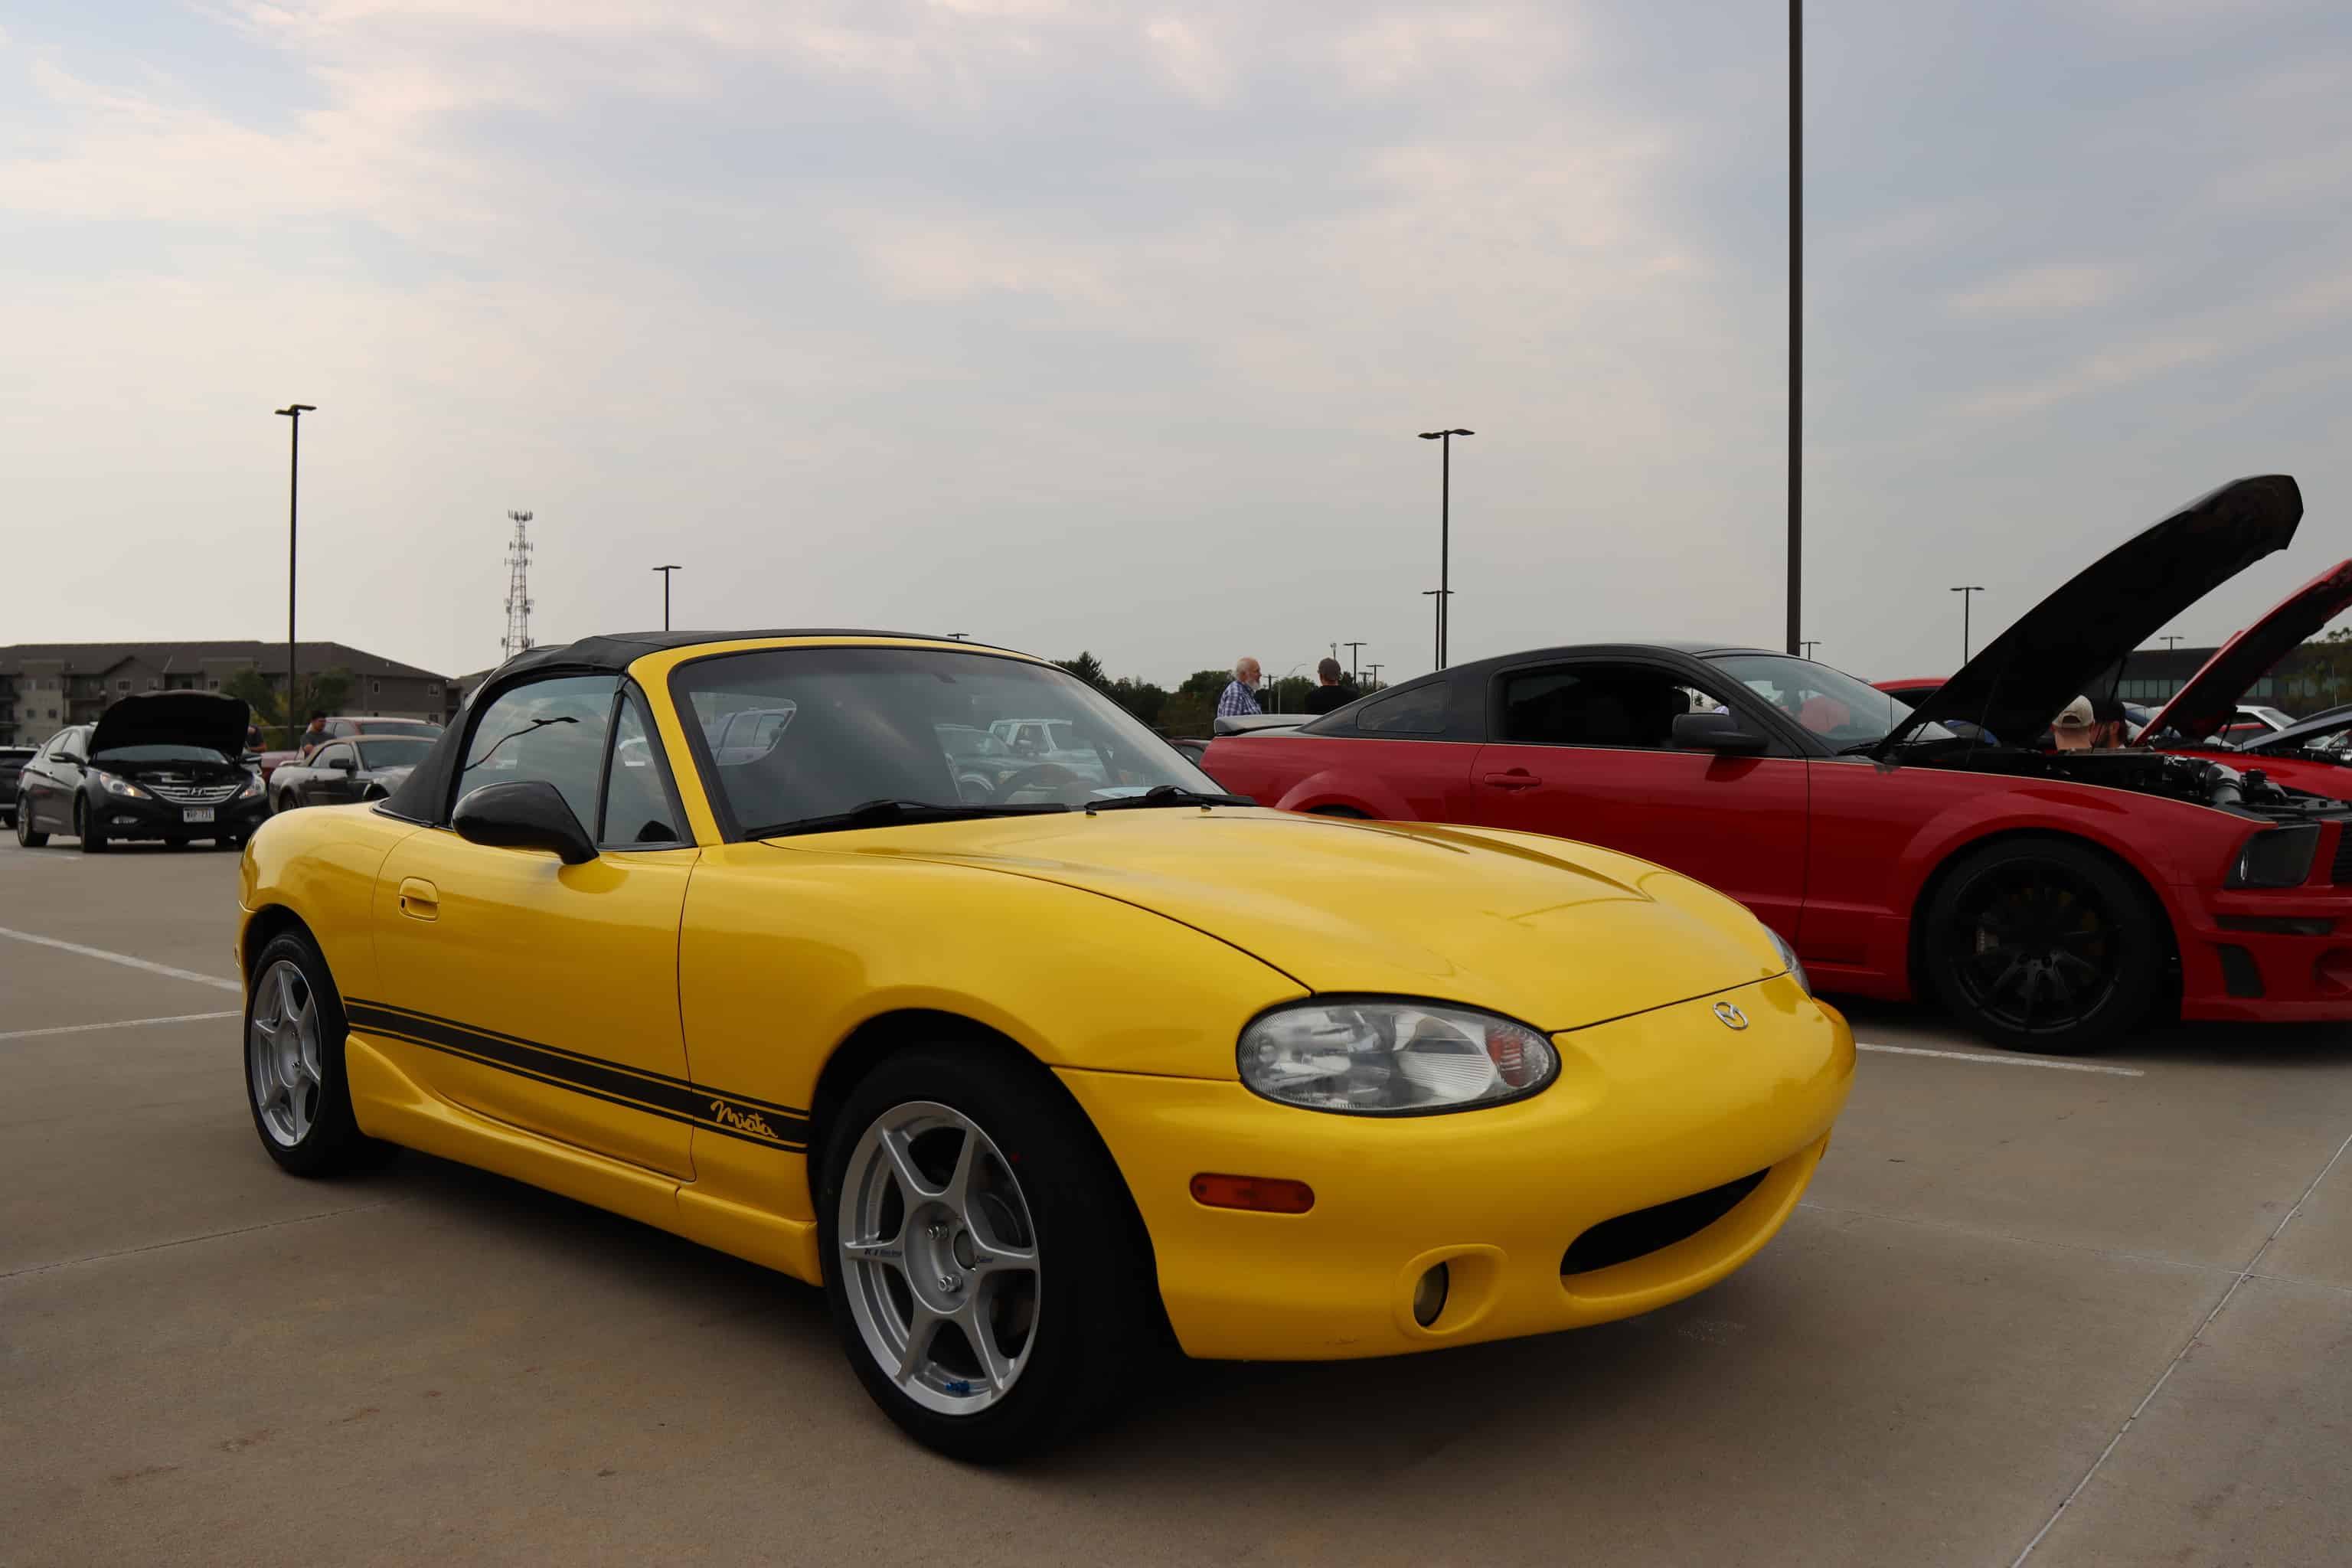
3M 2080 G15 yellow wrap
The exact color I went with was the G15 shade of 3M 2080 series wrap. I thought the yellow suited the Miata very well, and is a very unique and interesting color. I hadn’t seen a yellow Miata in person, but liked similar colors on certain cars like the Honda S2000, and Civic Type R.
Wrapping the Miata was surprisingly easy to do. I learned a lot while doing it, it’s definitely the sort of thing where the more you do it the better you get. There are some spots on my wrap that aren’t perfect, but it’s good enough for me. I may end up redoing some parts in the future, but for now I’m happy enough with the results. I will say that it’s something that would have been much easier with another person to help. Things like the bumpers require a lot of stretching that a second set of hands would make significantly easier.
From a distance the wrap looks perfect, and closer up there aren’t too many bad looking spots. The color really does look good on the car. I added some black Miata font text stripes on the sides where the factory paint changes textures to sort of cover up that line. I’m also doing some other black/carbon fiber accents that should contrast well with the yellow (things like the mirrors which were super hard to properly wrap).
I will say one big drawback with yellow is how easily it shows things like bugs and dirt. I’m constantly having to wipe off bugs in the summer since they are clearly visible. Certain bugs also seem to be strangely attracted to the color of the wrap, so sometimes when it’s parked I’ll see an unusually high number of bugs crawling around on the wrap.
Interior upgrades
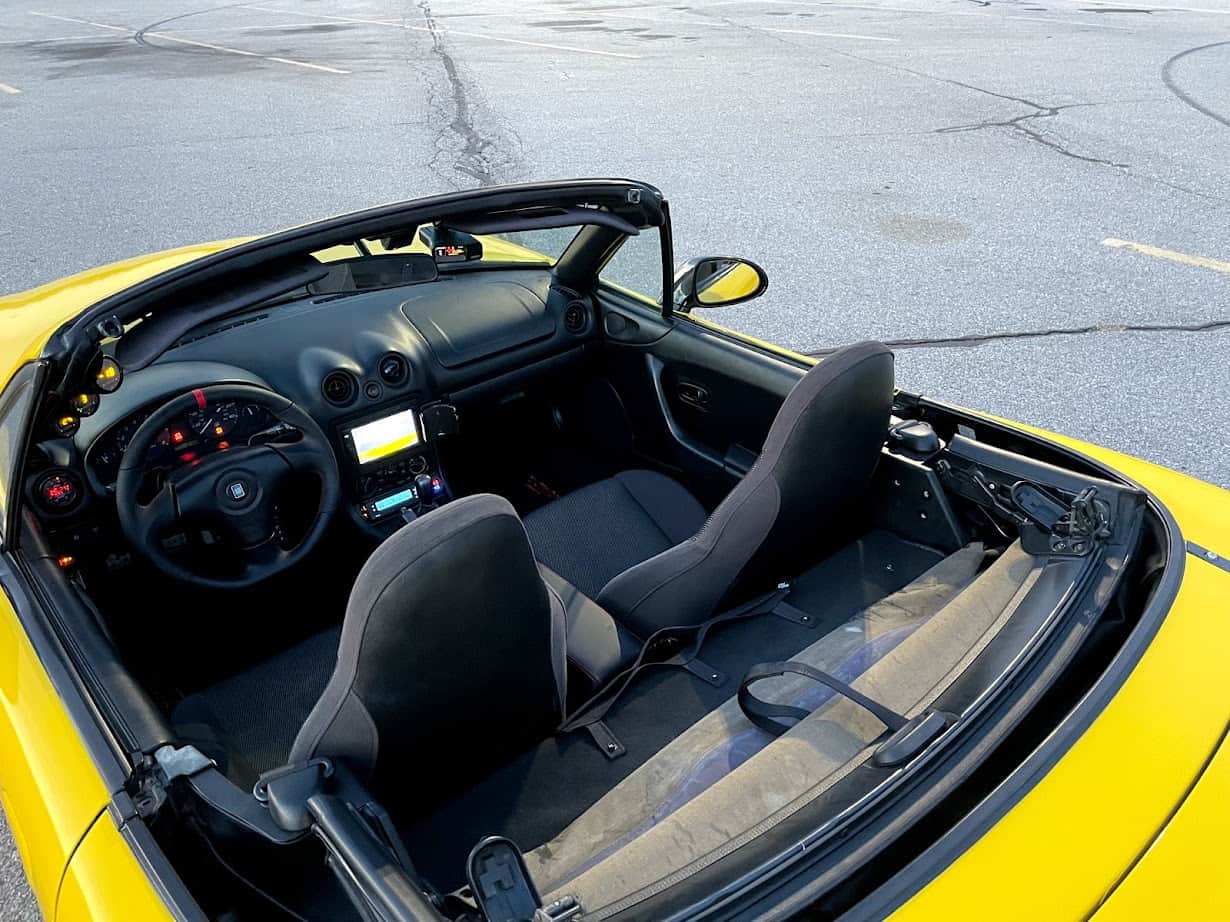
I made some improvements to the interior of my Miata that I thought were worth mentioning. These are in no particular order. I ended up going with a black/gray/red color scheme on the interior. These colors sort of go well with pretty much any exterior color, so if I end up removing my wrap or changing the color down the road I can leave the interior as is (if I used yellow accents in the interior it wouldn’t work so well if I went back to silver).
Controls
- Skunk2 weighted shift knob – I didn’t like the feel of the stock knob, especially when wearing gloves, this was a big improvement. It looks nice, and I really like the weighted feel to it.
- Cipher steering wheel – My goal was to improve the steering wheel without losing the airbag. This is a nice budget option, it’s basically a rewrapped stock steering wheel. The new wrap has a more leather feel to it, has some nice perforations on the side, red stitching, and a slightly more flat bottom, along with padded thumb grips. There are certainly better options, but they cost quite a bit more. I found the wheel to be particularly useful for the track driving due to the better grip.
- Flyin’ Miata extended pedal set – This kit replaces the stock rubber pads on the pedals with grippy aluminum pedals. The gas pedal also has a small extension that makes it easier to heel-toe downshift.
Comfort
- RedlineGoods leather upgrades – These are all high quality leather and have red stitching to match the color scheme. They look nice, and the center console padding in particular improves the comfort of the car quite a bit compared to the solid plastic stock lid.
- Shift boot
- Parking brake boot
- Padded center console arm wrest cover
- Padded door arm wrest
- NB2 Miata seats – The driver side seat in my car had a rip in it when I got it, over time it got worse and worse. I decided to get a pair of NB2 Miata seats to replace my factory NB1 seats. The NB2 seats have a much higher seatback that actually goes up to my head. This provides additional safety, especially once I get a roll bar installed. They definitely sit higher (although the driver side one I got had a foamsectomy already done), and they do make it harder to look backwards.
- Floor mats – I installed some Thompson Automotive floor mats, black with red Roadster text. They fit perfectly and have much higher quality carpet than what came in the car.
- Rear shelf pockets – I got some rear shelf pockets that snap onto the carpet snap connectors. They are useful to hold things like small bottles of water, or sunglasses.
Electronics
- Sony AX-1000 head unit – The radio that came with the car wasn’t working so I wanted to just replace it. This is a nice unit that works with a backup camera I installed. I also had to change out the speakers in the doors with some lower power speakers that don’t require an amp. It’s functional and supports Apple CarPlay, but doesn’t have the best sound quality.
- Gauges – I installed some gauges to get a better idea of the state of my Miata as I drive.
- Dashcam – While this isn’t completely necessary, it can be useful if I ever get into an accident. I chose the VIOFO A119 dashcam since I have had good luck with a similar model in my other car. I did a hardwire installation that can record even when the car is turned off as long as the battery voltage is high enough.
- Uniden R7 radar detector – I also hardwired in a radar detector in order to alert me to nearby police radar (as well as laser, but if you get a laser alert it’s realistically already too late). The range on the Uniden R7 is incredible, and it does a fairly good job at filtering out false alerts from things like radar cruise control.
- ScanGauge OBD2 reader – This is a handy device that allows me to keep an eye on some things like intake air temperature, coolant temperature, battery voltage, and other ECU sensor data. The reader can also scan and clear engine codes.
Aftermarket gauges
One of the things I didn’t like about my Miata was that the oil pressure and coolant temperature gauges in the gauge cluster aren’t very useful. The stock oil pressure gauge is essentially just an on-off sort of gauge and doesn’t move once you start the car. The stock coolant temperature gauge only really has three states: warming up, operating temperature, and nearly overheating. I wanted to have a better idea of the current state of my engine so that I can react if things go wrong and potentially save my engine.
It is possible to modify the stock gauges and change certain sending units in order to get the stock gauges to function correctly. I considered doing this, but really didn’t want to modify a fully functional stock gauge cluster.
So instead of doing that I ended up installing some aftermarket gauges. They will provide me with even more information and don’t require touching the stock gauges. My setup consists of three gauges on the A pillar (all from Innovate Motorsports), along with a single gauge in the driver side vent (from AEM).
A pillar gauges
The topmost gauge is a combination vacuum/boost gauge and also a shift light (I didn’t hook up the shift light portion though, at least not yet). My Miata isn’t boosted so it is really just a vacuum gauge, but it’s still interesting information that may be useful for diagnosing issues, and can help me tune the car in the future.
The middle gauge is a combination oil temperature and oil pressure gauge. This is arguably the most important gauge. I installed the sensors on an oil filter sandwich plate. These gauges tell me a lot about my car. I can see when the oil has warmed up by seeing the pressure decrease, and the temperature increase. When the temperature starts getting warmer I can know to slow down a little bit to cool off the oil a bit. I can also keep an eye out for a loss in oil pressure so that I can shut off the engine.
At the bottom of the A pillar is the final gauge. It is a combination coolant temperature battery voltage gauge. I installed the coolant temperature sensor at the top thermostat housing on the radiator side (so it only works once the thermostat has opened). Interestingly the water temperature here seems to be about 10 degrees warmer than the temperature readout from the OBD2 port. It’s also interesting to see that the oil temperature can rise quite a bit while the coolant temperature remains steady. I have found that the coolant temperature is warmest when sitting at a traffic light, while the oil temperature is warmest while running the engine hard at high RPMs for an extended period of time. The battery voltage gauge can be useful to know if I’m having issues with my alternator.
Air vent gauge
In the driver’s side air vent I installed an AEM AFR gauge. This gauge can tell me how rich or how lean my car is running, and provides an output that I can use with an aftermarket ECU down the road. I was actually able to use this gauge to notice that my car was running unusually rich. Replacing my MAF sensor with a replacement used sensor fixed this issue and got my AFR back to what it should be.
Overall all of the gauges I installed have been very useful and interesting.
Engine bay upgrades
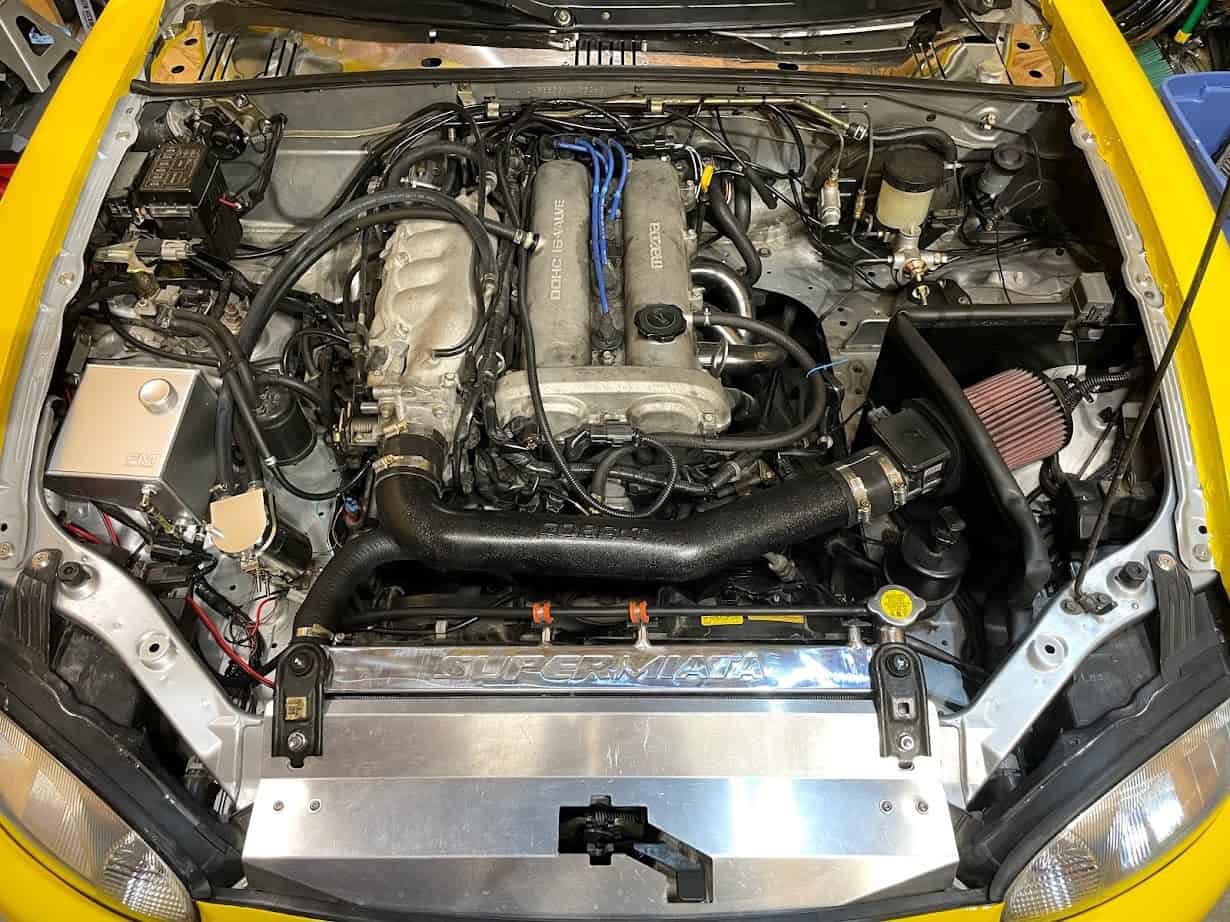
I installed some parts into the engine bay to make things look a little nicer under the hood. Some of them may add a little bit extra cooling potential which is useful for performance, but for the most part these are just to make things look nice.
- LRB Speed aluminum undertray – This replaces the stock plastic undertray that was beat up and missing hardware. I got the main cover along with the side covers. It helps air flow through the radiator properly, looks good, and is actually easier to remove when working on the underside compared to the stock tray.
- Replacement wiper cowl – One side of my car’s wiper cowl was broken off so I replaced it.
- Jass performance windshield cowl panel – I installed a cover over the windshield wiper cowl area behind the firewall. This cleans up the back of the engine bay nicely.
- Flyin’ Miata cowl water bottle relocation kit – This moves windshield wiper fluid reservoir into the wiper cowl area to free up space in the engine bay.
- Flyin’ Miata aluminum coolant overflow tank – A better looking coolant overflow tank that sits in the stock location.
- Cobalt radiator cooling panel – An aluminum panel that goes over the front radiator area to make things look nicer. It also does seem to result in slightly better flow through the radiator.
- Oil catch can – I installed an oil catch can on the PCV intake side. This is part cosmetic, but also really does clean any oil and gunk that may have normally gotten sent through the intake manifold.