PS1Digital first impressions review and installation – PS1 HDMI
This month the first generally available batches of PS1Digital kits were sold and I managed to get one. I thought I’d go ahead and write up a short review covering my first impressions and installation experience.
For anyone who is interested in the PS1Digital but doesn’t feel comfortable installing the kit themselves I will be providing installation services.
PS1 video output options
One of the challenges that users of old video game consoles experience is connecting them to modern TVs. Most new TVs don’t support the video signals coming out of old consoles, and if they do they can be prone to bugs and glitches. There is also the fact that a lot of times the analog video signal itself just doesn’t look so great.
For the PlayStation 1 here are the native options:
- RF video directly to TV provides the worst video quality.
- Composite video directly to TV provides improved video quality. This is what most people in the United States used.
- S-Video video directly to TV is a step up from composite.
- RGB video directly to TV is the best video quality that has been available prior to the PS1Digital.
These options all can be directly hooked into a TV. However, not all TVs support these standards. For those cases there have been some products like the RetroTINK, OSSC, FrameMeister, and HD Retrovision cables that can do the necessary conversions.
While many people prefer using original hardware, that isn’t the case for everyone. Here are some alternatives if you aren’t so interested in original hardware.
- All PS2 consoles can play PS1 games. The PS2 also supports component video directly (equivalent in quality to RGB, but more commonly found on TVs).
- All PS3 consoles can play PS1 games. The PS3 also supports HDMI video.
- There are PS1 emulators that can be used to play PS1 games using modern hardware.
Those are all of the ways to play PS1 games that have existed prior to the PS1Digital coming out.
PS1Digital overview
The PS1Digital was released very recently. Kits were sent out to reviewers and testers a month or so ago, but now they are finally being sold to the general public for $160. The PS1Digital was designed by citrus3000psi with inspiration and guidance from chriz2600’s Dreamcast DCDigital hardware.
These new HDMI output options are designed to take the raw digital video output that comes out of the console’s graphics processor (GPU) and convert it to an HDMI output signal that is supported by your modern HDTV. Through this digital to digital conversion there isn’t any loss of data, so you get the best possible video output quality from your console.
The PS1Digital was designed to be very configurable and upgradable. There are many options to adjust the video output, resolution, scan lines, and more. The onboard ESP32 allows the firmware to be updated over the Internet whenever new firmware is available which can fix any bugs, and introduce new features.
Another cool addition to the PS1Digital is a built in PsNee modchip. The PsNee modchip allows the PS1 to play backups and imports if the chip is connected to the PS1.
PS1Digital kit contents
My PS1Digital arrived in a regular padded envelope inside a simple plain cardboard shipping box. Within that box is pretty much everything you’ll need:
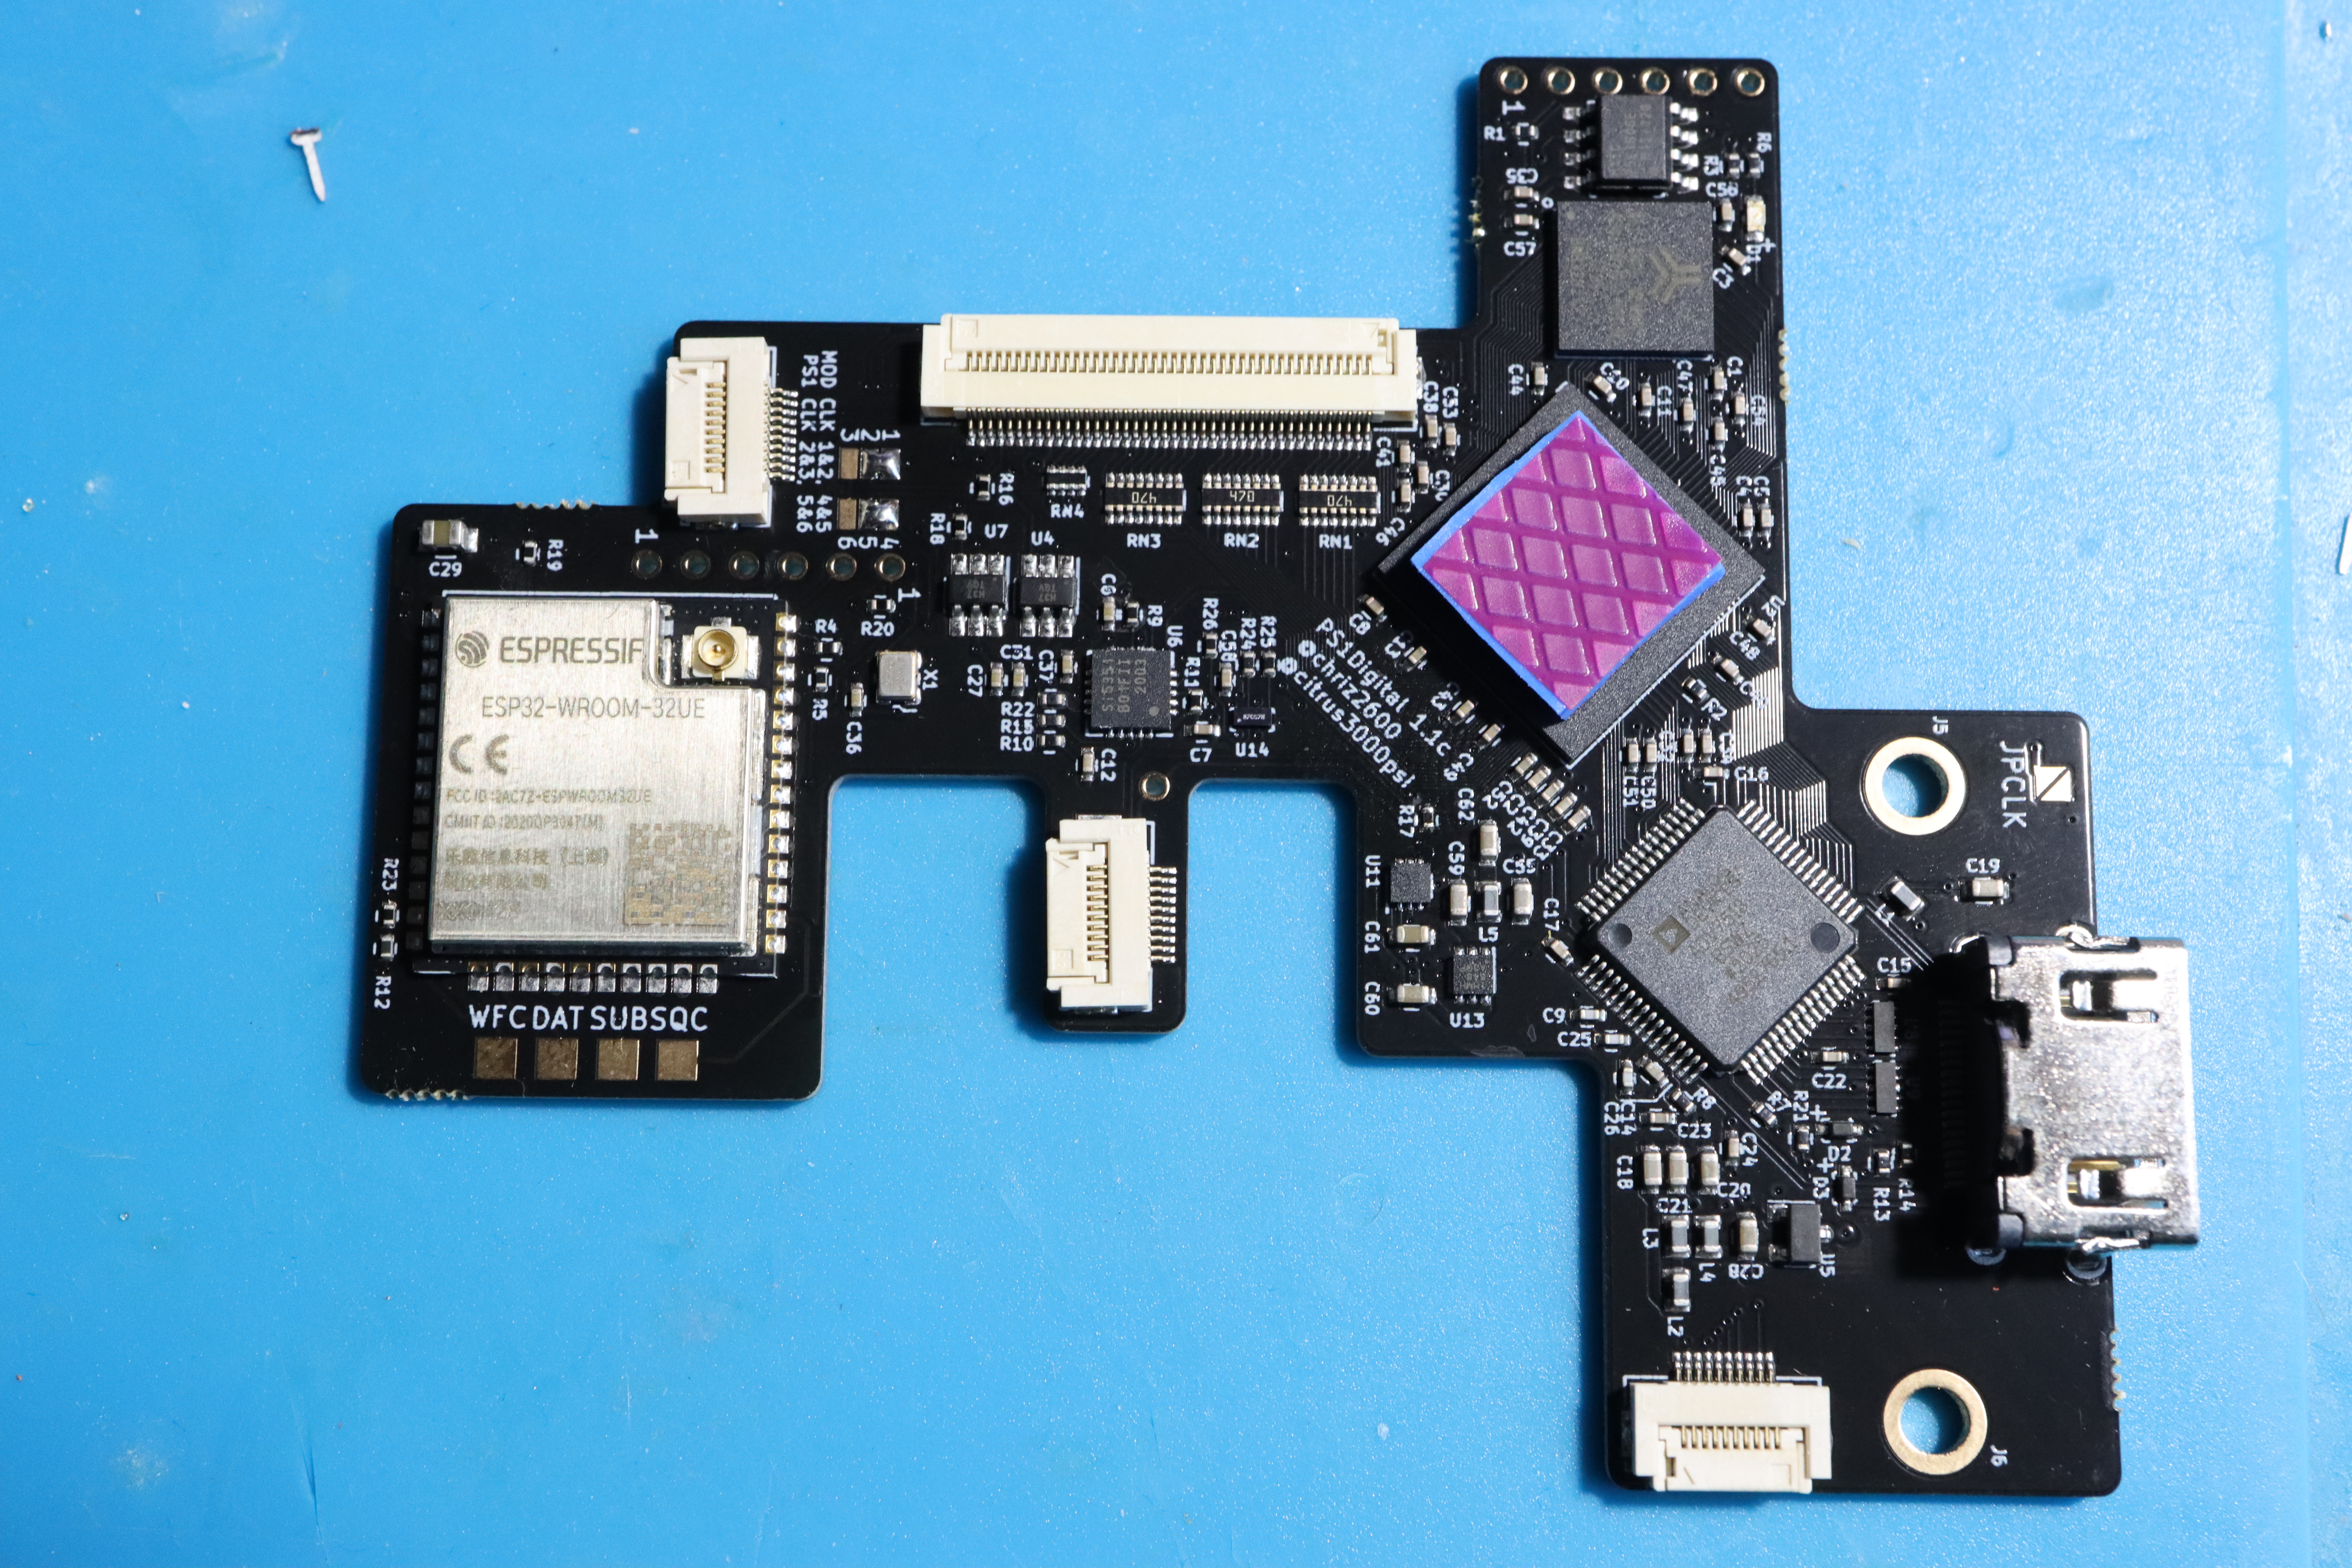
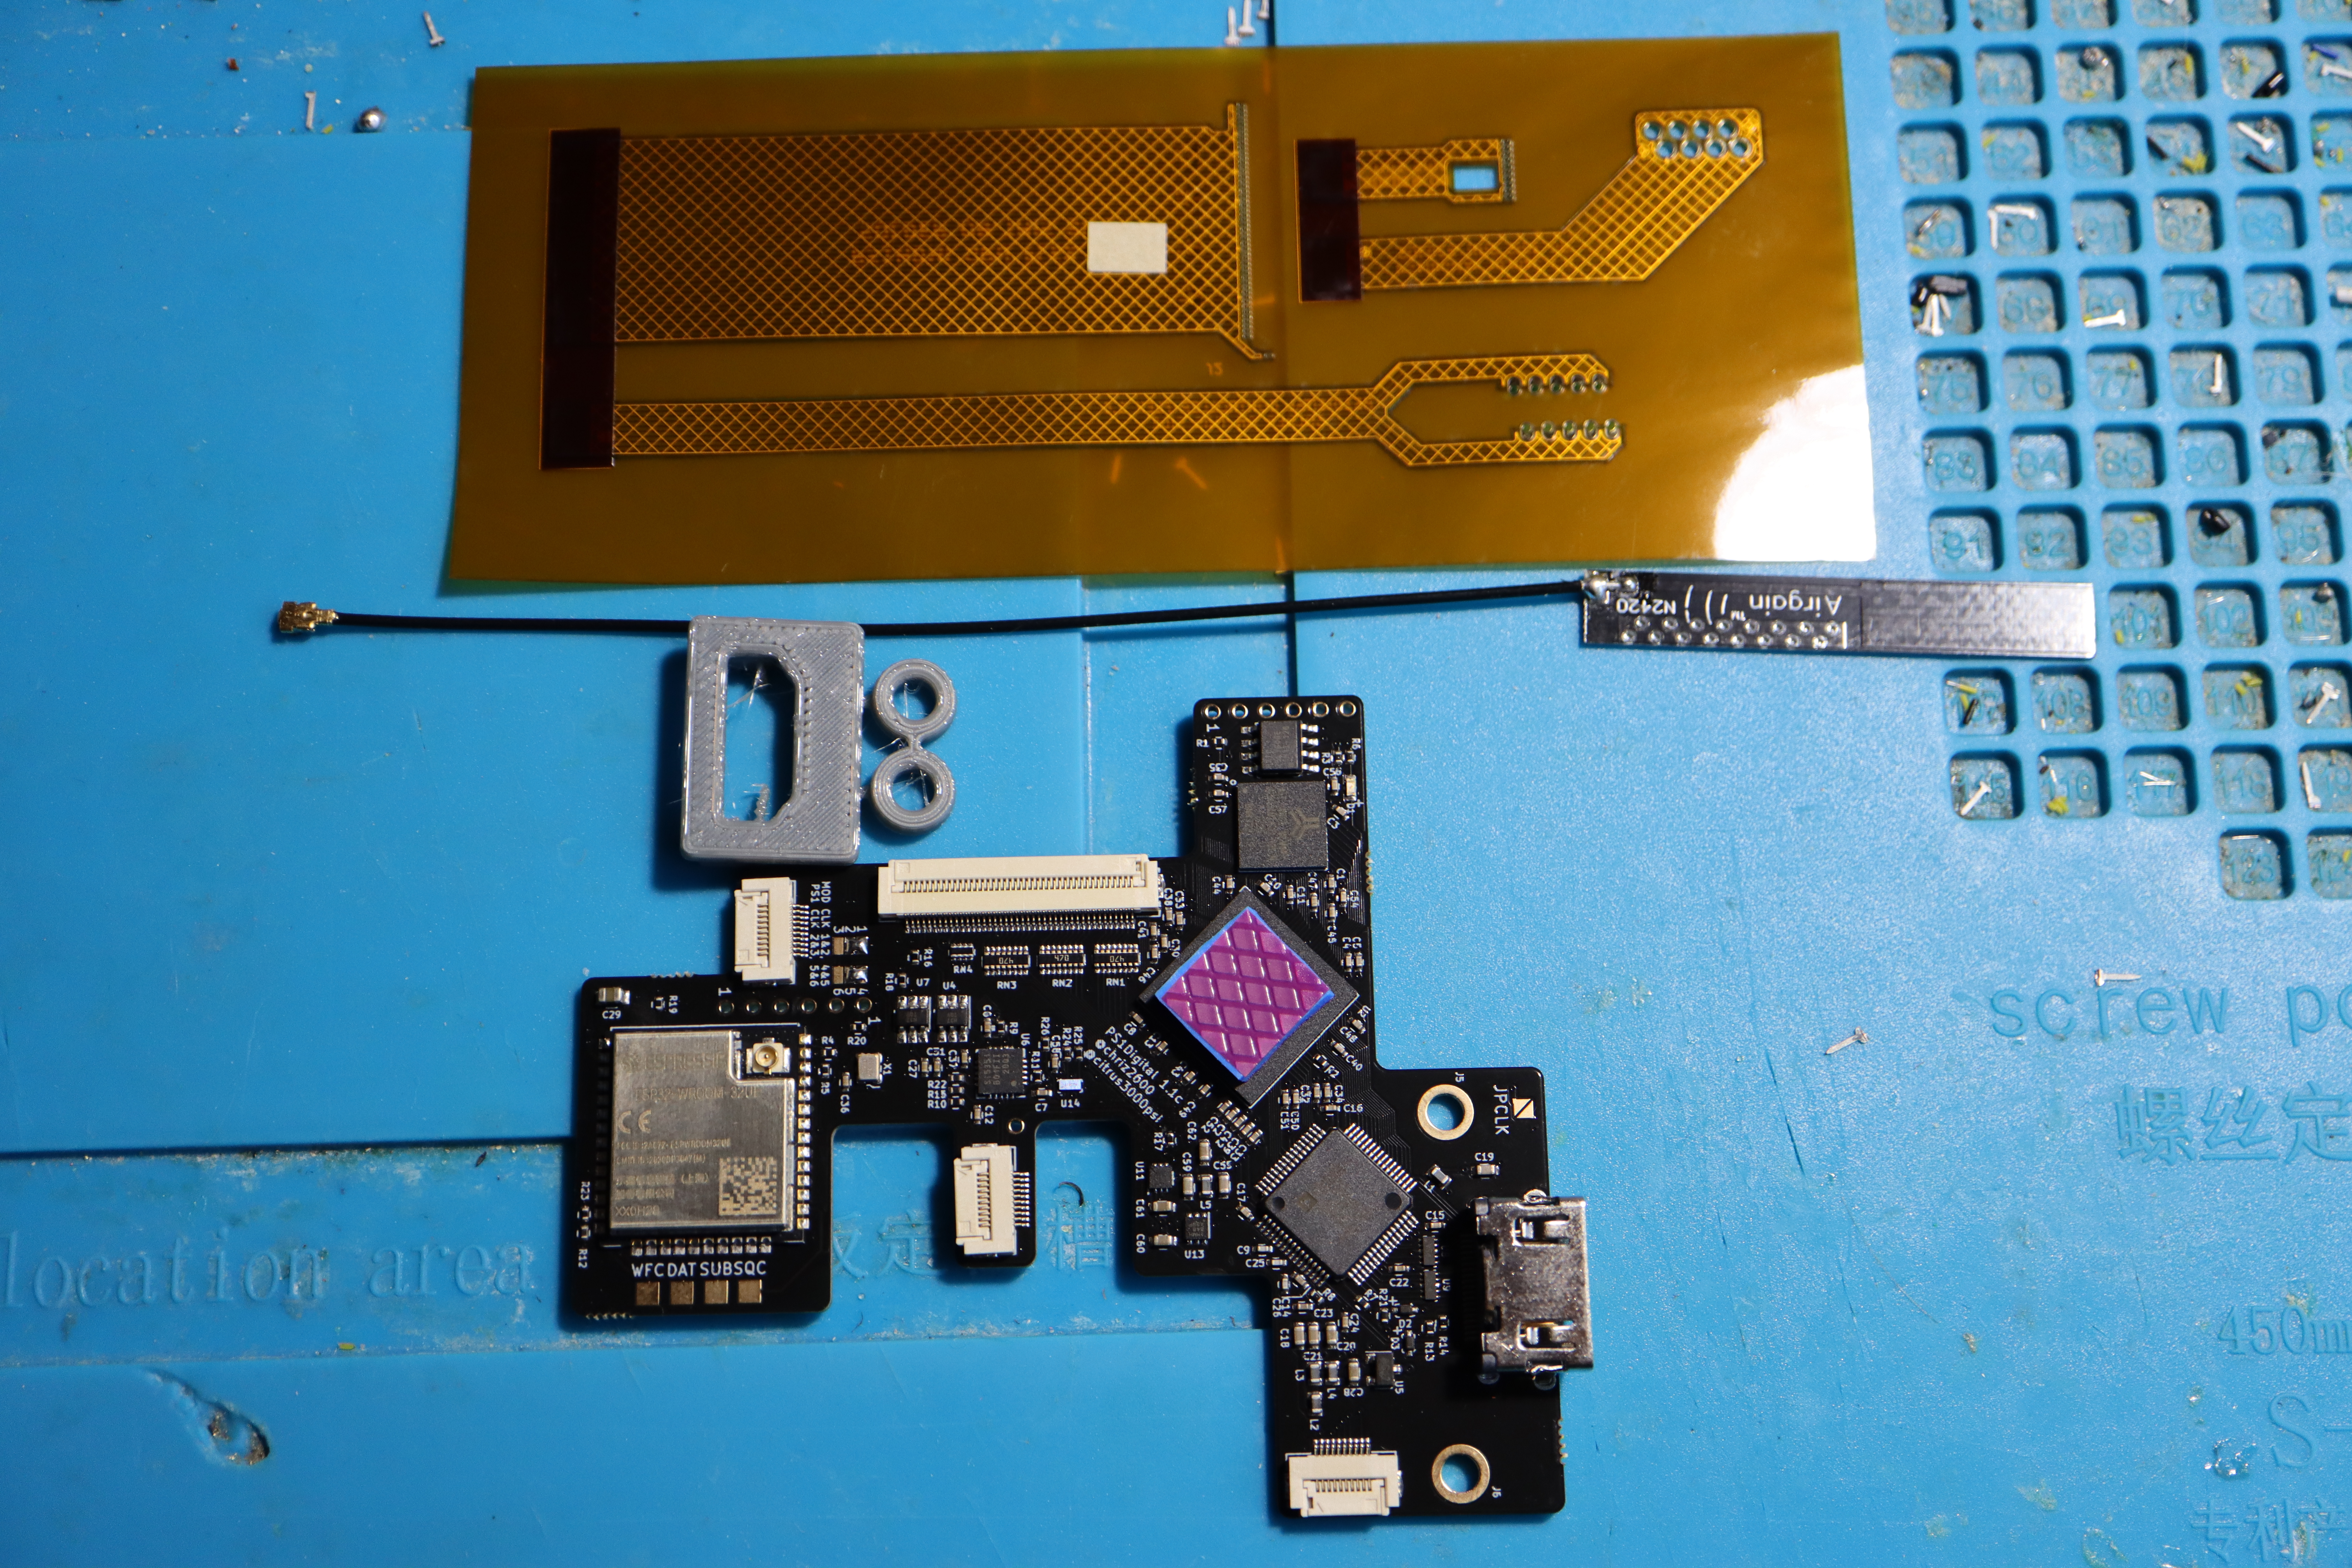
- PS1Digital board
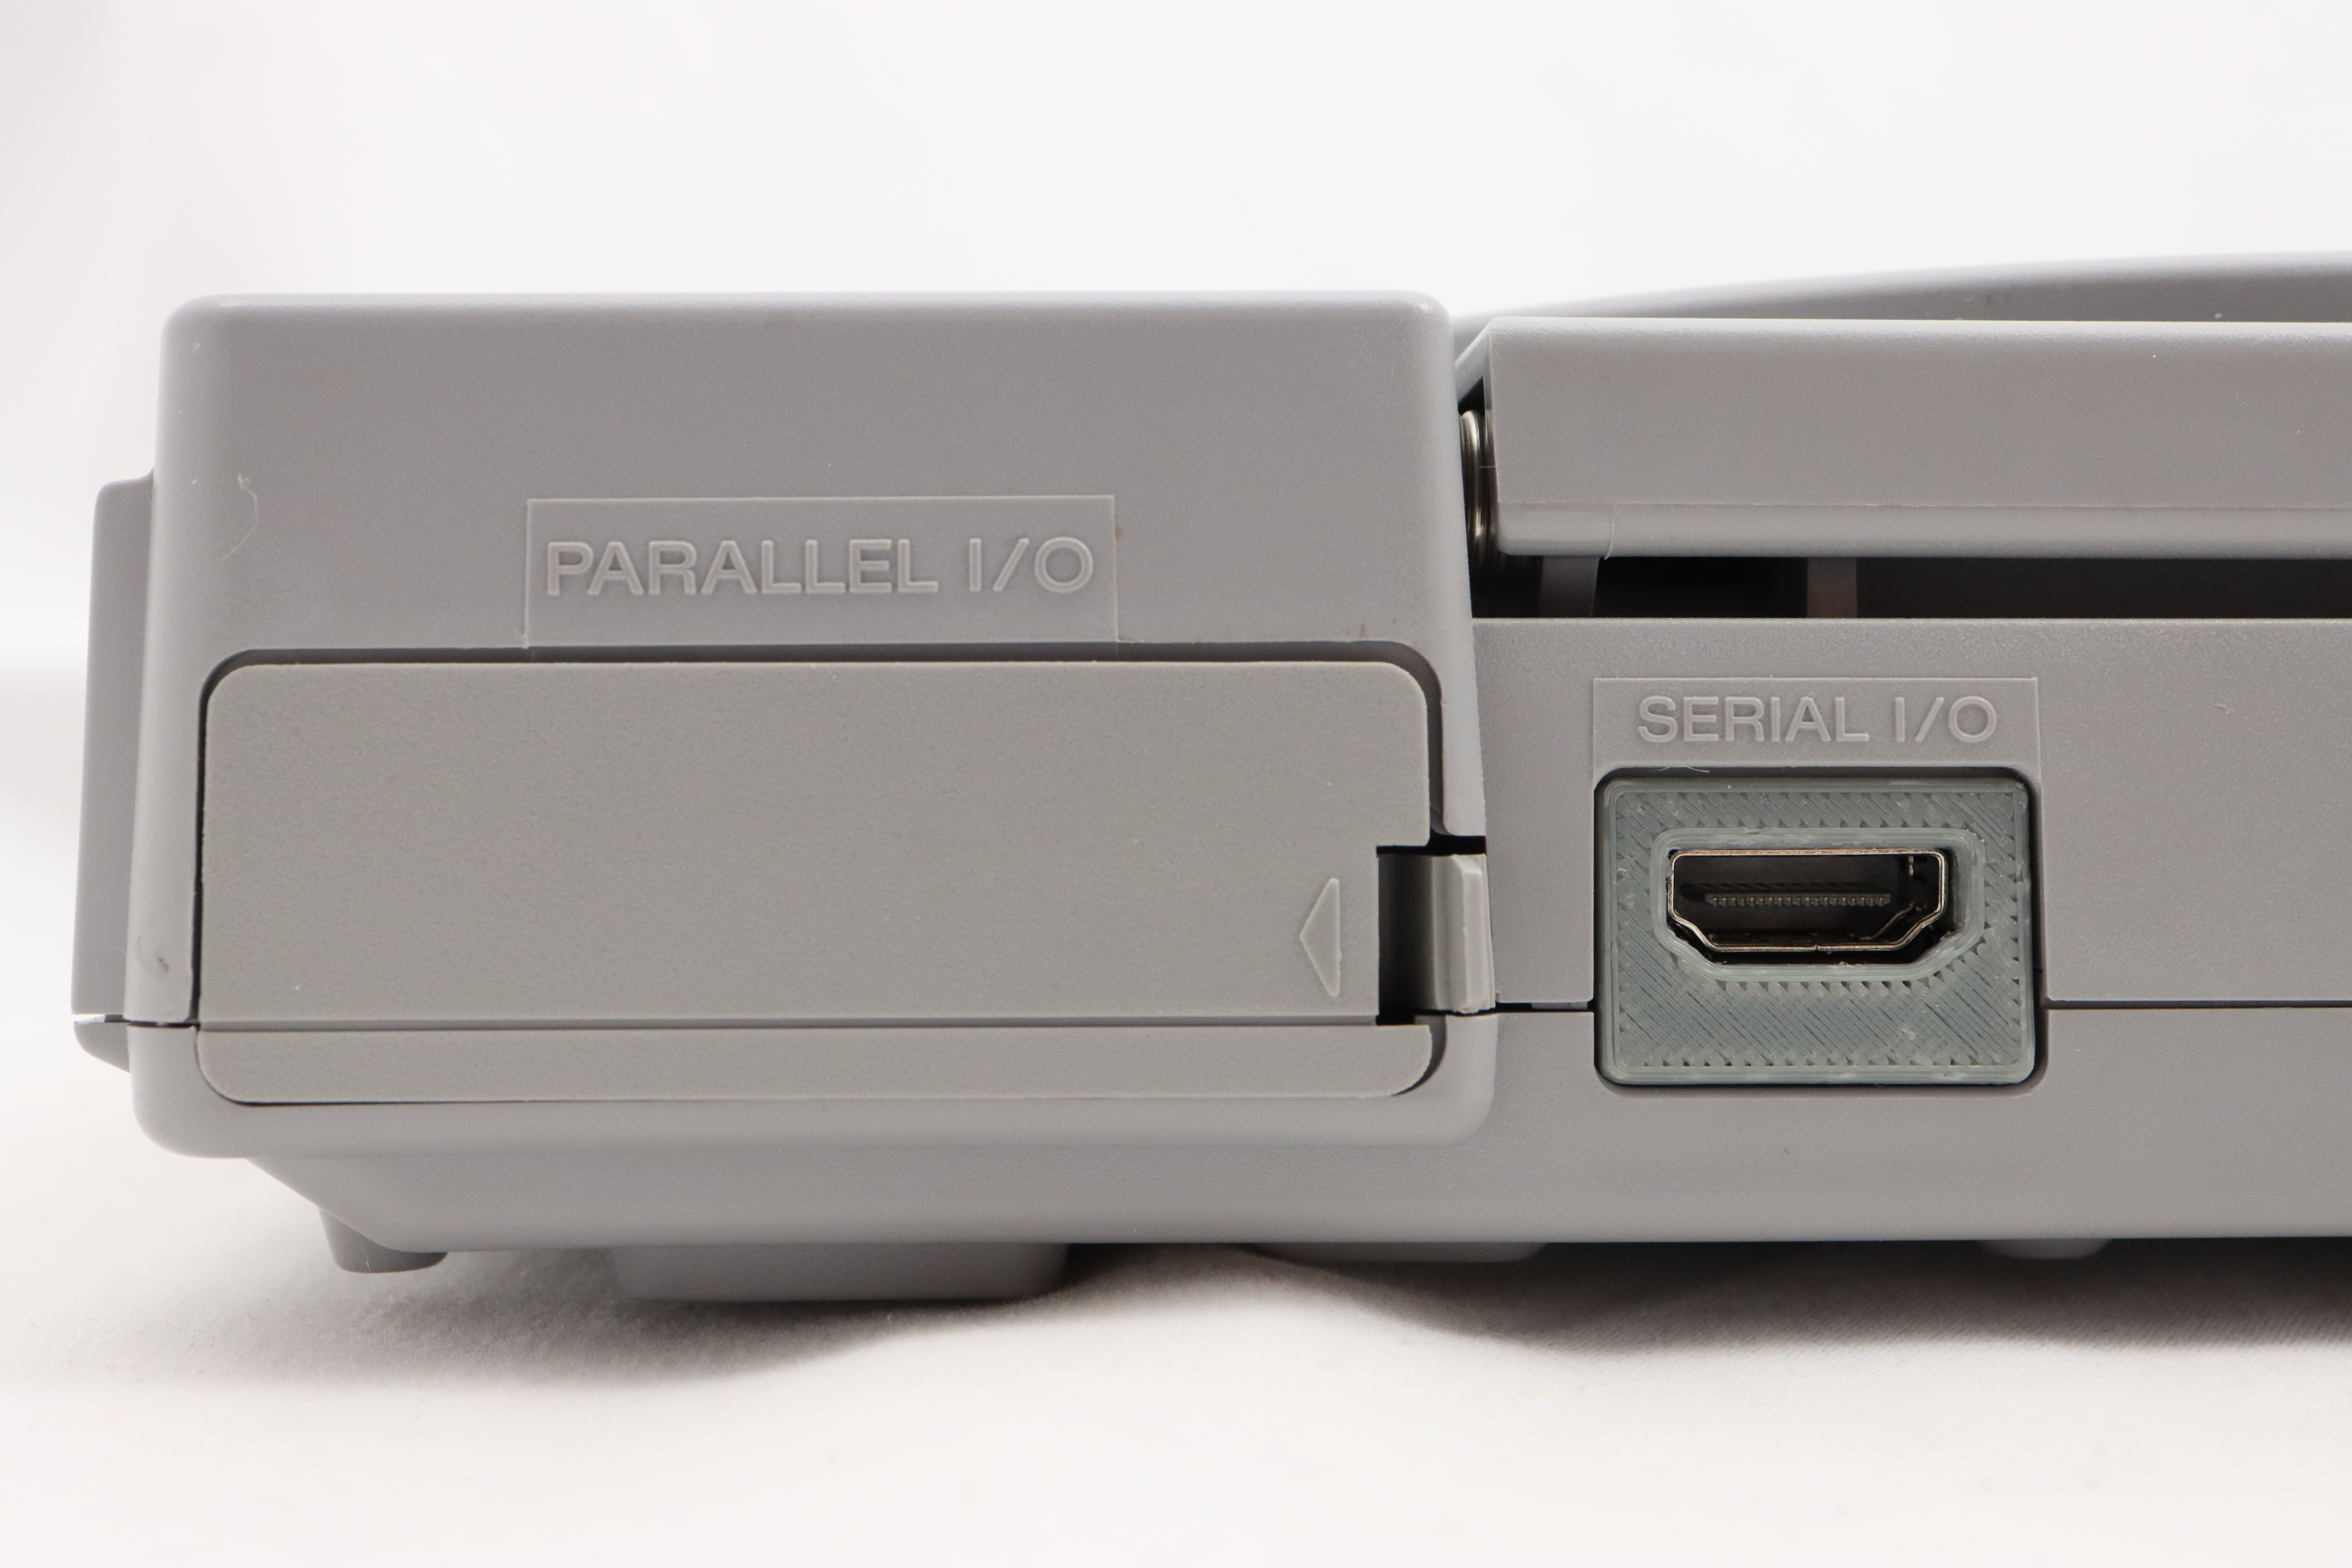
- 3D printed screw spacers and HDMI port cover
- WiFi antenna
- 4x flex cables (one for the GPU, one for the controller, one for the audio chip, and one for the serial port)
To actually install this kit you’ll need some additional equipment. This is what I ended up using.
- Soldering iron
- Heated vacuum desoldering tool: useful for removing serial port, but a regular soldering iron along with a solder sucker can be used instead.
- Heat gun: useful for removing surface mount components (and potentially fixing mistakes), but a regular soldering iron can be used instead.
- Microscope: useful for soldering and inspection, but a any sort of magnification is better than nothing.
- Multimeter: useful for making sure there aren’t any shorts, and verifying the PS1Digital has the correct voltage.
- Flux
- Solder
- Wire (if you want to connect the PsNee)
- Pliers
- Side cutters
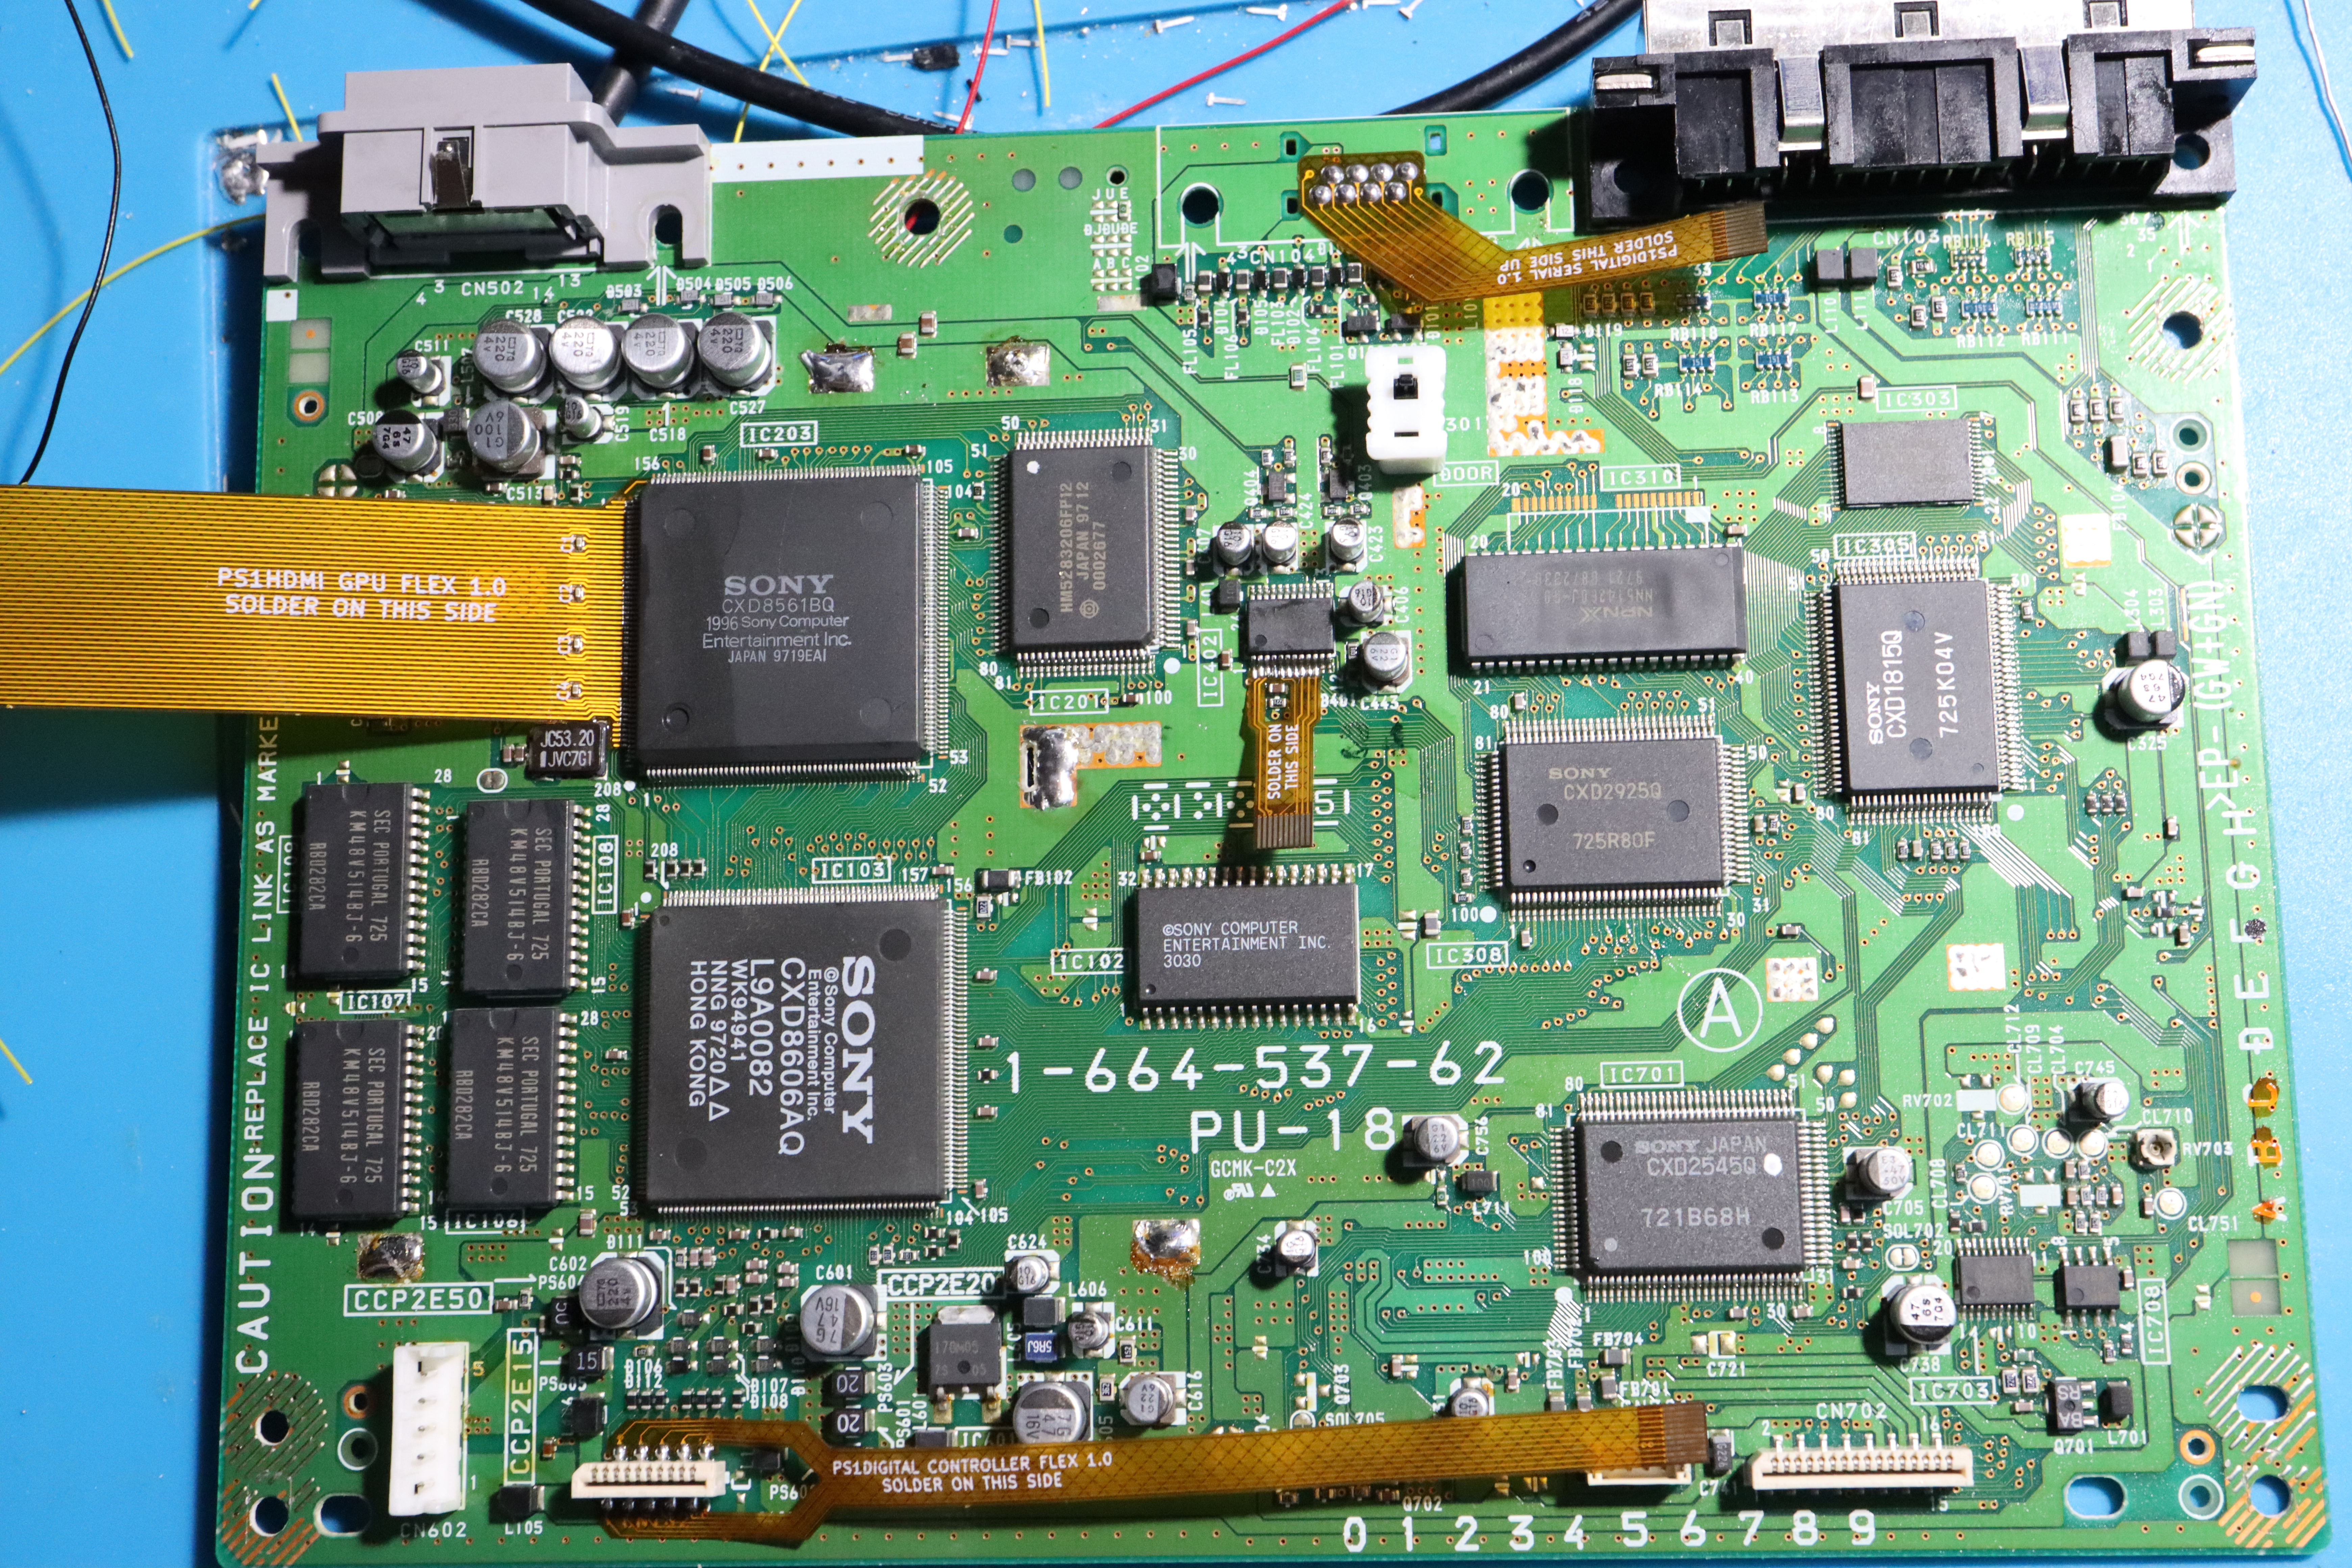
It’s worth mentioning that the PS1Digital has fairly limited console compatibility. At the moment it only works with the PU-18 and PU-20 boards that are found in SCPH-550x and SCPH-700x consoles.
PS1Digital installation process (PU-18)
Installation of the PS1Digital is fairly straightforward, but not really a beginner friendly installation. It’s really easy to mess up and destroy your system and PS1Digital if you don’t know what you are doing. This isn’t really a comprehensive guide, instead it’s more of an installation overview for the PU-18 board. A full installation guide is available elsewhere.
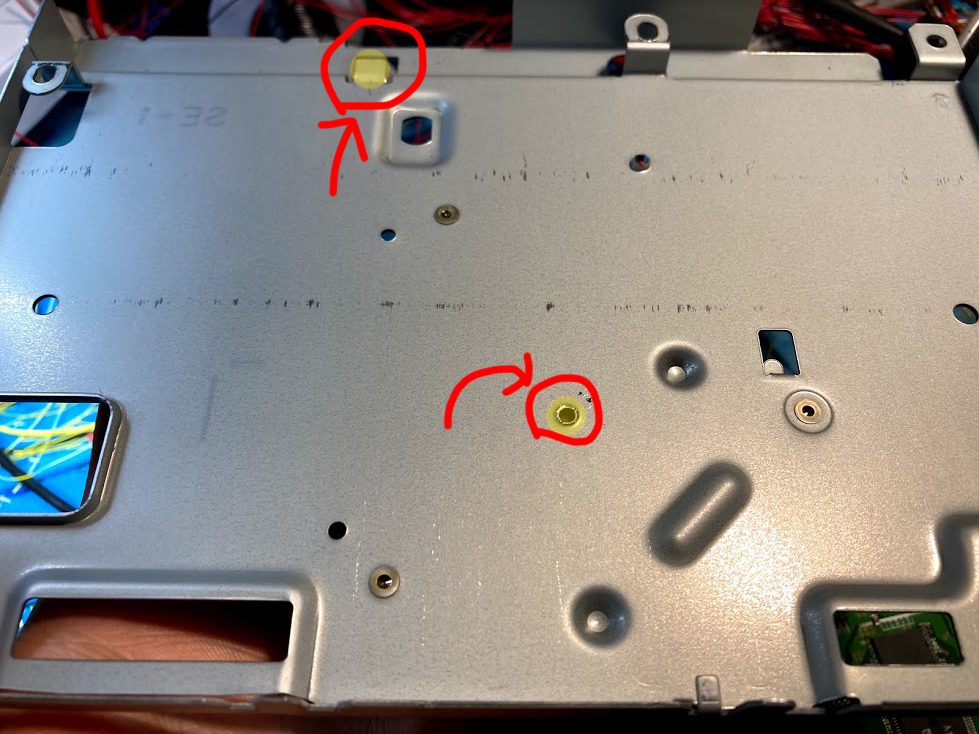
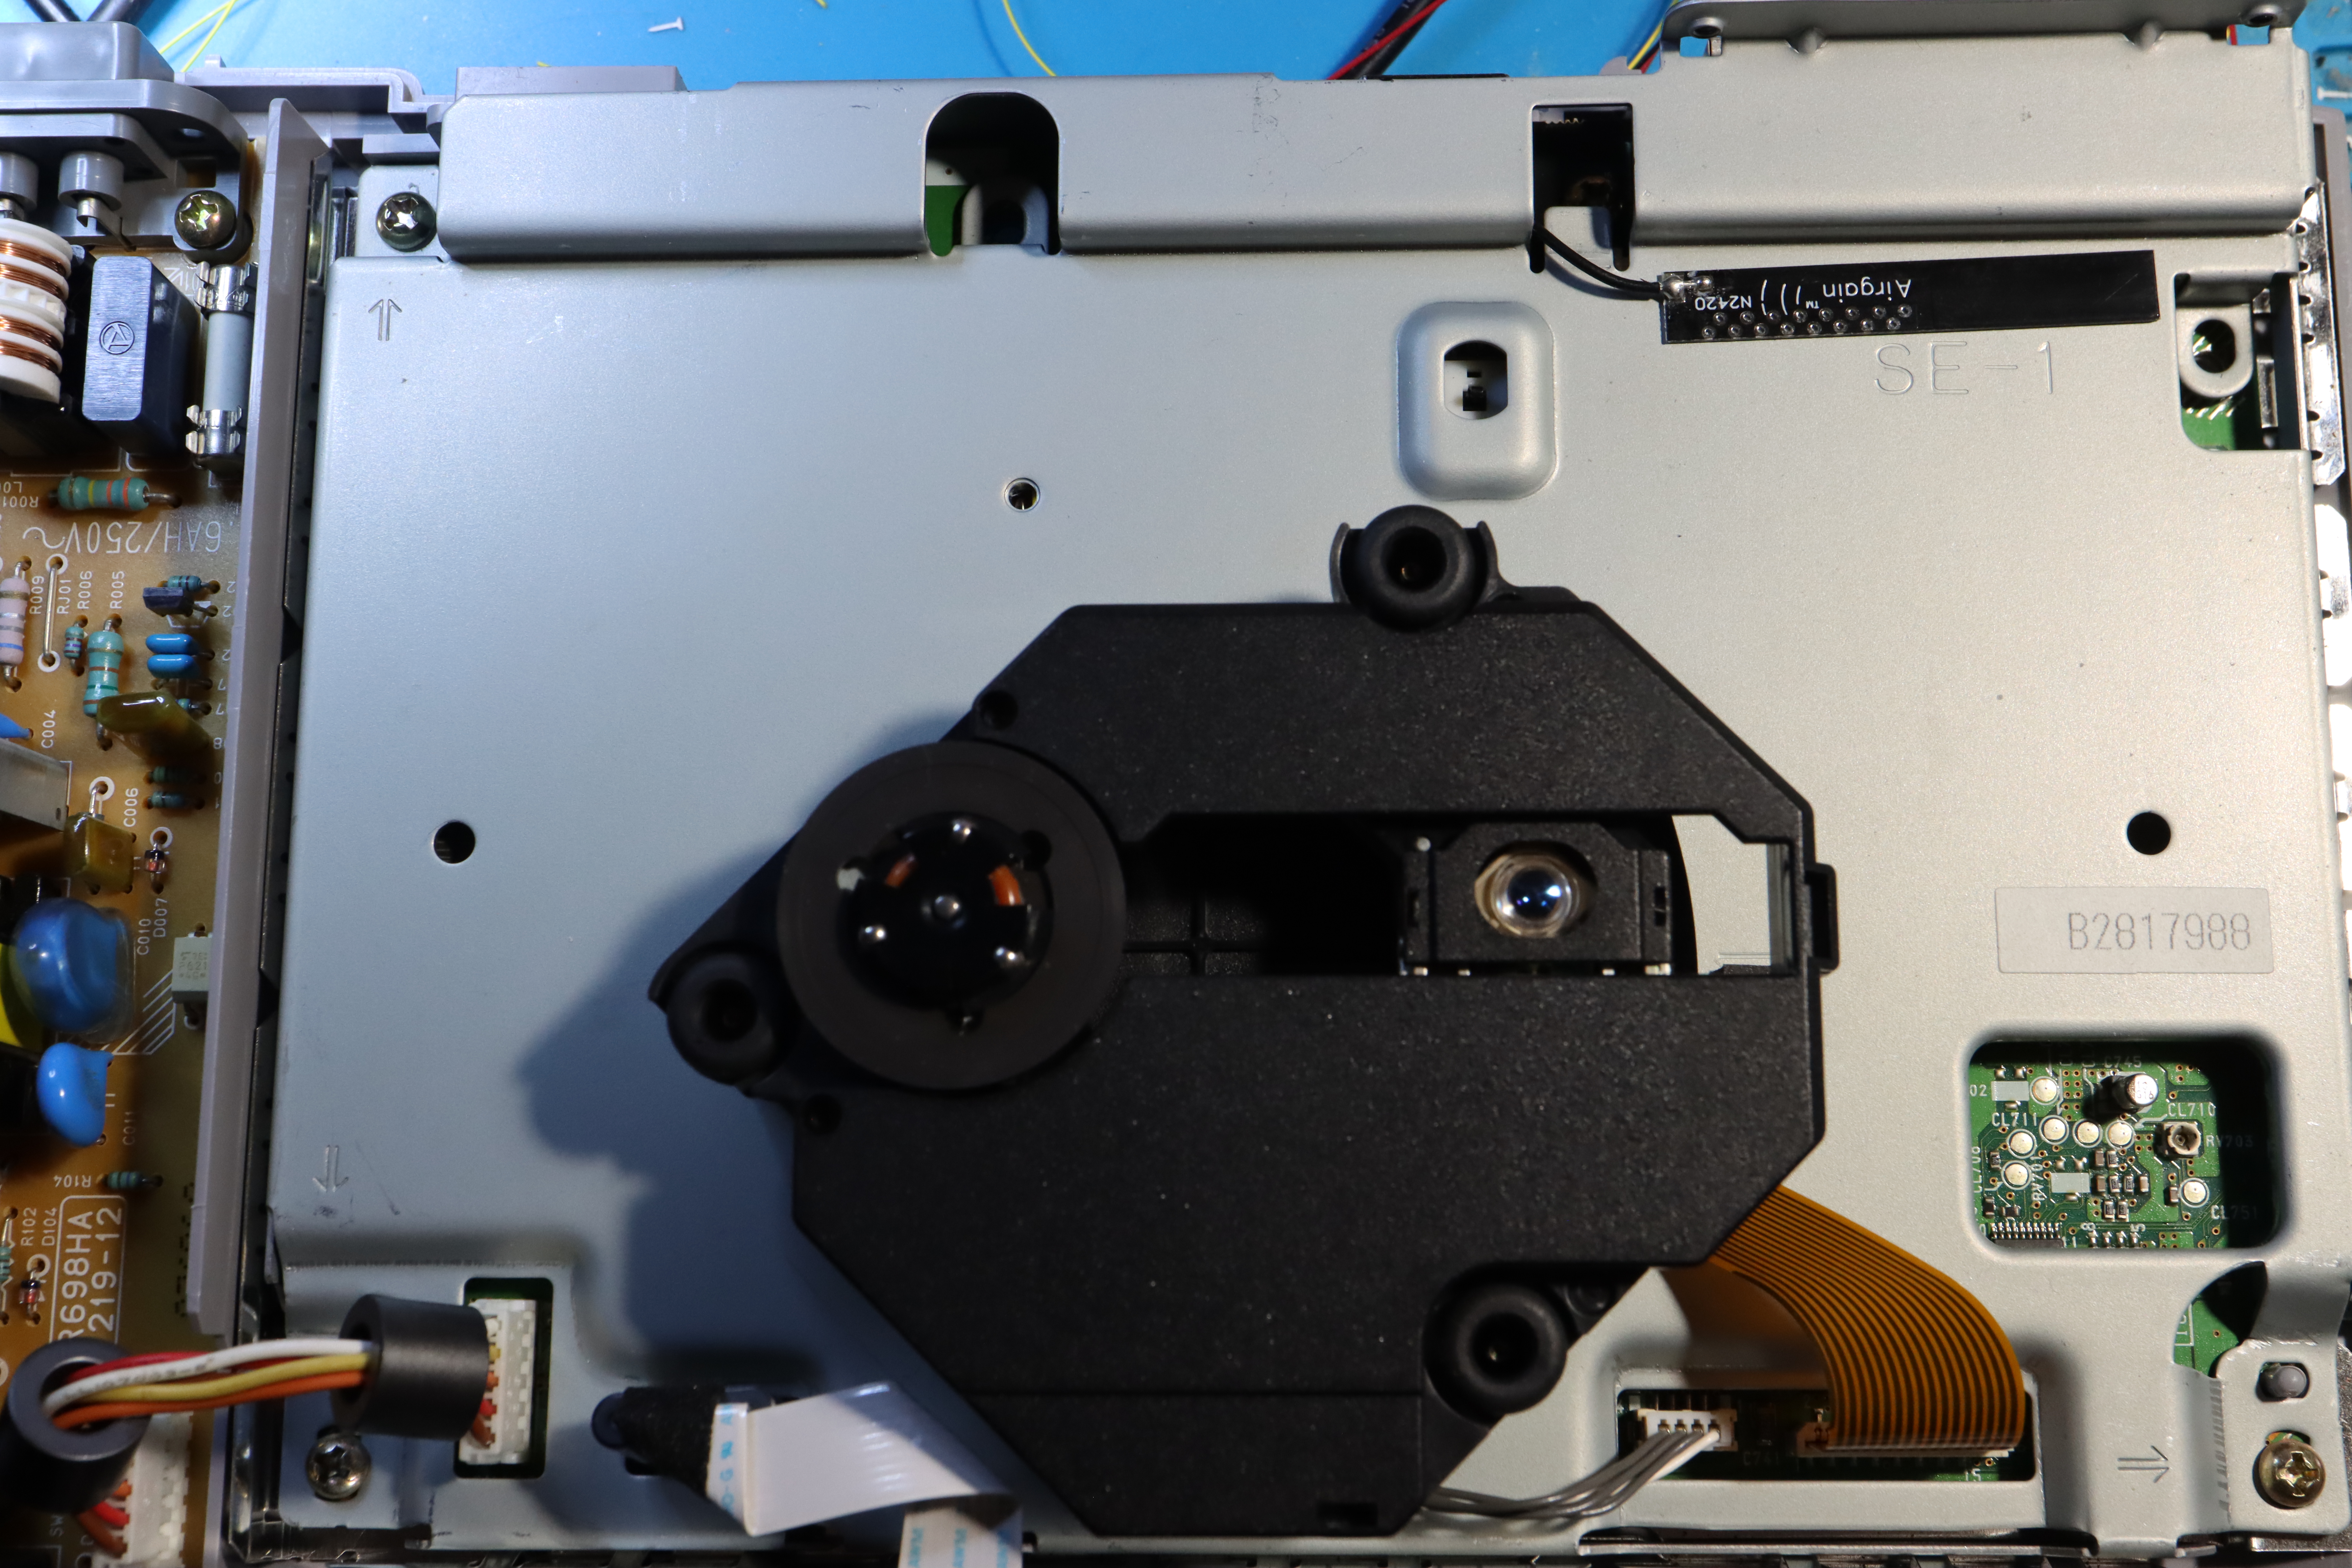
Before you begin you’ll need to do some preparation to the console’s top metal shield by removing the pressed dimple, as well as pulling up the metal tab near the serial port.
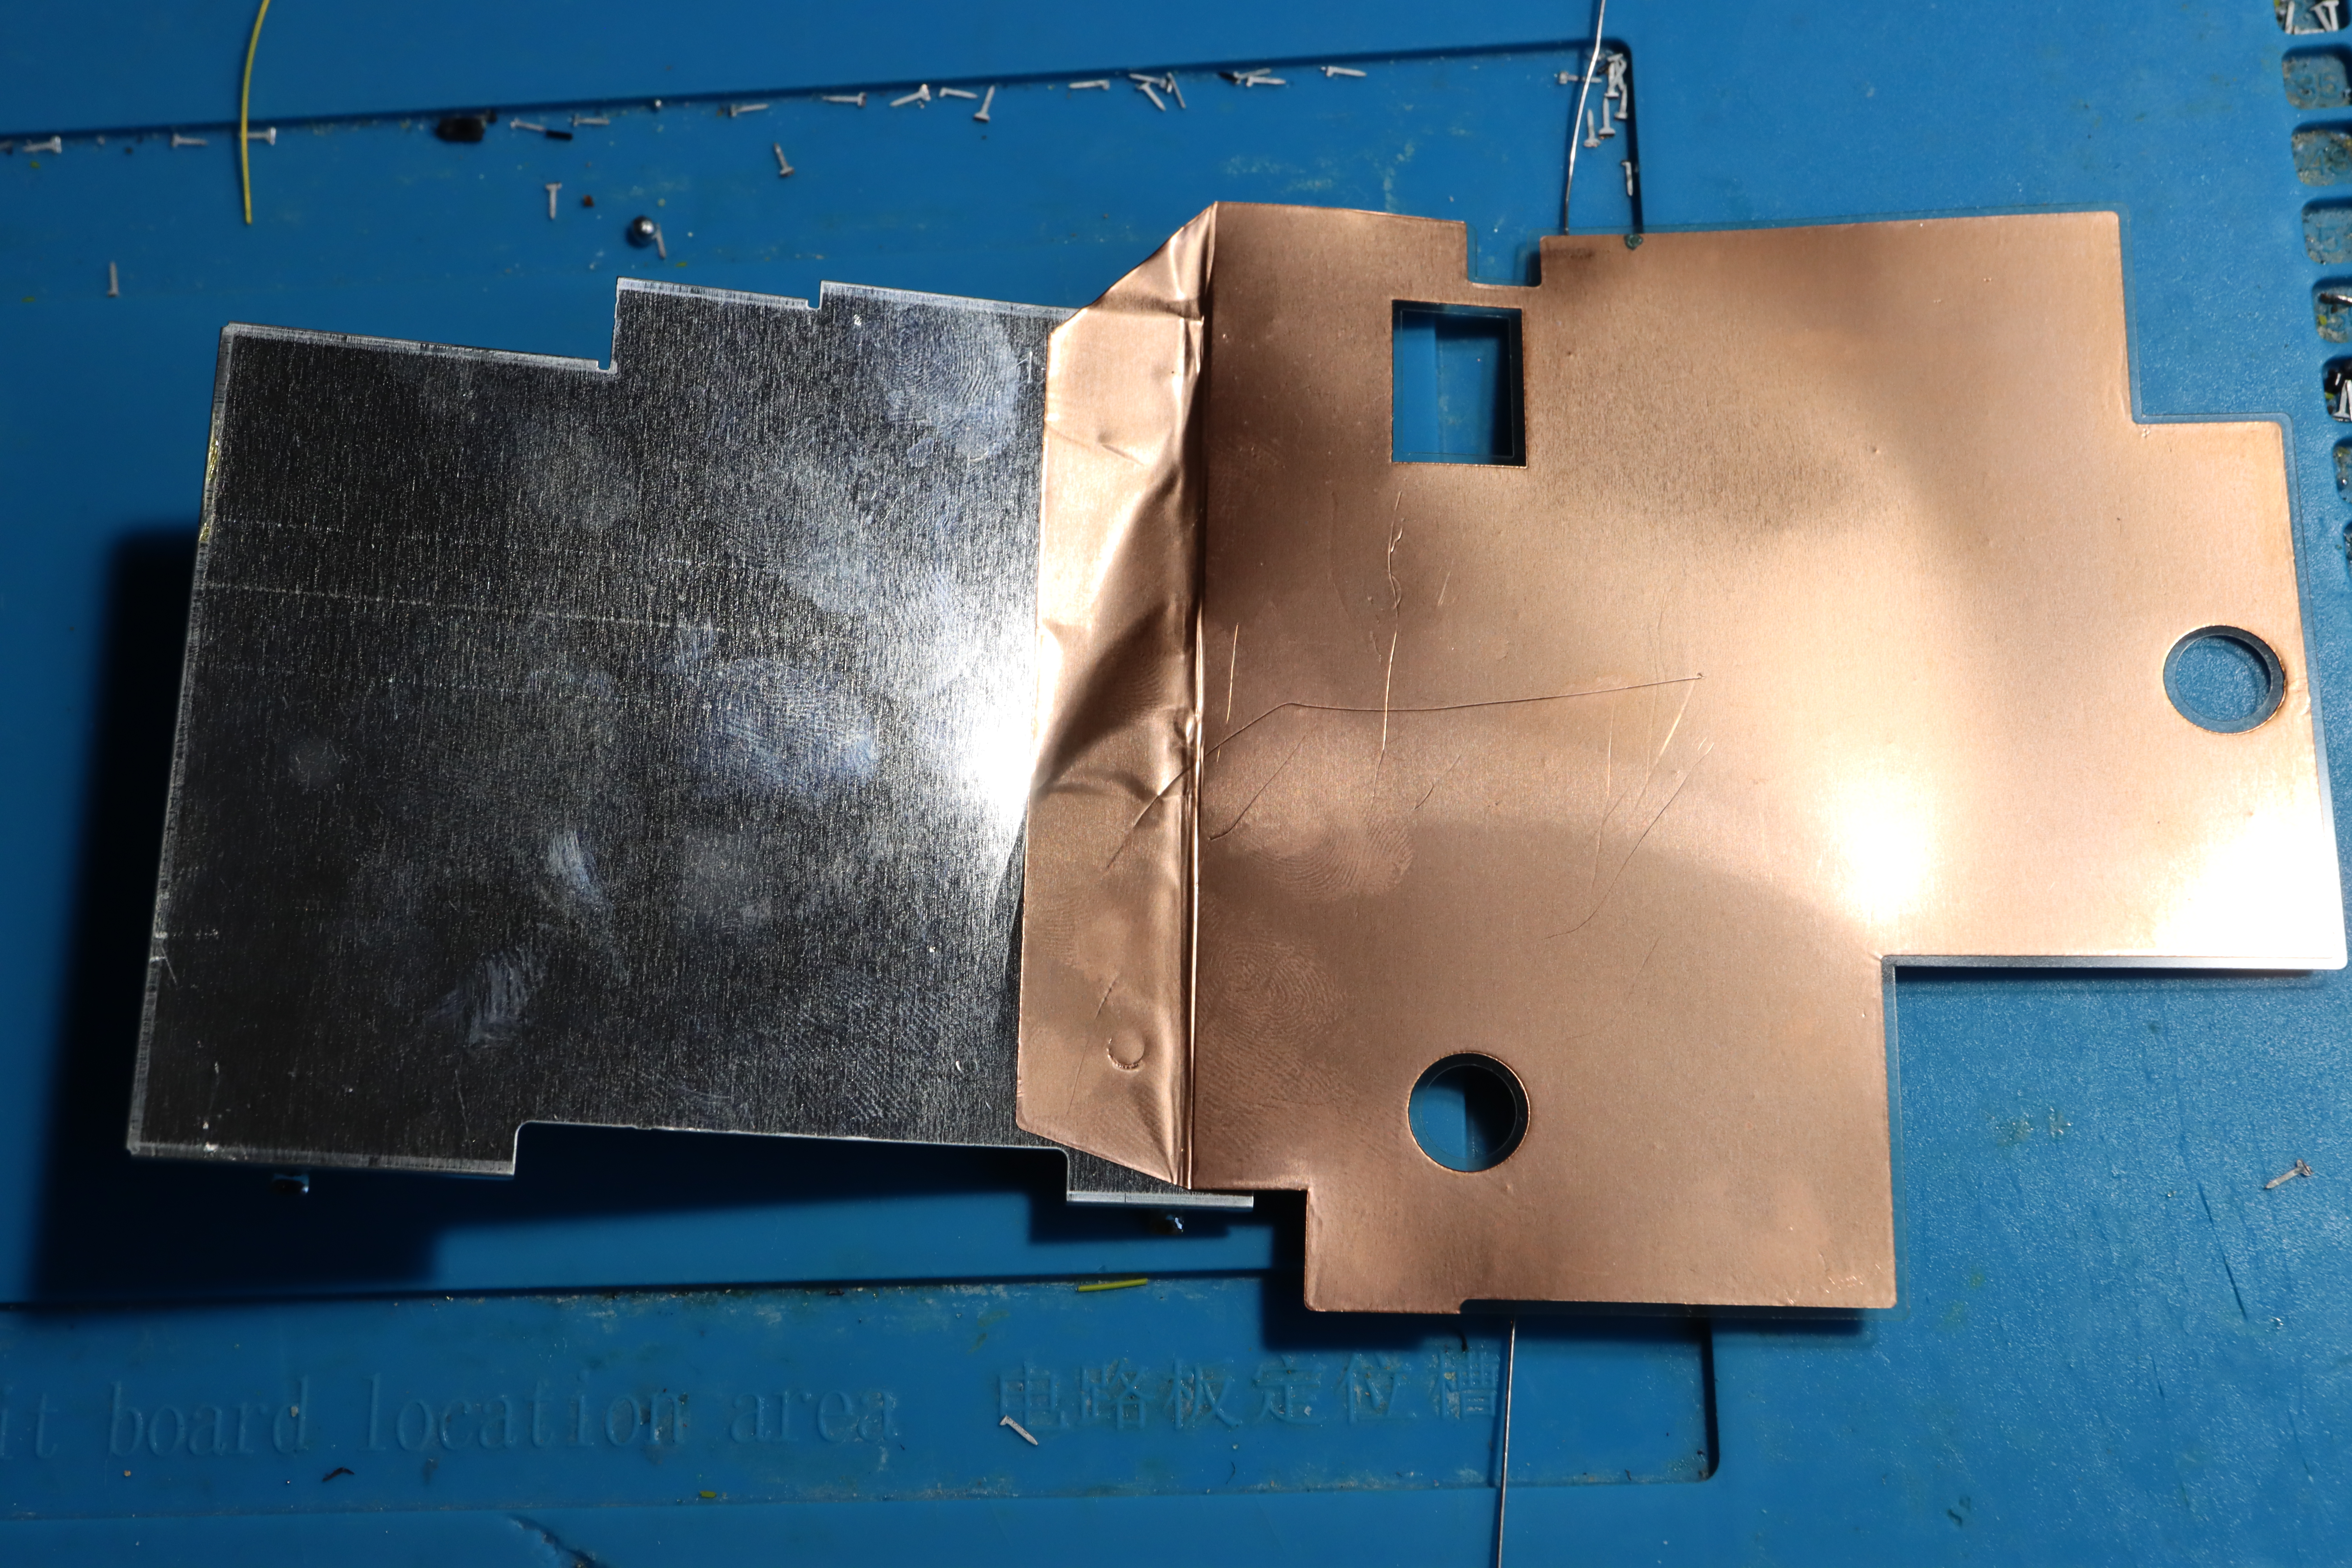
Then you can proceed to remove the soldered on metal shield from the board.
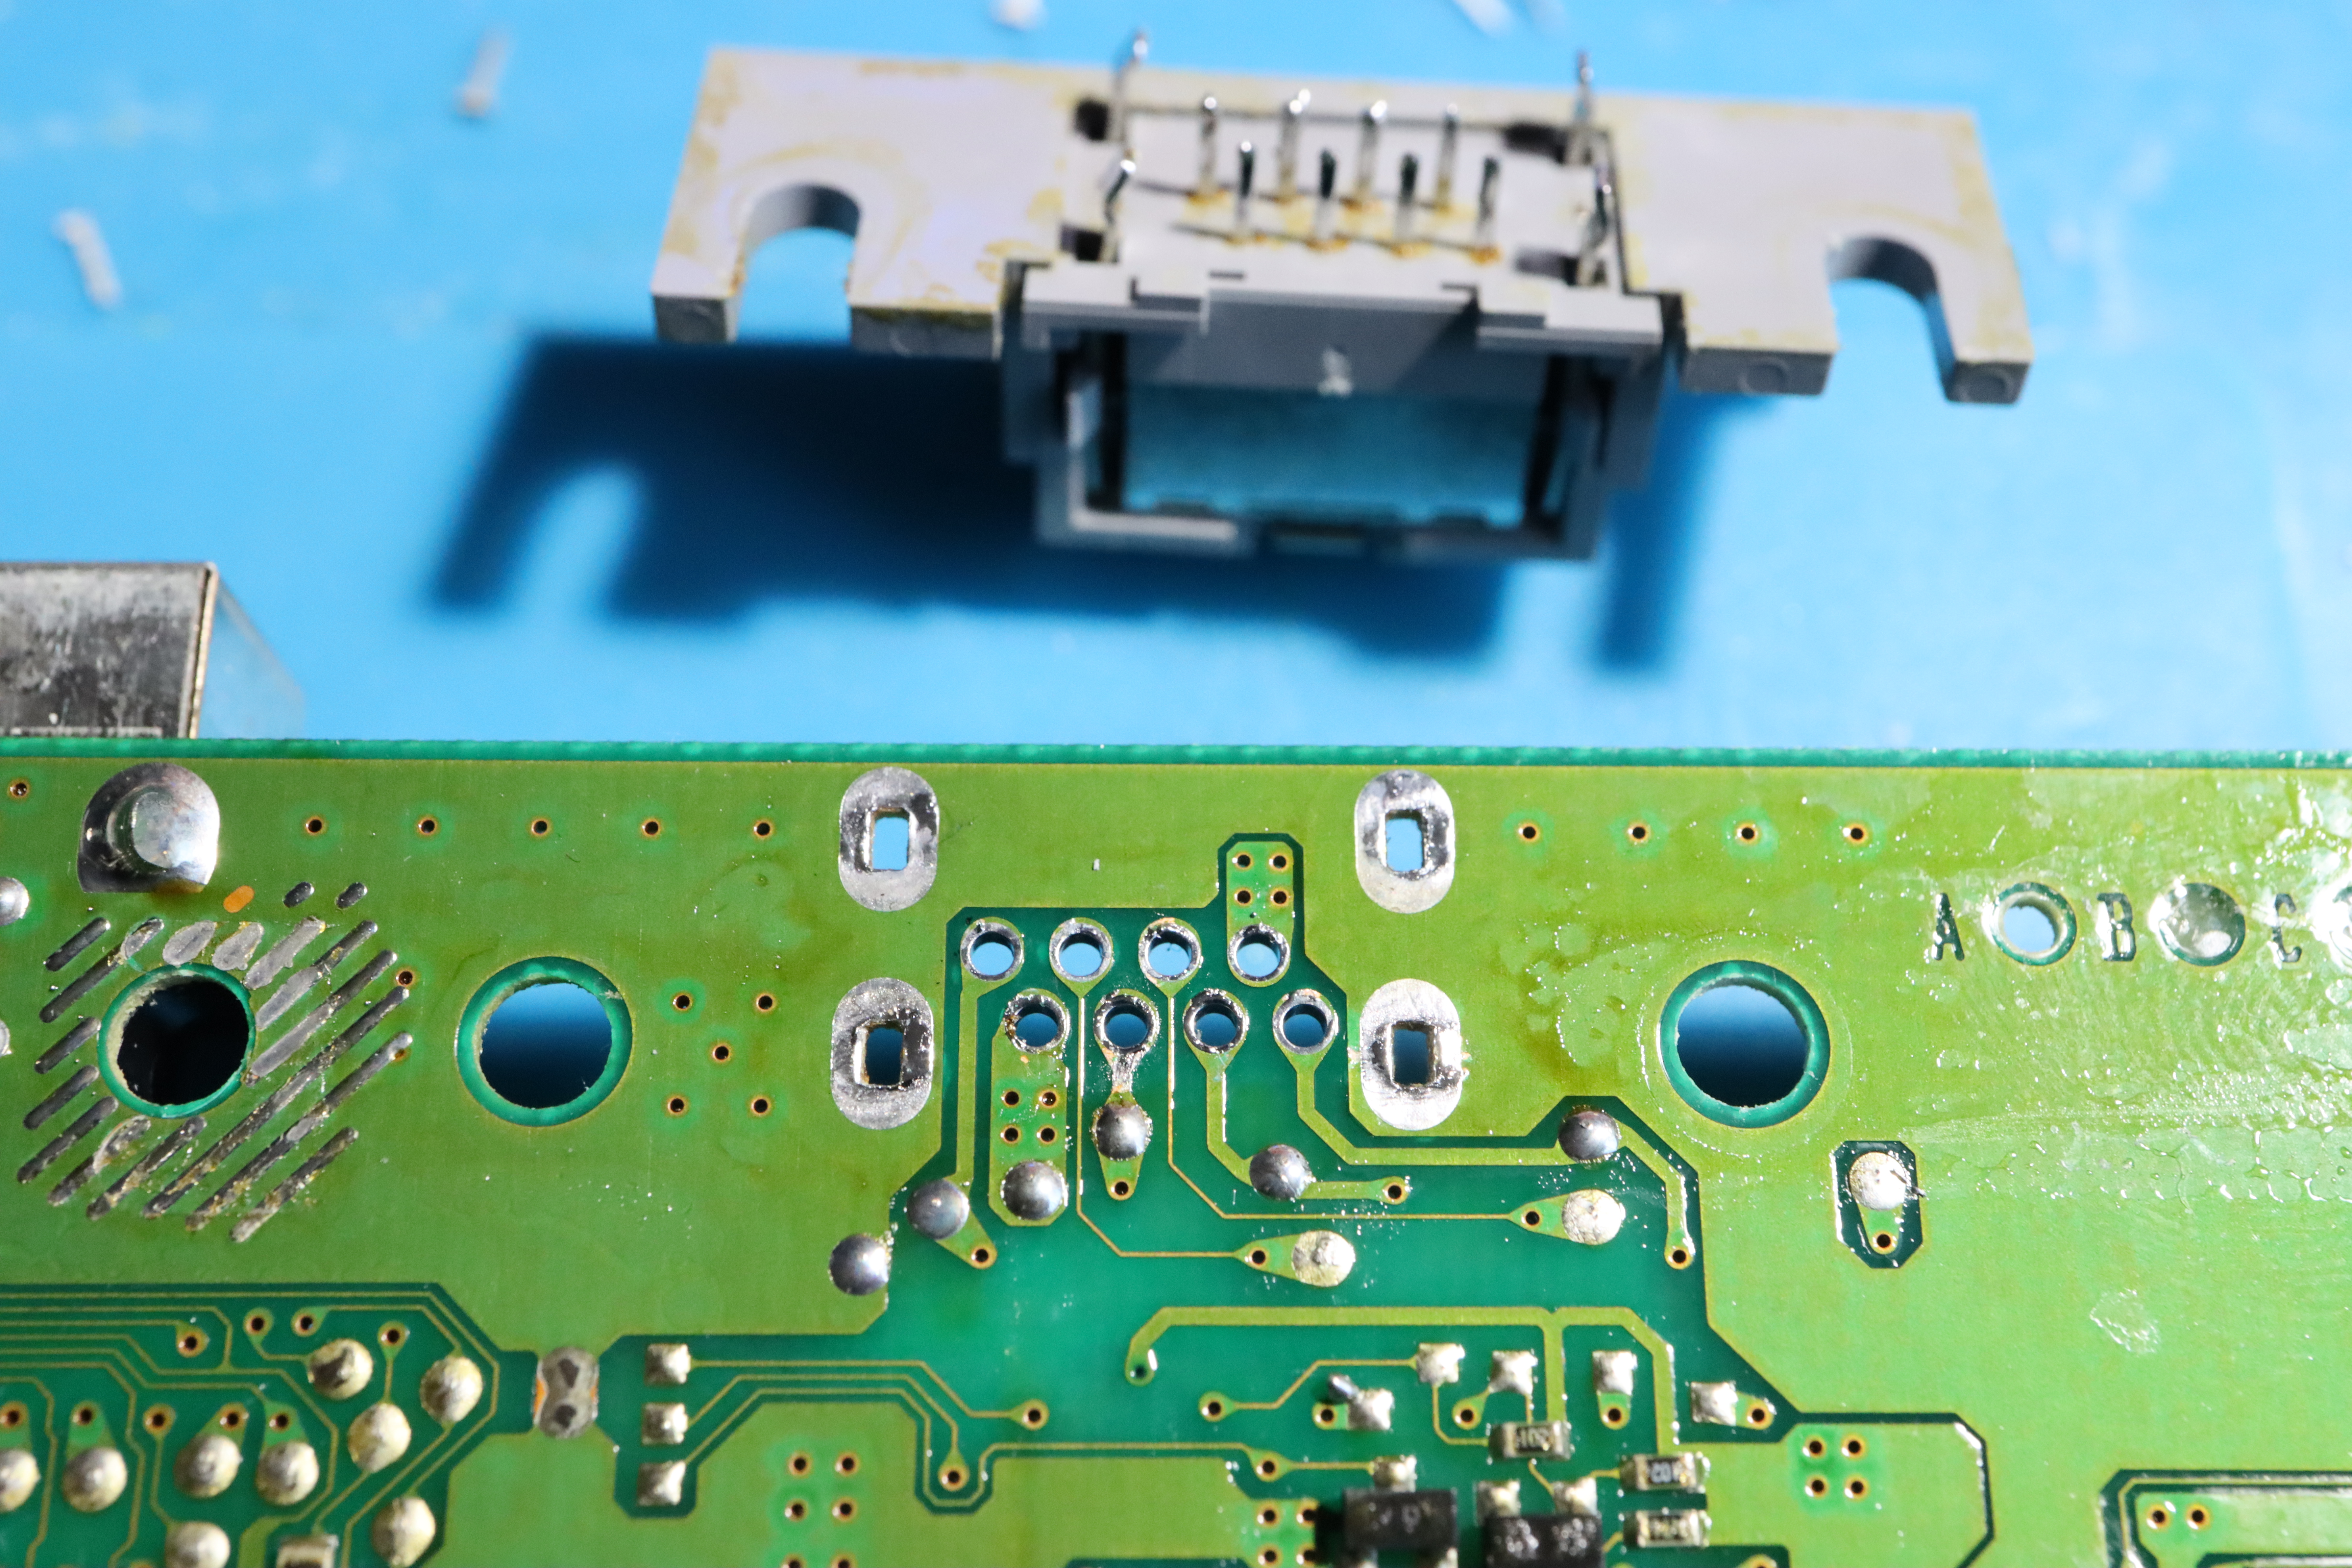
Next remove the serial port.
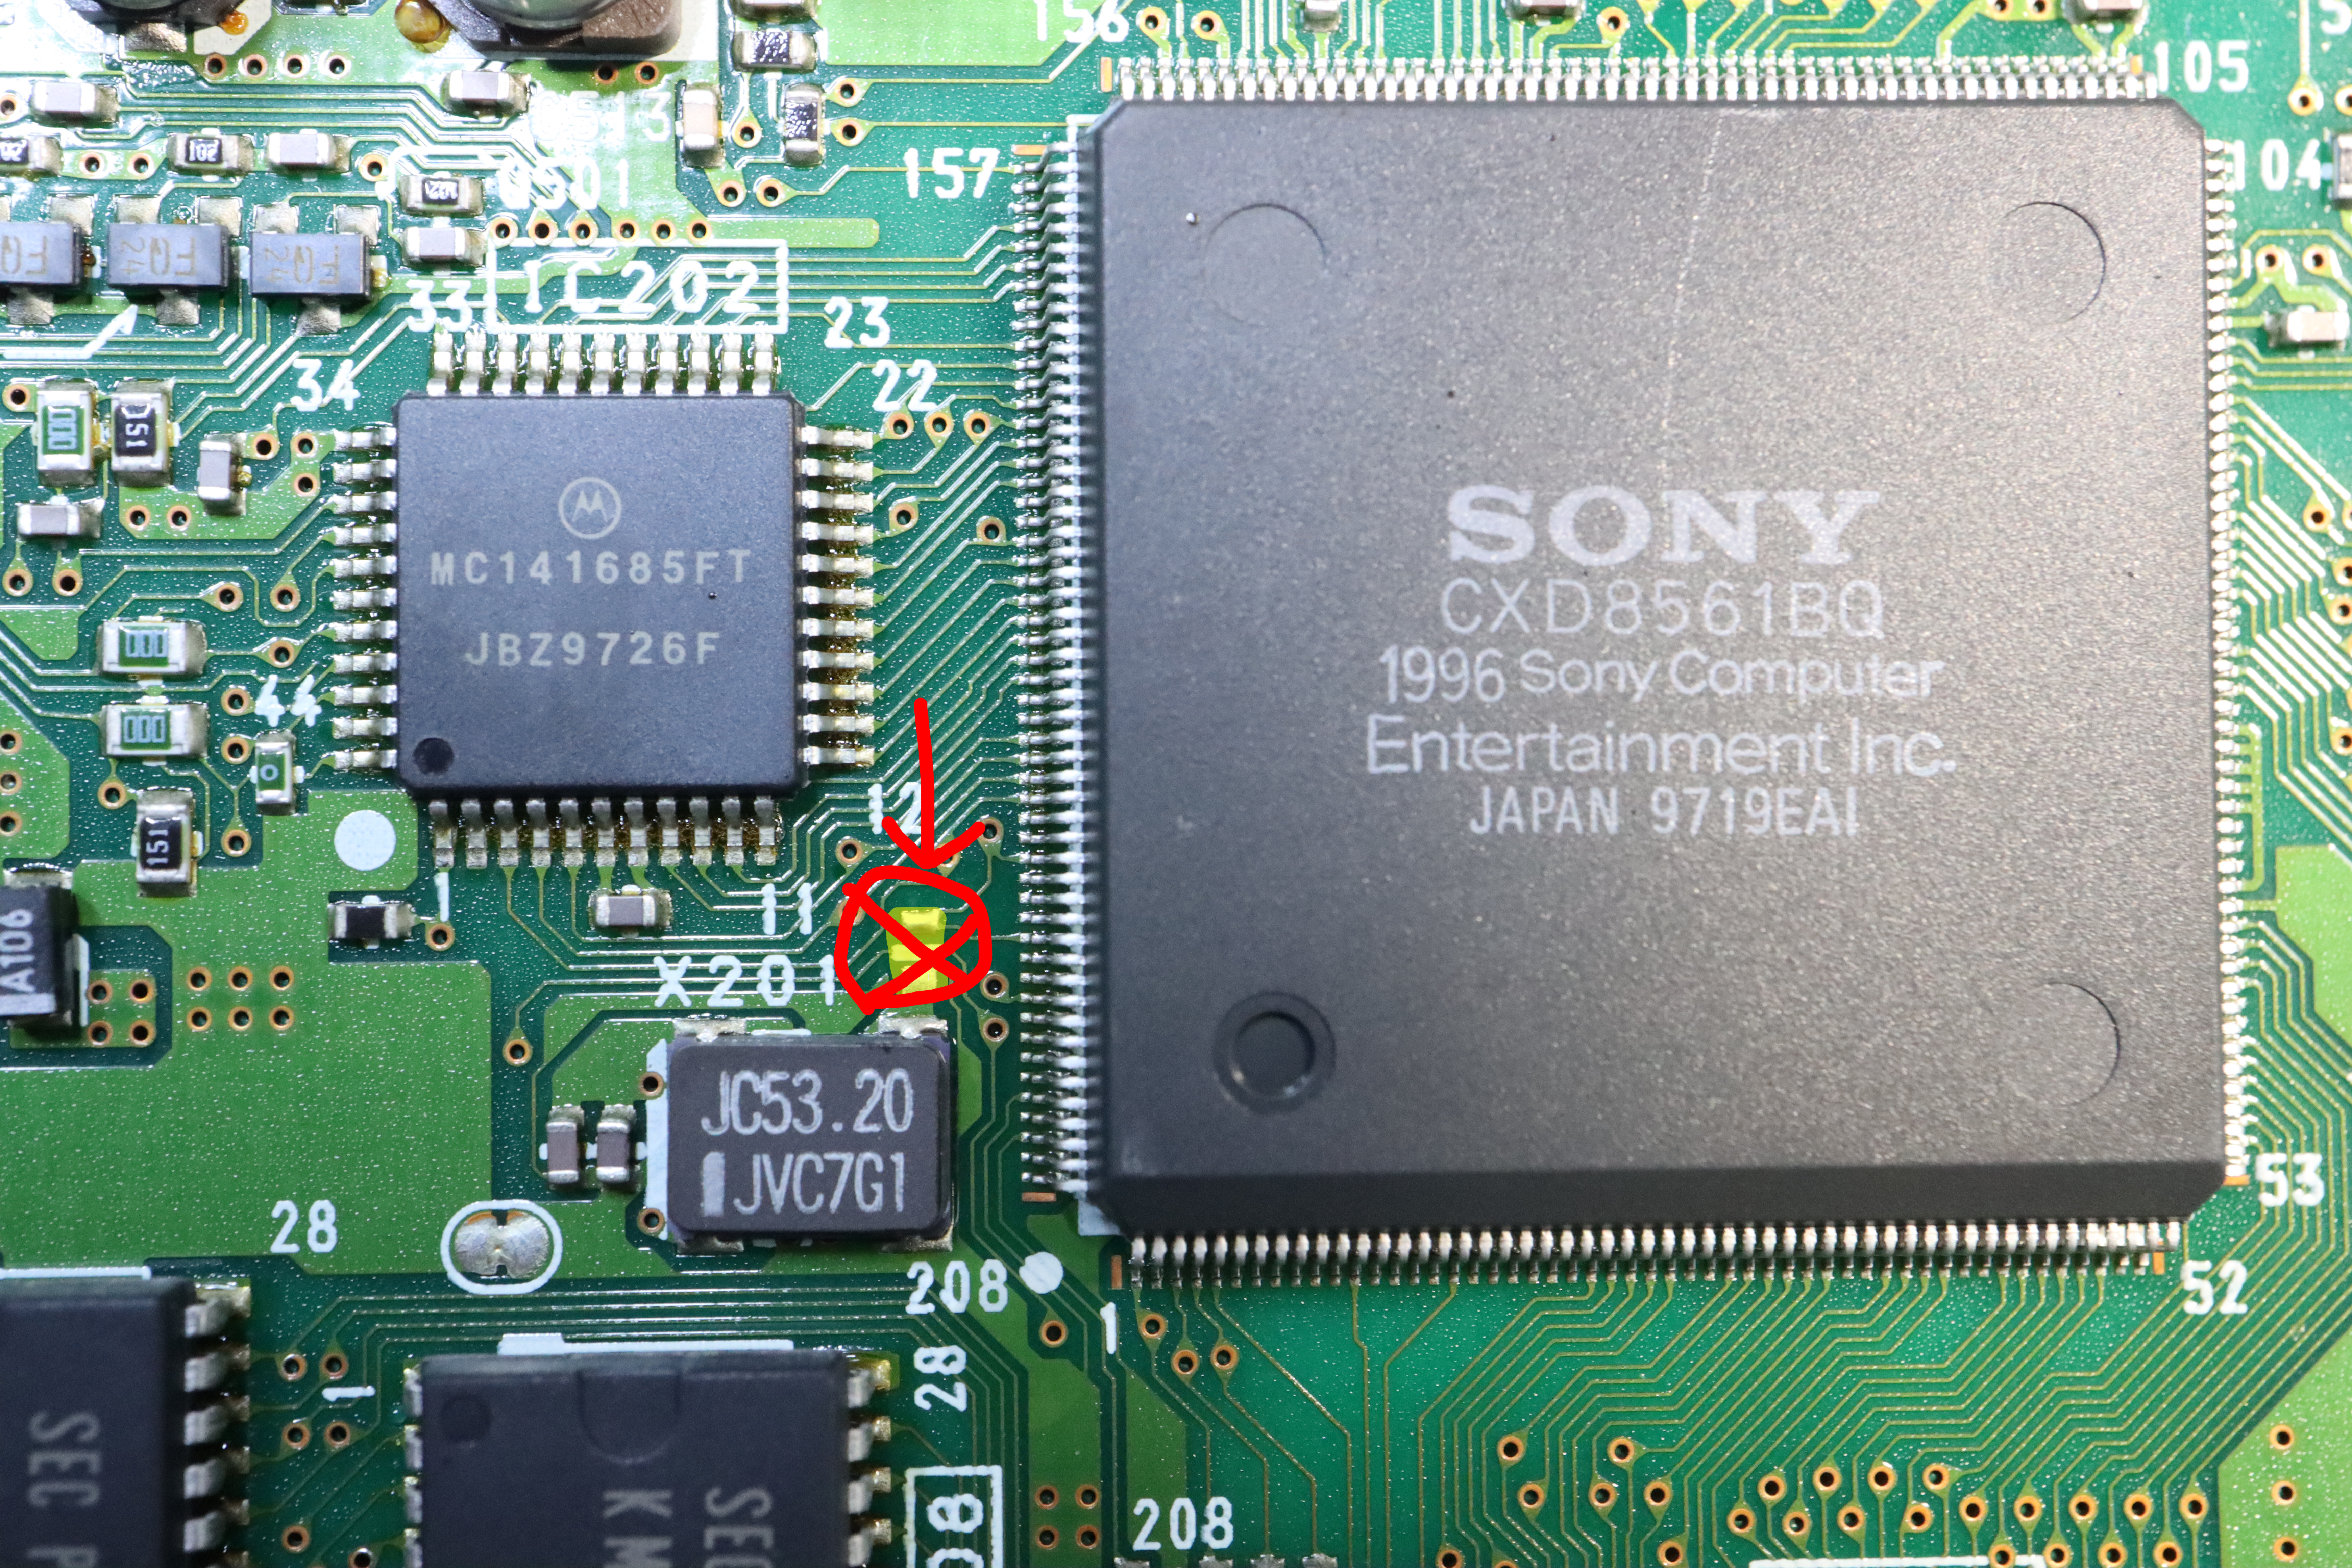
Then remove a surface mount resistor next to the graphics processor chip.
Now that the board is prepared you can start installing the flex cables. Start by installing the controller connector flex cable.
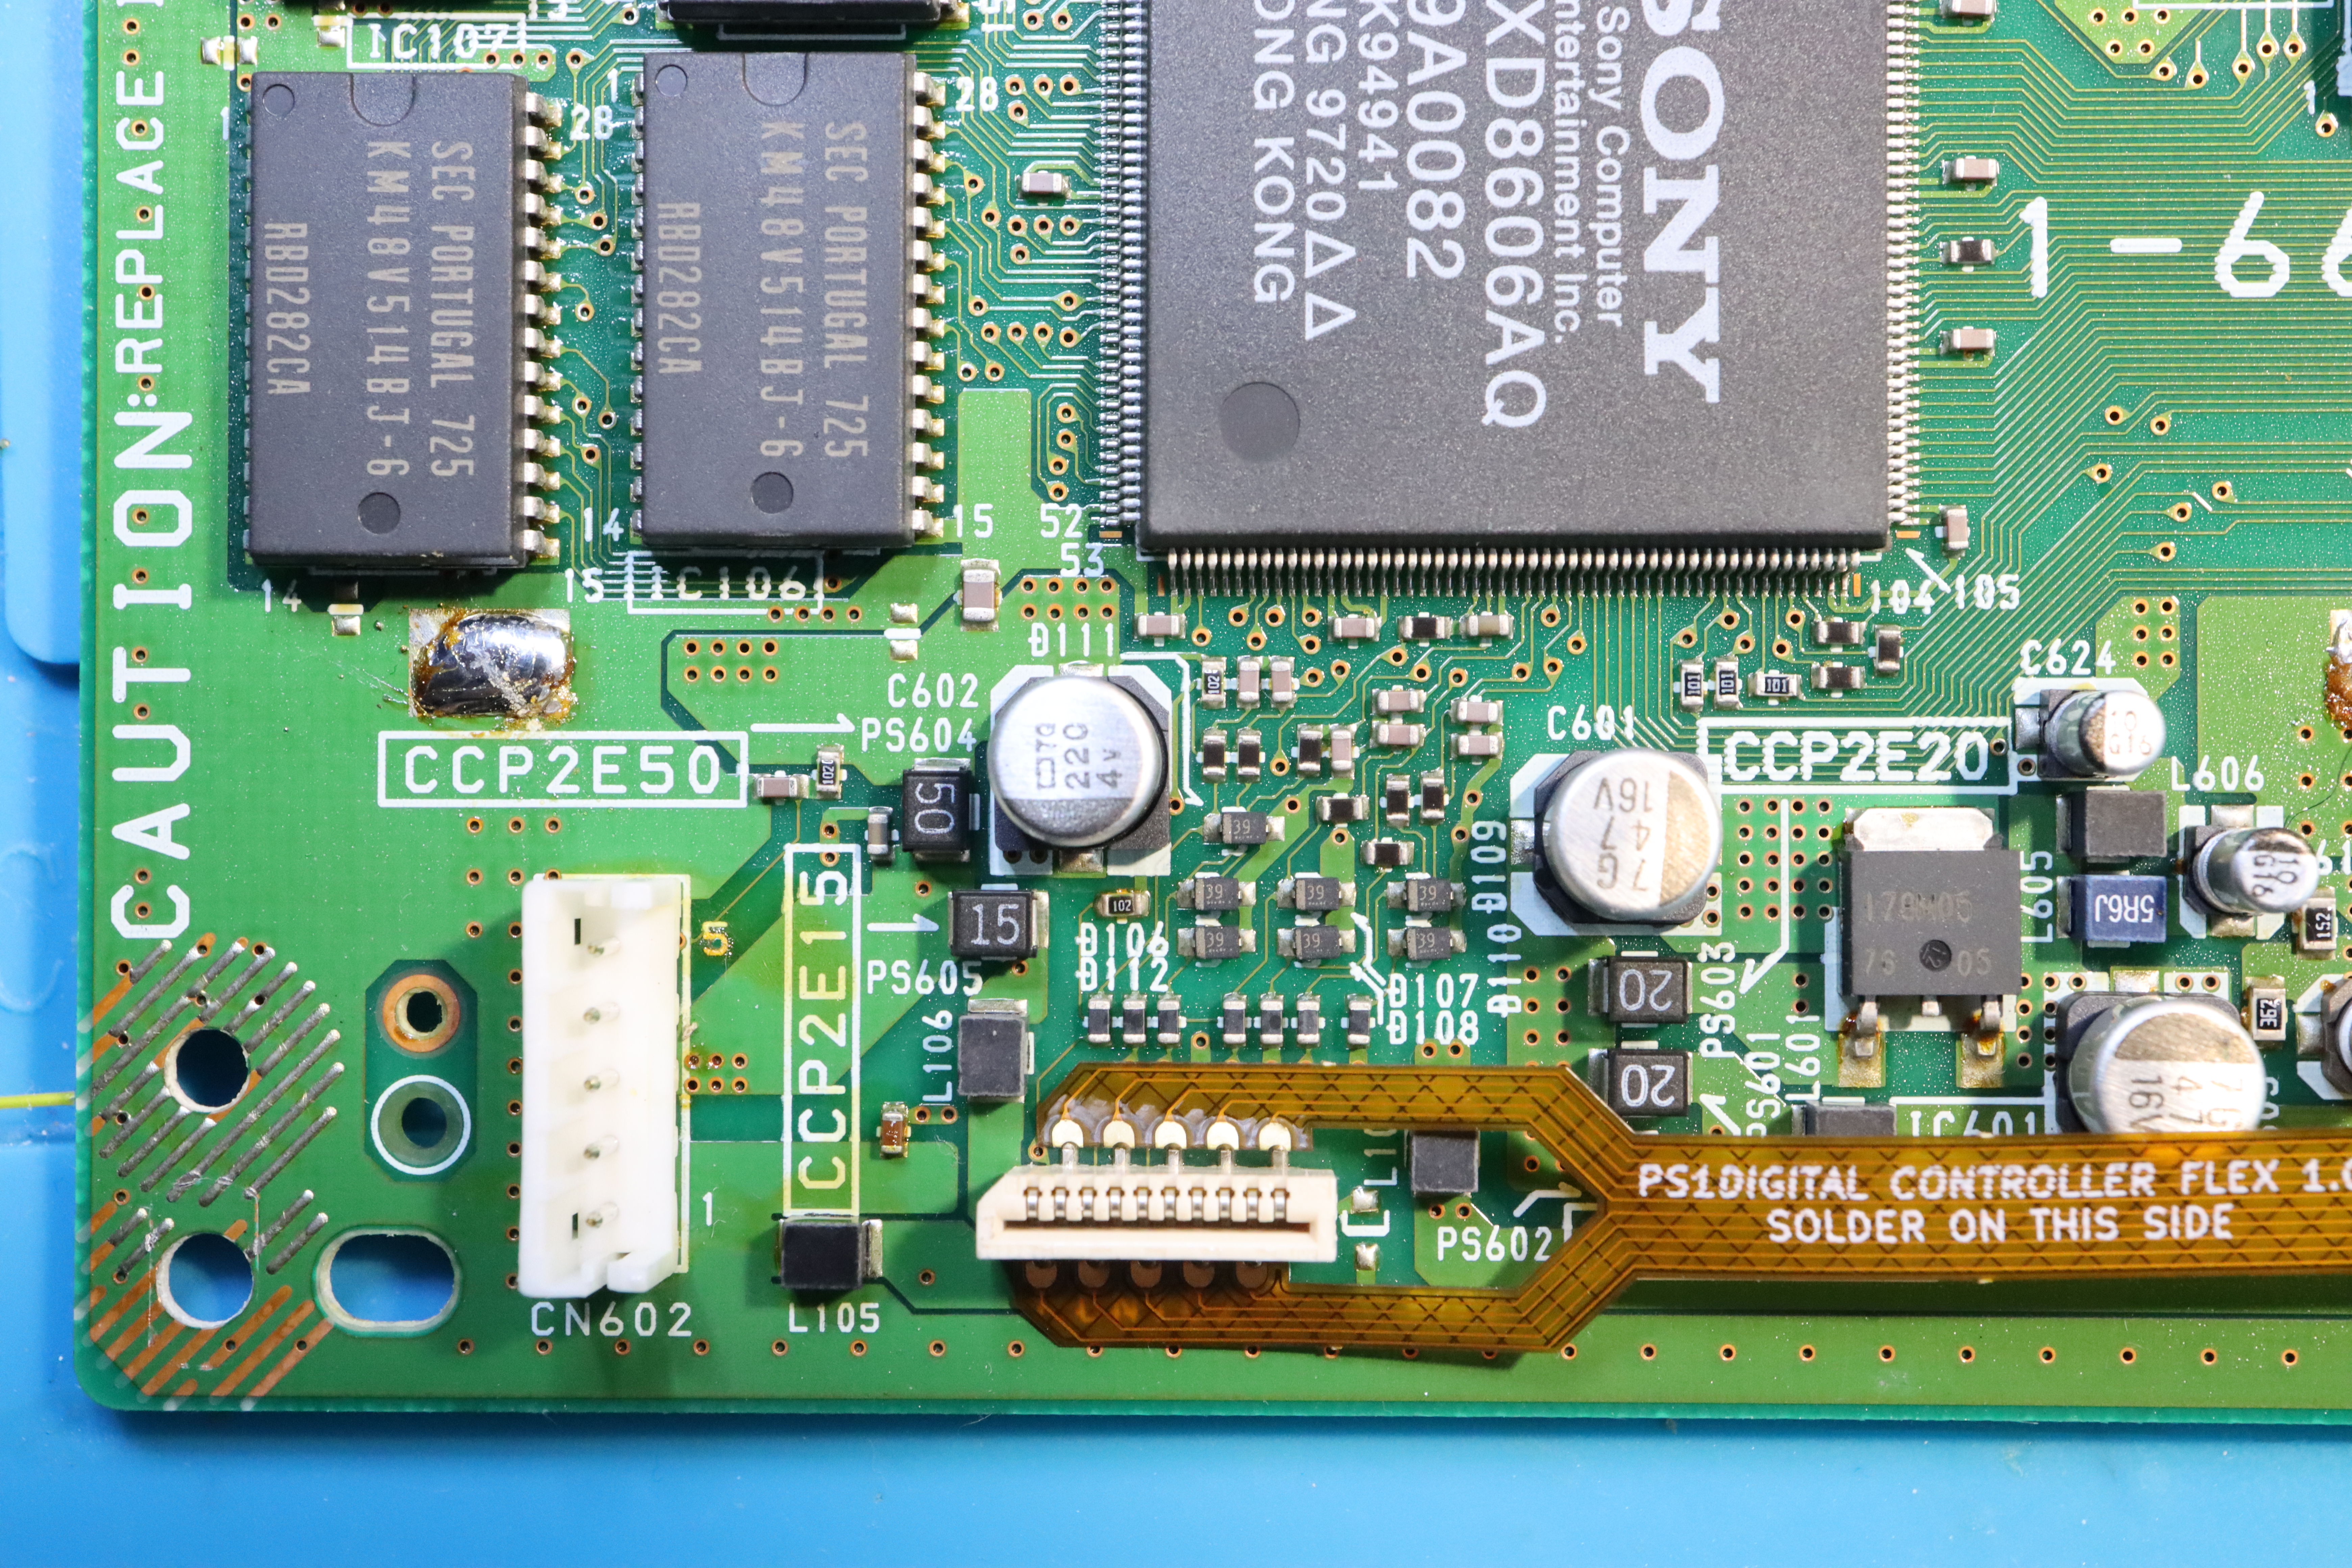
Then you can install the GPU flex cable. Alignment is very important (I actually installed it one pin off on my first attempt and had to remove it with a heat gun and reinstall).

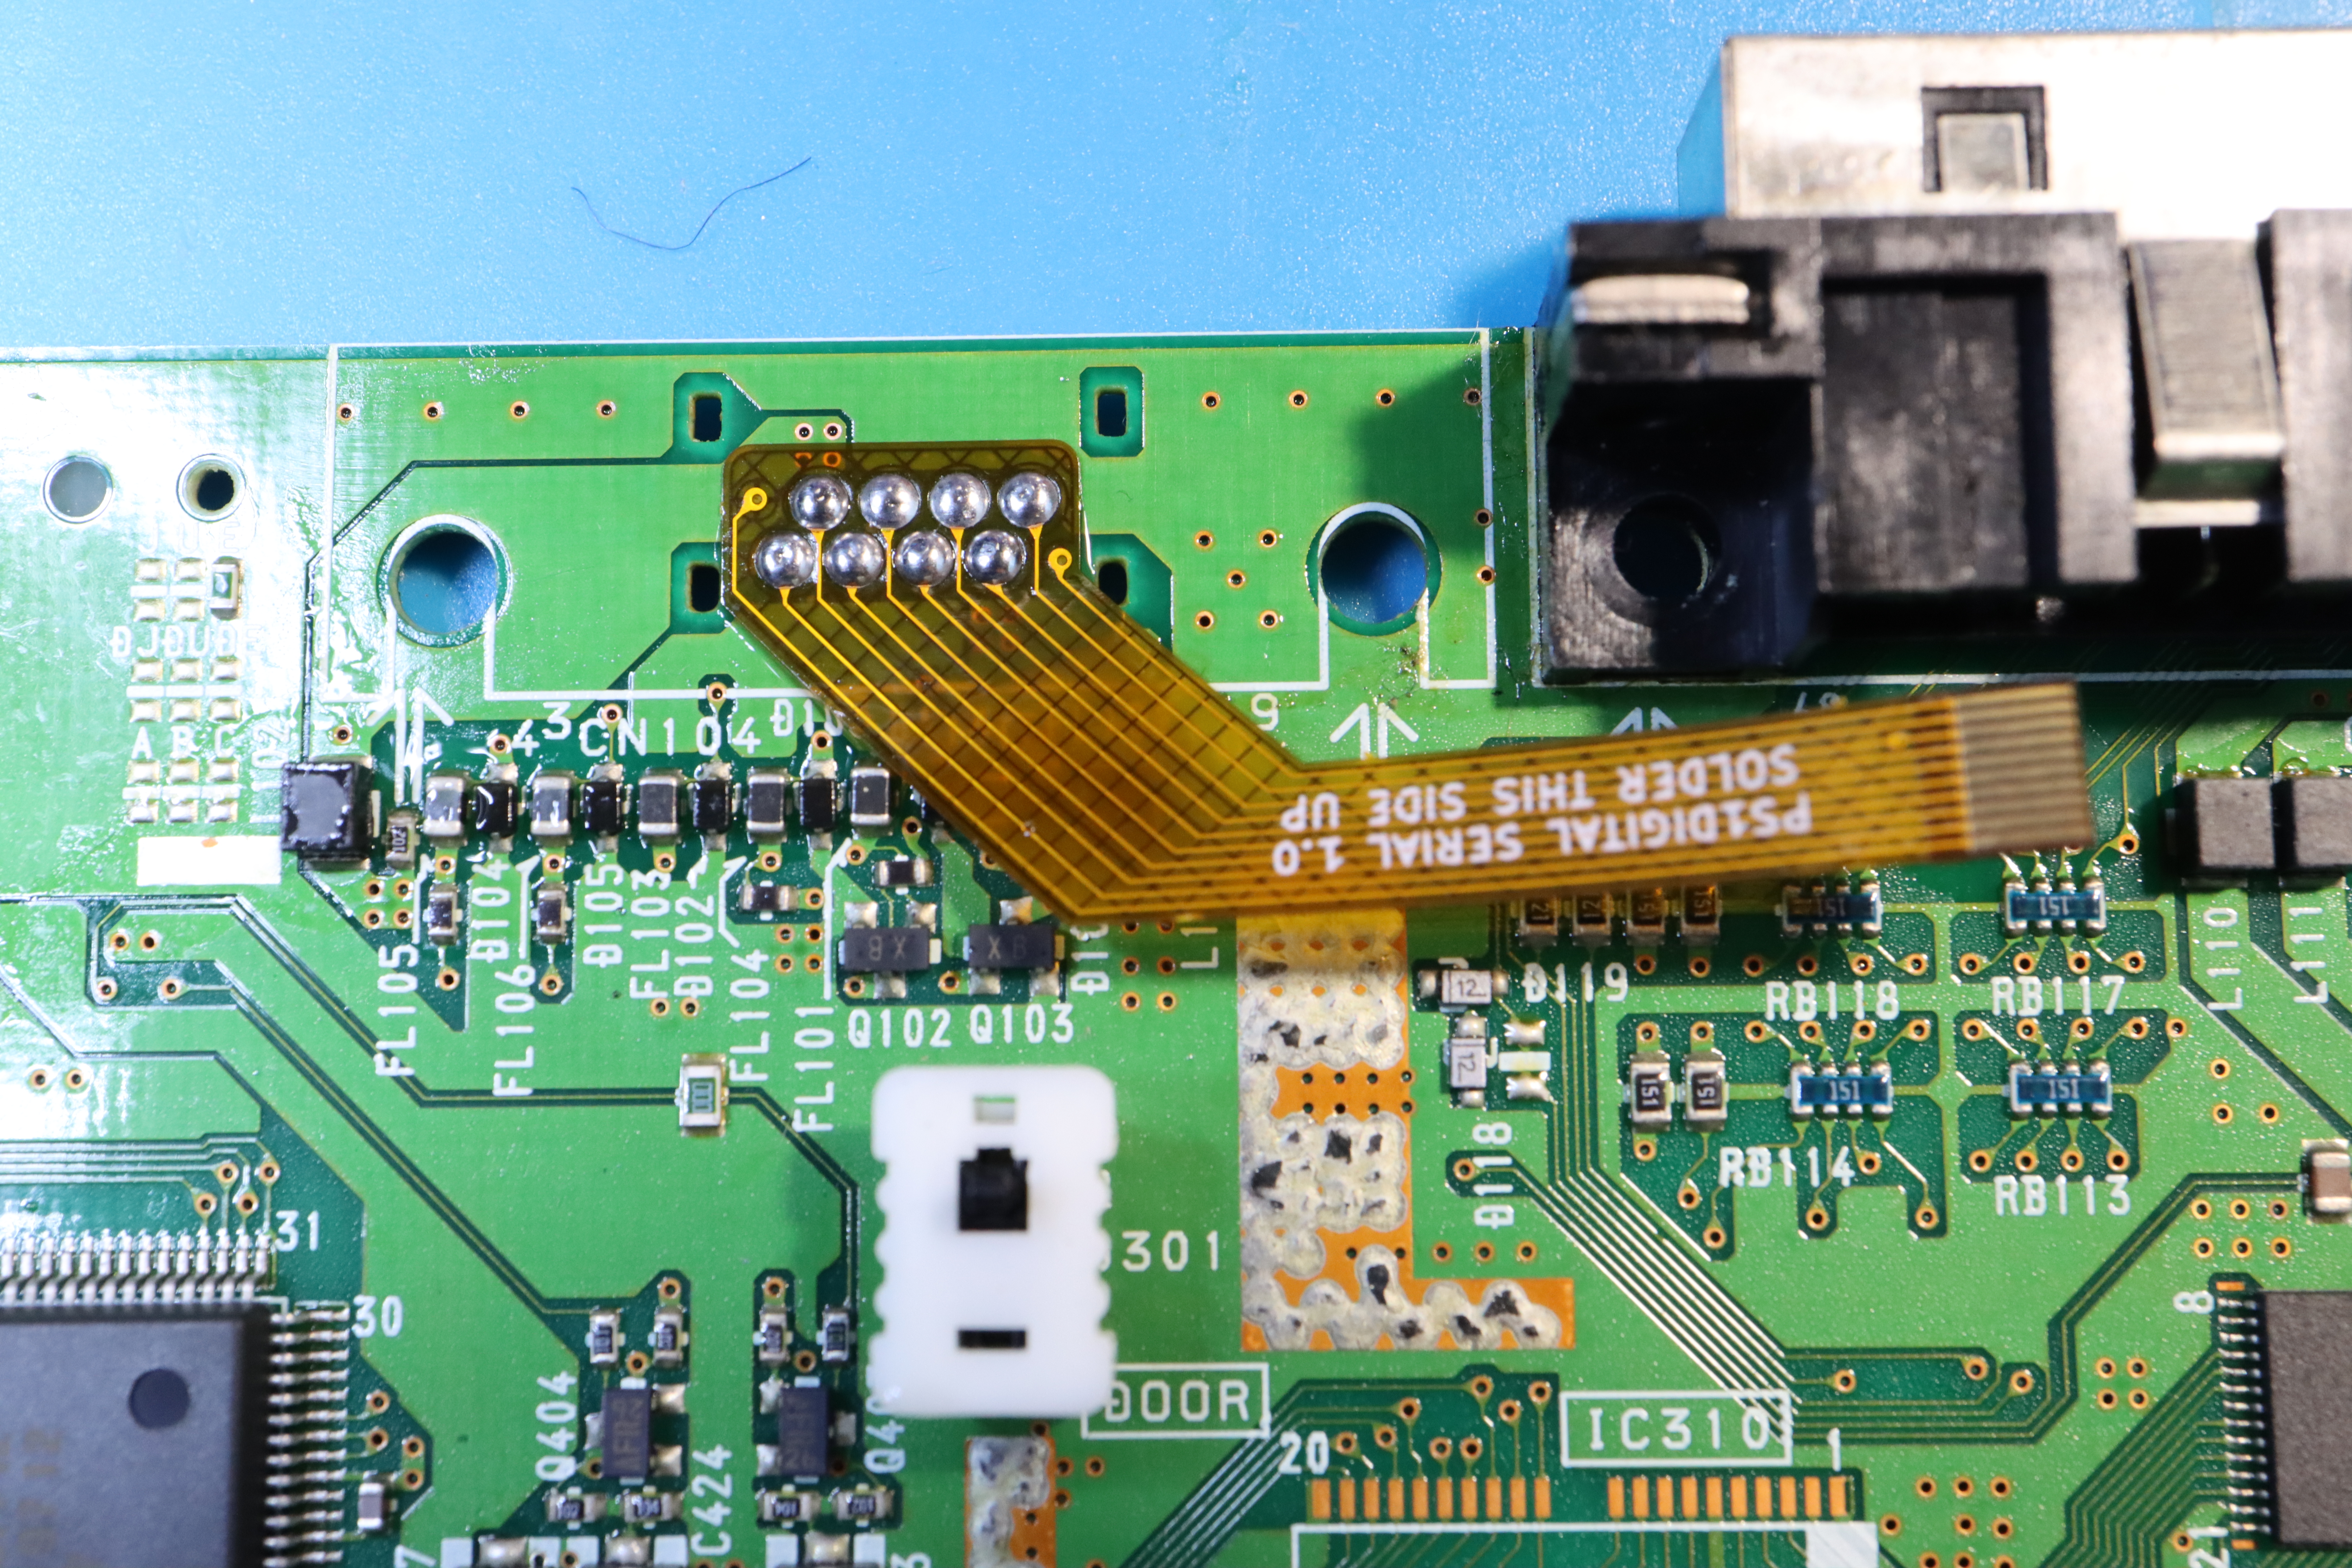
Next install the serial port flex cable.
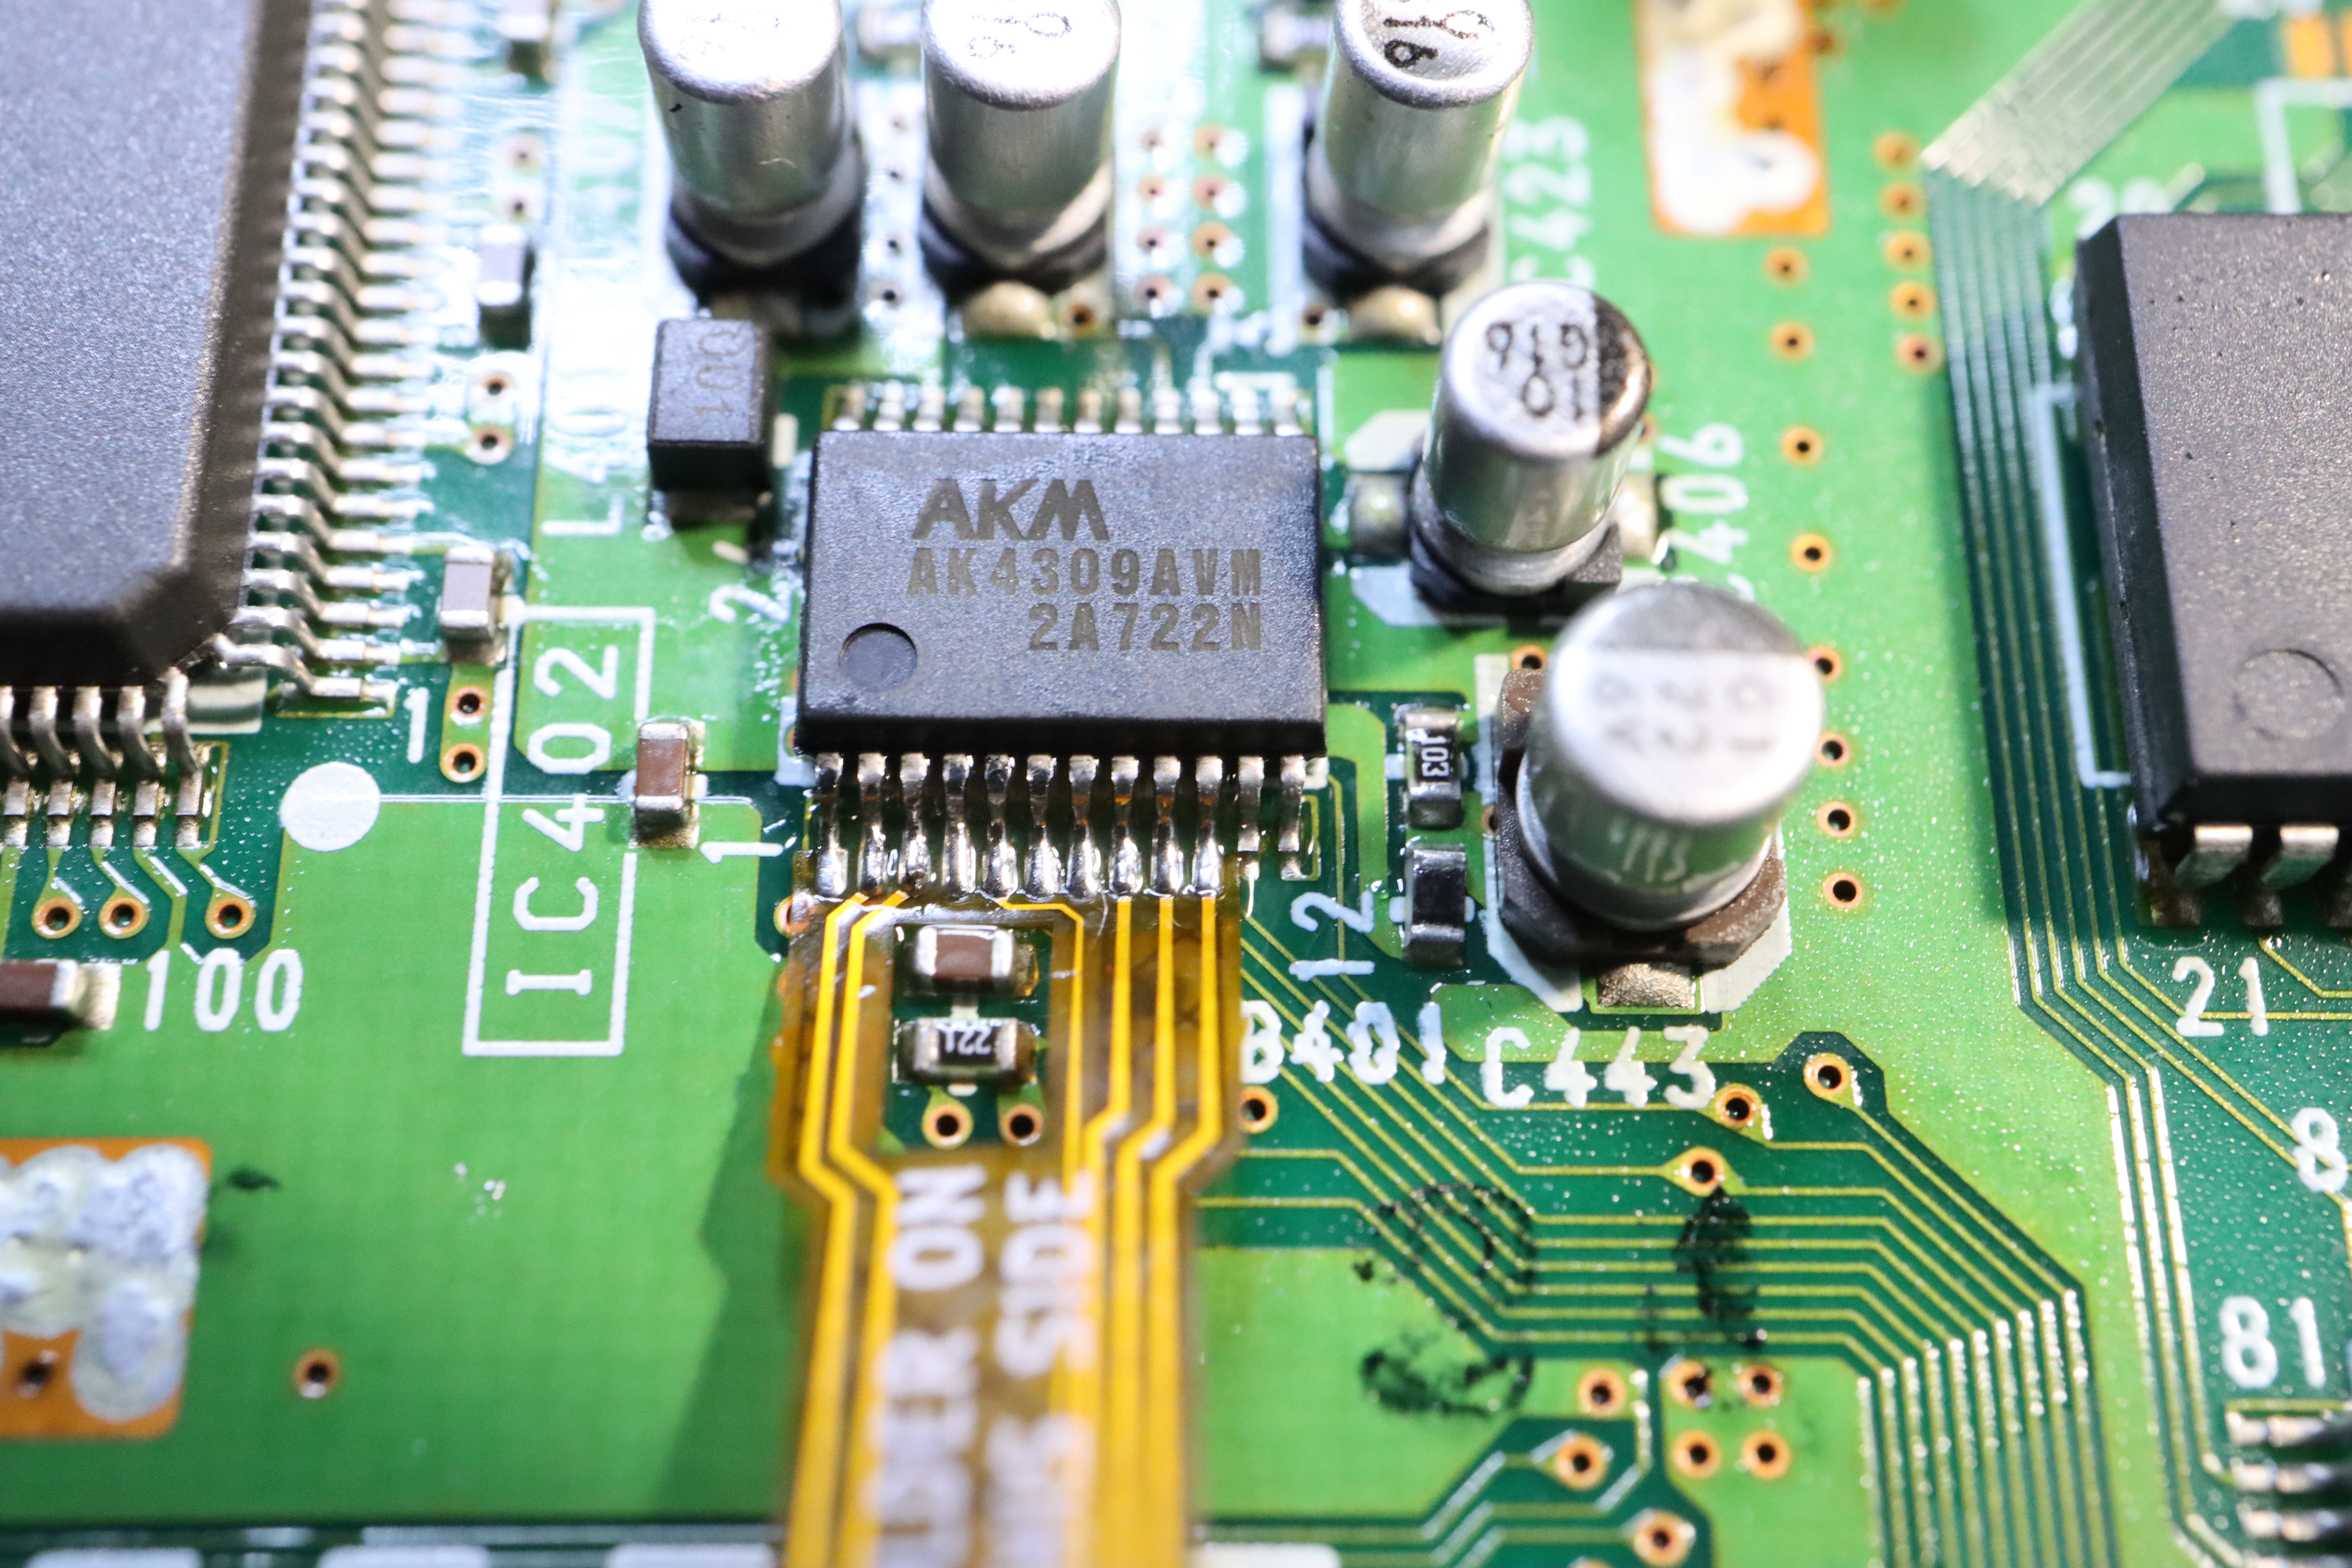
The last flex cable to install is the audio flex cable.
If you want to use the PsNee functionality be sure to run the four wires needed for PsNee up to near where the PS1Digital board gets placed. I have PsNee installation instructions (just follow them but ignore VCC/GND since they are provided by the PS1Digital).
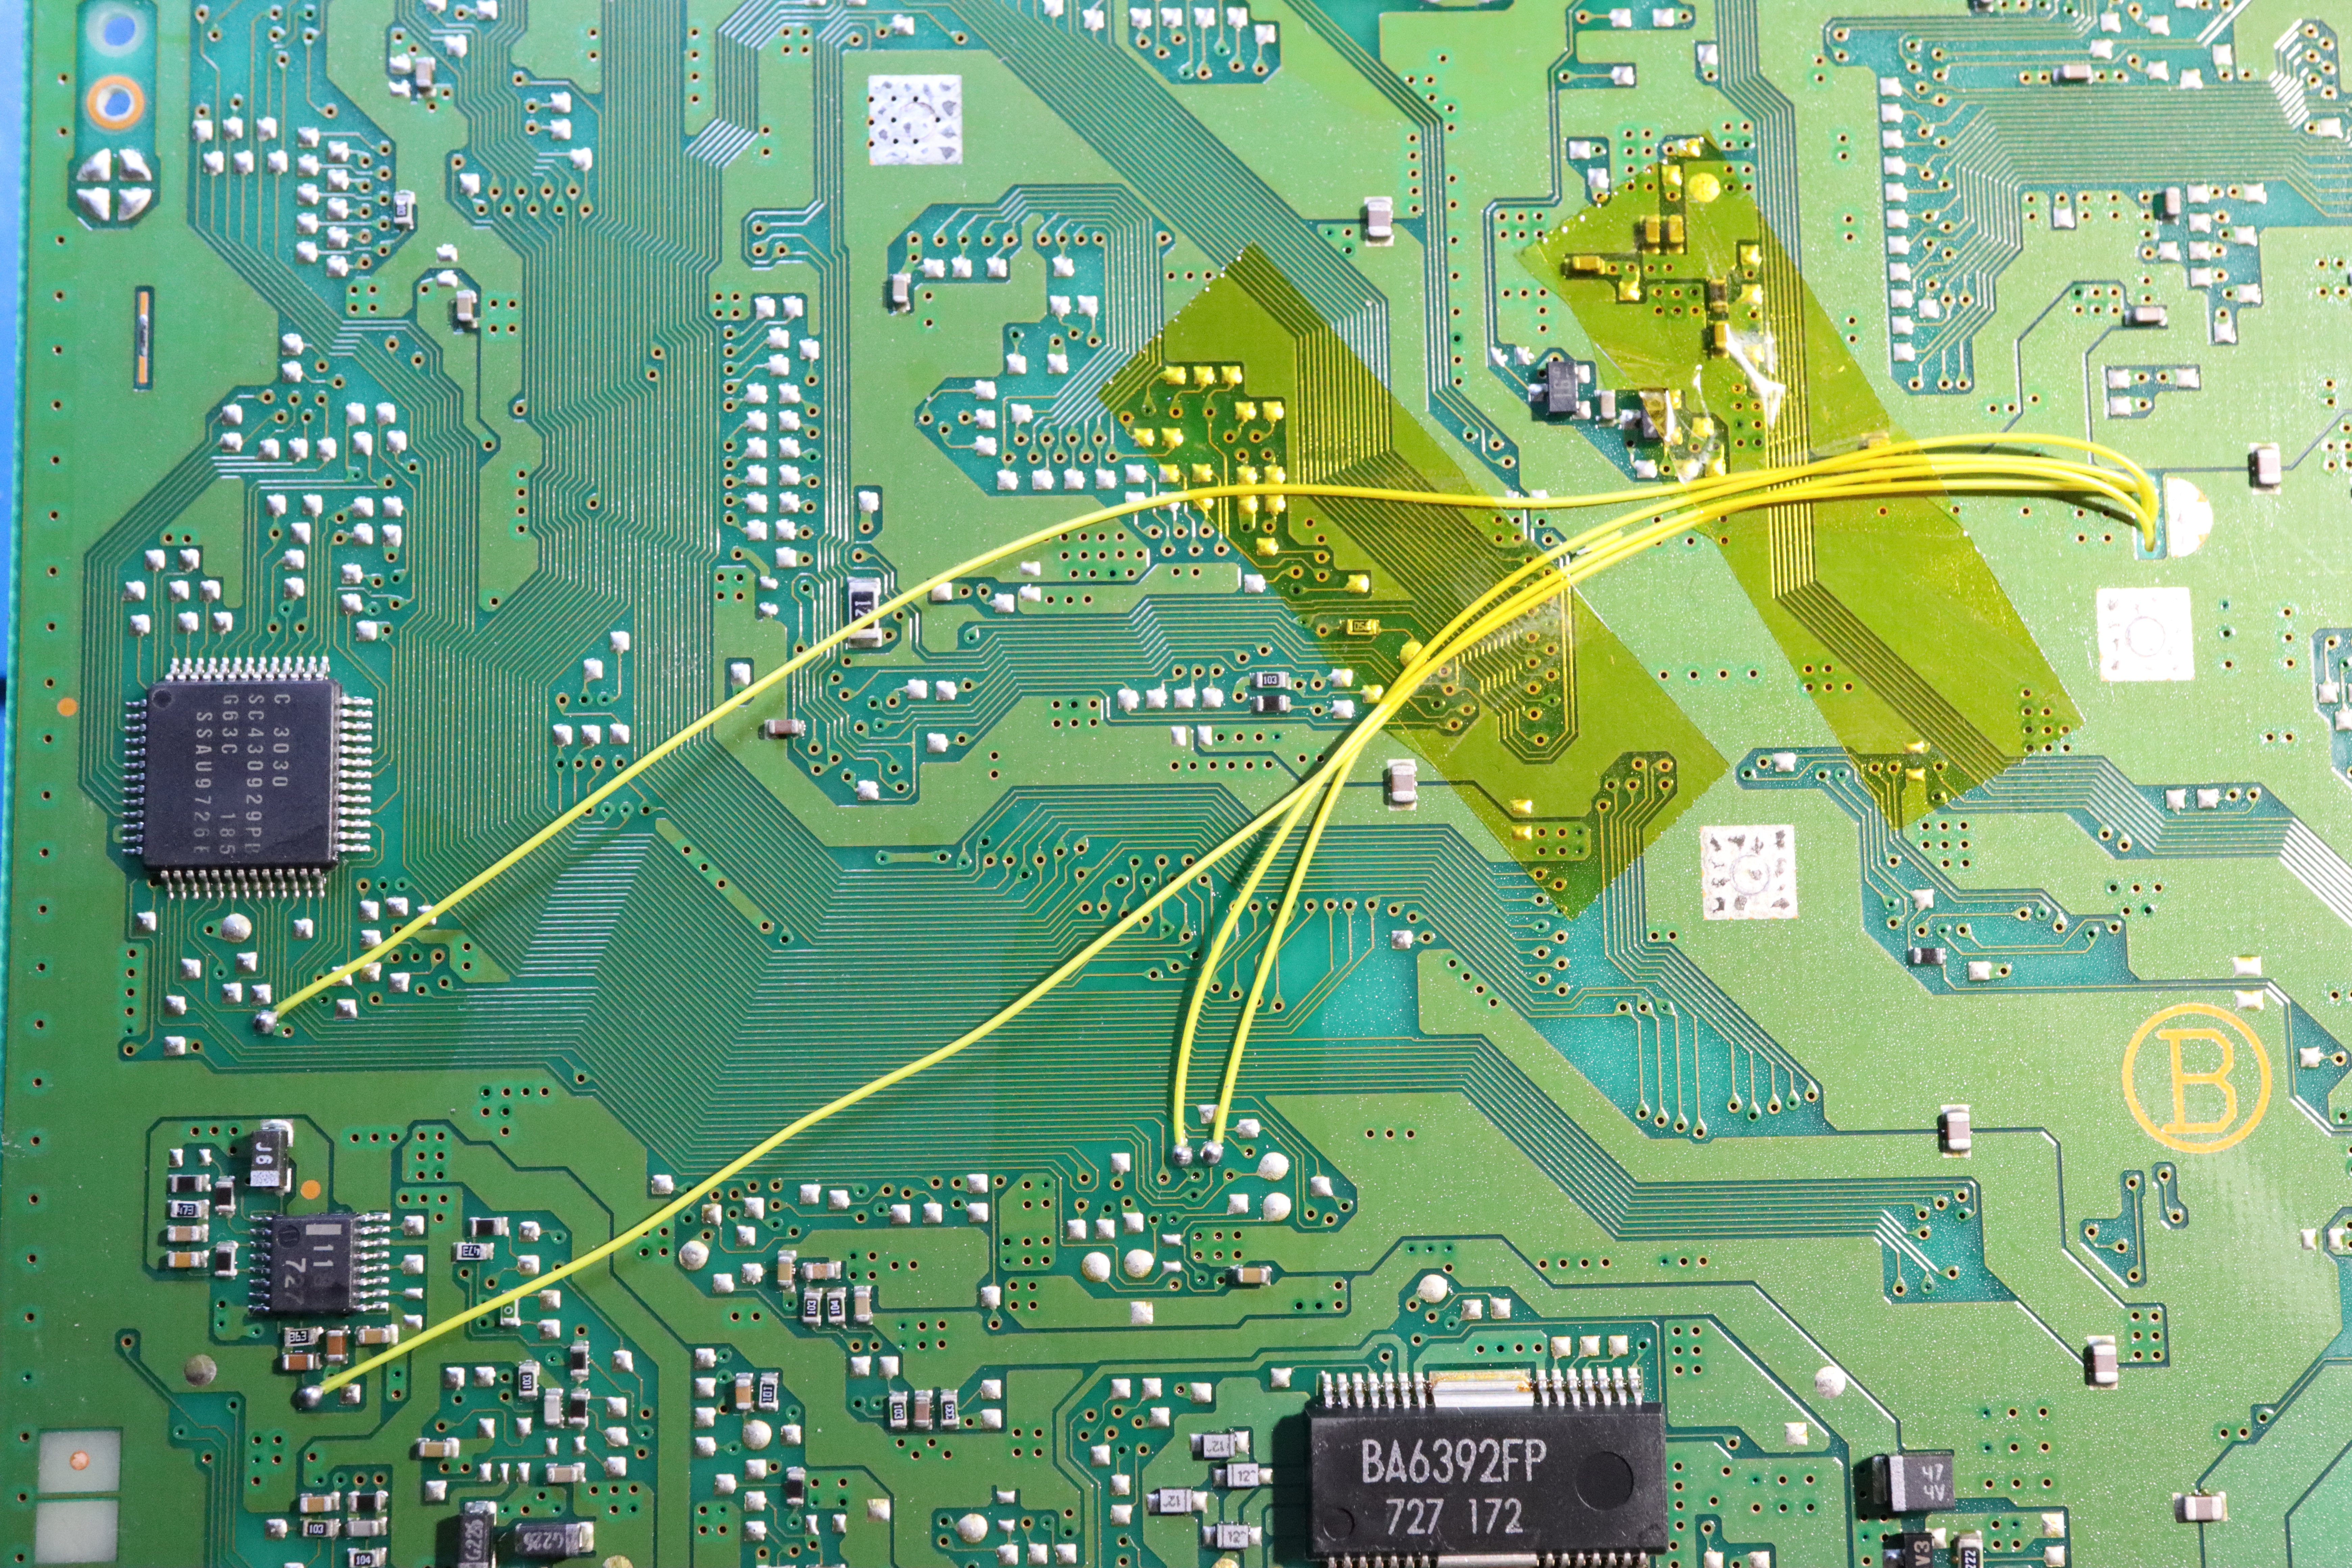
Now you can connect all of the flex cables to the PS1Digital (along with the PsNee wires if you want PsNee functionality).
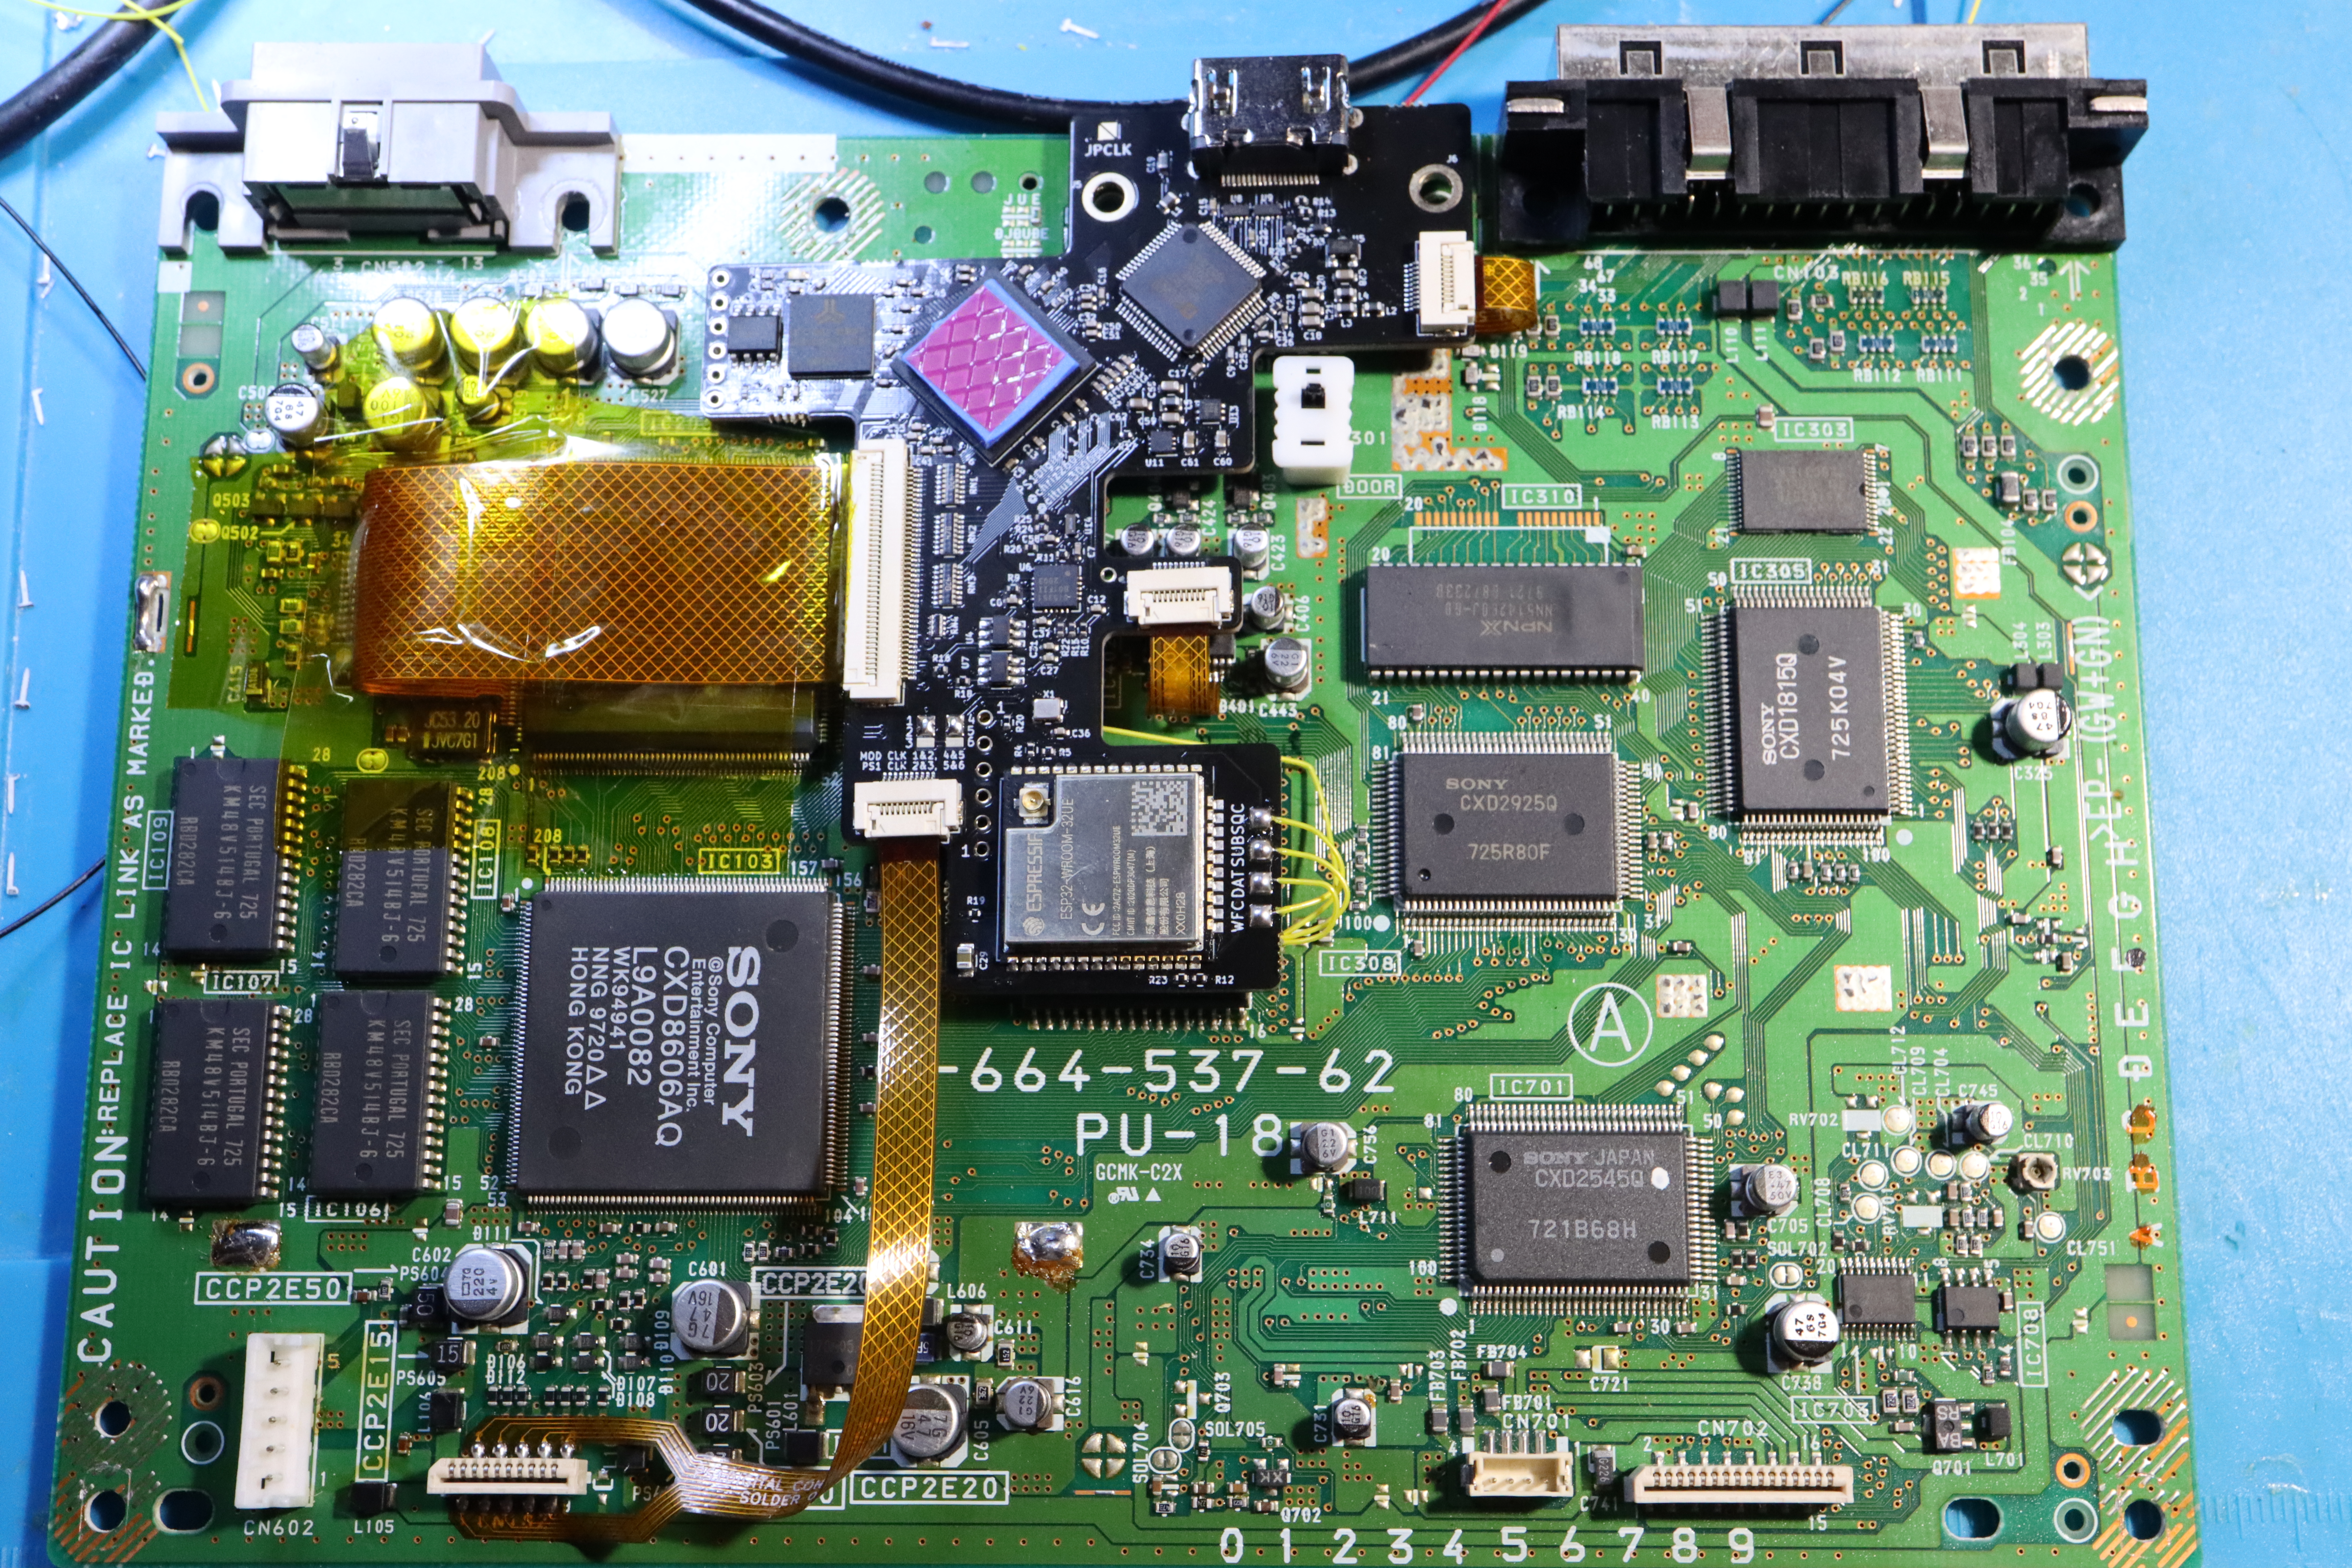
That’s basically it. The board screws into the screws near where the serial port was with the plastic spacers underneath the board. Run the antenna from the ESP32 on the board up to above the top metal shield.
PS1Digital installation thoughts
As I said before installation of the PS1Digital is pretty straightforward, but a lot can go wrong during installation. Good technique and patience are key to getting a working installation.
I found that I was able to install the GPU flex cable fairly easily with careful drag soldering. First I made sure a few pins on either end of the cable were properly soldered in place (to ensure proper alignment), and then I was able to drag solder the rest. It’s worth mentioning that you need only a very small amount of additional solder for the pins. Too much solder will just make a mess.
The ribbon flex cables themselves were very high quality. I’ve seen some ribbon flex cables in the past that are very low quality and melt really easily. That’s not the case with these. They even stood up to removal and reinstallation (I installed the ribbon cable off by one pin at first).
It is recommended to slightly crease the GPU flex cable. I did that and even then I still sort of worried that the ribbon may lift away from the solder connections. I’m sure it’s fine, but I did end up taping the ribbon cable down some more from the top to ensure it stays fixed in place with minimal stress on the solder.
Having to remove the serial port isn’t ideal. There are a small number of games that use it as a multi-console link cable. The benefit of using the serial port for the HDMI port is that there is no need to cut the console’s case up.
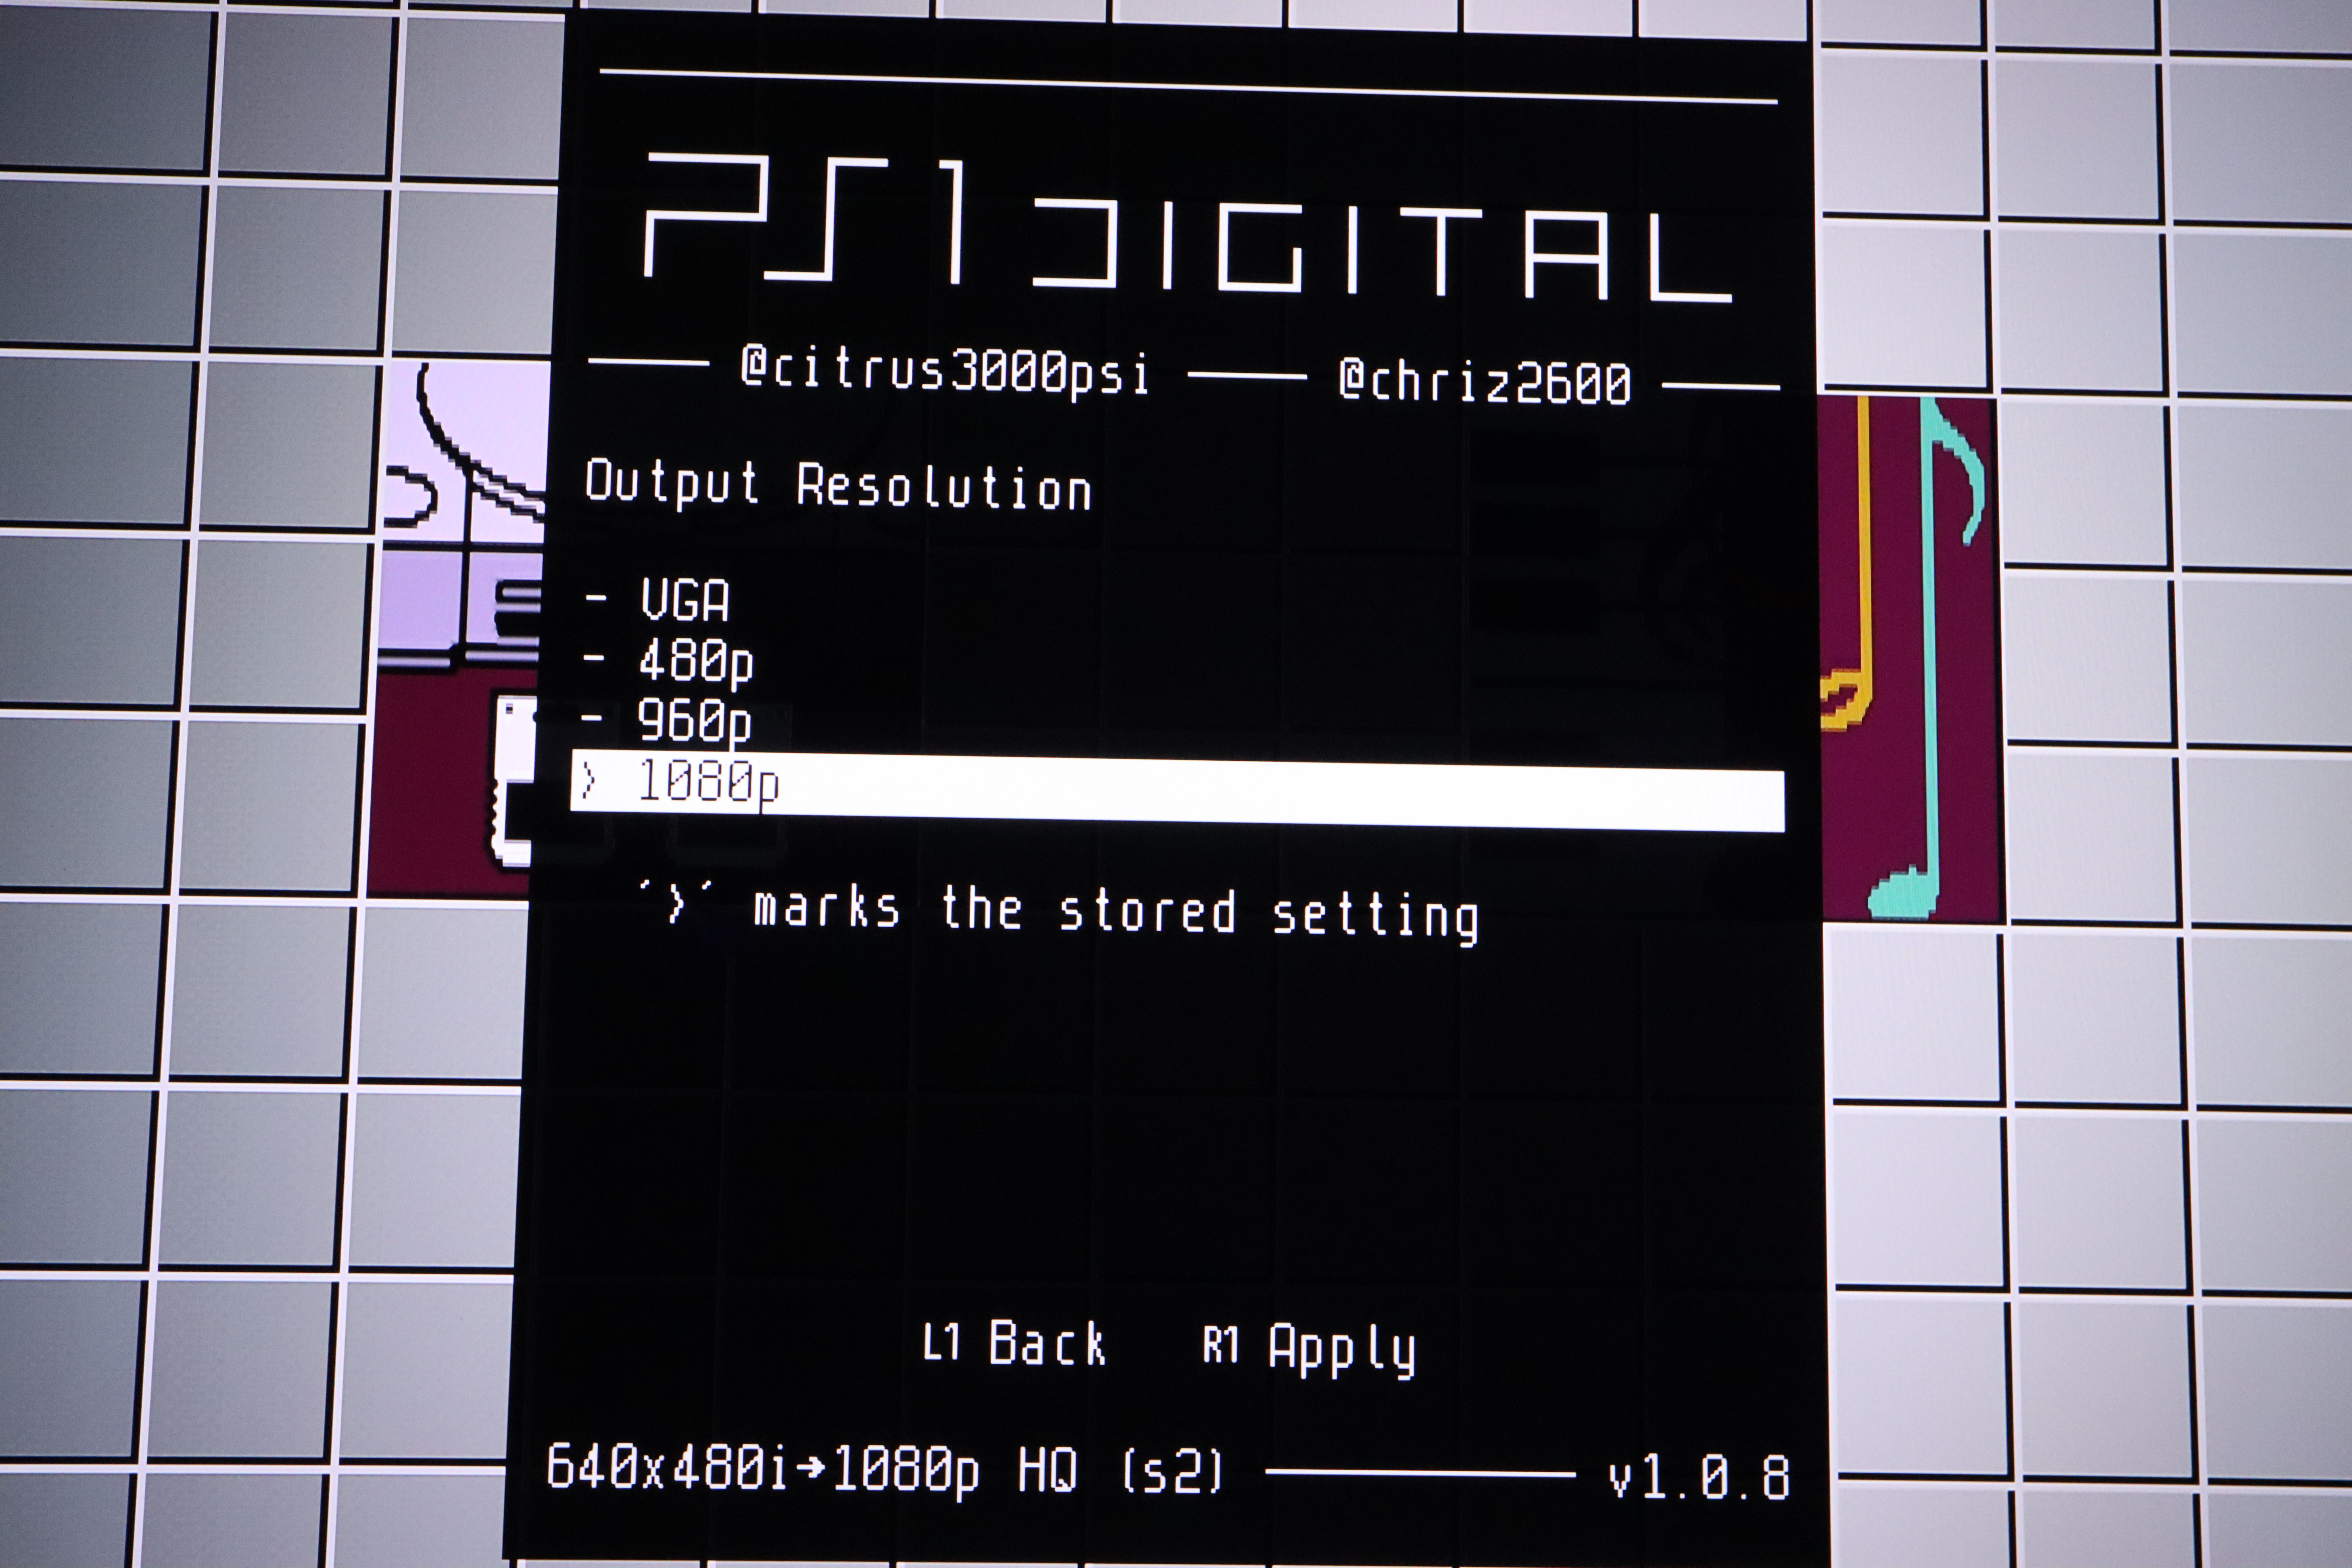
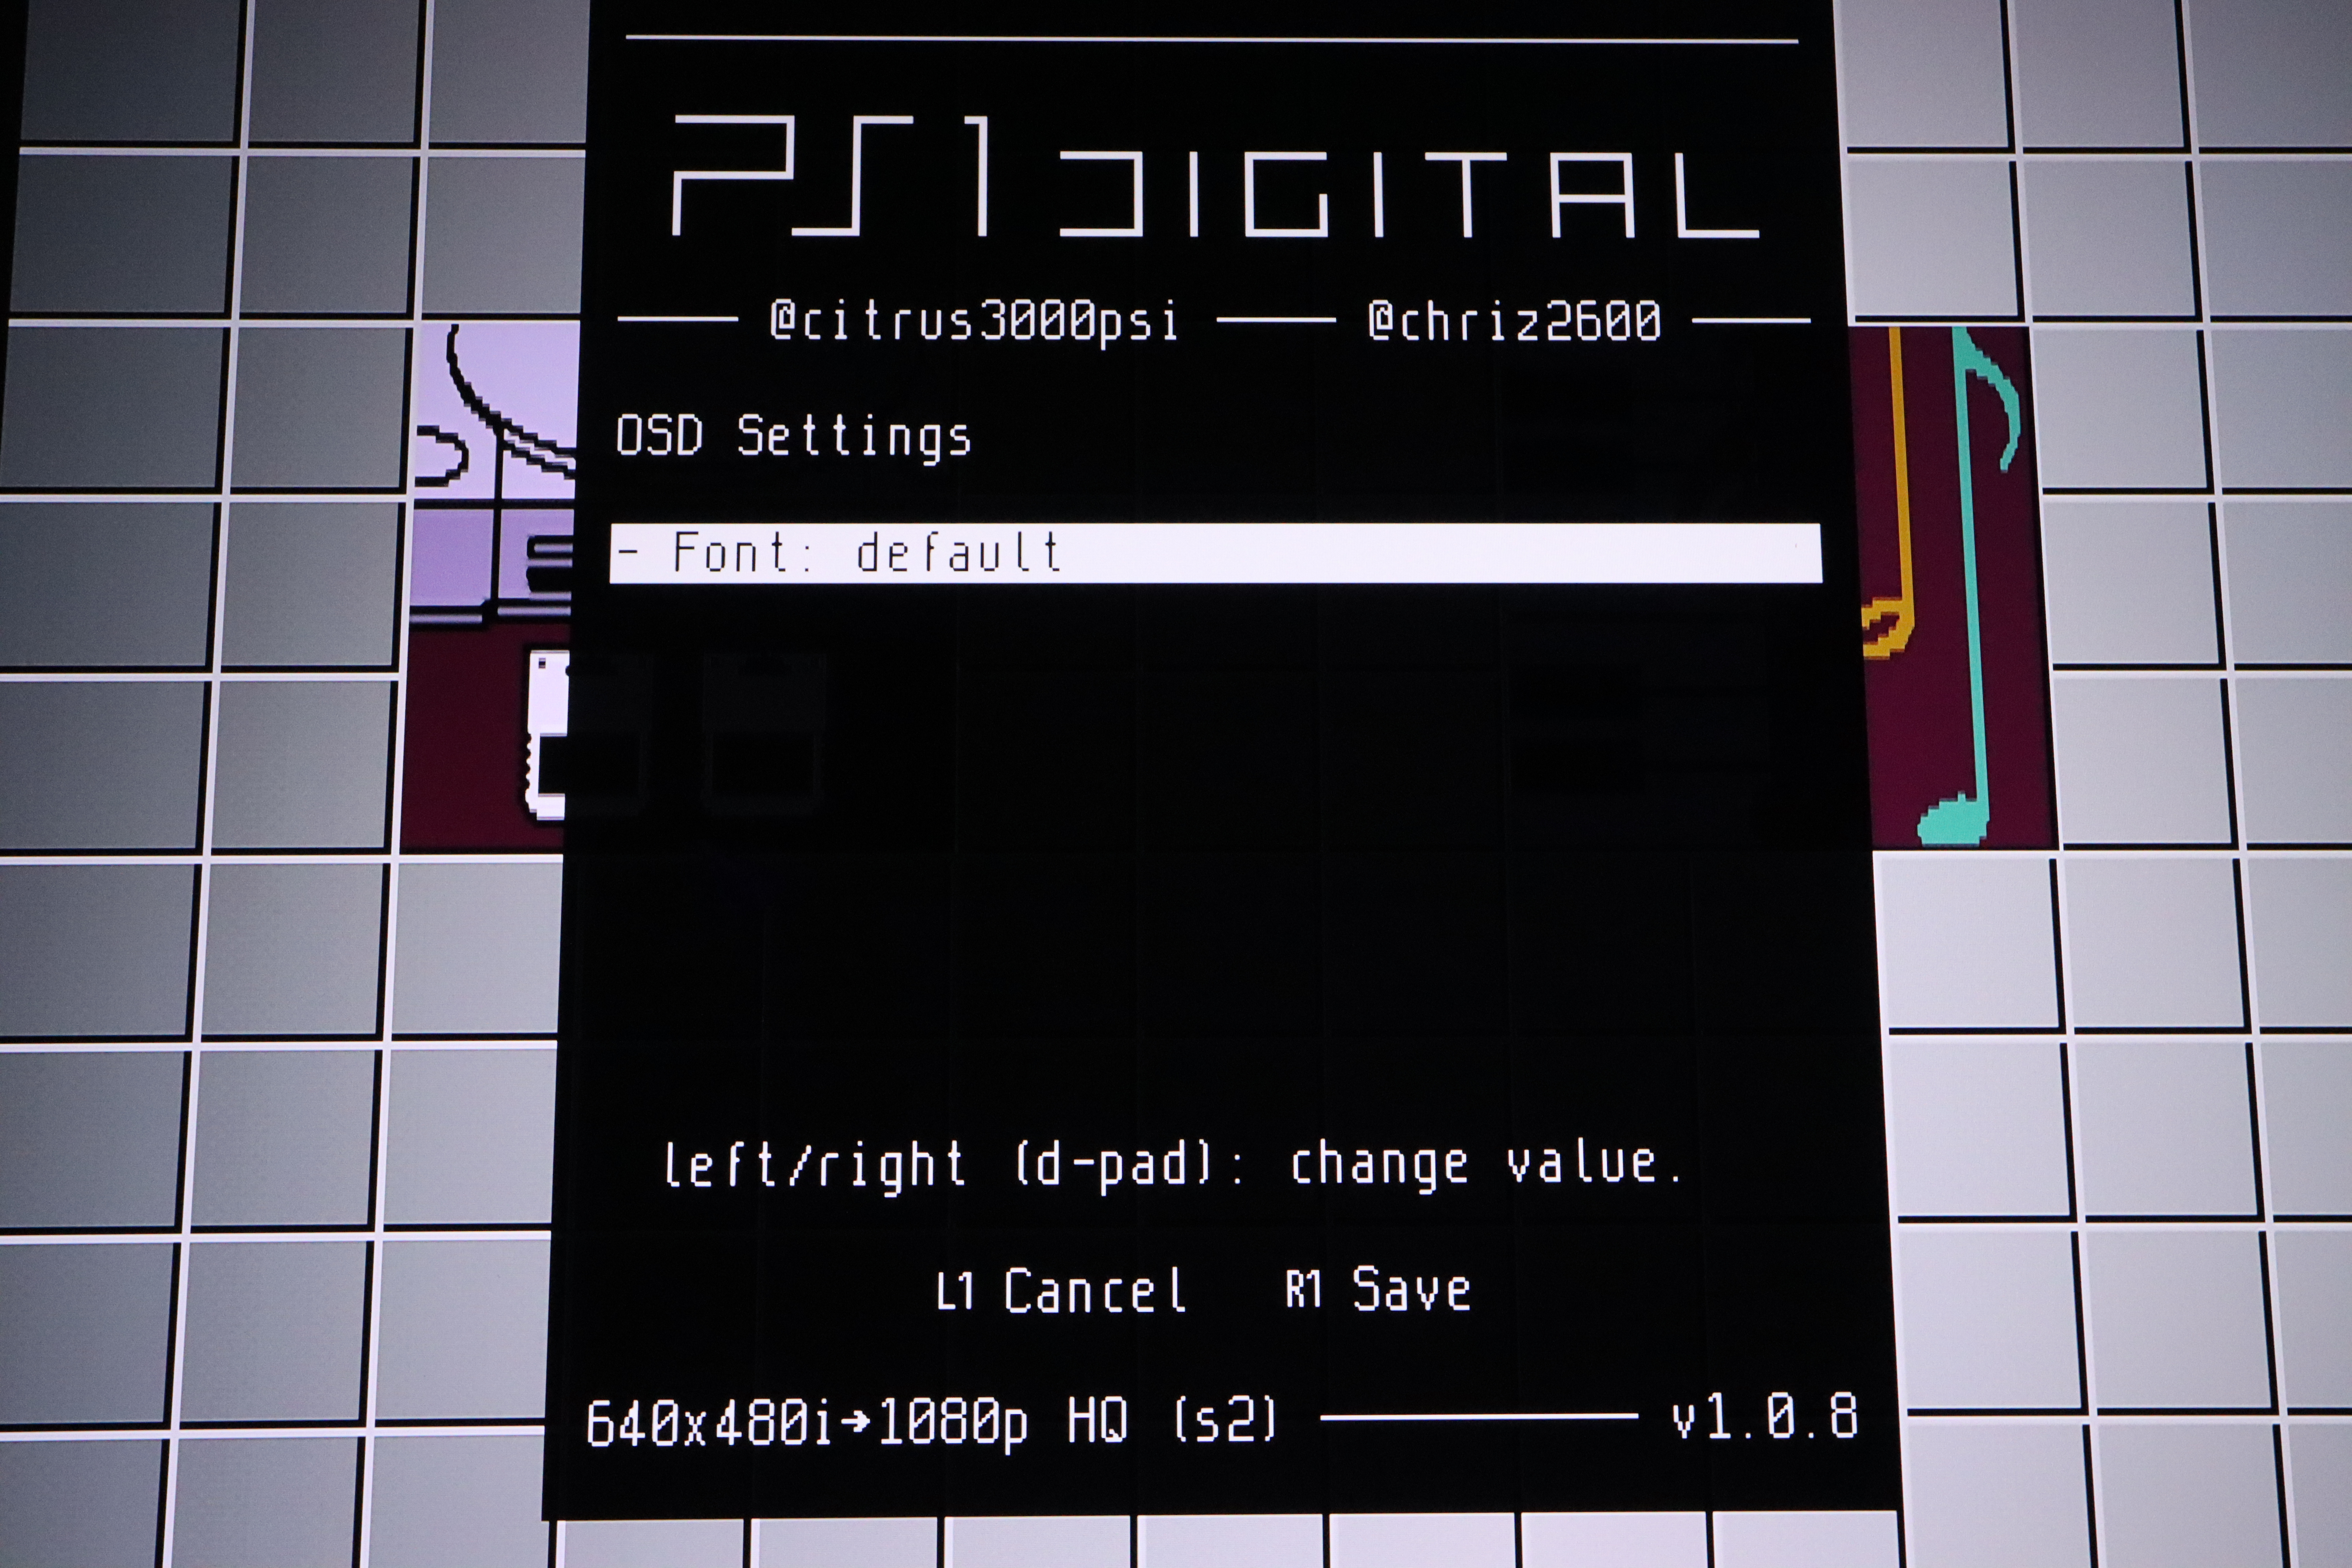
PS1Digital configuration options
There are lots of configurable options available inside the PS1Digital’s menu. To access this menu press and hold L2 + R2 + Square + X + Start. The PS1 isn’t polling for these buttons at all times, but whenever it is a menu will appear on the screen.
I’m not going to go into detail on these options. Instead I’ll just be including screenshots of each of the menus available on the current firmware so you have an idea of what they all are.
Main menu:

Output resolutions. 1080p is a nice way to have everything in the proper aspect ratio without needing to mess with the settings on your TV, but it does have a black border around the screen.
There are some advanced video settings.

The firmware can be updated through the Internet.

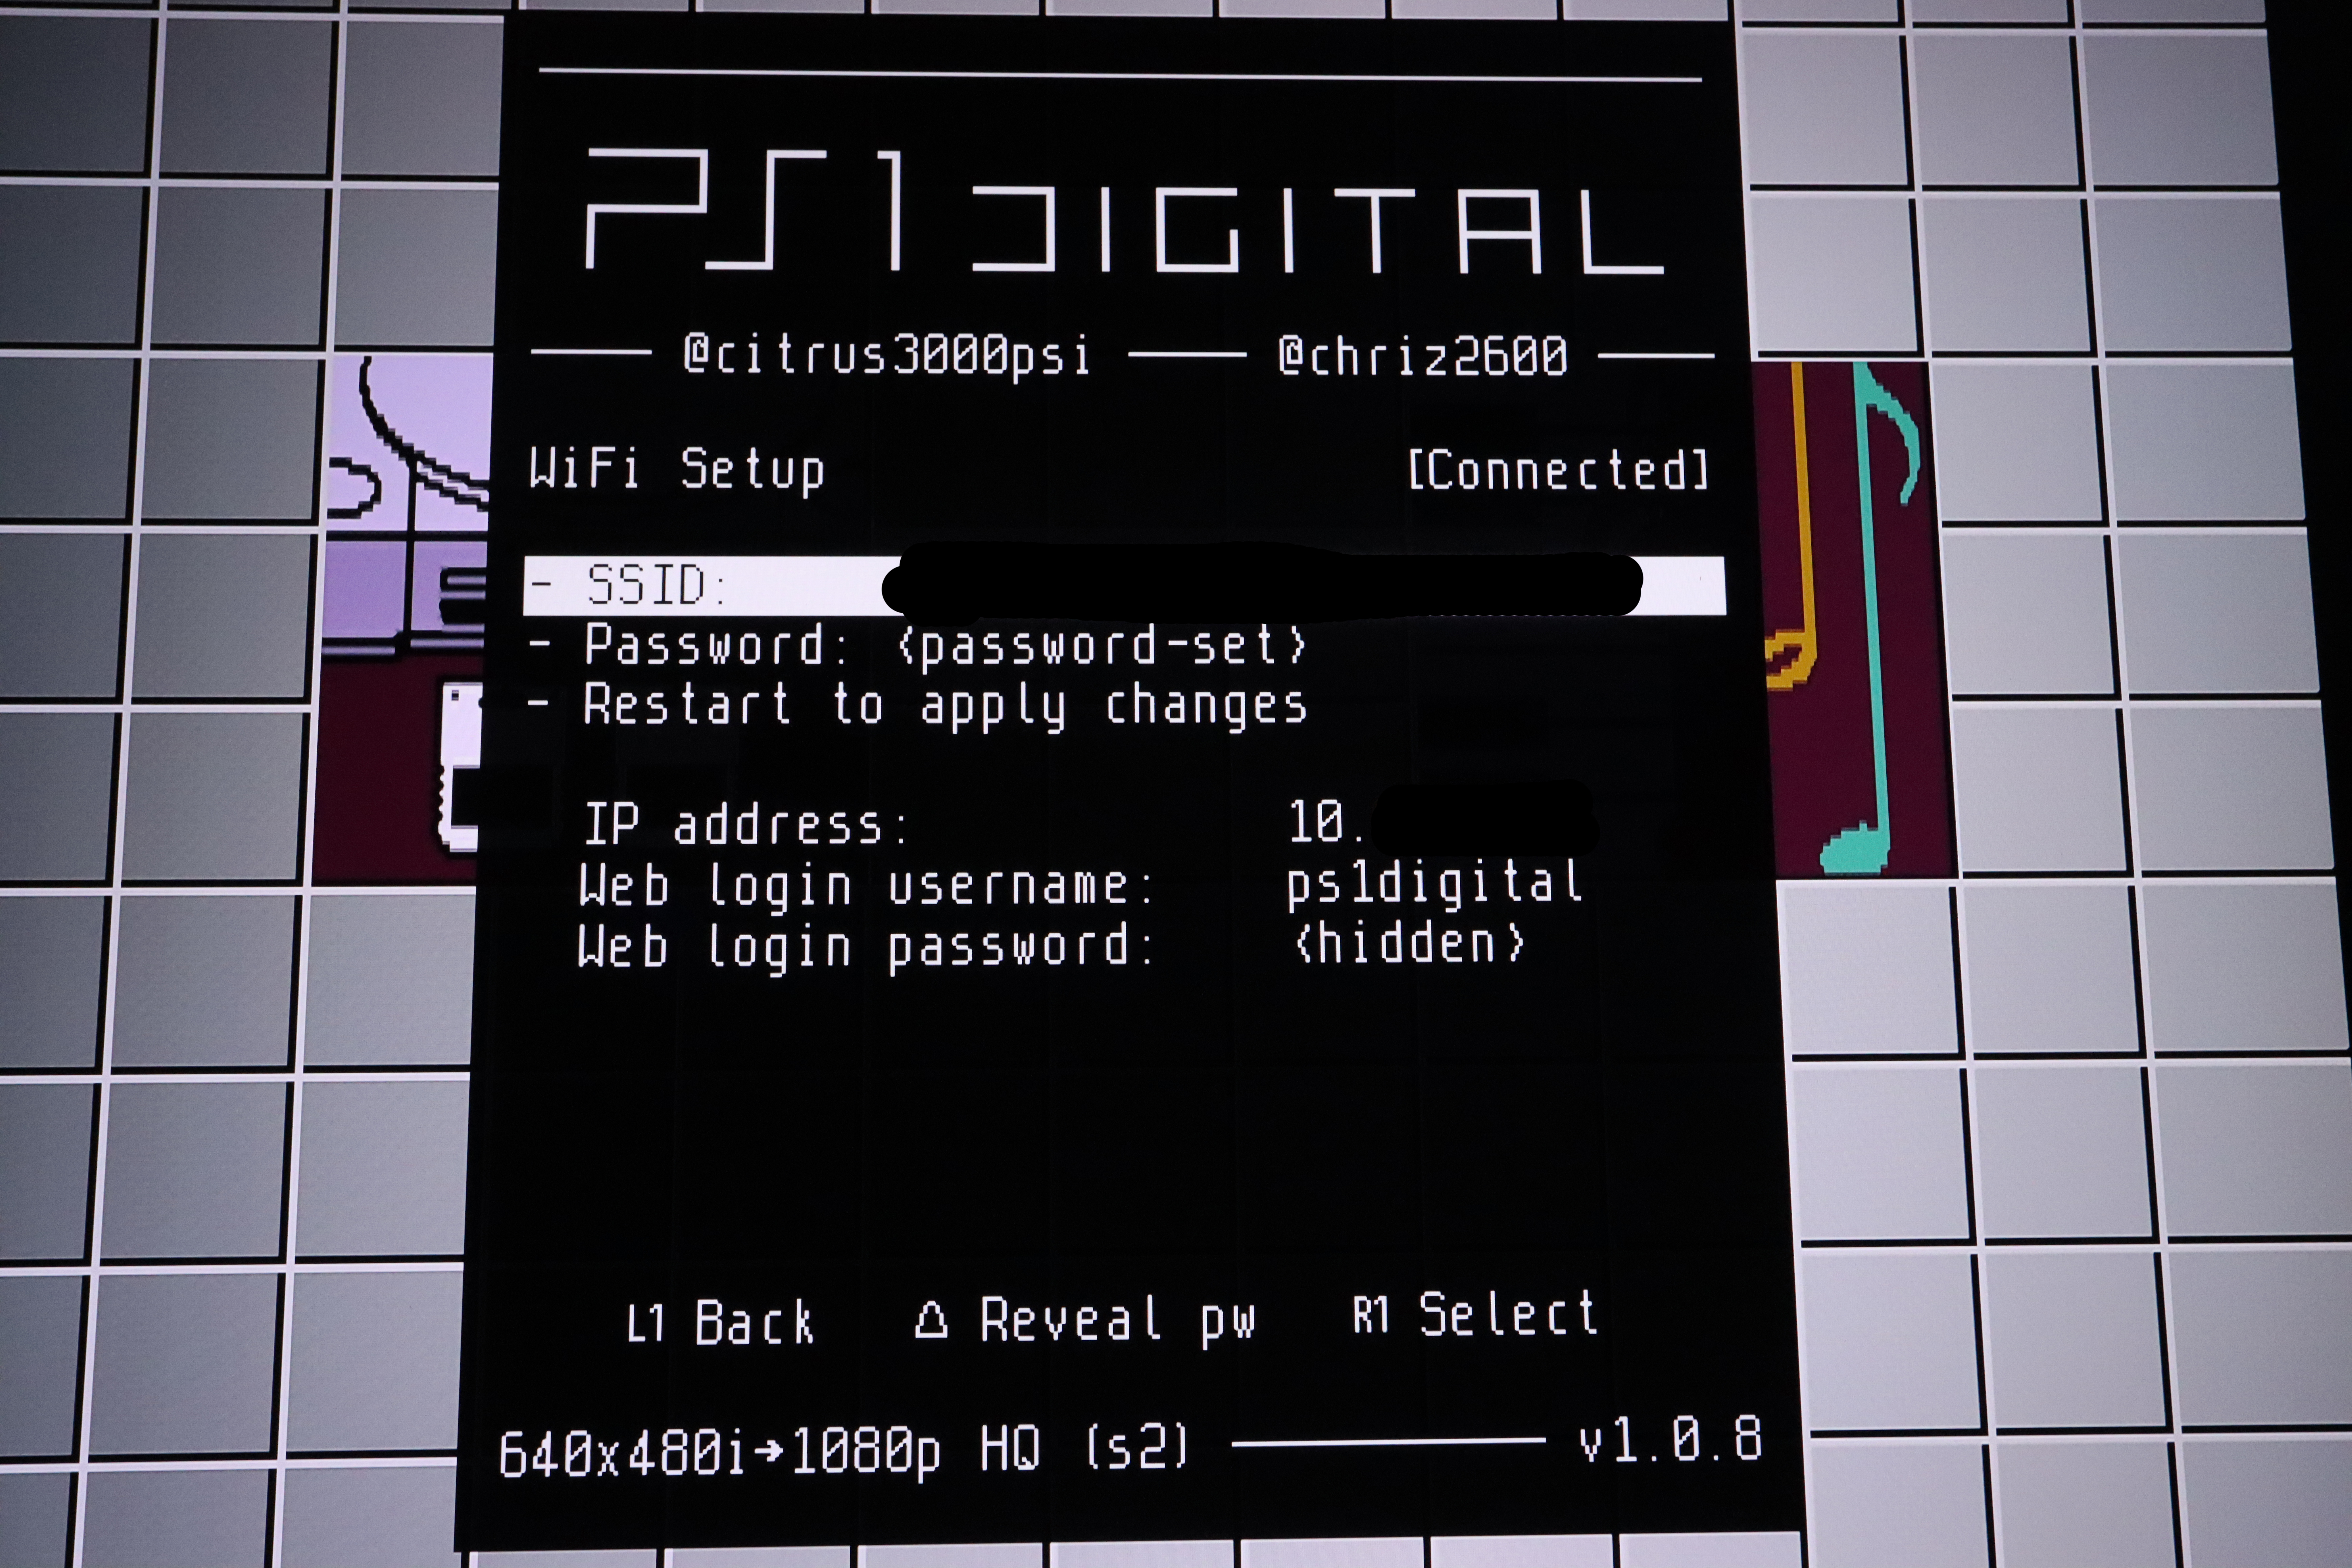
You can configure the board to connect to a WiFi network. Interestingly there is also a web command line management interface. It was kind of a pain to type the WiFi network name and password.
Here is a pretty empty OSD settings menu.
Here is a test/info screen. You can use it (with the test software) to test the installation.

Final thoughts
I’m very impressed with the PS1Digital. In the past I have tended to prefer just going with RGB output on most consoles since direct digital HDMI output mods tend to be fairly expensive. I bought the PS1Digital because the PS1 is one of my favorite consoles and it was definitely worth the $160 price.
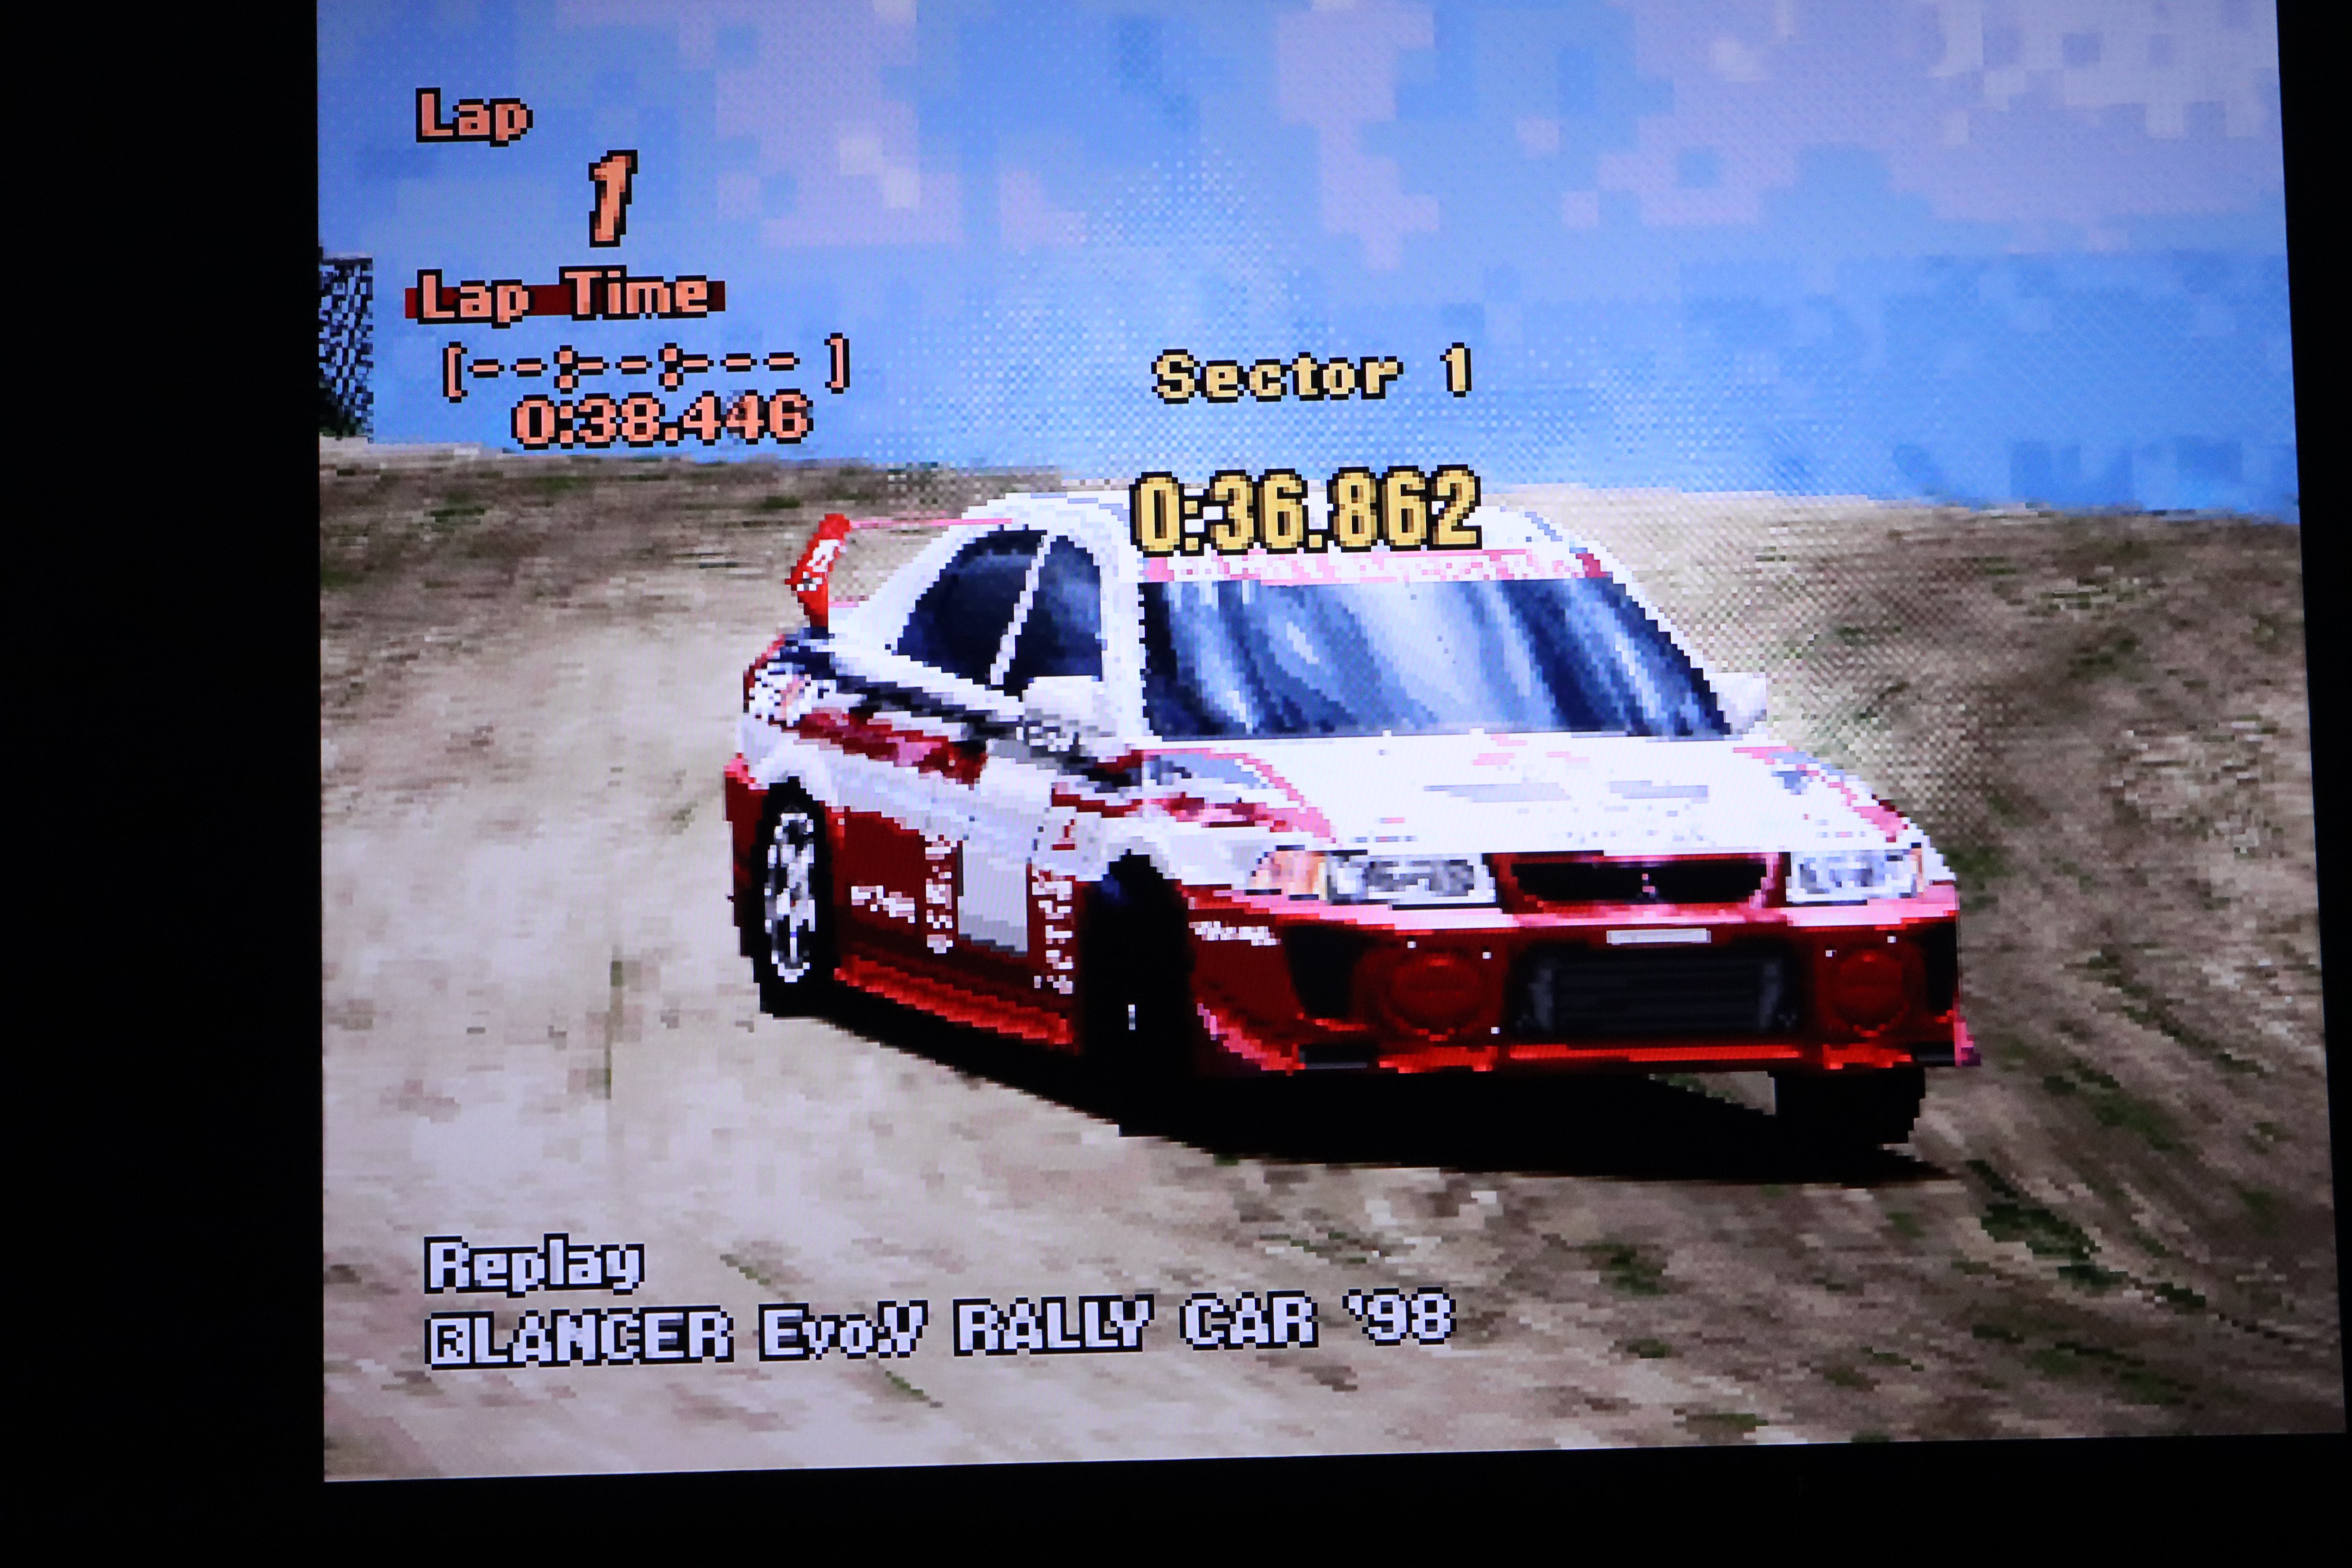
Normal RGB PS1 video output is very good, but this HDMI output is perfect. It’s even better than a PS2 with component, or PS1 games on the PS3. Obviously PS1 textures don’t always look so great nowadays, and there can be a lot of dithering, but this kit allows the PS1 to output video in the best possible way using original hardware.
Another nice thing about the PS1Digital is that it can switch between 240p and 480i instantly, which is something a lot of other solutions run into issues with. A lot of games will frequently switch between 240p and 480i on the PS1.
The first batch of kits sold out pretty much immediately, but I believe they’ll be continuing to restock new batches every month as long as there continues to be demand for them. A price of $160 may be a little high for some, especially if you need to have someone else install the kit, but if the PS1 is one of your favorite consoles it’s definitely worth considering.
I know a PS2Digital HDMI direct digital output mod is currently under development by citrus3000psi which will also likely be a great option considering the PS2 can play both PS1 and PS2 games.
To anyone who is interested in a PS1Digital but doesn’t feel comfortable installing it themselves I will be providing installation services.
For more information about the PS1Digital you can check out the official product page.