Original Xbox TSOP flashing guide
There are two types of mods you can do to run homebrew on your original Xbox. The first, and easiest method is a softmod. The second method is a hardmod, which requires a physical hardware modification. A softmod is useful, but doing things like replacing your hard drive is much more difficult than with a hardmodded system. This is a guide on how to hardmod an original Xbox through the Xbox TSOP flash chip.
The original Xbox has a small EEPROM chip on the motherboard in a TSOP package.This chip acts as the BIOS of the original Xbox. Basic hardware initialization code is executed from the BIOS every time the Xbox boots. By flashing the BIOS with an aftermarket BIOS you’ll be able to unlock additional functionality that the Xbox is capable of. Some features include booting from homebrew disks, using unlocked hard drives, and upgrading RAM.
Requirements
Here’s a list of things you’ll need to TSOP flash your original Xbox. The process shouldn’t shouldn’t take any more than an about an hour at the most once you have all of the items on the list.
- Original Xbox console, revision 1.0 through 1.5. A revision 1.6 console doesn’t have a TSOP flash chip, so this method won’t work, you’ll need to buy a modchip instead.
- Hexen boot disc, I used the 2017 version. Just download the .iso file and burn it to a DVD.
- Your console needs to be already softmodded, because otherwise you won’t be able to run the Hexen boot disc. I may eventually make a tutorial on how to softmod, but for now you can follow this tutorial on Reddit.
- Soldering iron, and some solder.
- Tools to open up your console.
Motherboard preparation
In order to TSOP flash your system you’ll need to open up your original Xbox to get to the motherboard. You will need to modify the motherboard to disable write protection on the TSOP flash chip.
The process of preparing your motherboard depends on the revision of your console. In the case of my revision 1.3 console all I had to do was bridge two pairs of solder pads. Most consoles require this same modification (any console from revision 1.2 through revision 1.5).
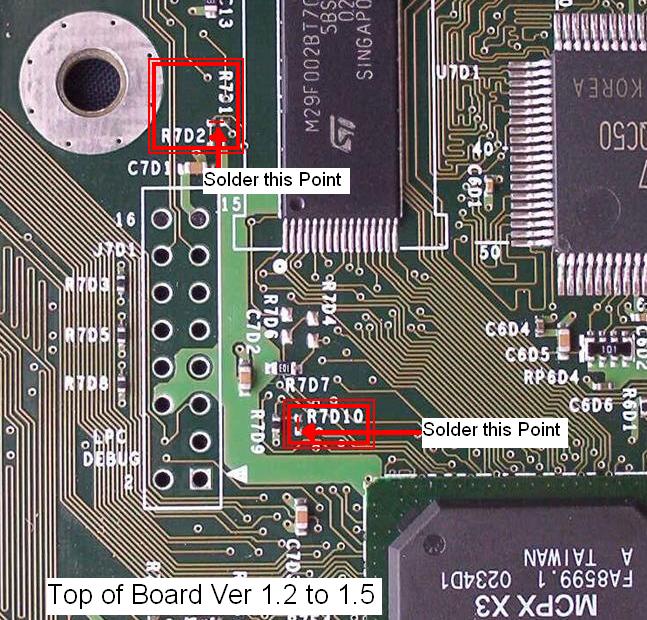
The image above shows the locations of the pads. You’ll need to solder the R7D1 pad to the R7D2 pad, and the R7D10 pads together. The solder pads are very small, but if you’re patient and careful you should be able to heat both of the pads, and apply a little extra solder until the two pads are connected.
It can be hard to tell if you successfully made the connections. If you are unsure you can always put back together your Xbox, and continue with this guide. Unsuccessful soldering results in an error when flashing the TSOP chip, so if you encounter that error just attempt to solder the pads again.
Booting into HeXEn to TSOP flash
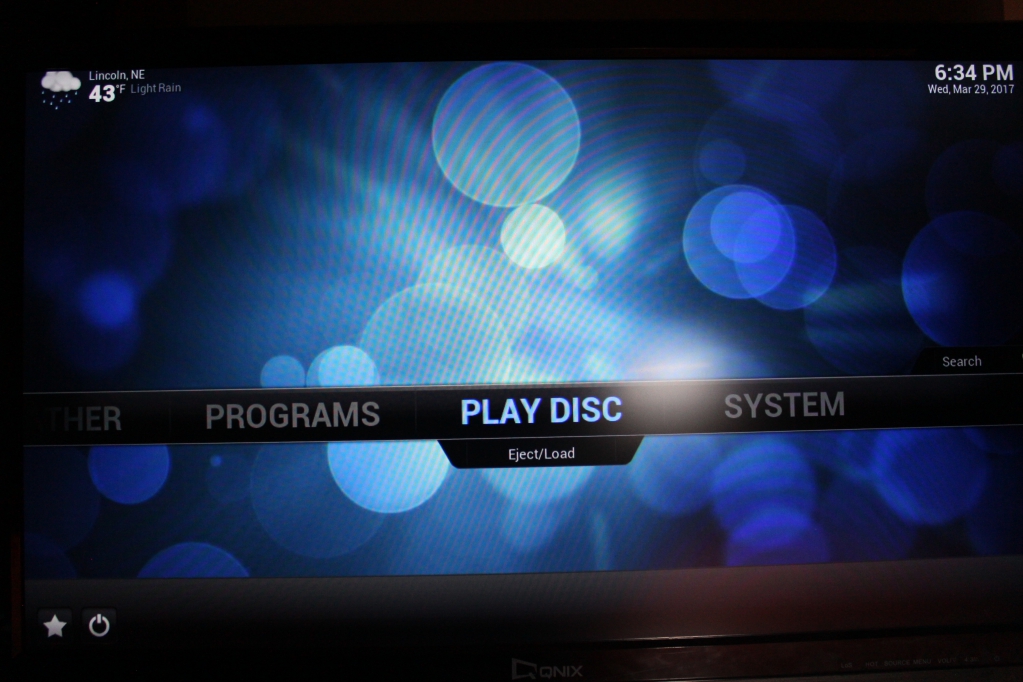
Now that your motherboard is prepared for flashing, you’ll need to actually flash the TSOP chip. Begin by starting your softmodded Xbox to your custom dashboard, then insert and launch the Hexen DVD.
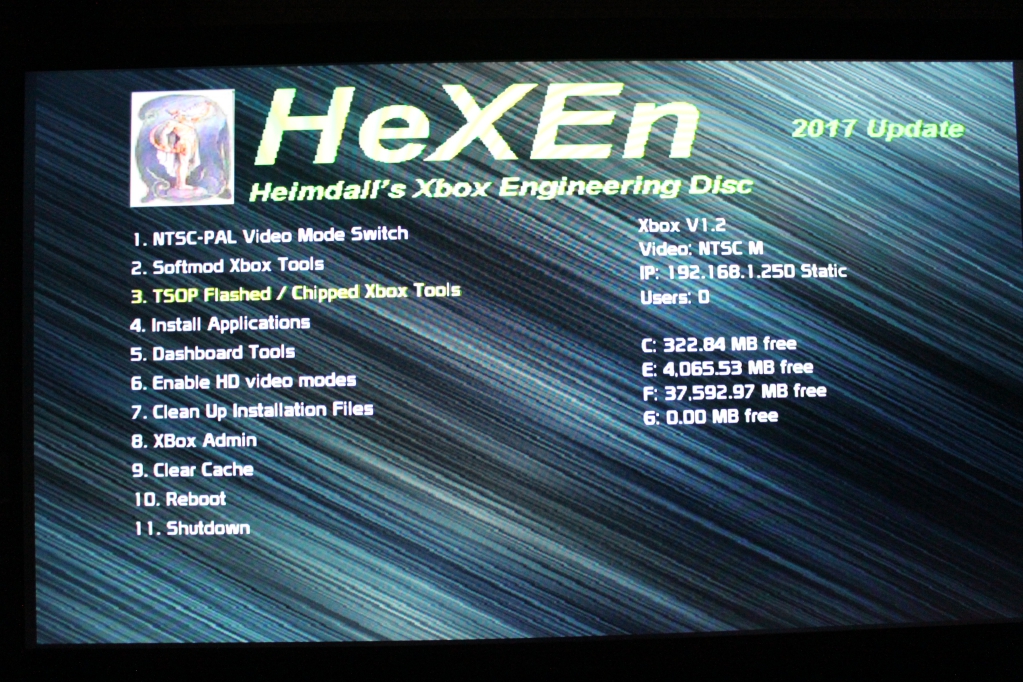
After a couple of minutes you should see the Hexen home screen below. There’s a whole lot of functionality built into this DVD, but for this post we’ll be covering just the third item labeled “TSOP Flashed / Chipped Xbox Tools”. Select that third option.
You’ll now see another menu, which is pictured below. Option 3.1 contains some useful instructions if you ever get confused. My TSOP chip isn’t a Winbond or Sharp chip, so I selected option 3.2 labeled “Modchip / TSOP Flash (Not Winbond).

BIOS selection and flashing
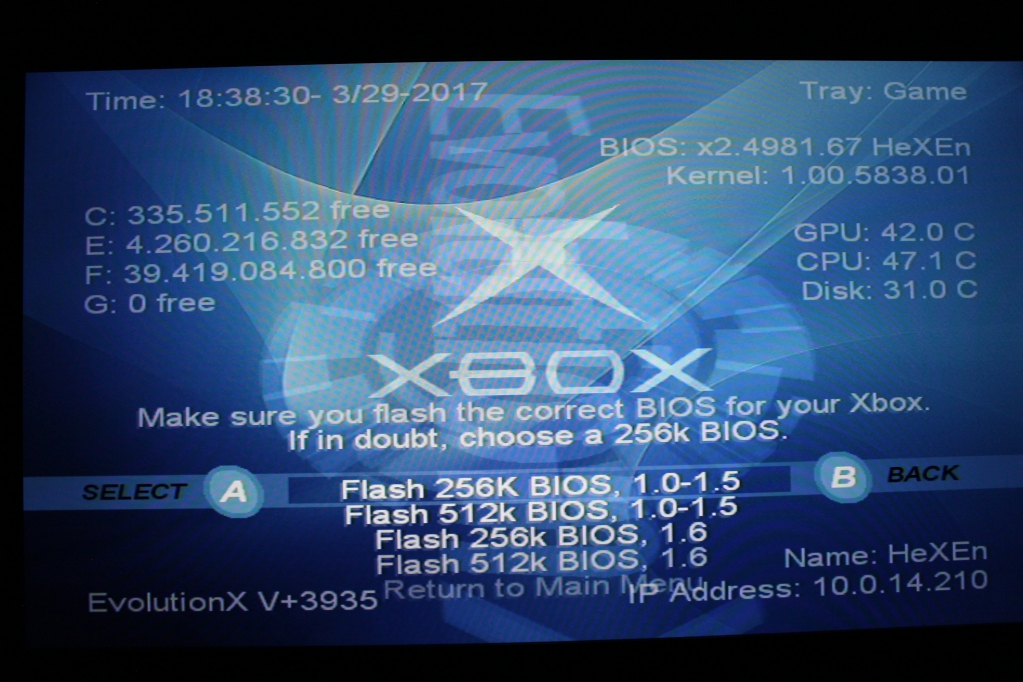
After you confirm your selection you’ll see a new menu pictured below. Since my Xbox has a 256KB TSOP chip, I selected the “Flash 256K BIOS” option. This is the most universal option since it works on all Xbox consoles from version 1.0 through version 1.5. Some older consoles support larger BIOS images, and the ability to have multiple BIOS images installed at the same time.
Now you’ll see a menu where you are prompted to select a BIOS. My disc came with several versions of iND, X2, and Evox. You’ll probably want to select a BIOS with “F and G” listed at the end of the name. Those letters correspond to drive letters that the hard drive is partitioned into. By selecting F and G you will be able to use an additional G partition for supporting larger hard drives.
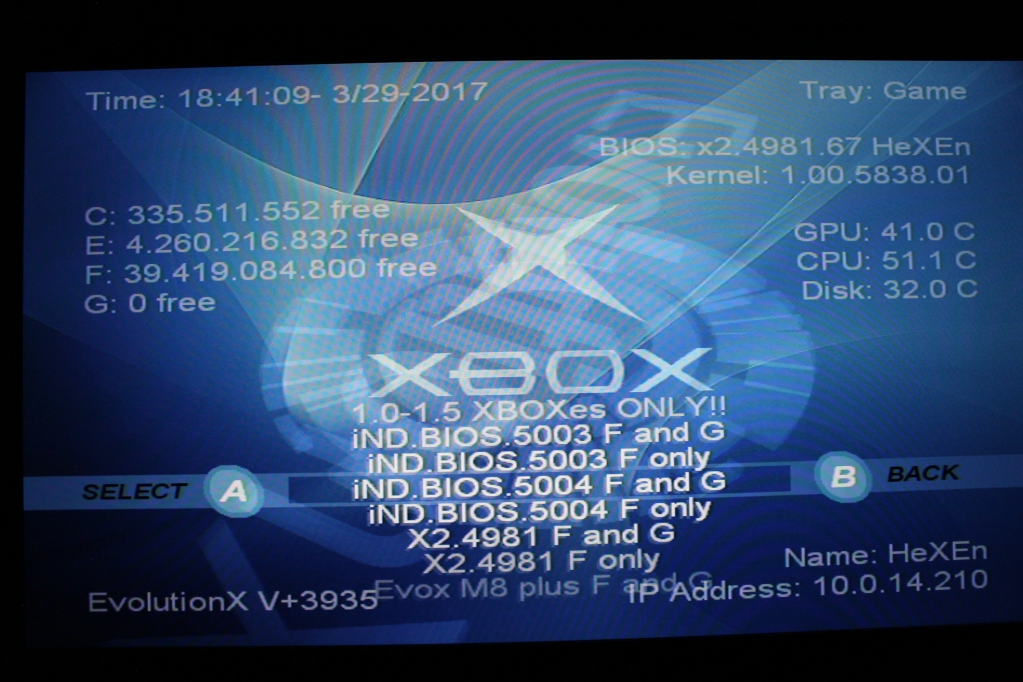
I personally chose iND BIOS 5004 F and G for my Xbox. I chose this BIOS because it allows you to configure the BIOS using a config file on the hard drive. Without the config file I would need to reflash a modified BIOS every time I wanted to make a change. This slows down the boot process, but it’s worth it for me.
The Xbox will then prompt you to confirm before it proceeds to flash the BIOS. After flashing the console will power off, you should be able to turn it back on using the power button.
Conclusion
Flashing an original Xbox’s TSOP BIOS is a pretty easy process that allows you to unlock additional functionality from your console. Obviously it’s a more risky process than a simple softmod, but if you succeed you’re system will be much easier to repair if a component like your hard drive or disc drive ever fails.
I’d like to mention that there is another option for hard modding an Xbox, a modchip. Installing a modchip involves soldering header pins through some holes on the Xbox’s motherboard, along with some other points. These holes are much larger and easier to work with than those solder pads used for TSOP flashing. If your console is a revision 1.6 Xbox, then a modchip is your only option.
“If your console is a revision 1.6 Xbox, then a modchip is your only option.” Not true. It has been possible to softmod 1.6 xboxes for some years now. I have done 2 myself.
This in terms of a custom Bios/hard mod not general kidding options as it even has you soft mod your device to complete the mod
i think he was refering to a modchip being the only other hardmodding option.
Yes, I see now that was what he must have meant.
Very comprehensive and very clear. Thank you for the write up and images. I myself am installing a couple modchips and it’s nice to see current information like this. Very appreciated!
Thanks for the info got 3 old unmodded xboxs not in use and think they would make a great little media players and great for emulation, Do you have any info on the 128mb ram upgrade?
You’ll want to install the XBlast OS BIOS before doing the upgrade, since it lets you to boot and test the memory after you install each memory chip (normally you’d have to install all four and have no idea which ones are causing problems if it fails to boot). Once installed you can switch back to any supported BIOS. The installation process is pretty straightforward. Buy four memory chips, ideally the same model as the ones that are already in your system. You can either buy new chips, or desolder chips from a donor console board. Then you just install… Read more »
I’ve been following your 128MB upgrade tutorial. I installed Xblast OS on my v1.0 TSOP, installed all 4 RAM chips and they cleared the test program. However, I am now stuck as I do not know how to install a different BIOS? Xblast OS does not seem to boot my Hexen disc. I don’t want to frag my TSOP after all this work to get the 128MB working. How do you go about reverting your BIOS?
XBlast OS can actually be used to flash the BIOS, I believe it’s the Flash Tools option in the menu.
is this possible to do with a hard modded xbox? have an xenium chip in mine
Yeah. You can flash the modchip itself.
Please tell me why coolers do not work correctly in UnleashX? When I set it to 40% it is the maximum flow, and 20% is the minimum and 100% is the minimum. This started after working with Xblast OS
My Xbox 1.4 wont boot after I flashed EvoX on an ST Tsop. It displays the blob animation, EvoX logo in the top left corner, then Microsoft under the X at last and just switches to black screen with a constant orange light. Saw similar instructions as yours that go through the same steps, followed them correctly with a HeXEn 2017 disc. What could be the problem? Does HeXEn install the EvoX dash automatically or do I need to transfer it myself into C: ? Oh, and it also won’t boot HeXEn anymore. Tried 5 different DVDRWs with different HeXEn… Read more »
Waldo Try burning to DVD-R.