Installing a PC heatsink onto an Xbox 360
In a previous post I wrote about the many heatsink options for the fat Xbox 360 consoles. I focused on the official heatsinks that Microsoft used. I was able to improve temperatures using newer heatsinks, but I still wanted to look into better cooling options. In this post I’ll be covering installing a PC heatsink onto an Xbox 360.
Things you’ll need
Here’s a list of items you’ll need for installing a PC heatsink onto an Xbox 360.
- A spare Xenon Xbox 360 CPU heatsink
- A spare Falcon Xbox 360 CPU heatsink
- Arctic Alumina thermal adhesive
- Dremel
- Pliers
- Clamp
- Cooler Master Hyper TX3 heatsink
- Thermal paste
- Tape
- 80mm fan
- Soldering iron and solder
Those items are specifically for the final mod that I ended up with. I used the Xenon CPU heatsink for the mount of the new CPU heatsink, and the Hyper TX3 for the heatsink itself. You can make your own mount, or use any other PC heatsink as long as it fits.
I ended up using a Falcon CPU heatsink with an 80mm fan taped on top for the GPU heatsink. You could alternatively make a second Hyper TX3 based heatsink for the GPU, which I may end up doing in the future.
I also used Arctic Alumina thermal adhesive. Other thermal adhesives could be used. You may also be able to solder or weld the two heatsinks together which could result in better performance.
Preparing the Xenon CPU heatsink base
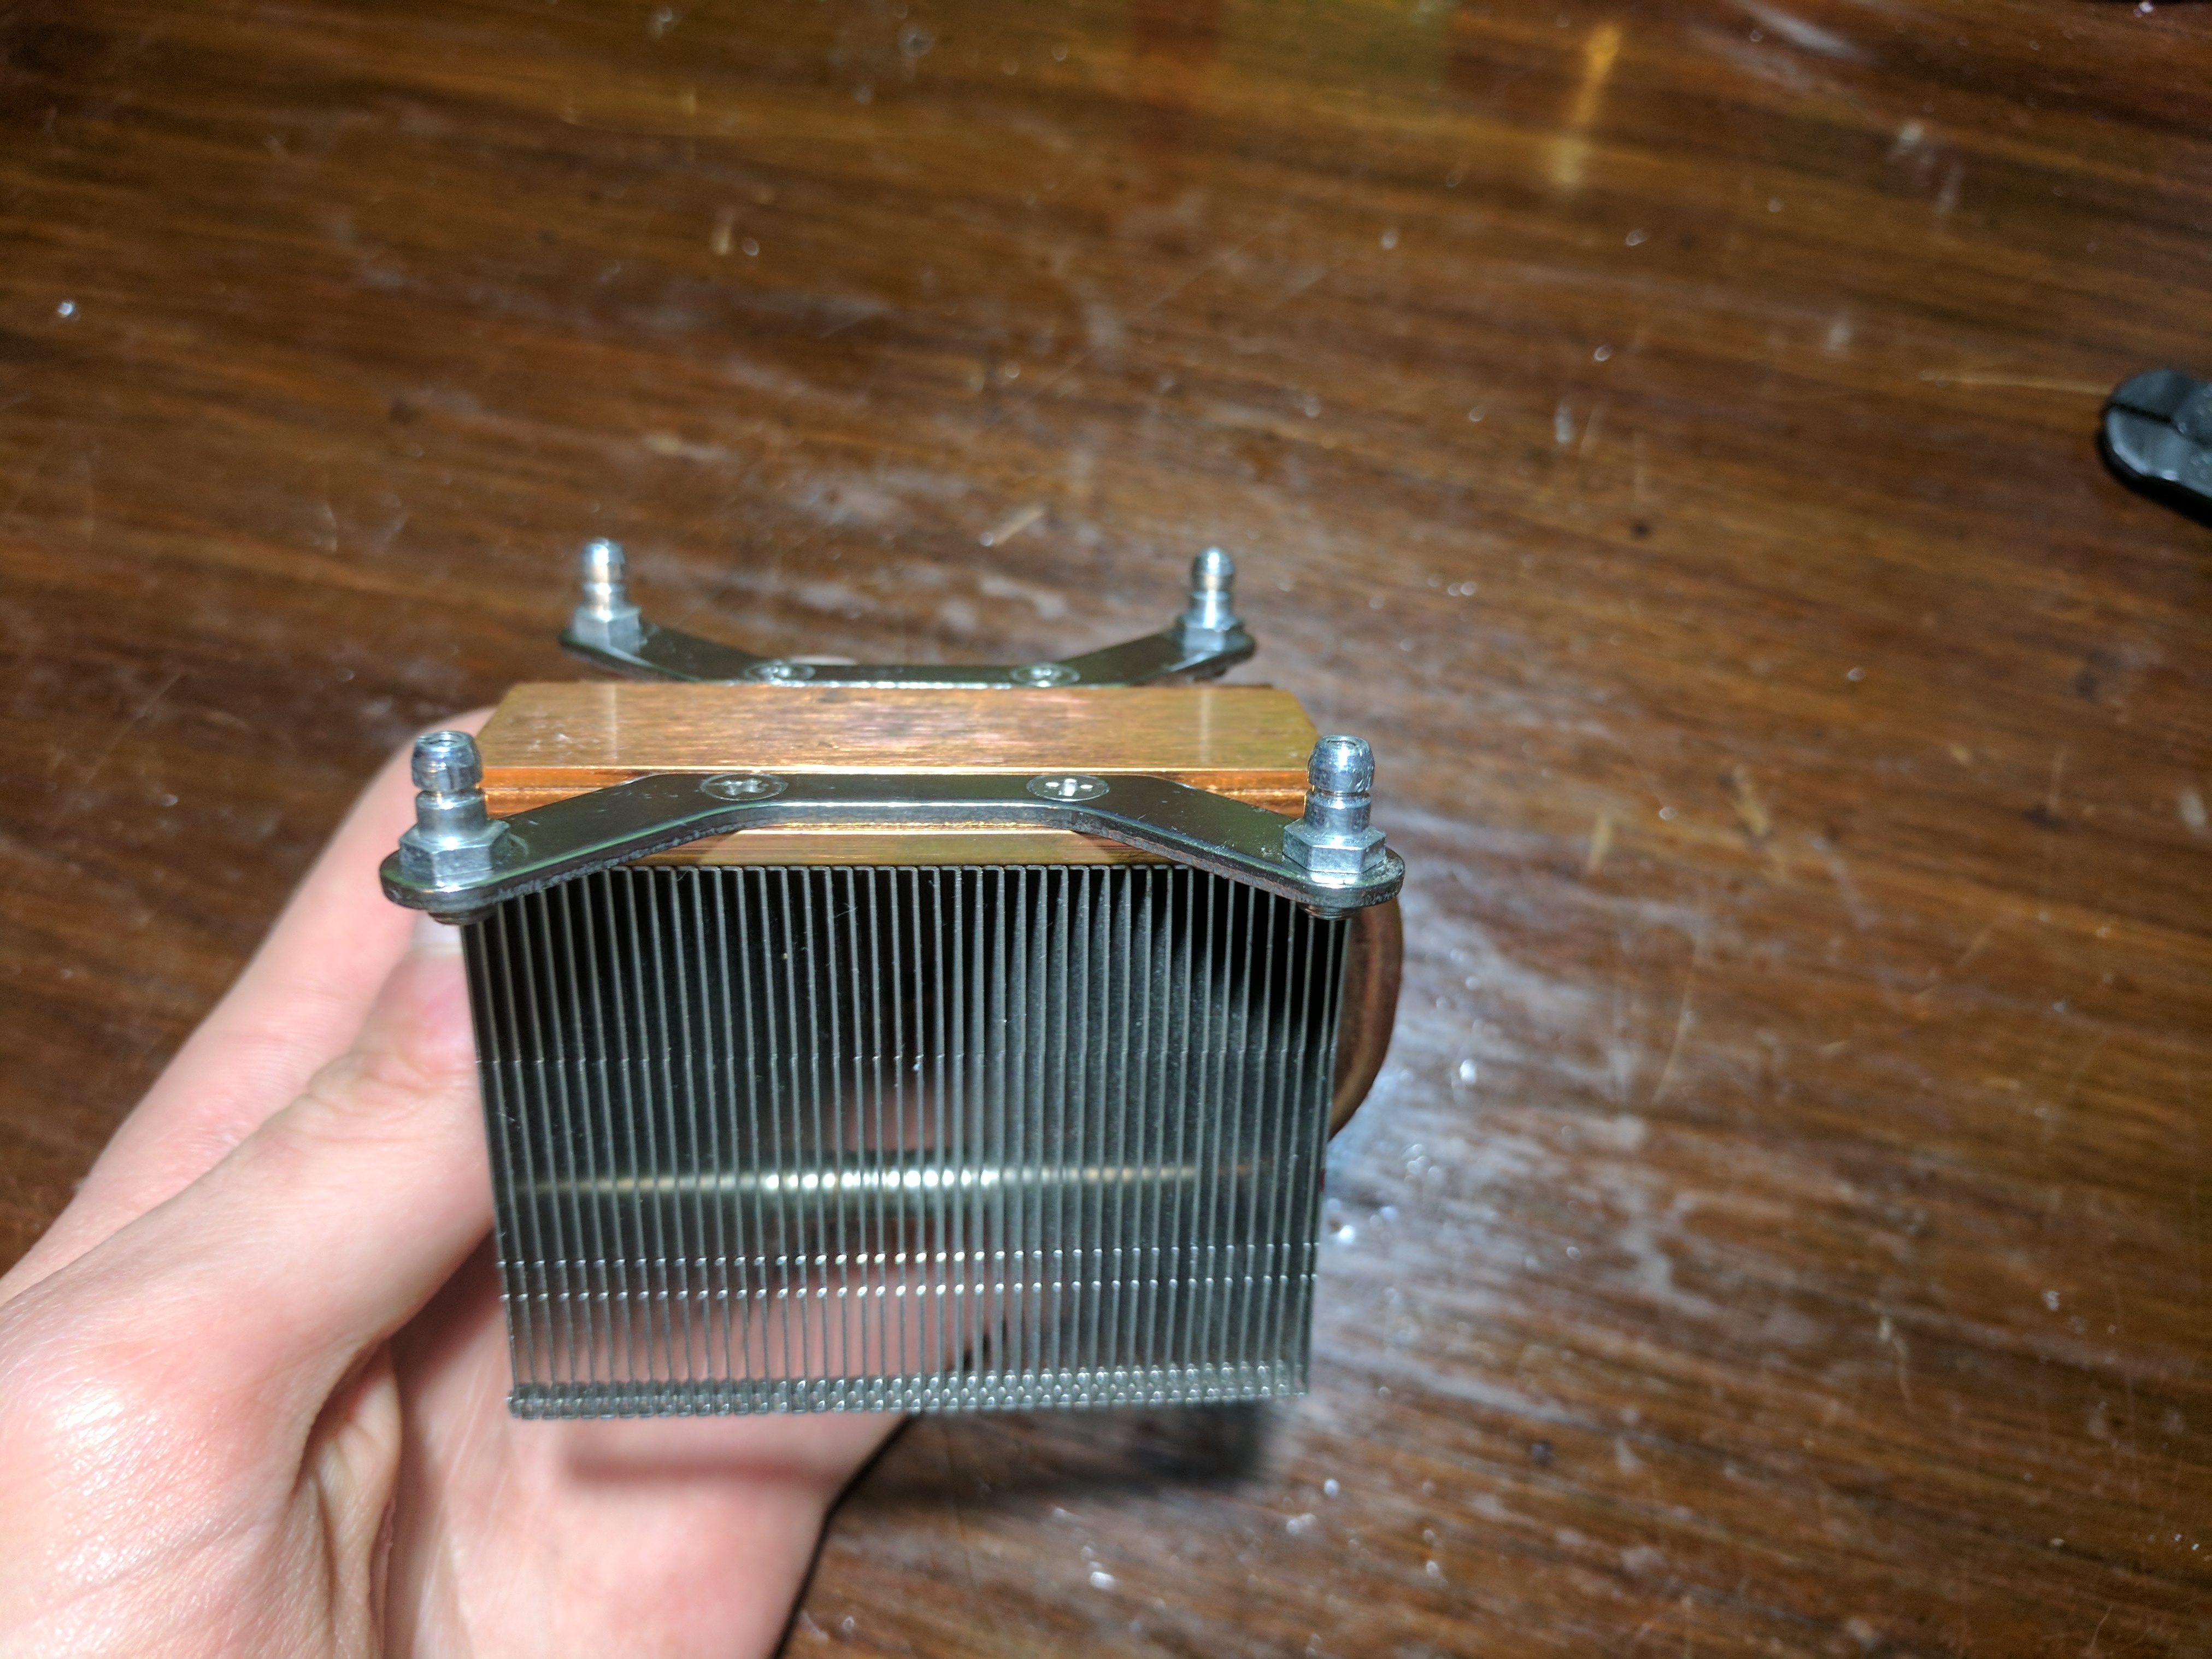
The Xenon CPU heatsink that came with my Xbox 360 seemed like a good option for a heatsink base. It already has the mounting holes I needed, and had a nice large solid copper base to attach the actual heatsink to.
To prepare this copper base you’ll need to first remove all of the screws. The four X-Clamp prongs can be removed by twisting them off using pliers. The mounting brackets can be removed using a standard screwdriver.

Now that you have just the heatsink you need to remove all of the aluminum fins, and the copper heat pipe. I used pliers to remove each aluminum fin individually. This was a slow process, but worked. It may be easier to just use a tool like a Dremel to cut them off directly.
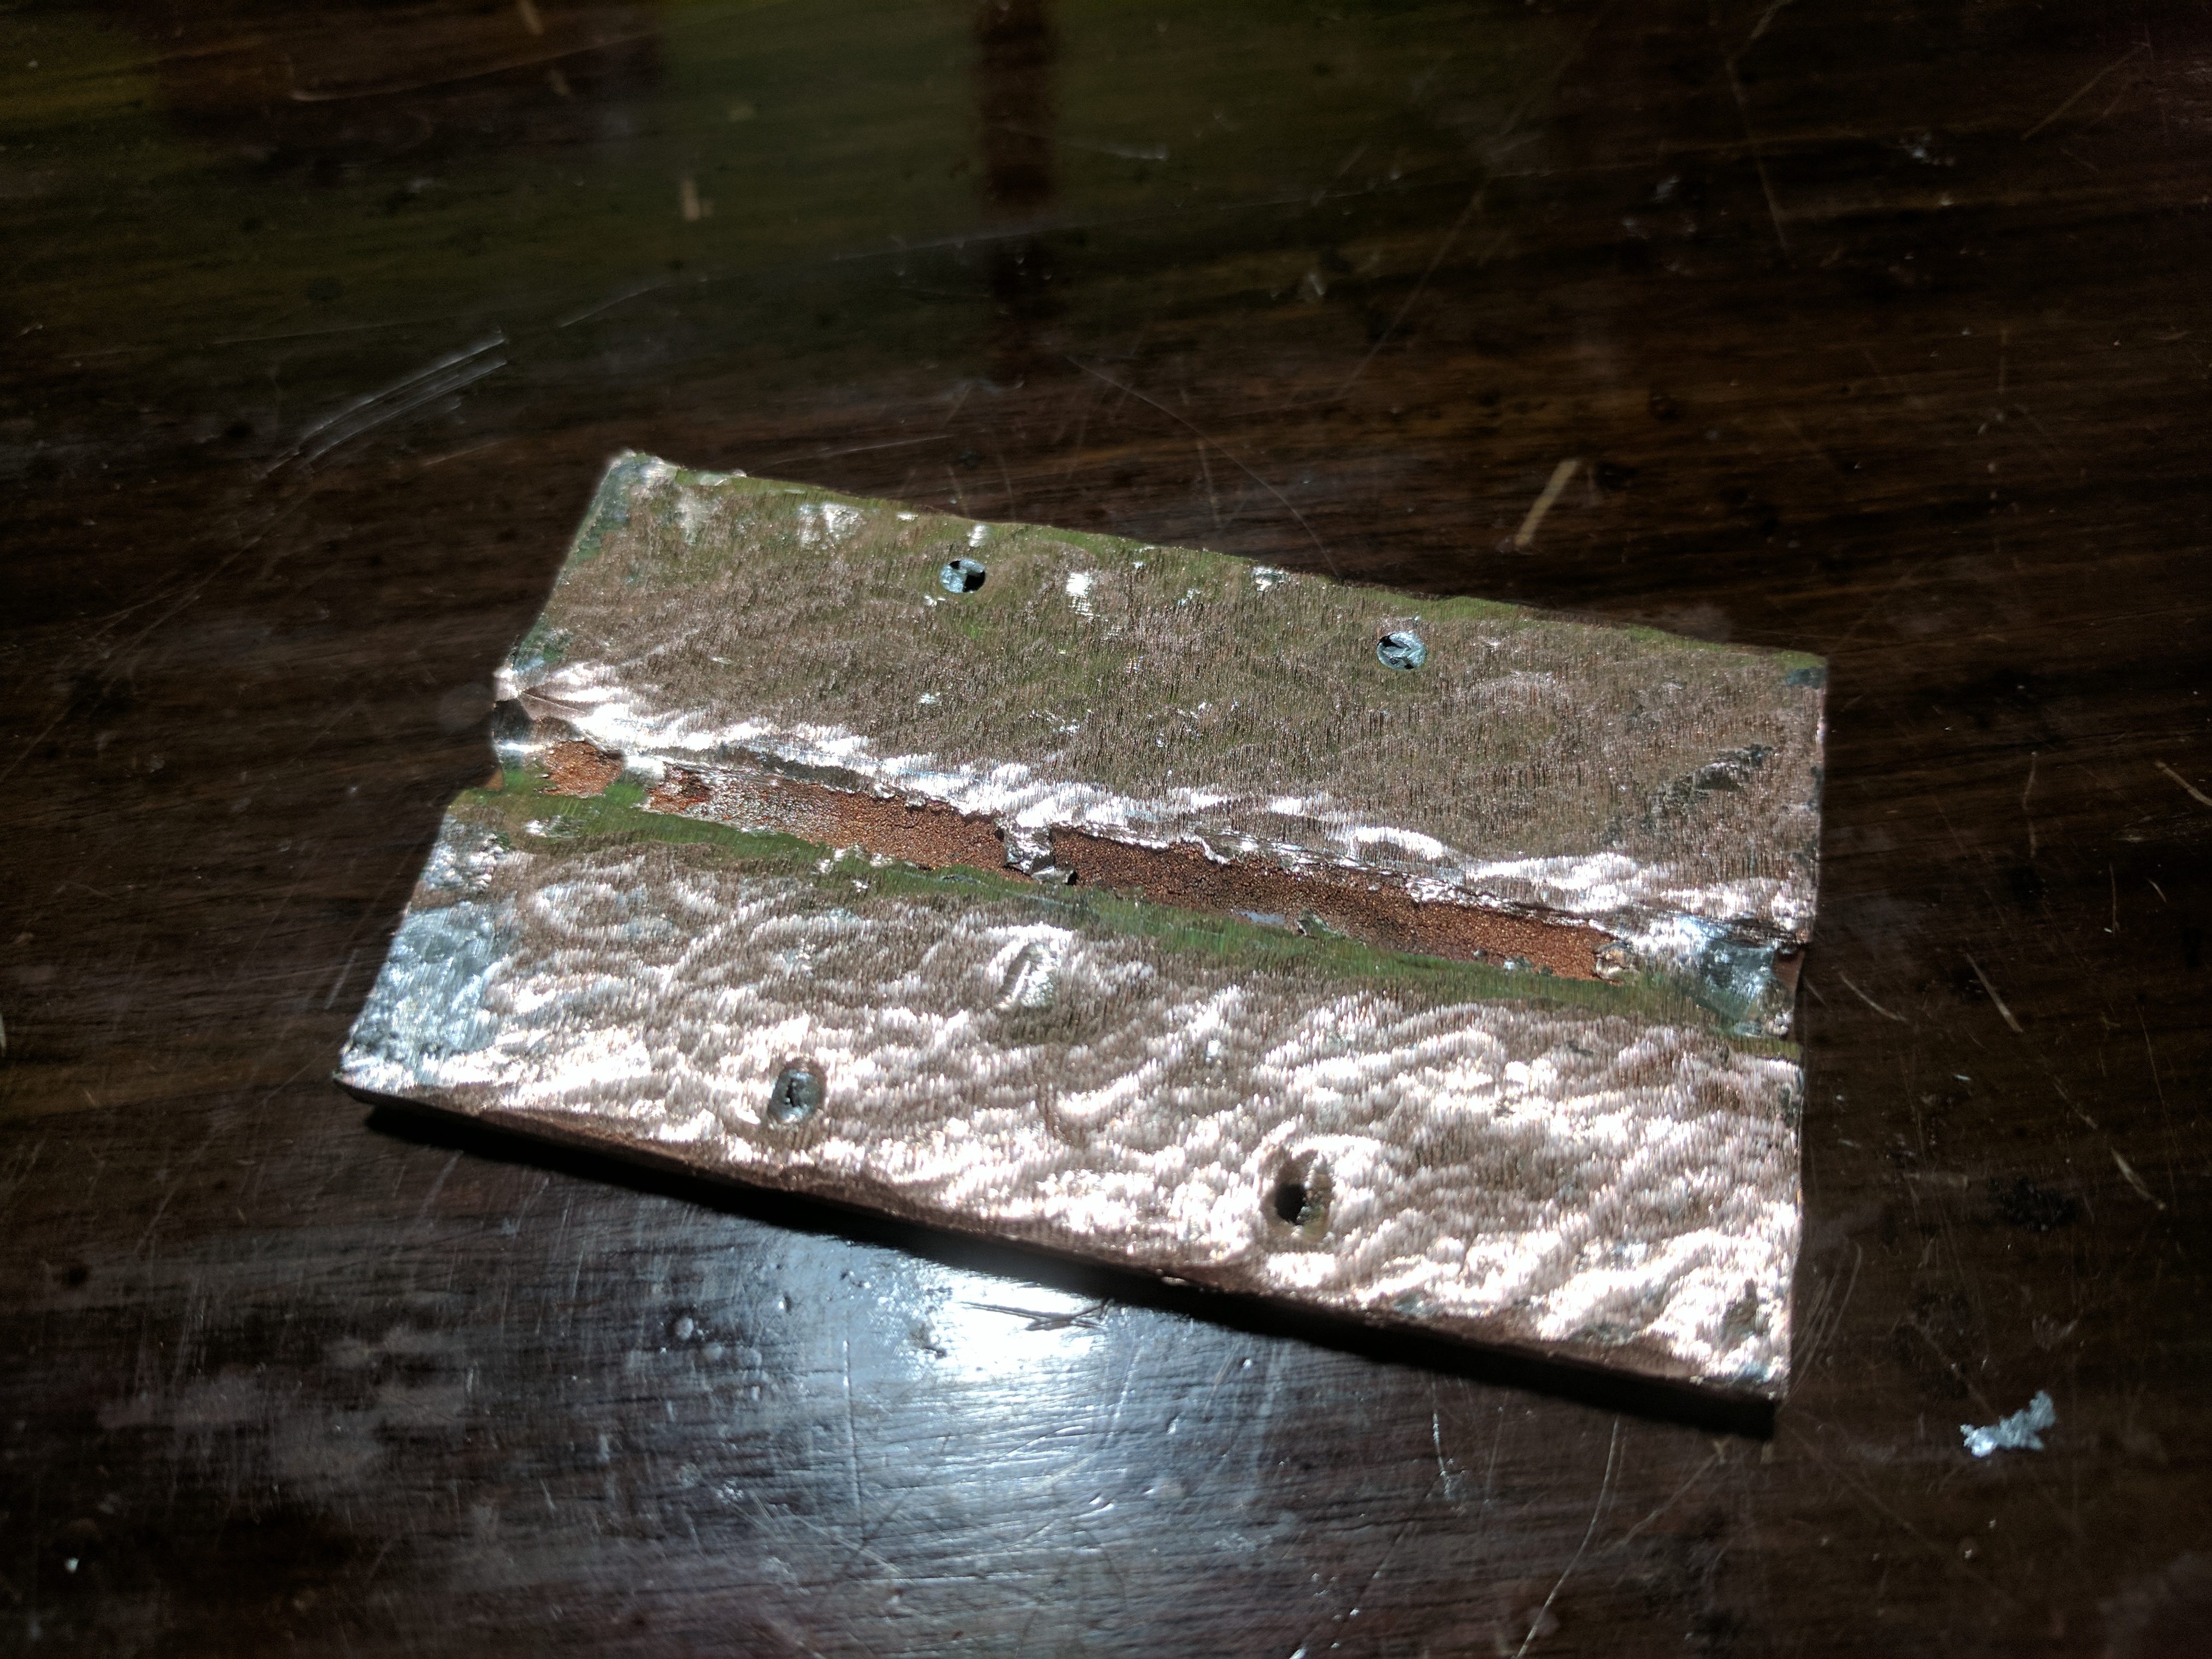
Once the aluminum fins have been removed you’ll need to remove any of the remaining aluminum, and get the copper underneath to be as smooth as possible. I used a few different Dremel grinding, sanding, and polishing tips to remove the aluminum, and smooth out a bit.
Pictures make the surface look really rough, but it’s fairly smooth to the touch. It doesn’t have to be perfect because the thermal adhesive will fill in any gaps.
Attaching the PC heatsink
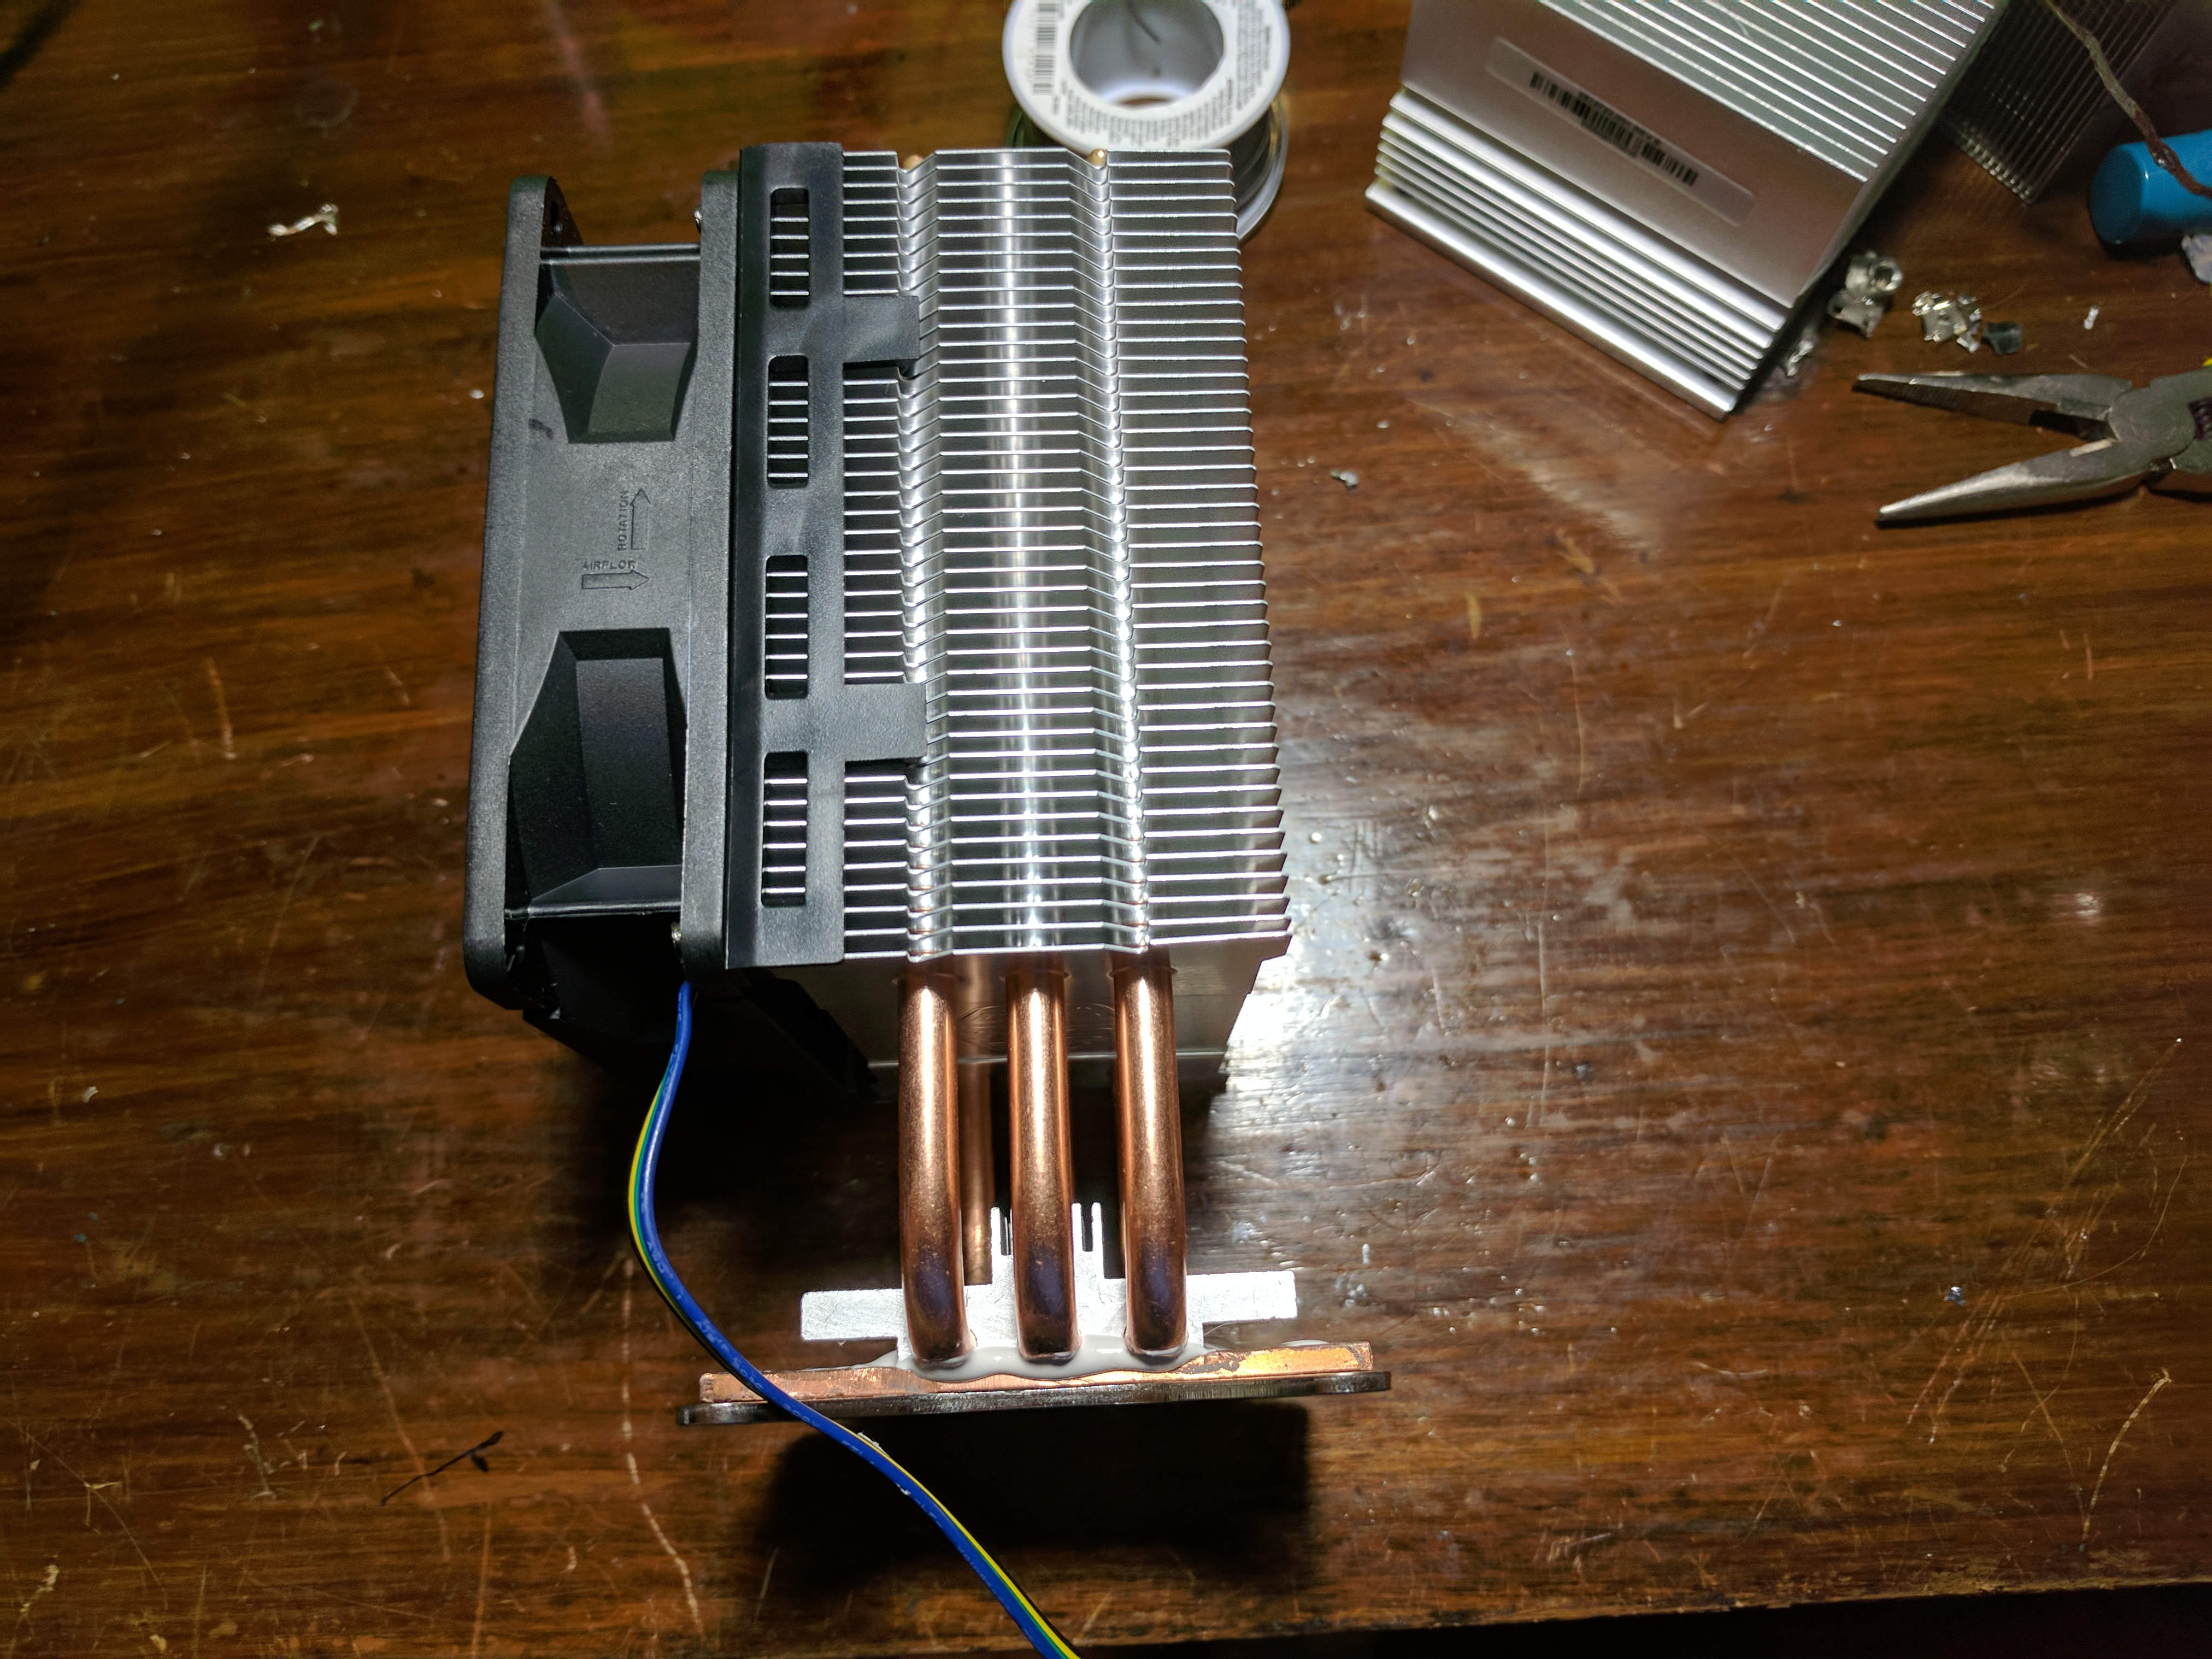
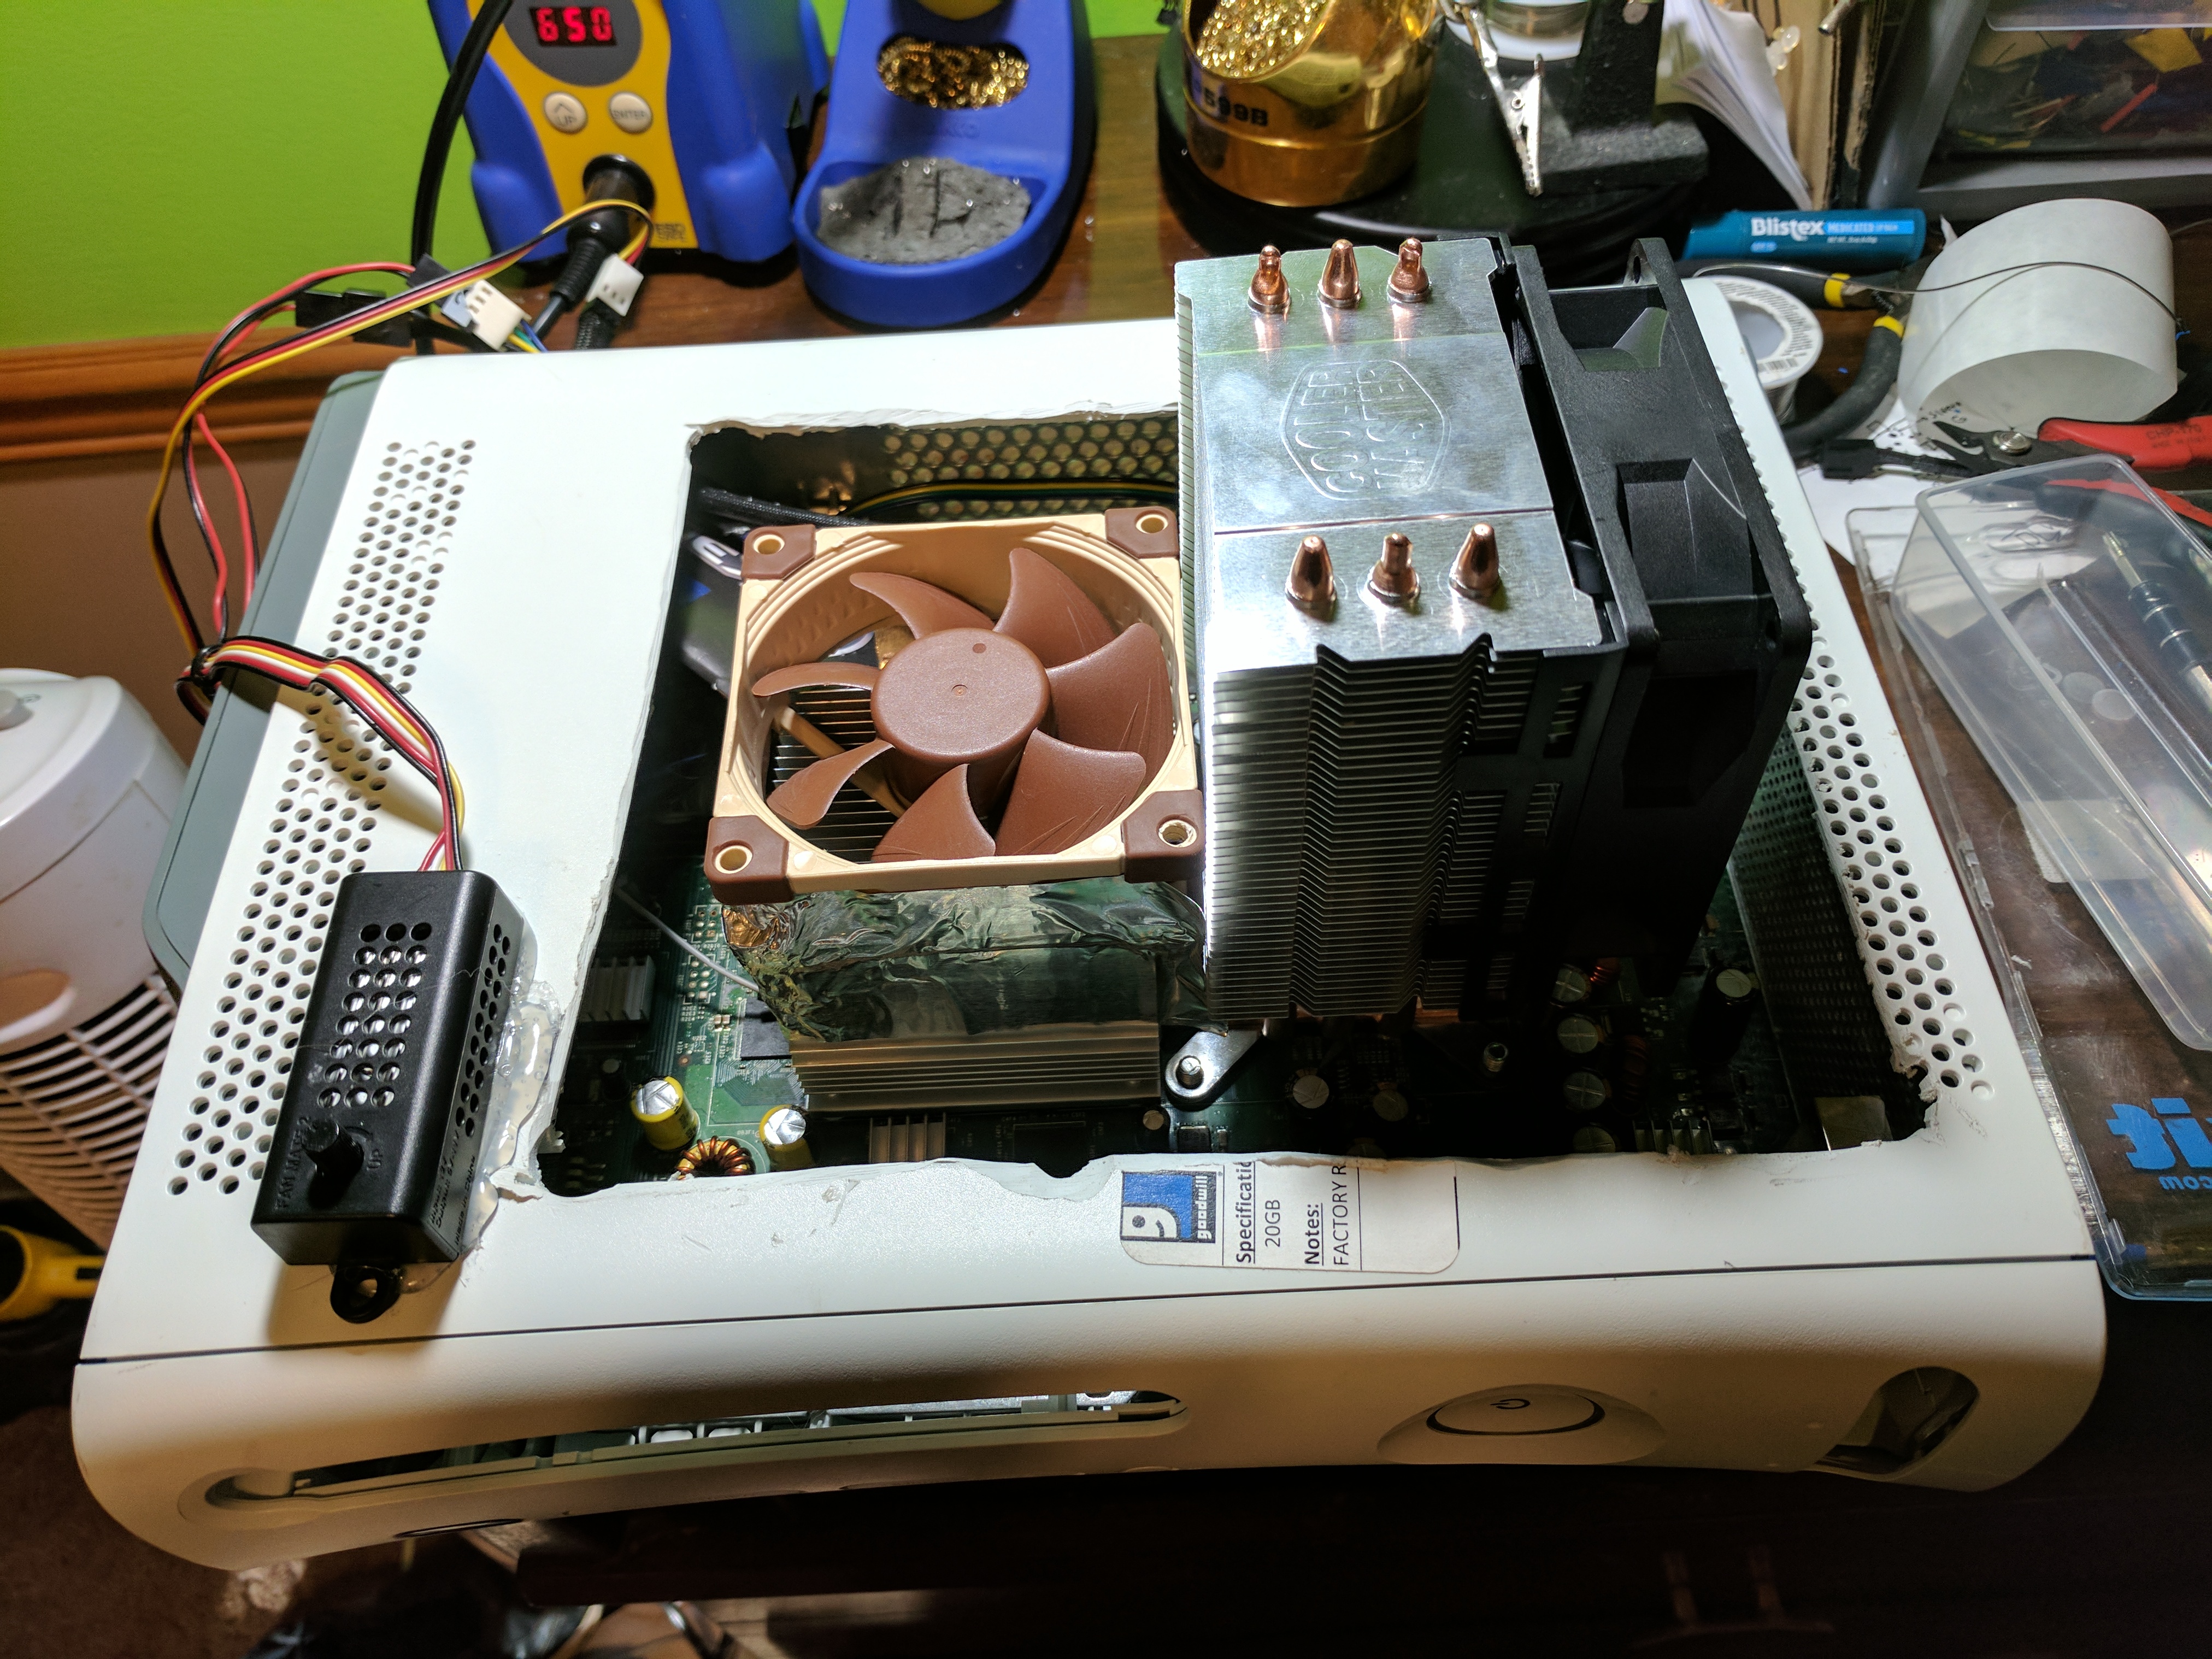
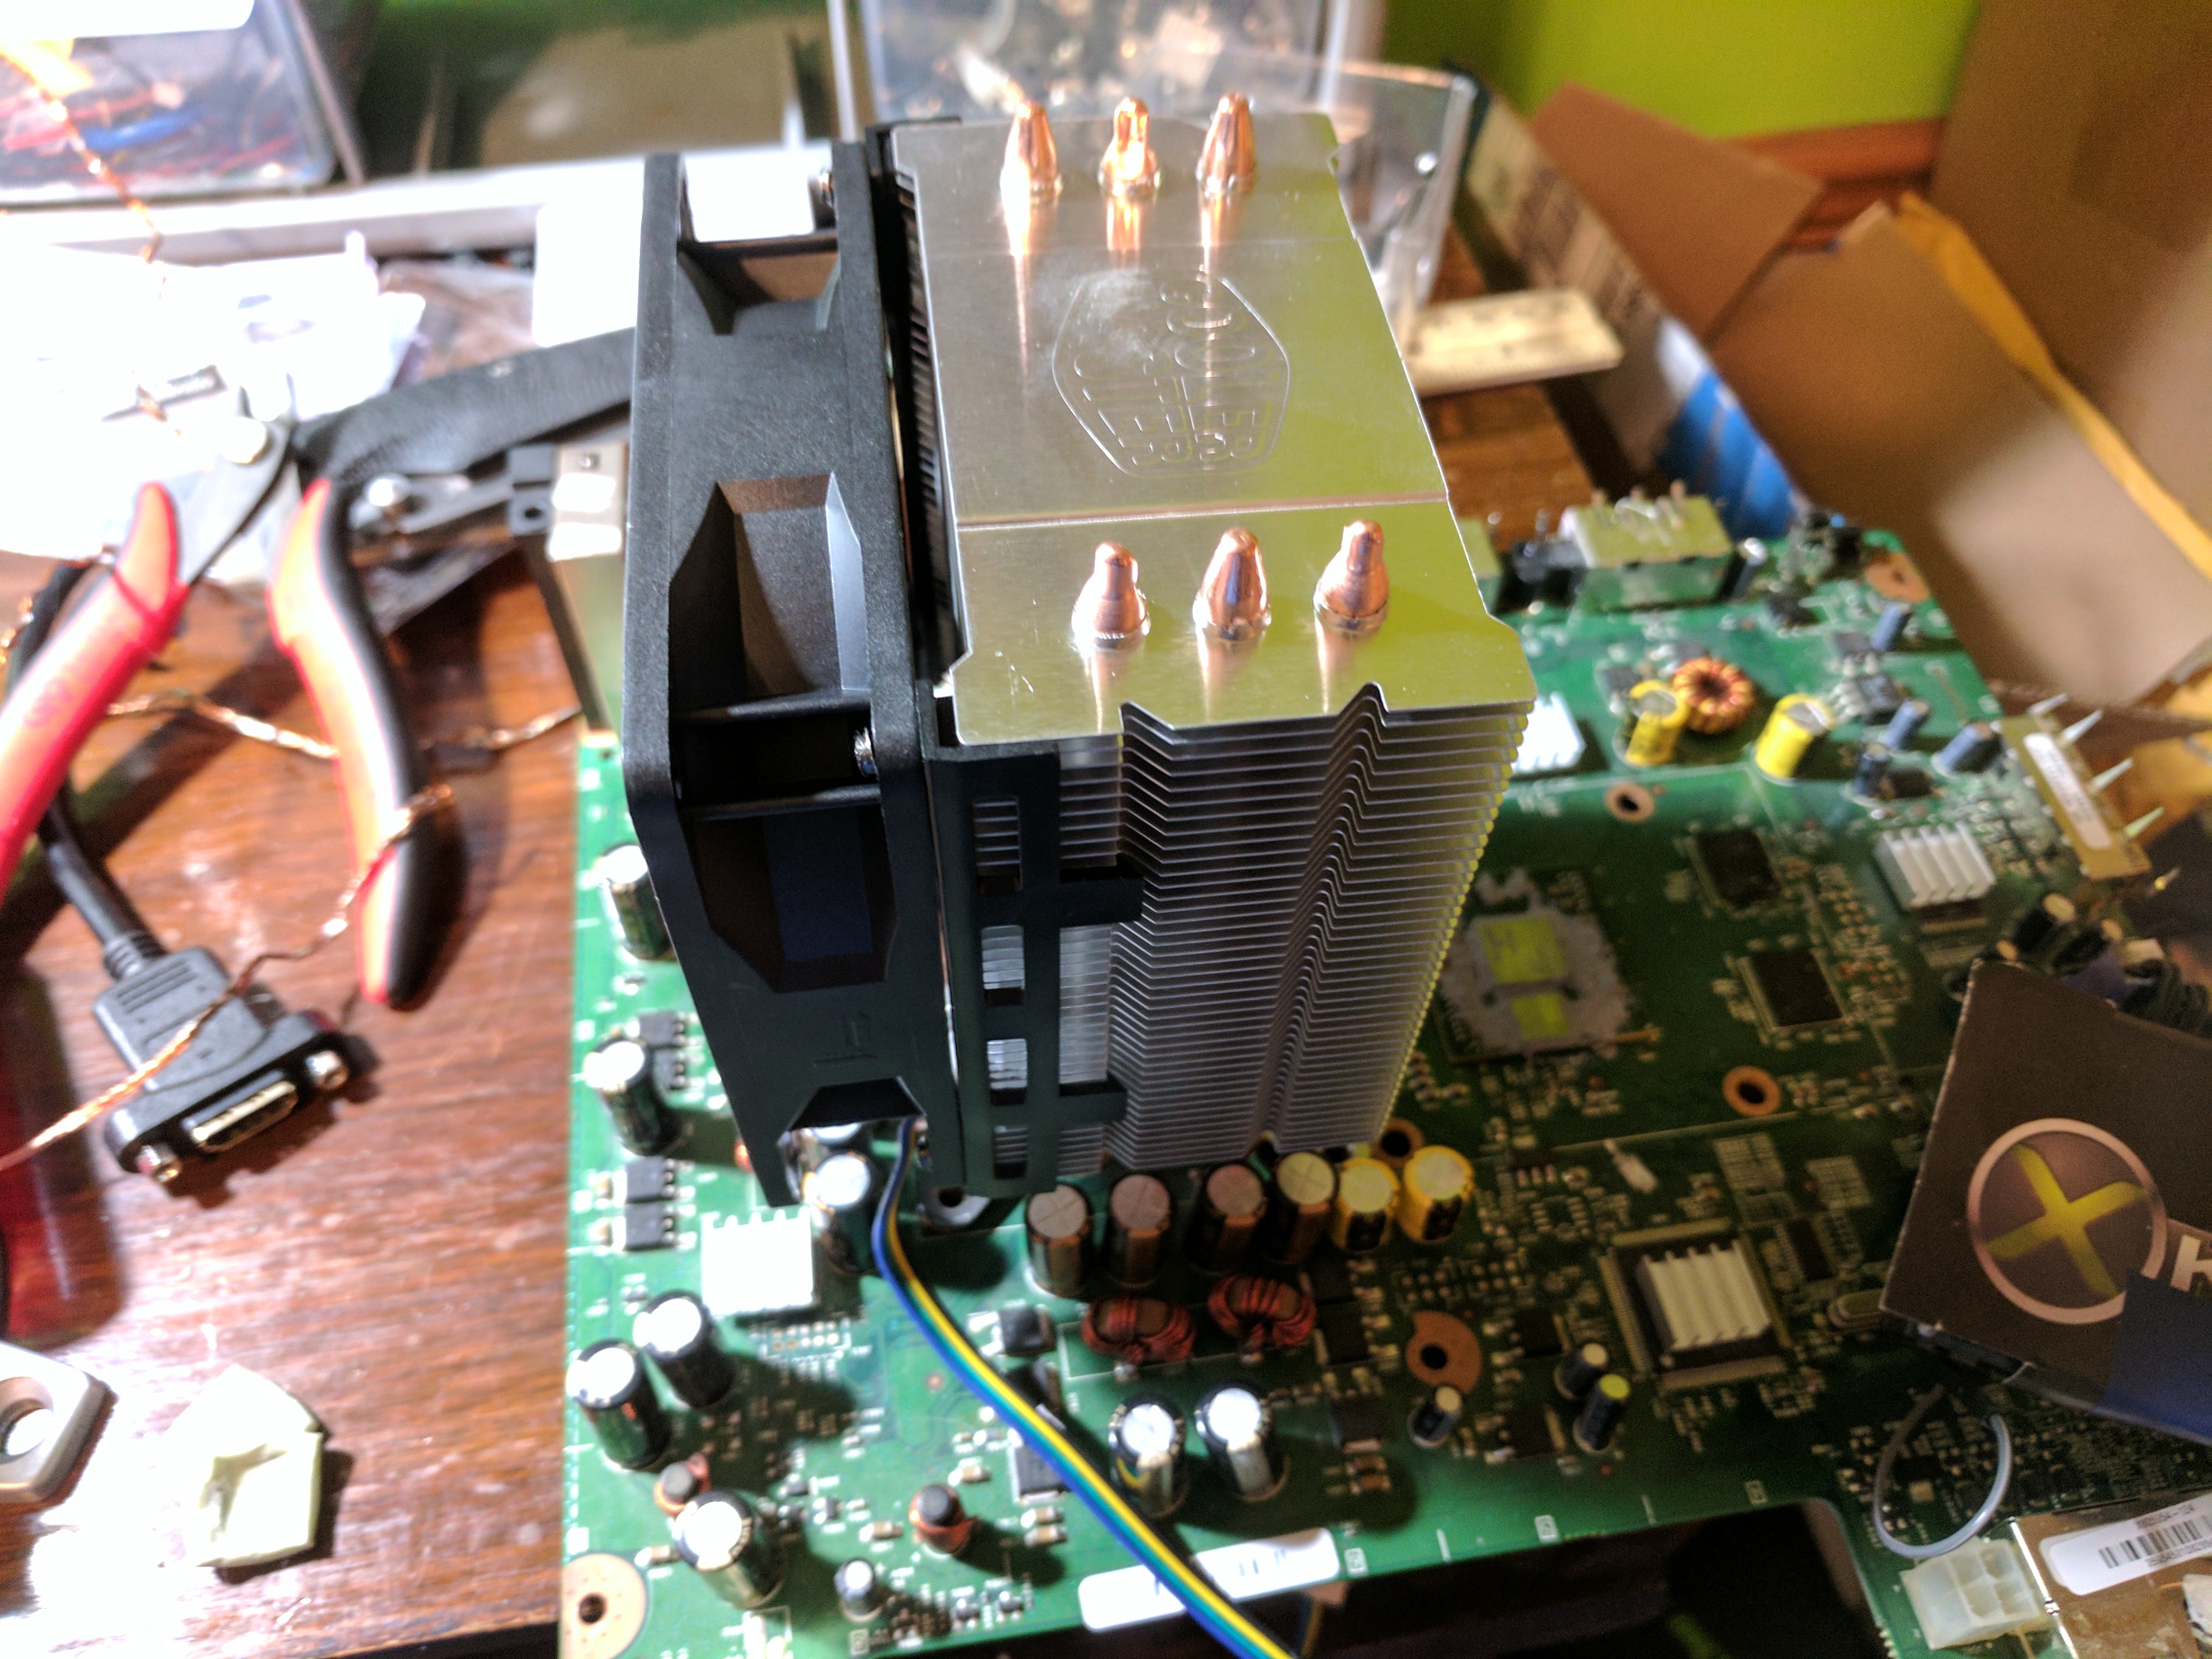
You’ll want to reattach the mounting hardware to the copper block, and then do a test fit on the motherboard. You can mount your heatsink in any direction that fits. I mounted my heatsink so that a fan sits at the bottom and pushes air through the heatsink upwards.
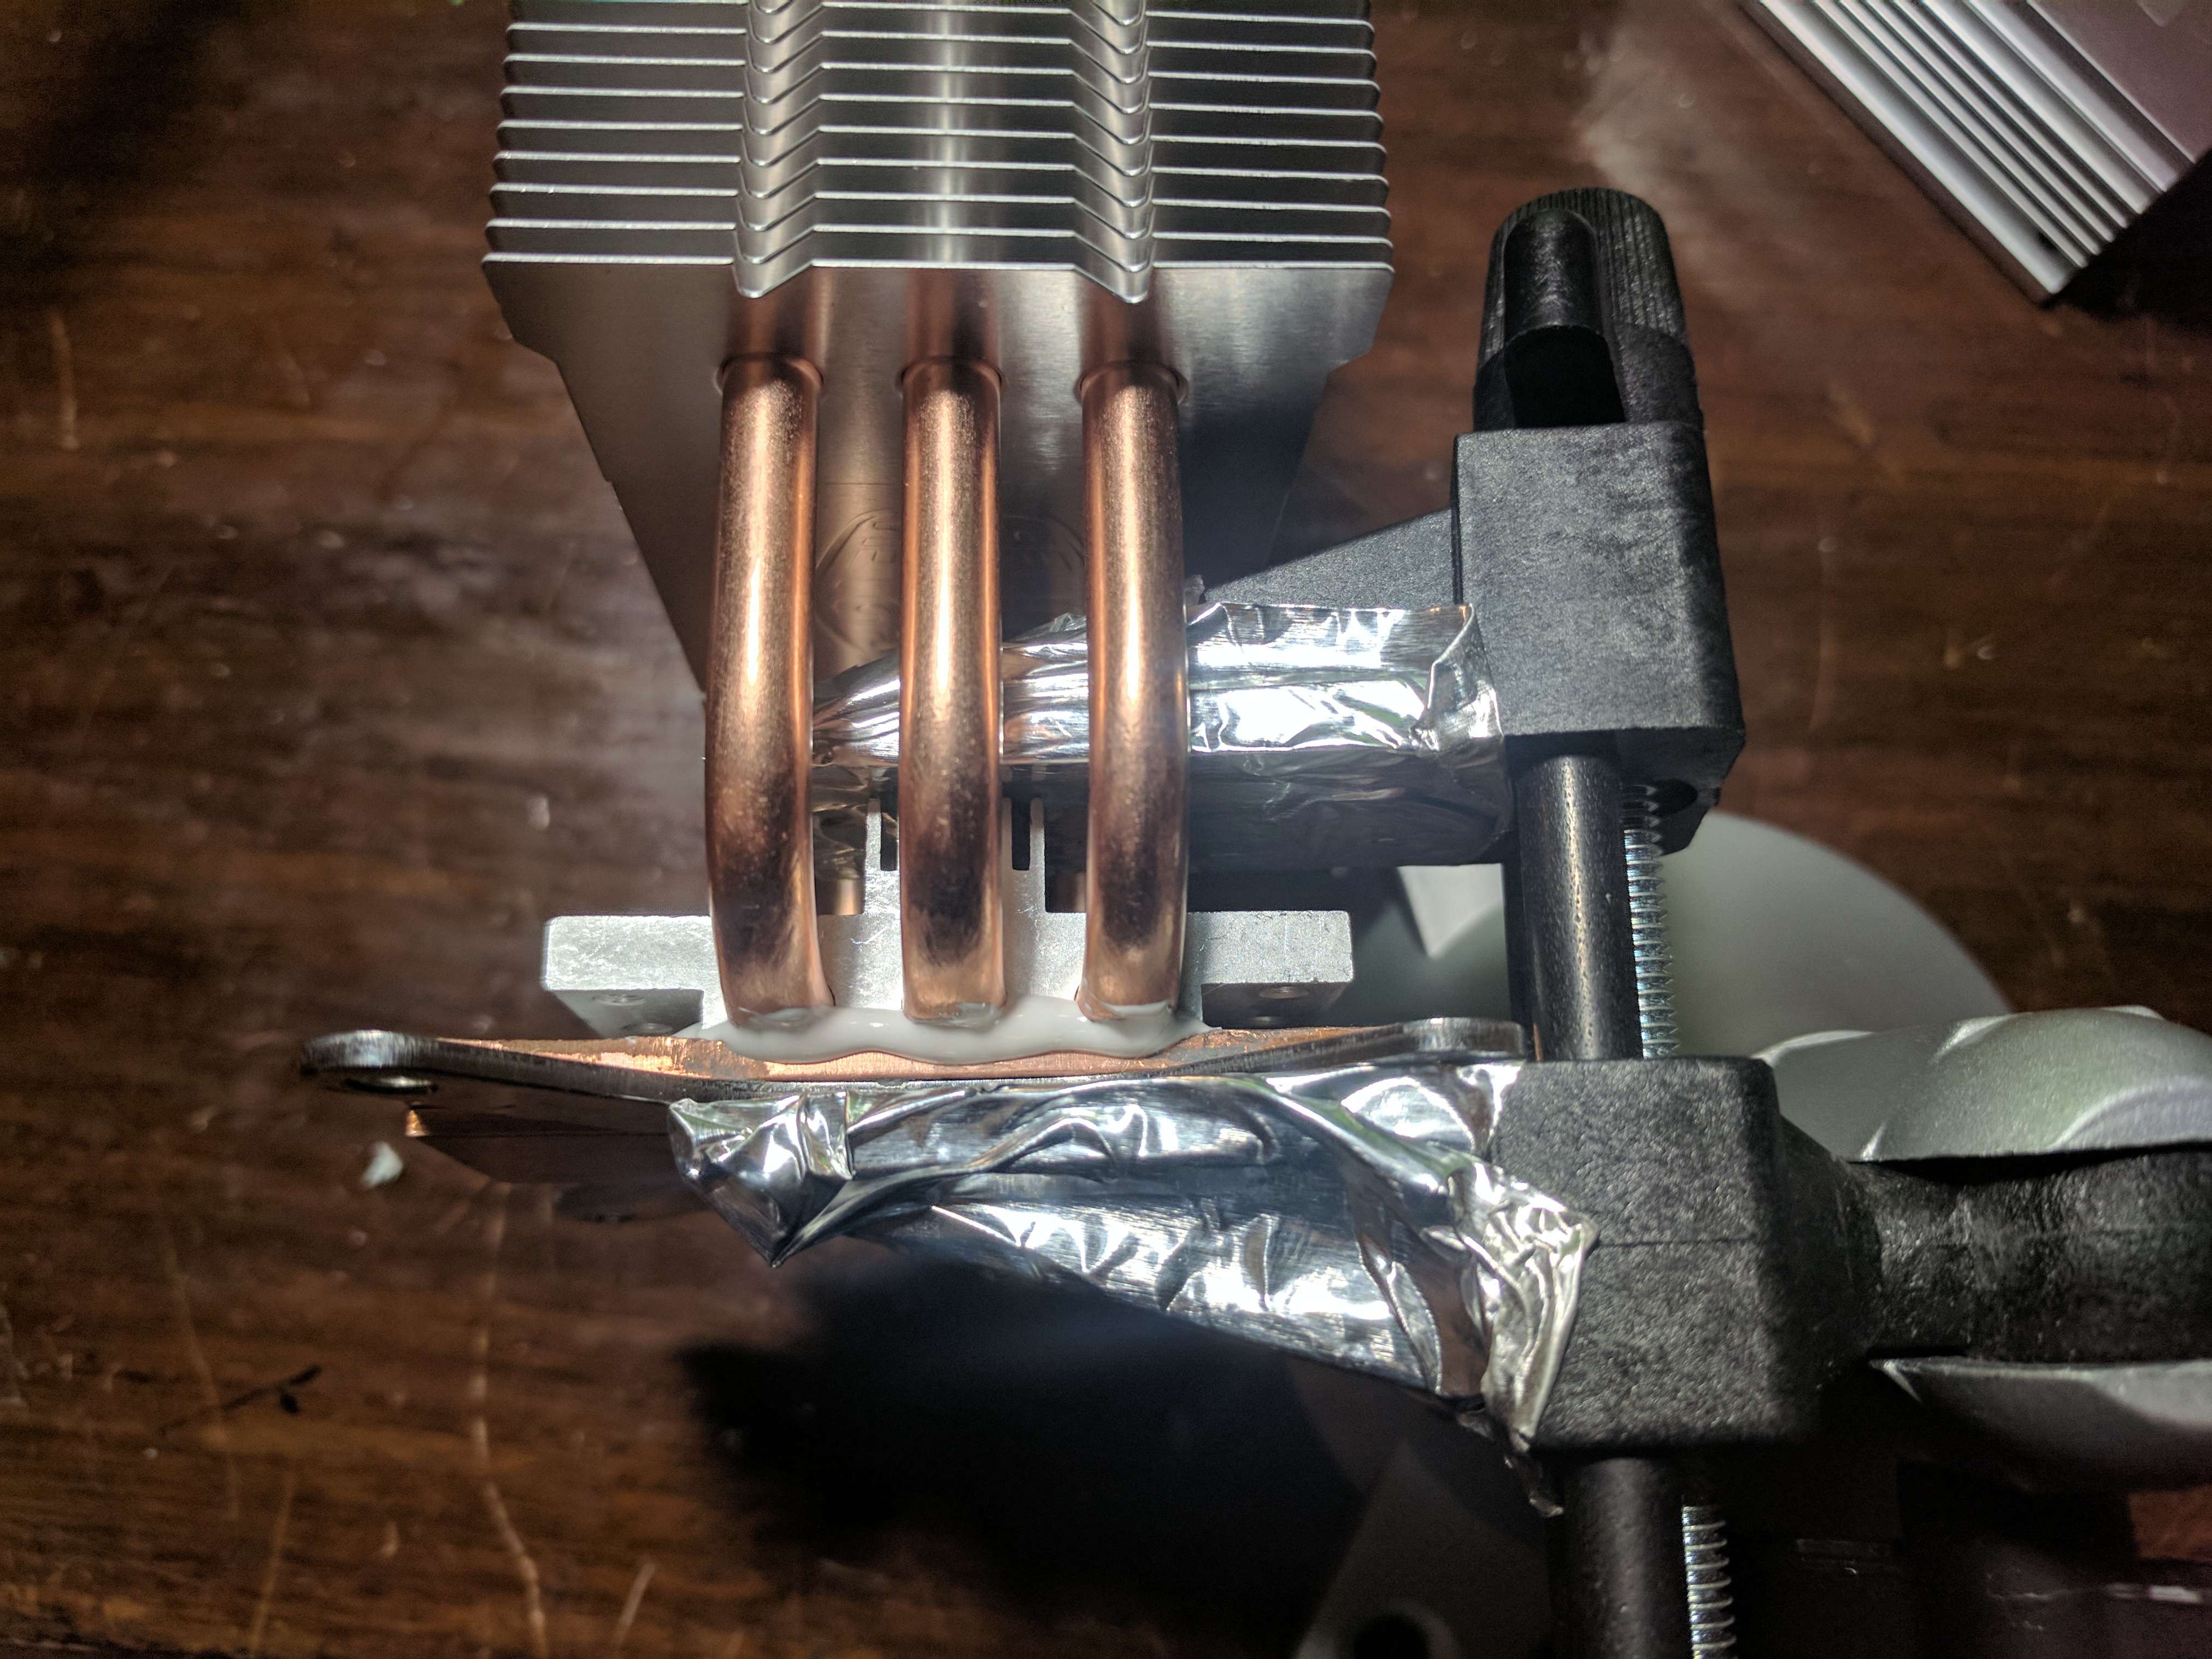
If everything fits you can use thermal adhesive to secure the Hyper TX3 heatsink to the copper base. I had originally wanted to use a larger Hyper 212 Evo which I already had, but the cooler was too tall for the shelf I use for my Xbox 360.

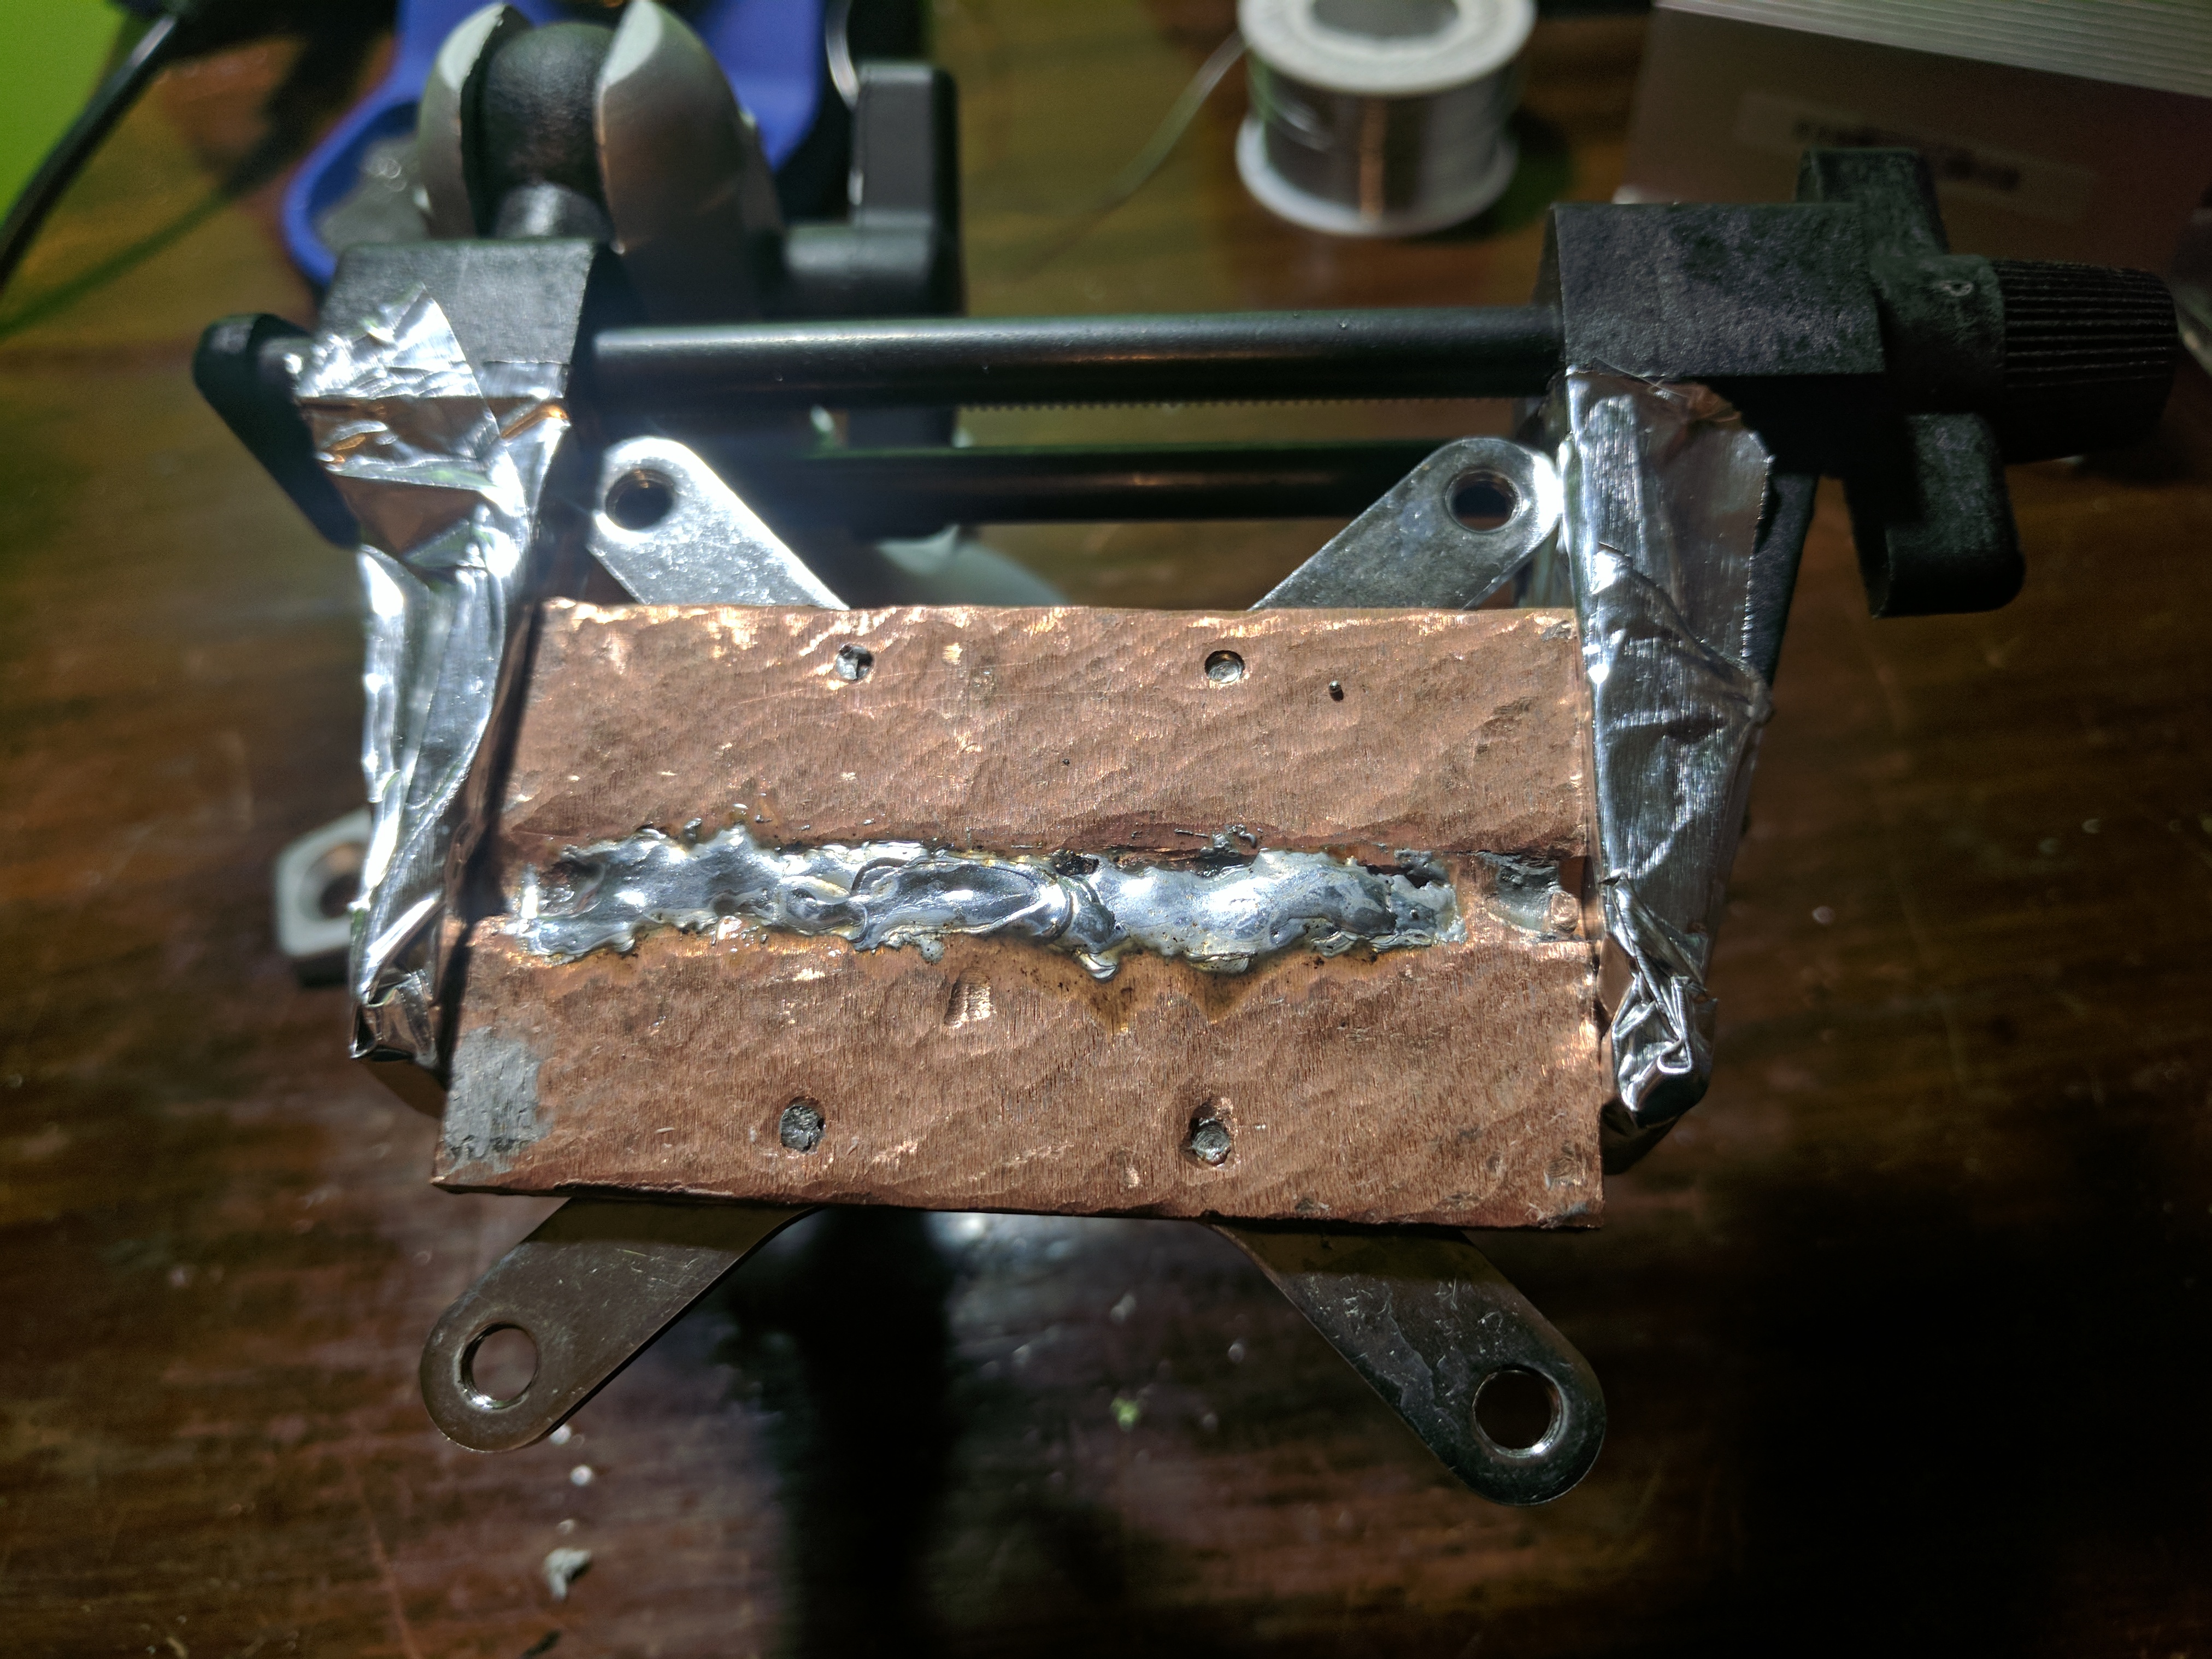
I originally wanted to solder the two together, and then seal the solder using thermal adhesive. Solder is much more thermally conductive than thermal adhesive, which would have resulted in better performance. The problem with doing this is that you need to get the heatsink and the copper base very hot, and apply a lot of solder. I wasn’t able to get the surfaces hot enough to melt solder on top of them, so I ended up using just thermal adhesive. I did end up filling in the gap from the heat pipe with solder.
Using the thermal adhesive was very easy. All I had to do was mix two compounds together, and apply the mixture two both surfaces after they were cleaned. Once the surfaces were ready I simply clamped the cooler to the base and let them sit for a day.
Powering the fans
Microsoft uses a square four pin connector to connect the stock fans to the Xbox 360’s motherboard. You can make an adapter cable to wire regular rectangular PC fan connector to the Xbox’s connector, or you can make a manual fan control dial like I did.
I used a Zalman fan speed controller wired to the 12V line on the Xbox 360’s DVD drive cable to power my fans. To connect the second fan and the fan controller I used fan spare fan splitters and extensions. Using a manual fan speed controller gives me more control in how fast the fans spin, and how much noise they make.
Putting everything back together
Once you have finished making the heatsink all you’ll need to do is put everything back together. I mounted the new heatsink to the GPU, and attached a Falcon CPU heatsink to the GPU.
Instead of using the stock Xbox 360 fans and making a shroud to route the air through the new GPU heatsink, I taped an 80mm fan to the top of the heatsink. This should be quieter than the stock fans, and could result in better temperatures.
I had to cut a hole in the top of the Xbox 360’s case for the new heatsinks to stick through. This was as simple as cutting a roughly square hole with my Dremel. If you plan out the cut you could make a much smaller hole so there aren’t any gaps.
With the larger heatsinks there was no longer any room for the DVD drive. You could extend the drive’s cables to make it external. I ended up using an x360key optical drive emulator instead. The ODE lets me put all of my games onto an external USB hard drive and load them from the hard drive. I’ll make a post on the ODE at some point. I use an old computer to make backups of my games that I can copy onto the external hard drive.
Conclusion
Both heatsinks perform much better than the stock heatsinks that my Xbox 360 came with. They’re both quieter, and do a better job of keeping the system cool. Even factors like the not so smooth copper surface I attached the heatsink to seemed to do a decent enough job of conducting heat to the heatsink.
Using the Xenon heatsink’s copper base as the mount for a PC heatsink allows for a lot of flexibility in what you can use to cool your Xbox 360. You can install large heatsinks, small heatsinks, and even water coolers.
In the future I’m planning on buying a second Hyper TX3 that I can use for the GPU heatsink. I’m also interested in creating a single heatsink that connects to both the GPU and the CPU, ideally something more low profile