SCPH-70012 PS2 slim teardown guide
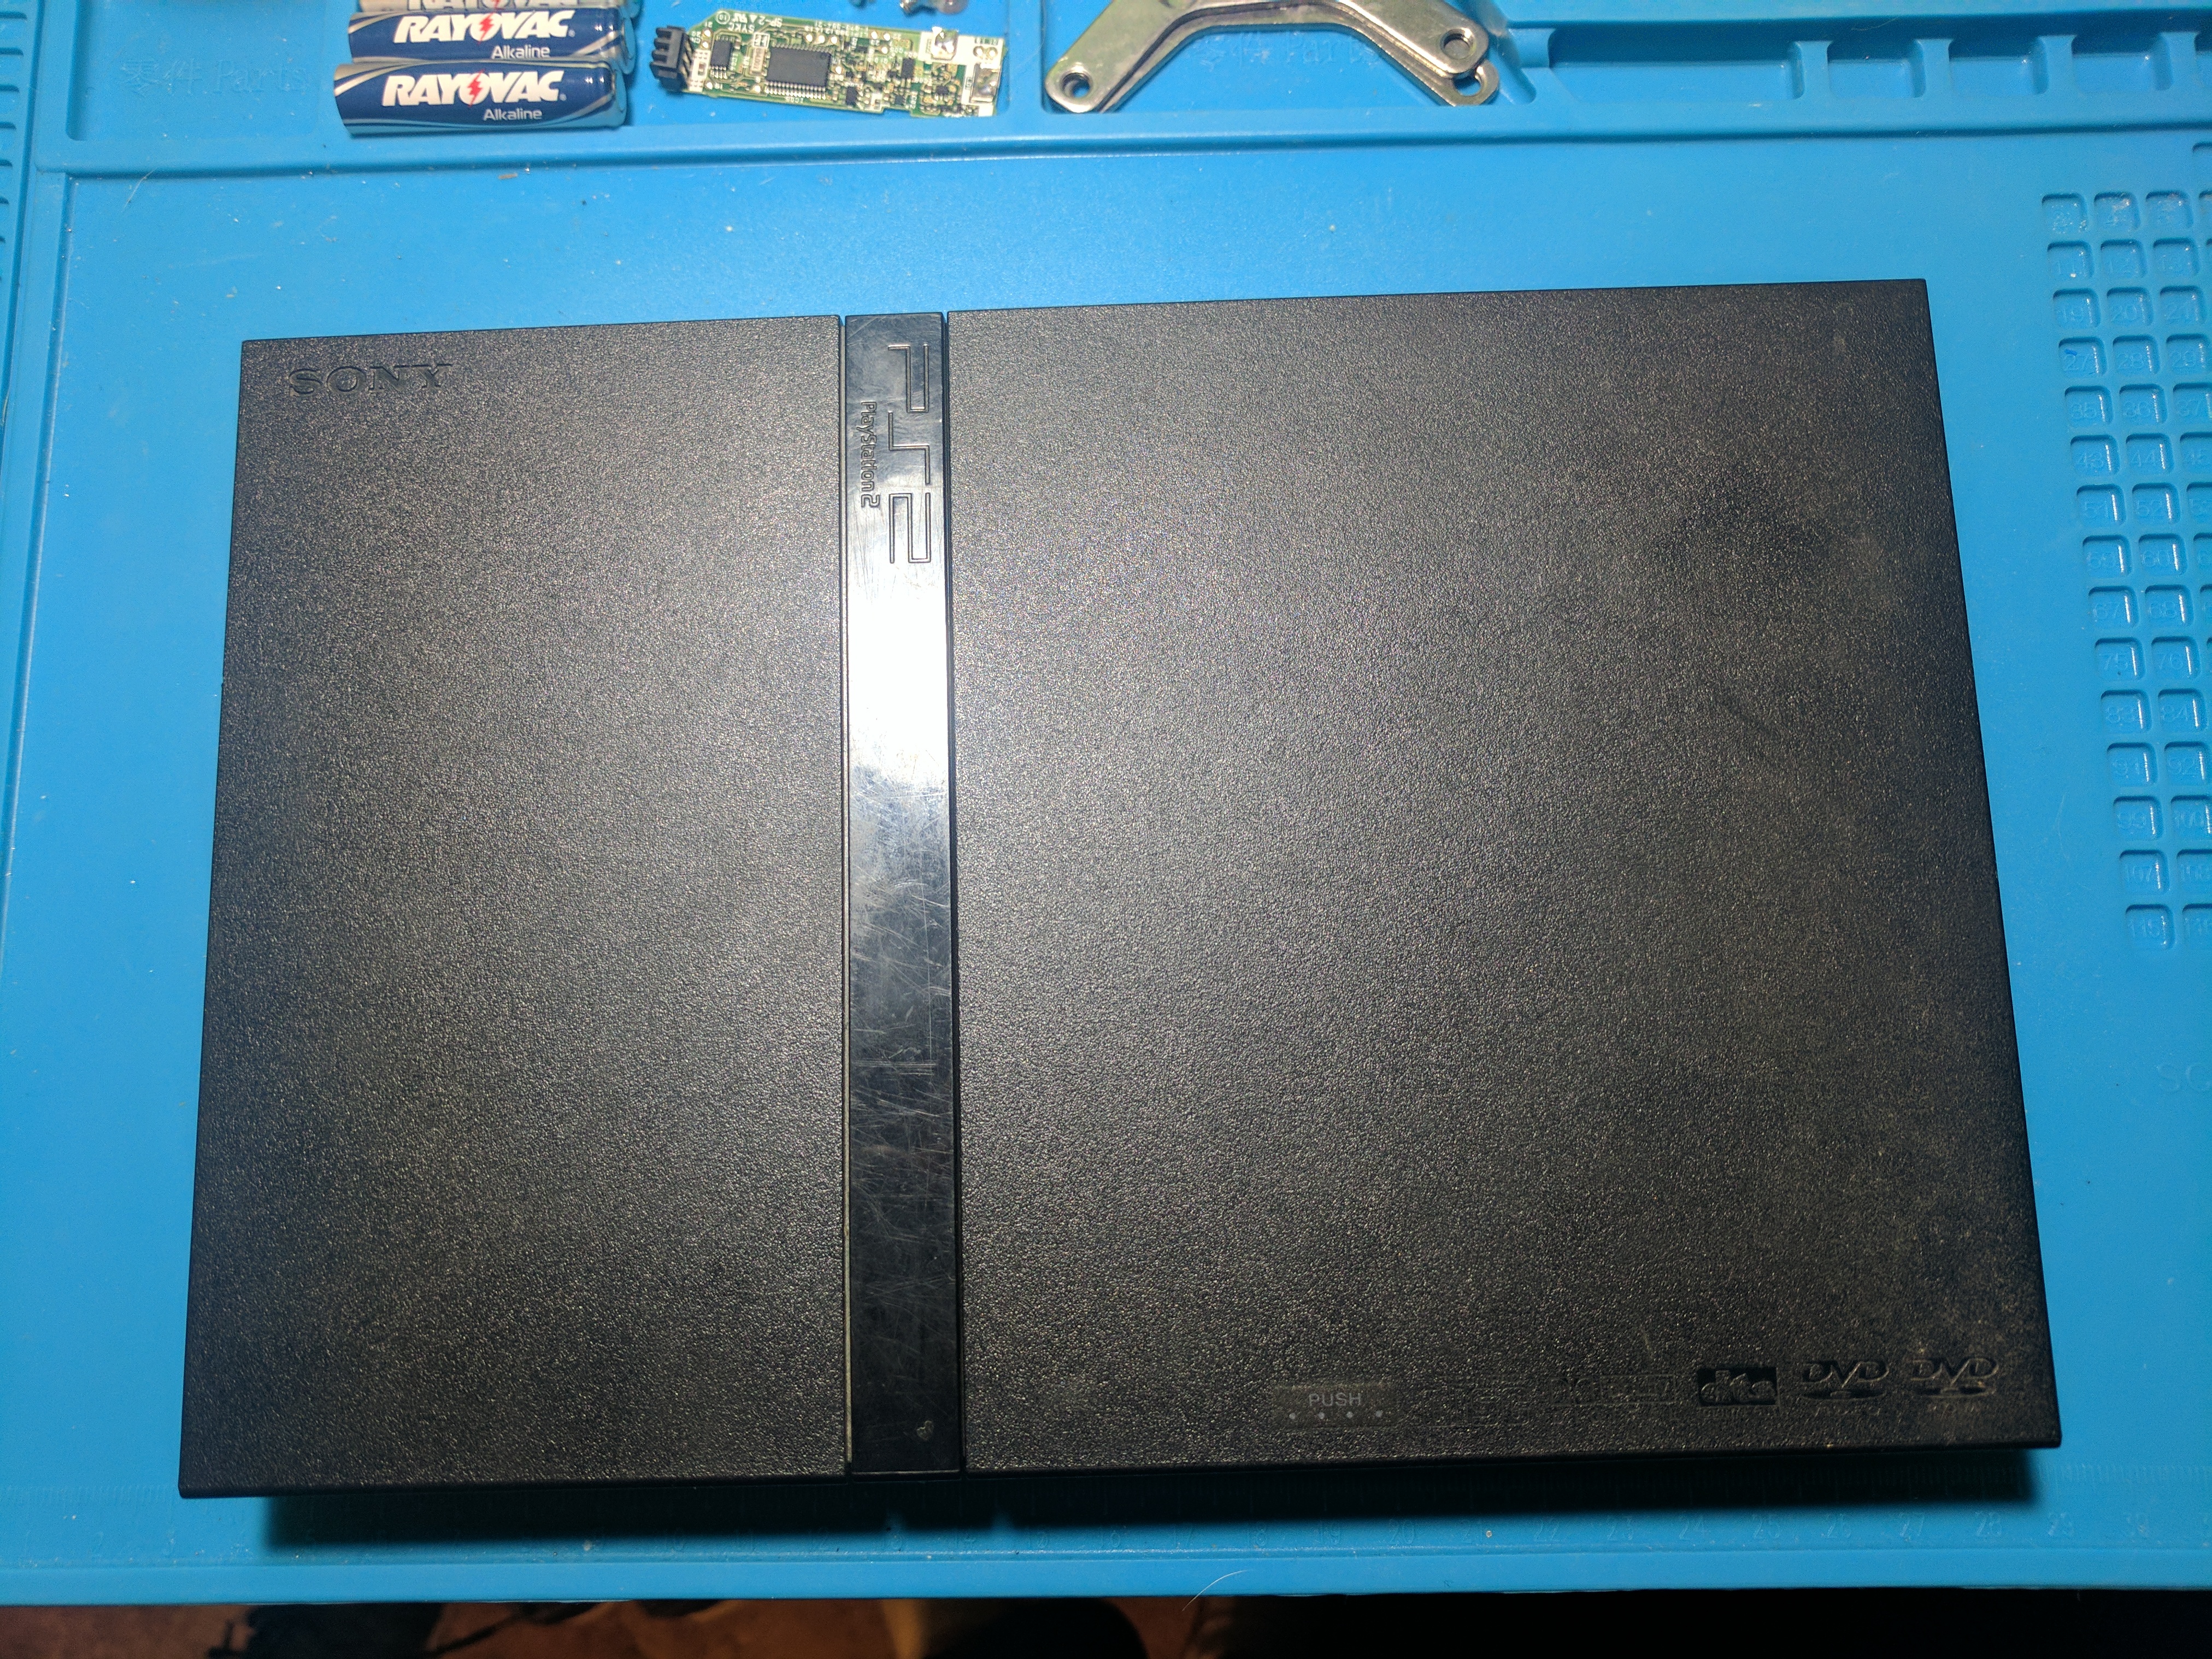
I haven’t posted a console teardown guide on this blog yet, mostly because they are difficult to make. I recently took apart my PS2 slim for the first time, and took pictures along the way to create this guide. My goal is to have a PS2 slim teardown guide that’s more complete than the others available online.
This was the first time I had ever taken apart a PS2 slim, and I hadn’t looked up any guides online. I found the process of taking apart the system to be very easy, this guide should help you better put back together the system by following these steps in reverse.
As you can see in the pictures the PS2 is pretty dirty. After taking the console apart I cleaned it. I have another guide on how to clean a video game console that will be published soon. I’ll update this post with a link once the console cleaning guide is published.
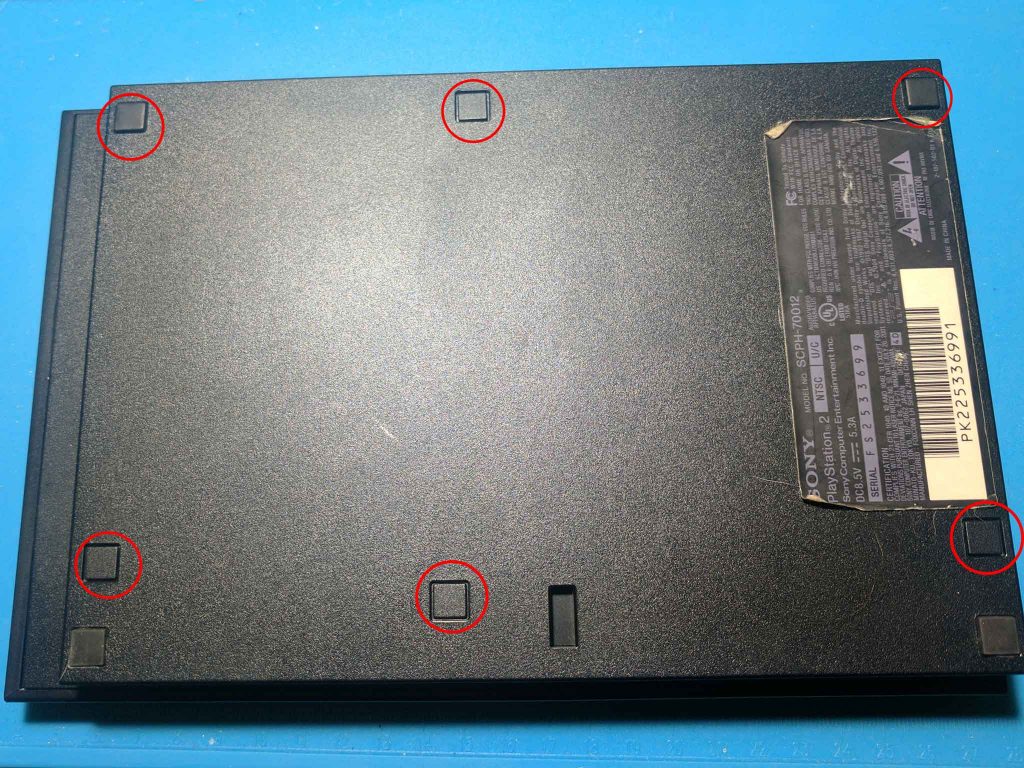
Step 1 – Top plastic housing removal
To begin you’ll need to remove the six screw hole covers from the bottom of the PS2 as shown in the picture below. I find these are easiest to remove by prying with a very small flat head screwdriver. With the screwdriver you can also cut the warranty sticker along the seam.
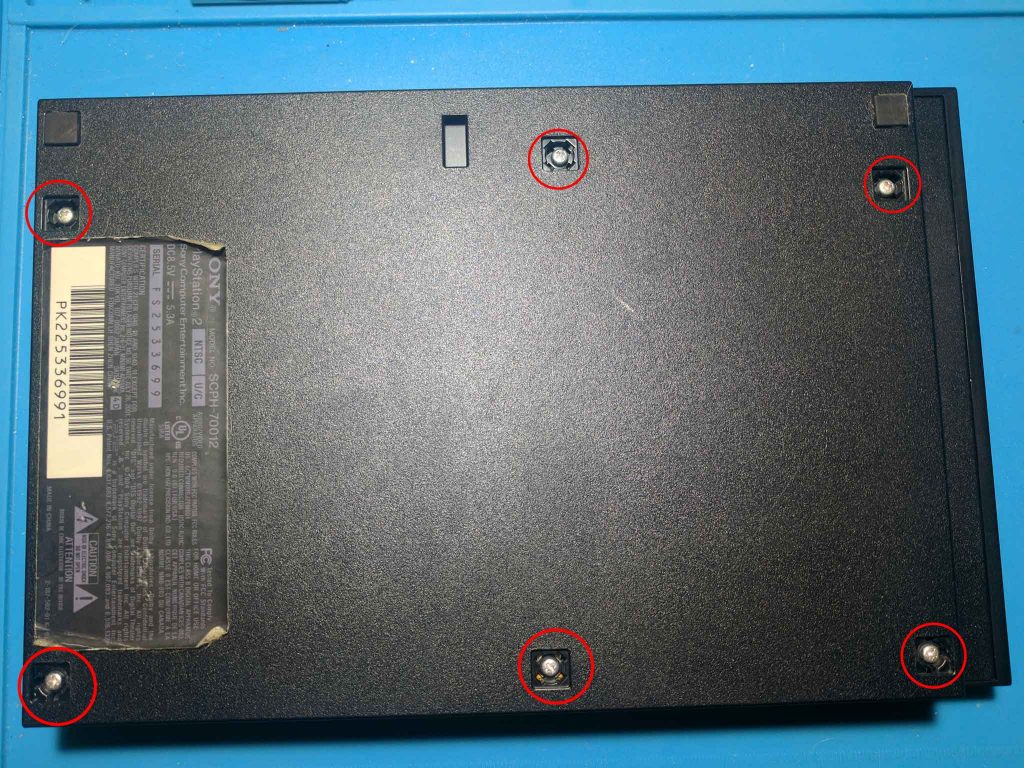
With the screw hole covers removed, you can unscrew the six screws shown below.
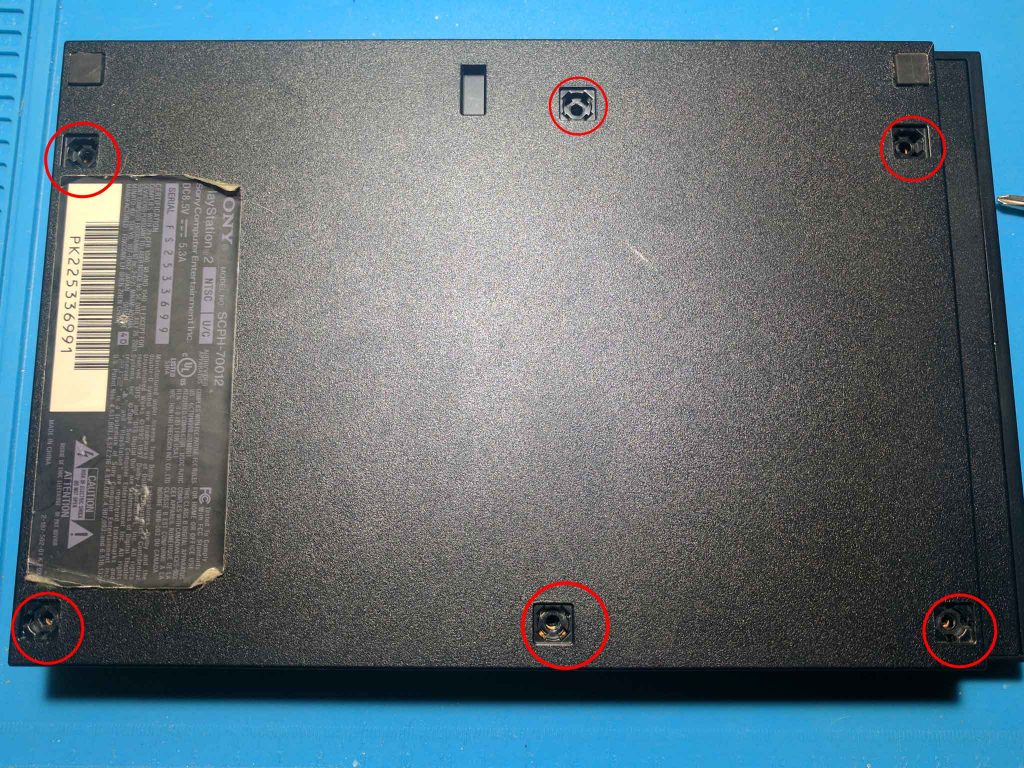
Below are the the empty holes once the six screws have been removed.
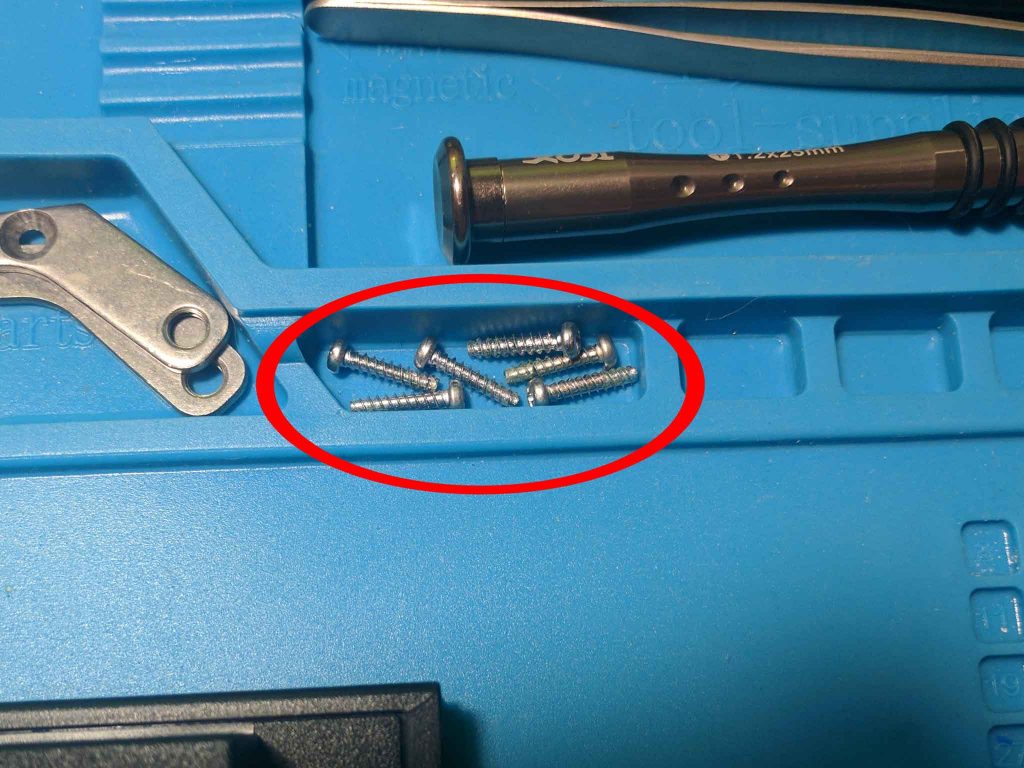
Below are the six screws. They are all the same size, so you don’t need to keep track of which hole they came out of.
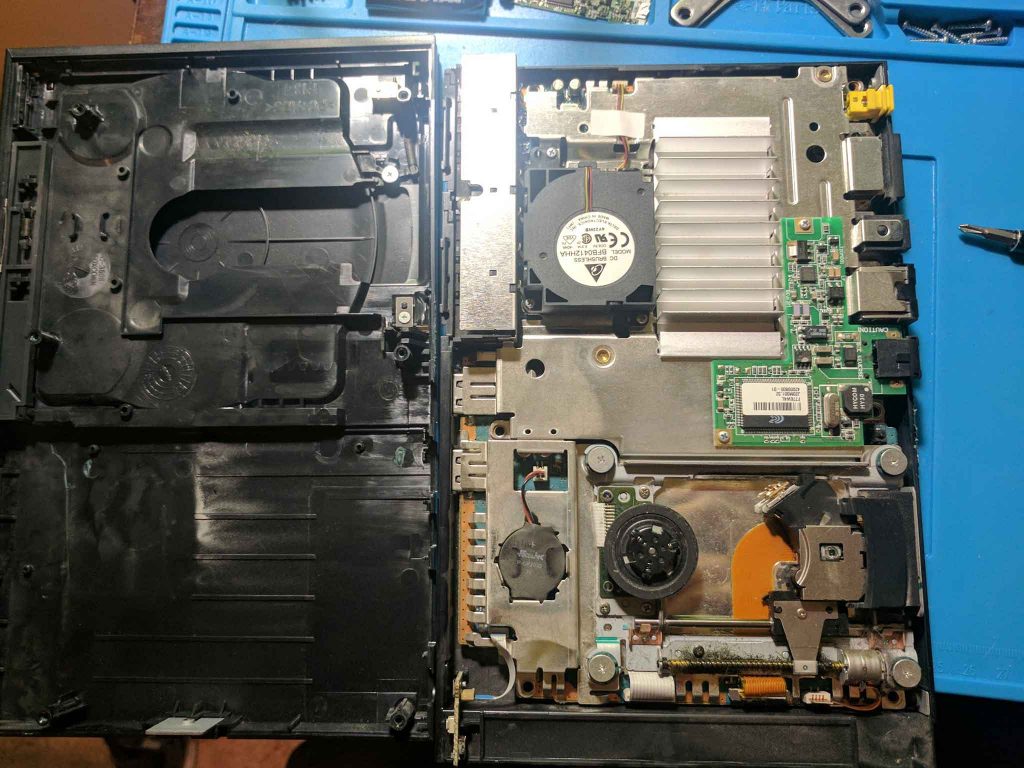
With the screws removed you can carefully wiggle the top plastic housing off of the rest of the PS2. It’s tricky to remove, but as long as you are careful you won’t break anything. You can see the top housing, and the components underneath in the image below.
Step 2 – Bottom plastic housing removal
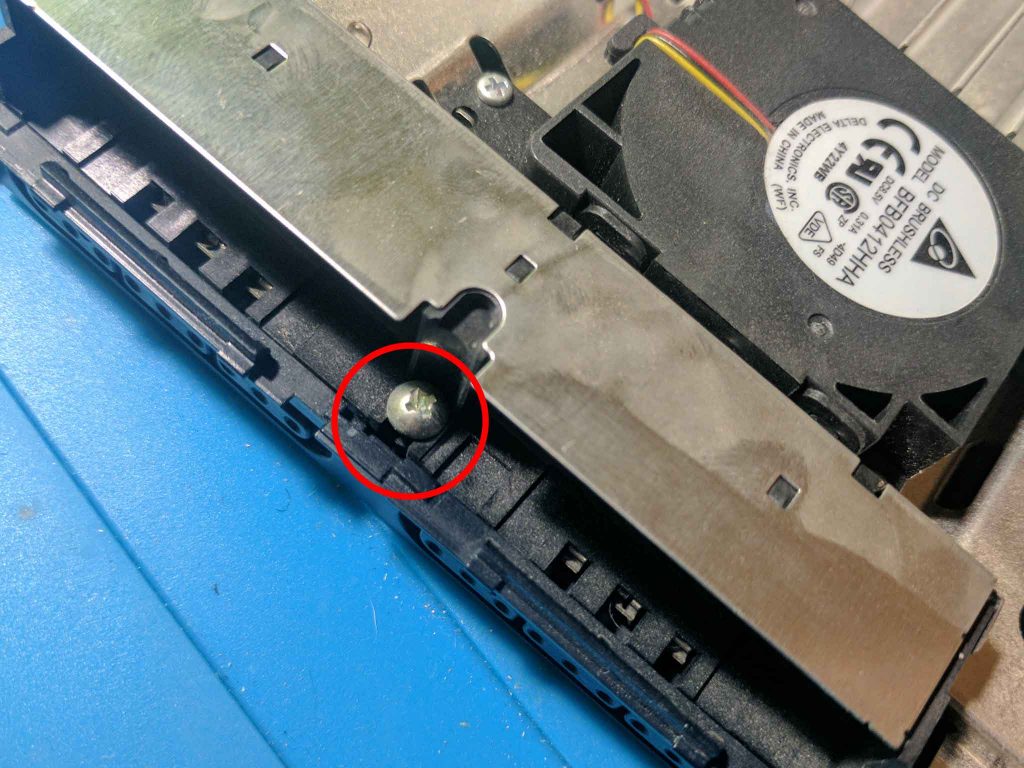
With the top plastic housing removed you can now separate the bottom plastic housing from the PS2. You will first need to find and remove the screw near the memory card and controller ports shown below.
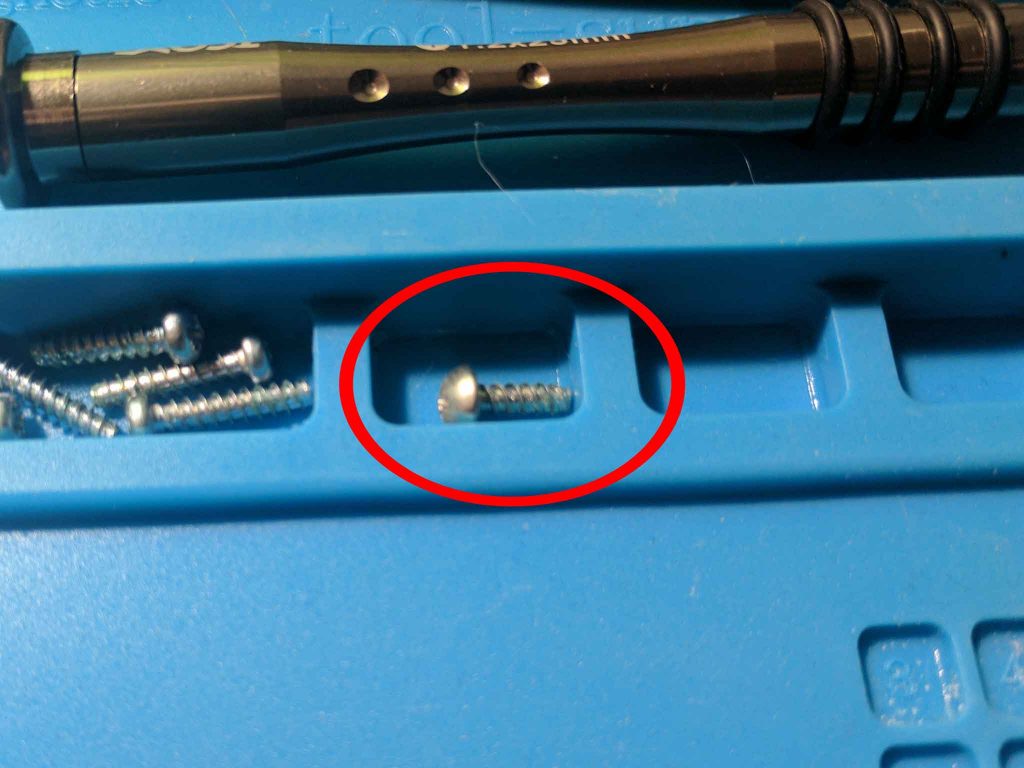
Below is a closer look at that screw.
Below is with the screw removed.
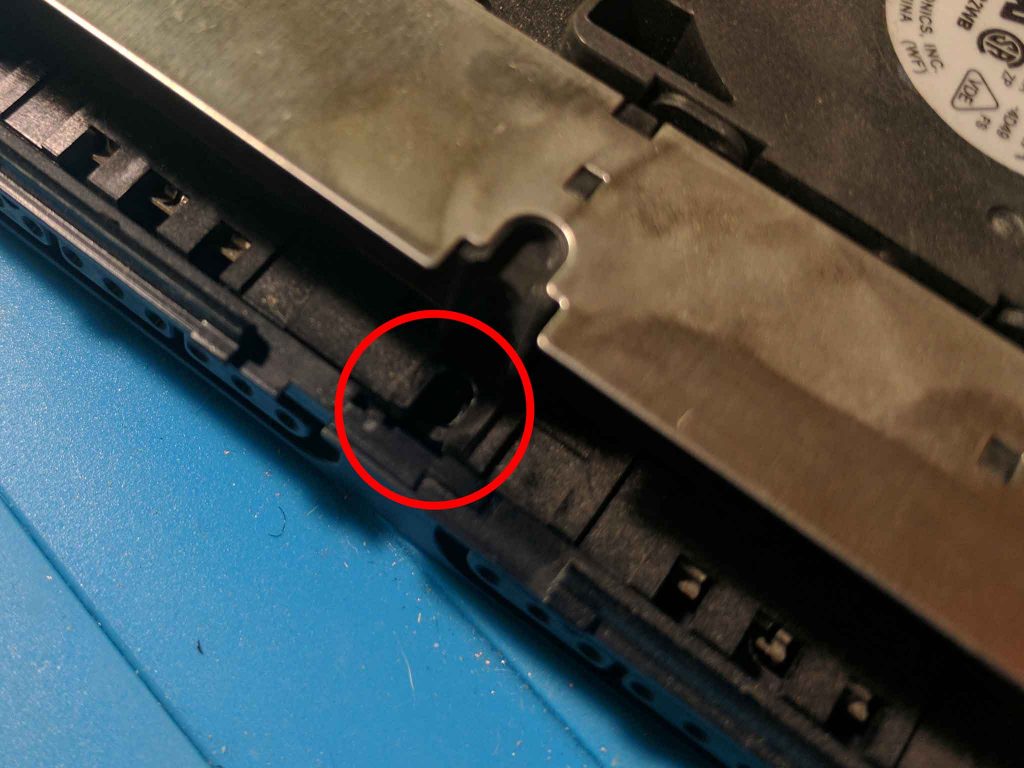
This screw is different from the others, so keep track of it.
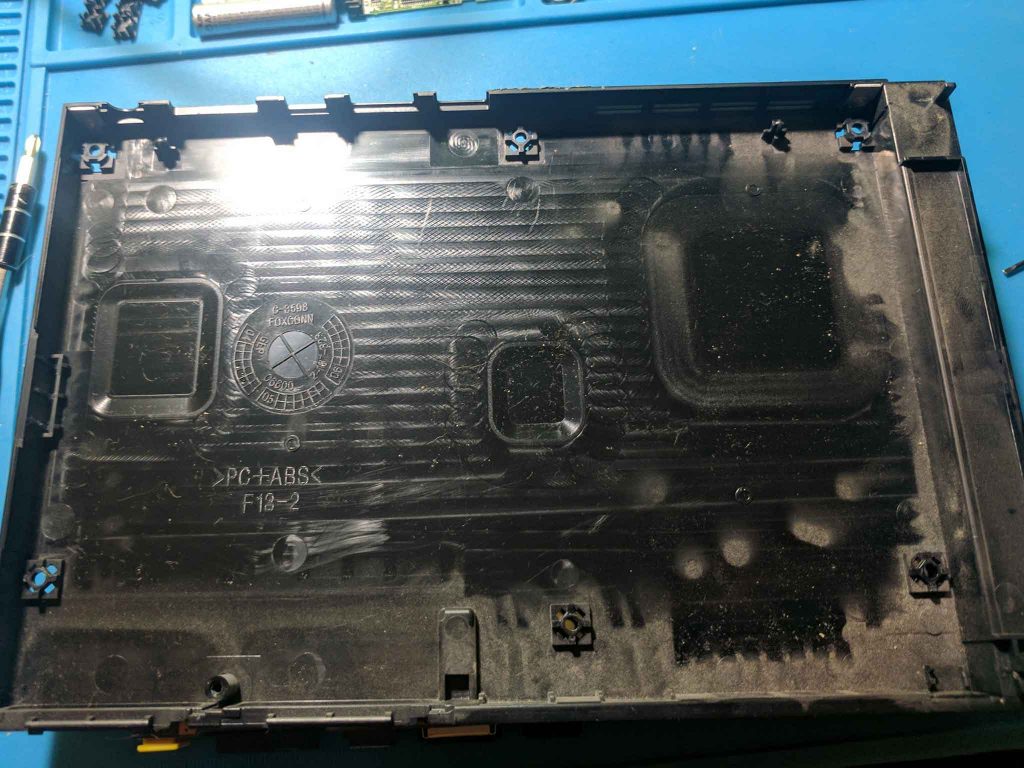
You can now just lift up on some of the ports to lift the PS2 board from the bottom plastic housing. Below is an image of the plastic housing once removed.
Step 3 – Bottom metal plate screws
There are four screws on the bottom metal plate that need to be removed. The positions of the screws are labeled below.
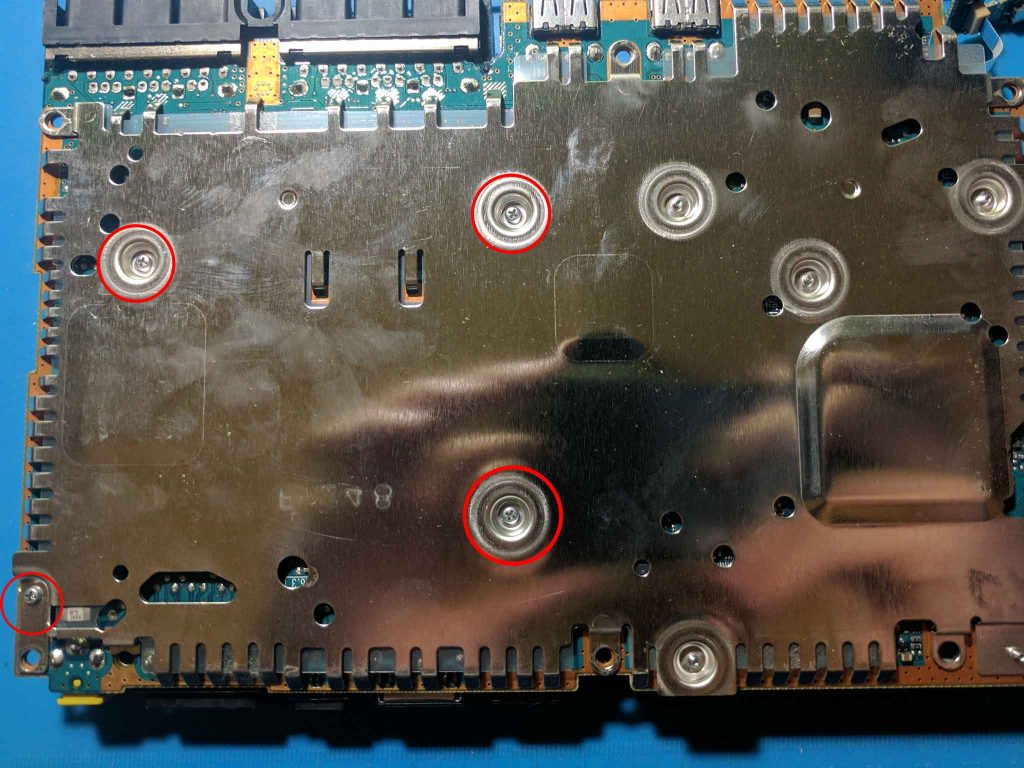
Below is an image of the plate with three of the four screws removed. I removed the fourth screw in the bottom left later because I missed it, but it makes sense to remove all four of these at the same time.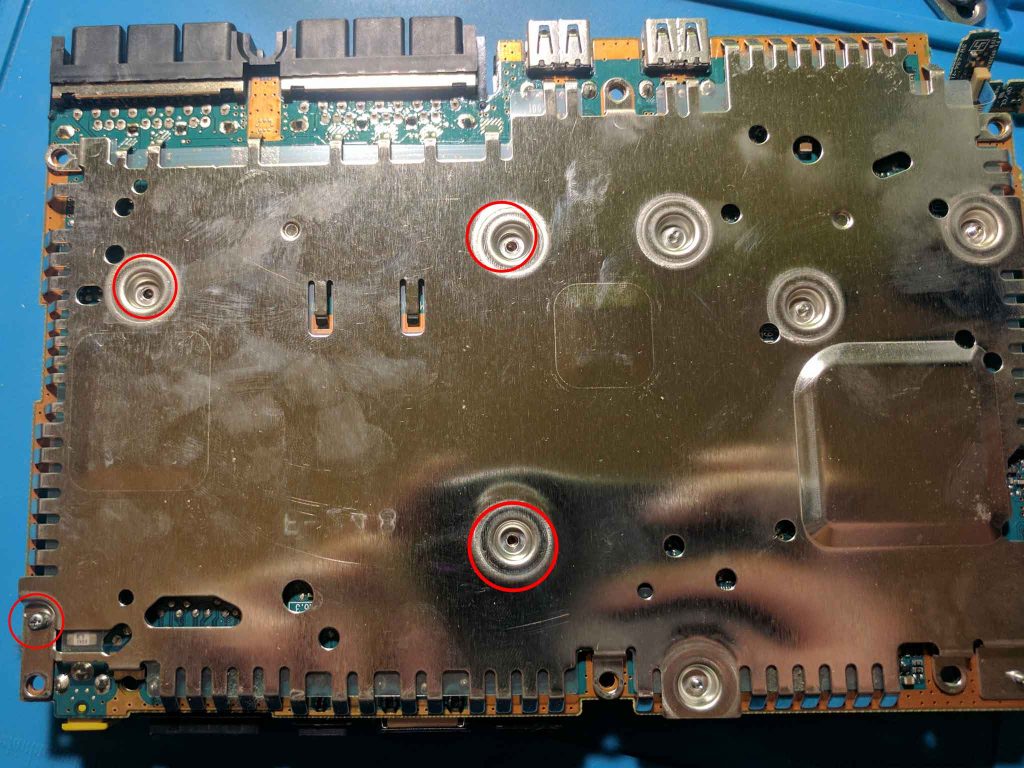
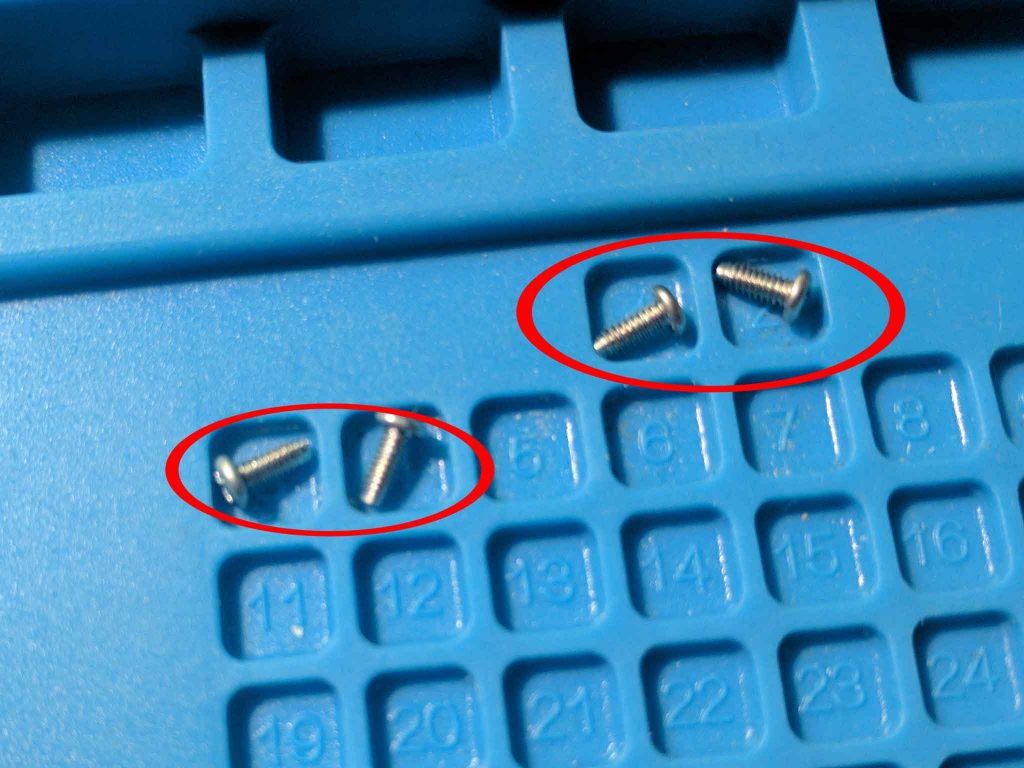
You can see the four screws below. They are all the same, so you can keep them together if you’d like. I put them in four separate labeled spaces to keep track of them.
Step 4 – Disc drive assembly removal
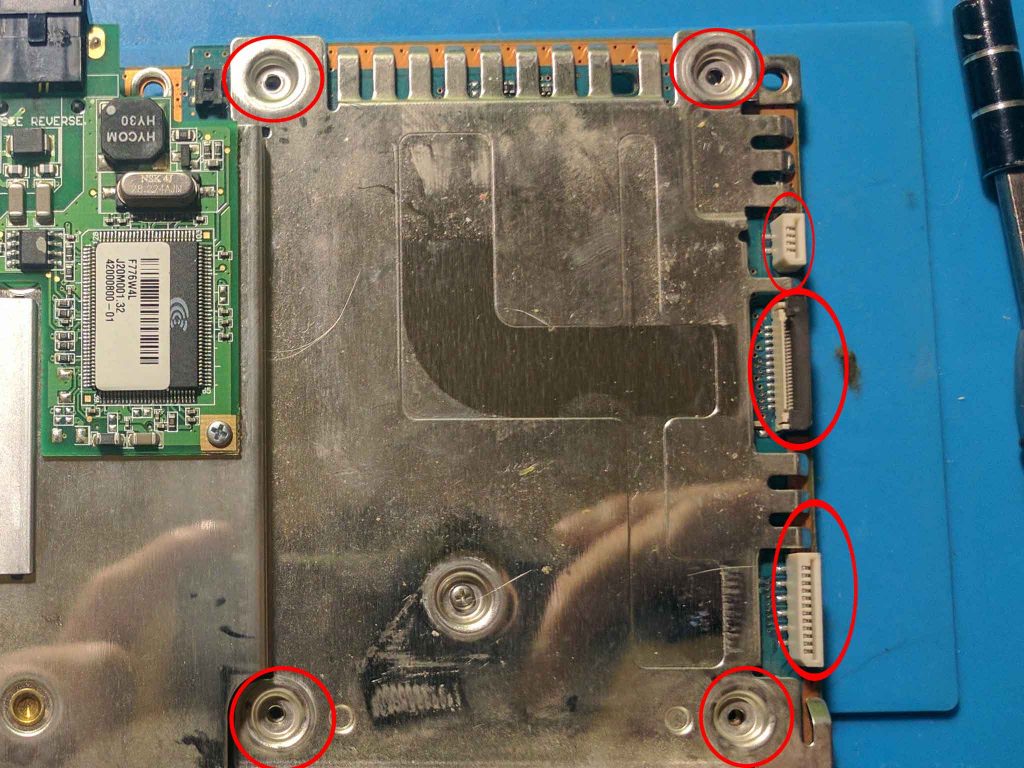
To remove the disc drive assembly you’ll need to remove the four screws that are pictured below.
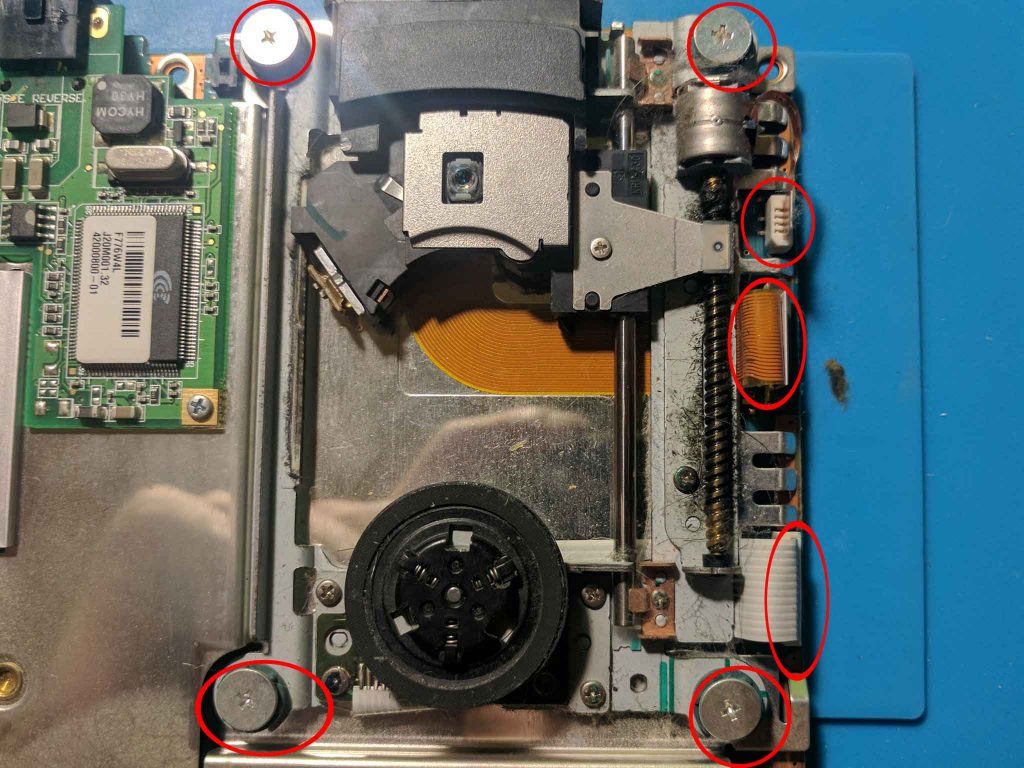
Once the screws are removed, you’ll need to remove the three ribbon cables. The top and bottom ribbon cables are removed by simply pulling the cables upwards. The middle ribbon cable is removed by pushing the clip to the unlocked position. The ribbon cable in the middle is glued to the metal plate, so you’ll need to carefully peel it off.
When putting the PS2 back together make sure that the middle ribbon cable is properly adhered back to the metal plate to prevent it from getting caught on something when a disc is inserted.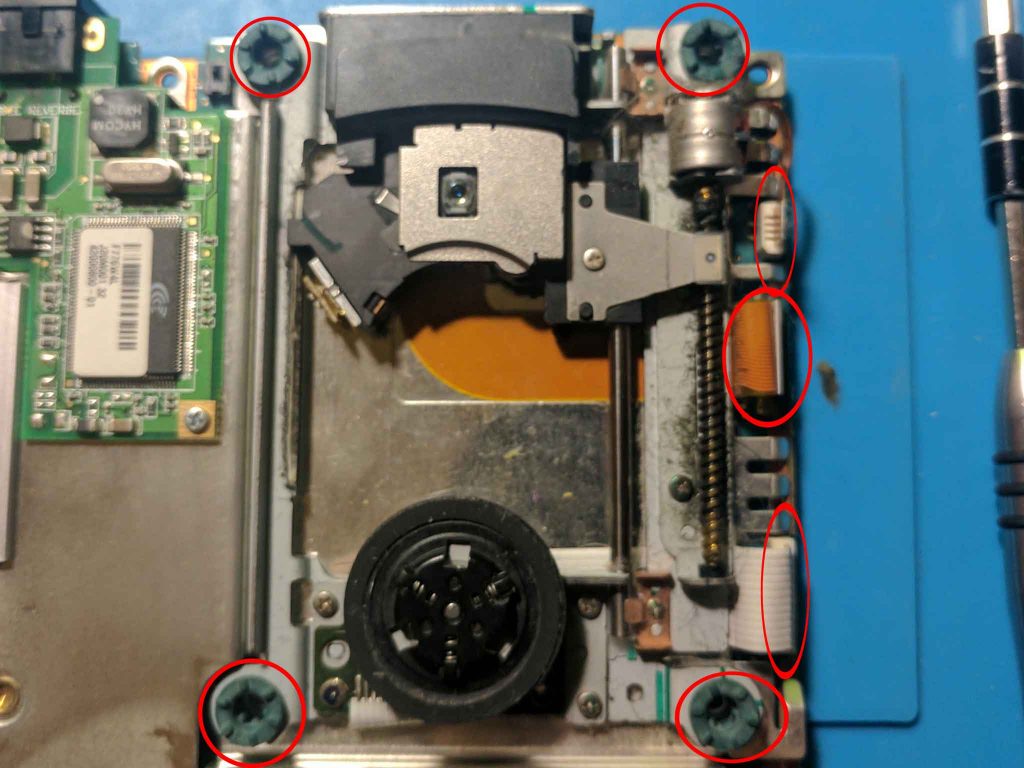
Below is a picture of the disc drive assembly area with the assembly removed.
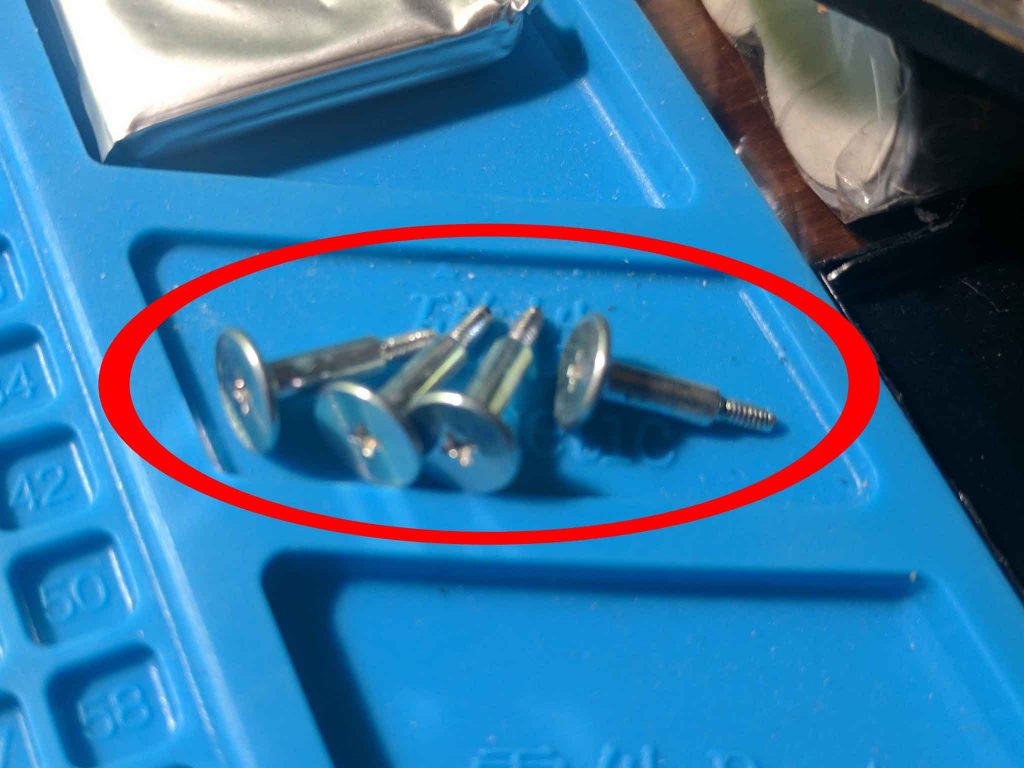
The disc drive assembly’s four screws are identical, so you can store them together. I didn’t disassemble the disc drive assembly any further, but if that’s something anyone is interested in, leave a comment and I’ll look into making a post on the topic.
Step 5 – Bottom metal plate removal
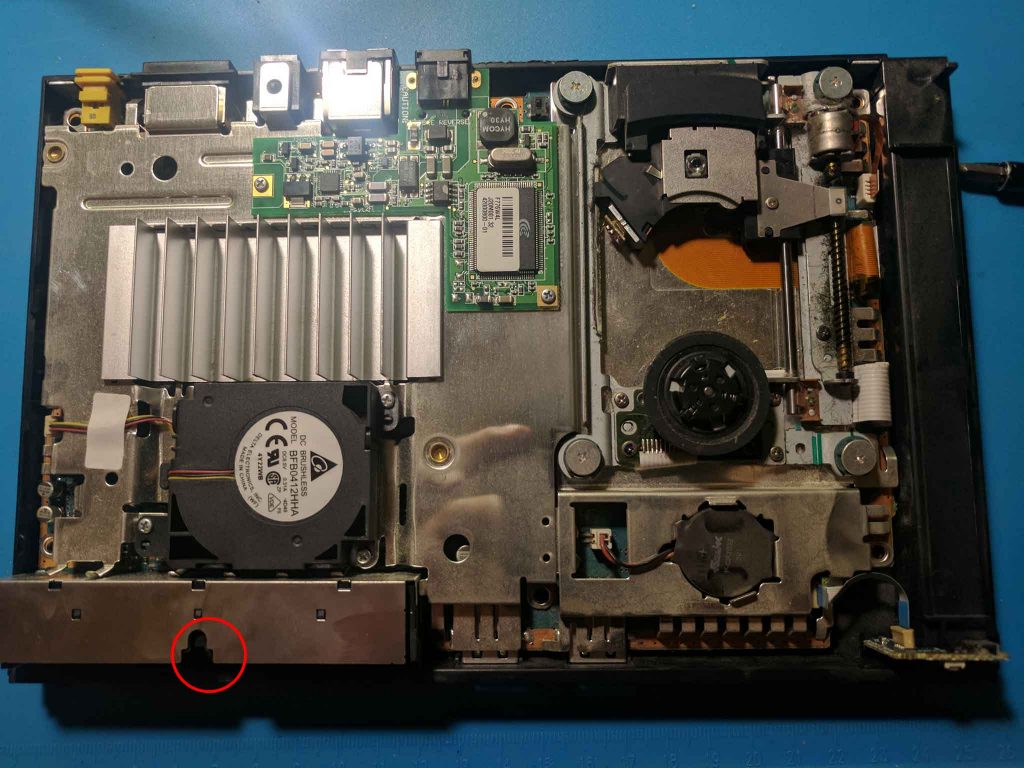
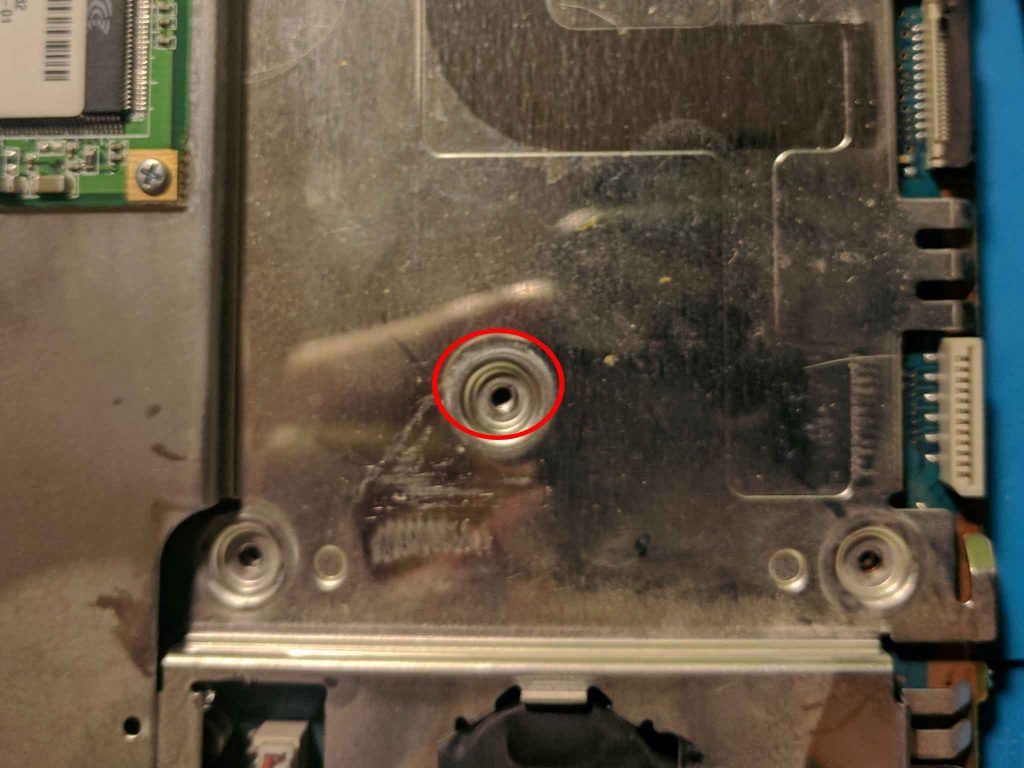
The bottom metal plate is now being held in by just a single screw. That screw can be found where the drive assembly was previously located as seen in the picture below.
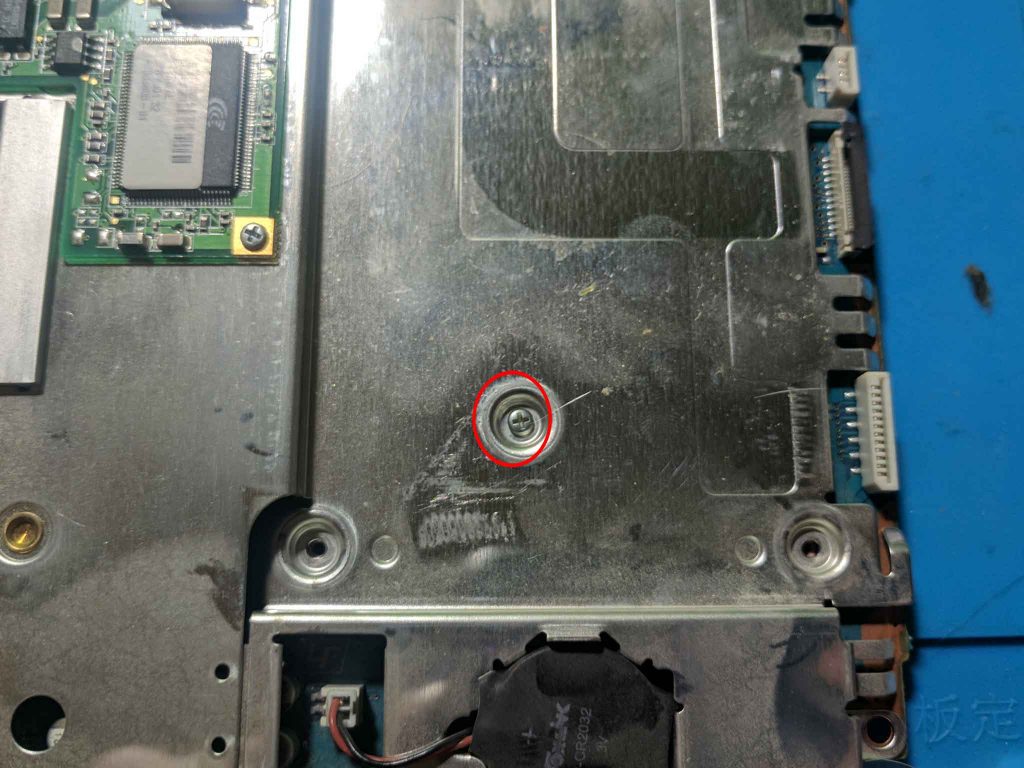
Below is a picture of that screw removed.
I placed this screw in a new place to keep track of it.

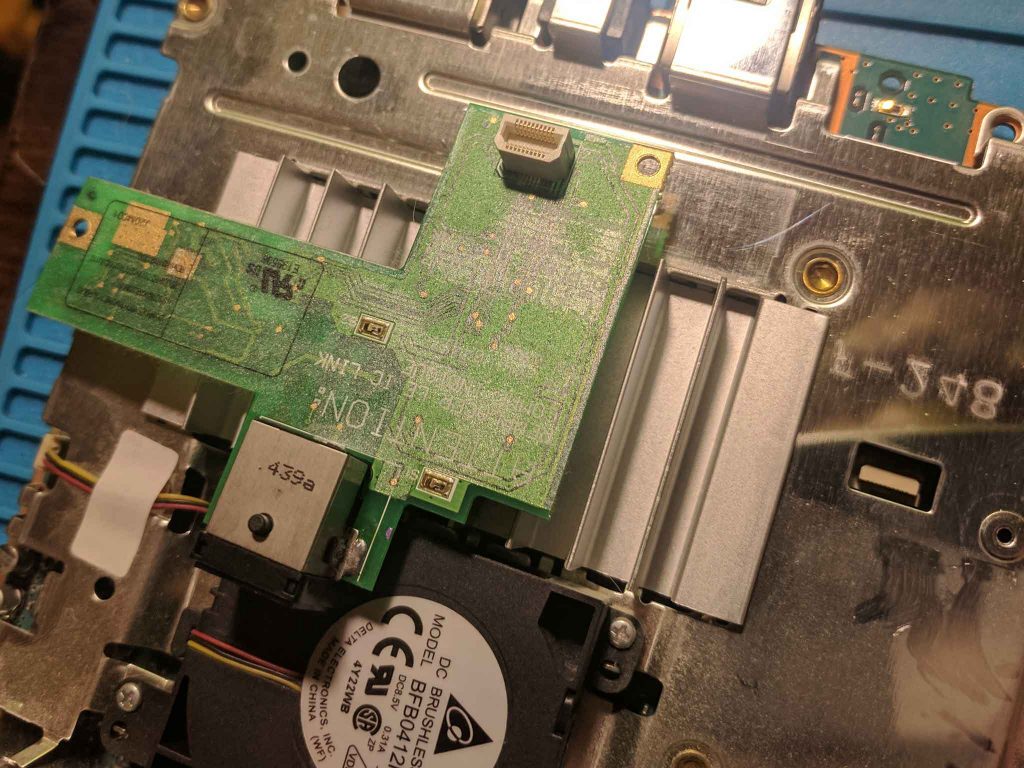
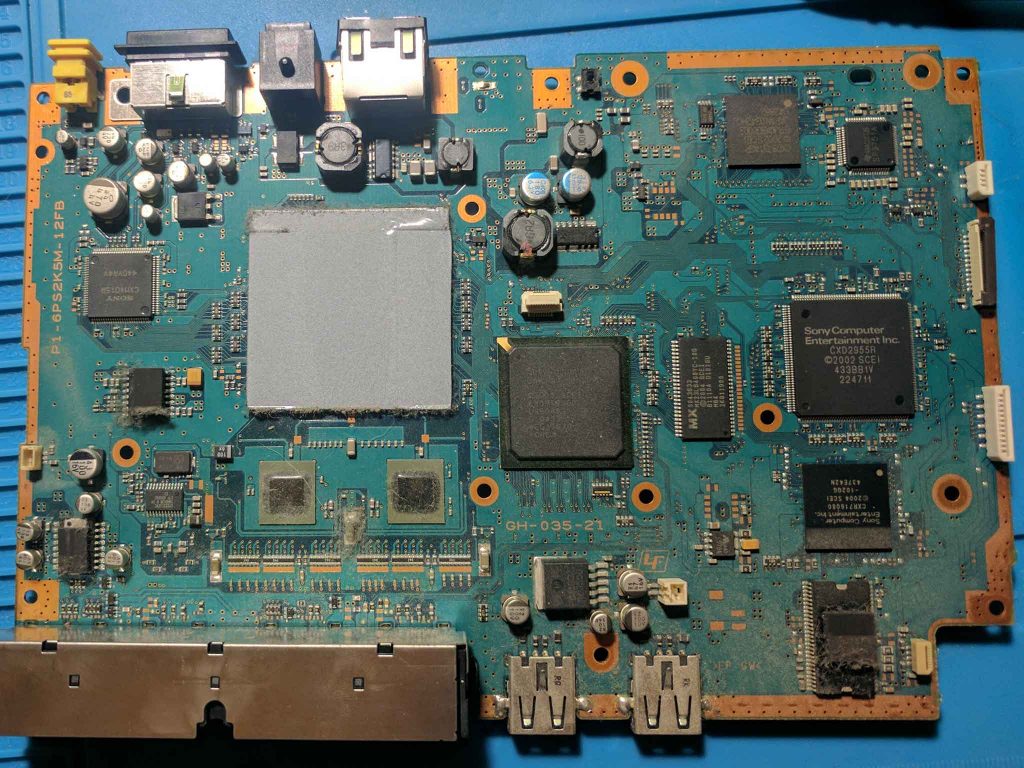
With that screw removed you can lift the bottom metal housing off of the PS2 board to reveal the bottom of the motherboard.
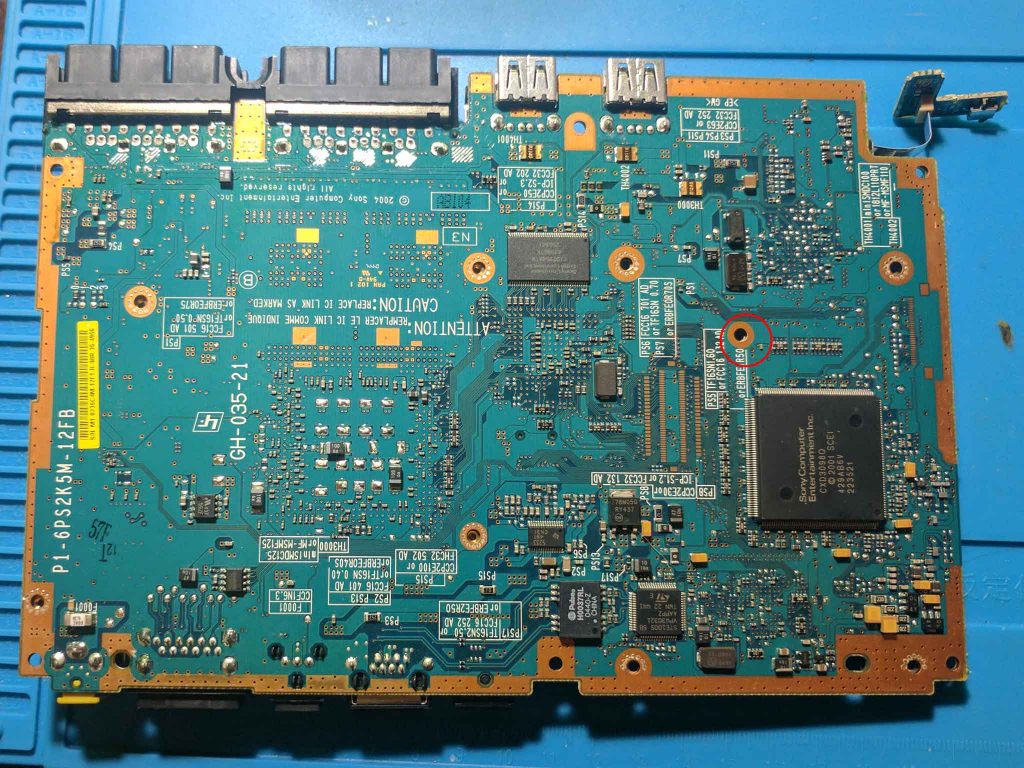
Step 6 – Modem board removal
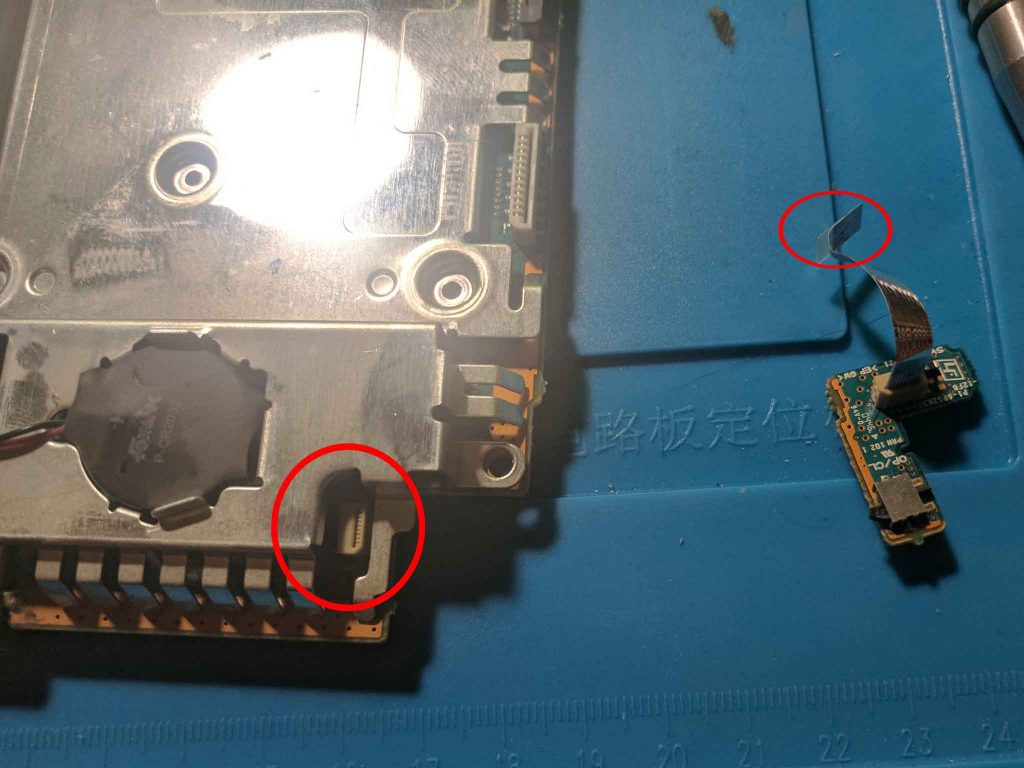
You can now remove the power button board. It’s connected by a ribbon cable that can be removed by lifting upwards.
There are two screws that hold the modem board to the PS2 board.
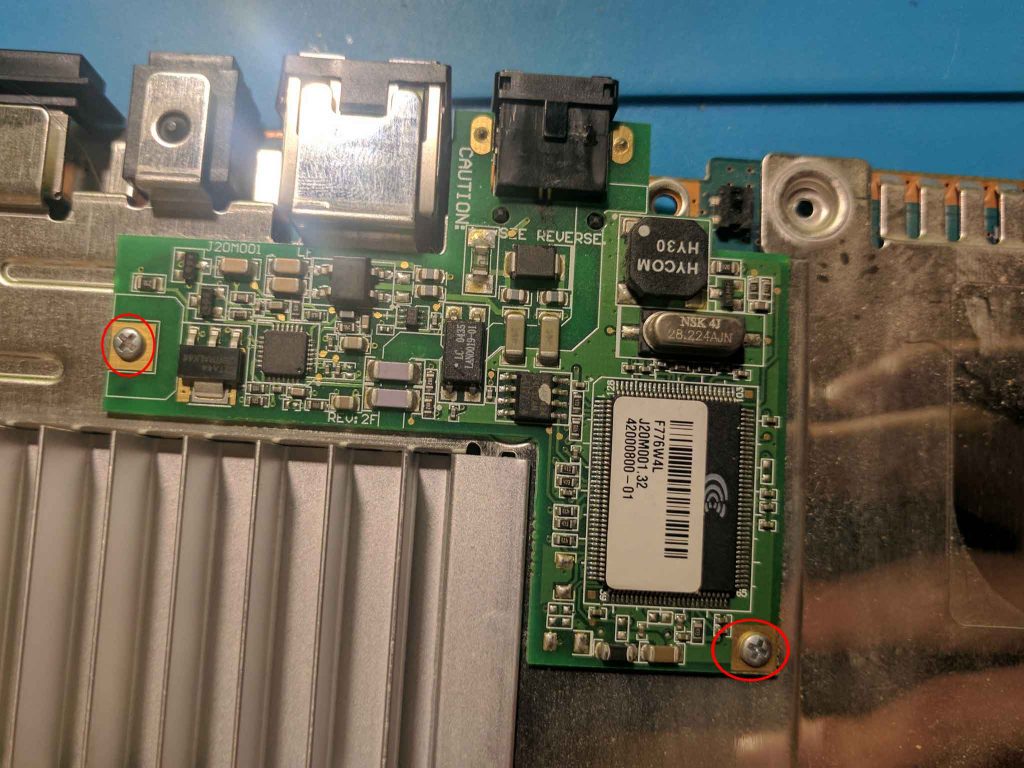
Below is an image showing the modem board with the screws removed.
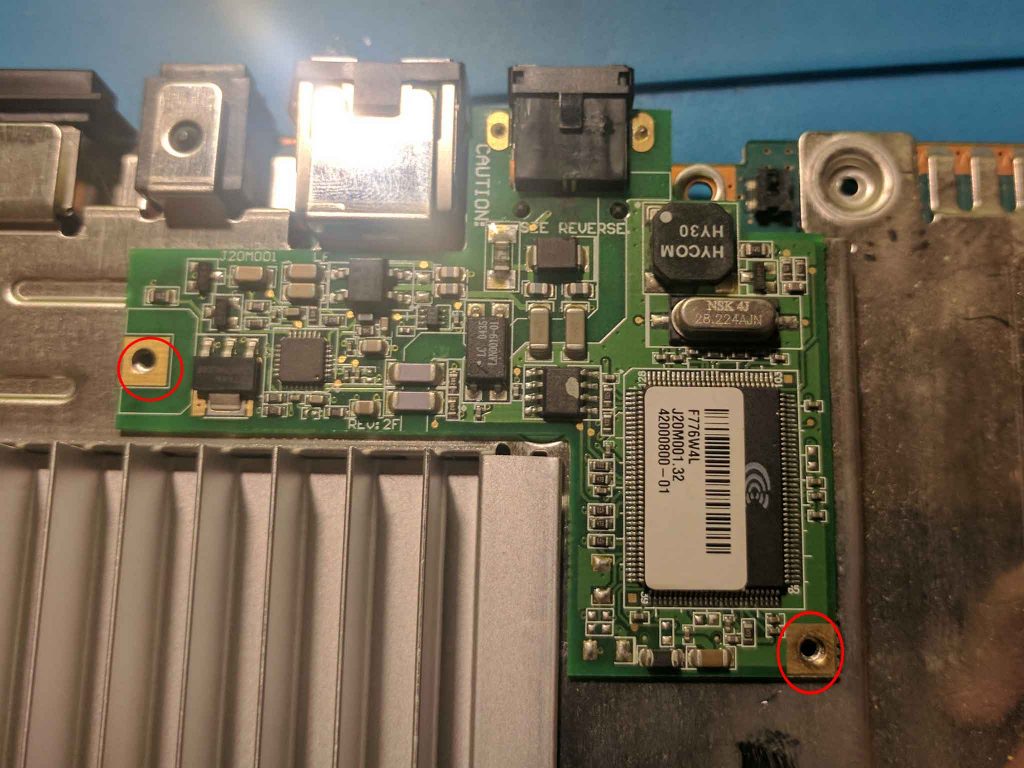
The modem board can now be lifted out of its socket.
I placed the two identical modem board screws into two new places.
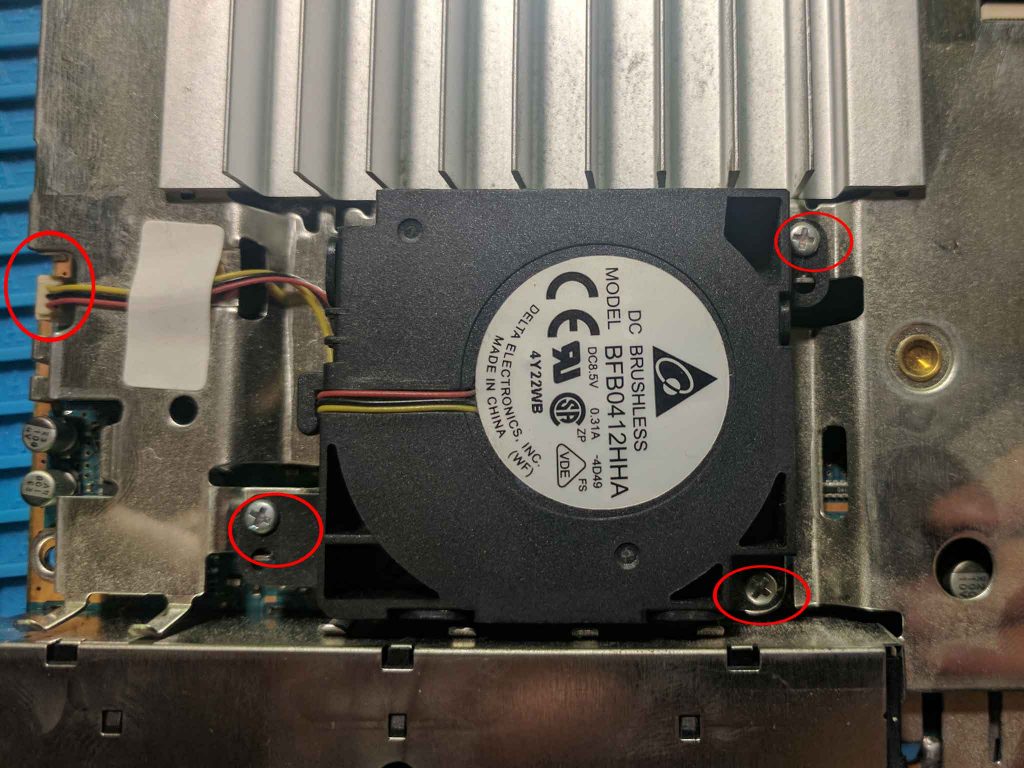
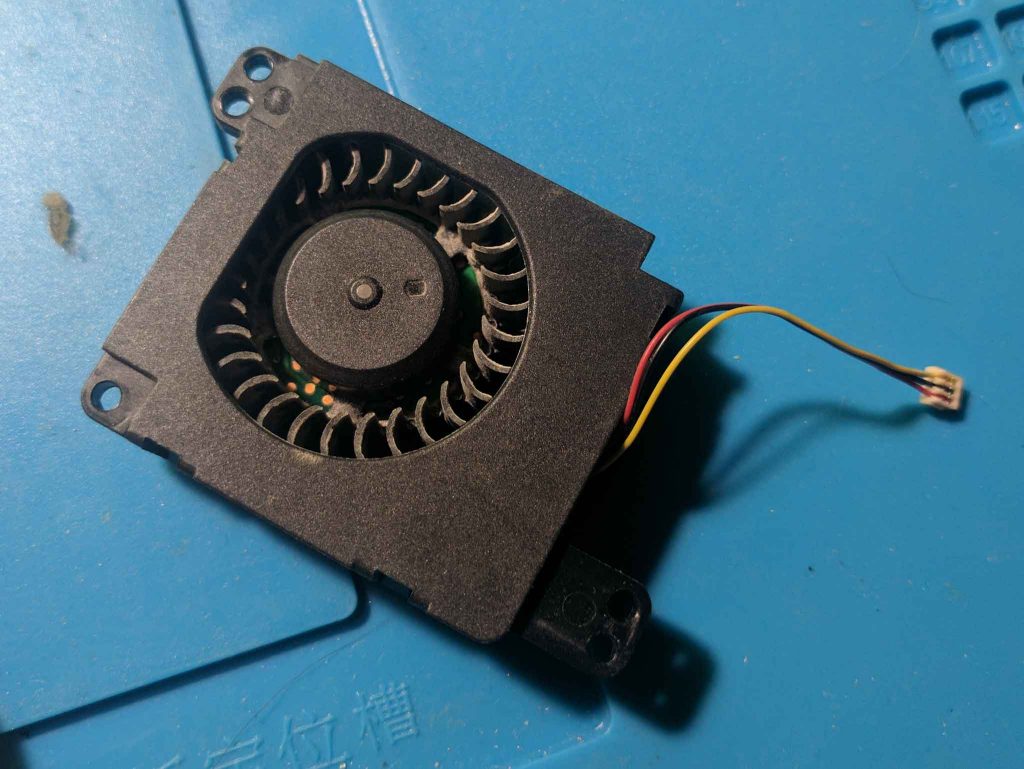
07 – Fan removal
You can remove the fan from the board by removing three screws, and unplugging the fan connector.
Below is an image of the fan with the three screws removed.
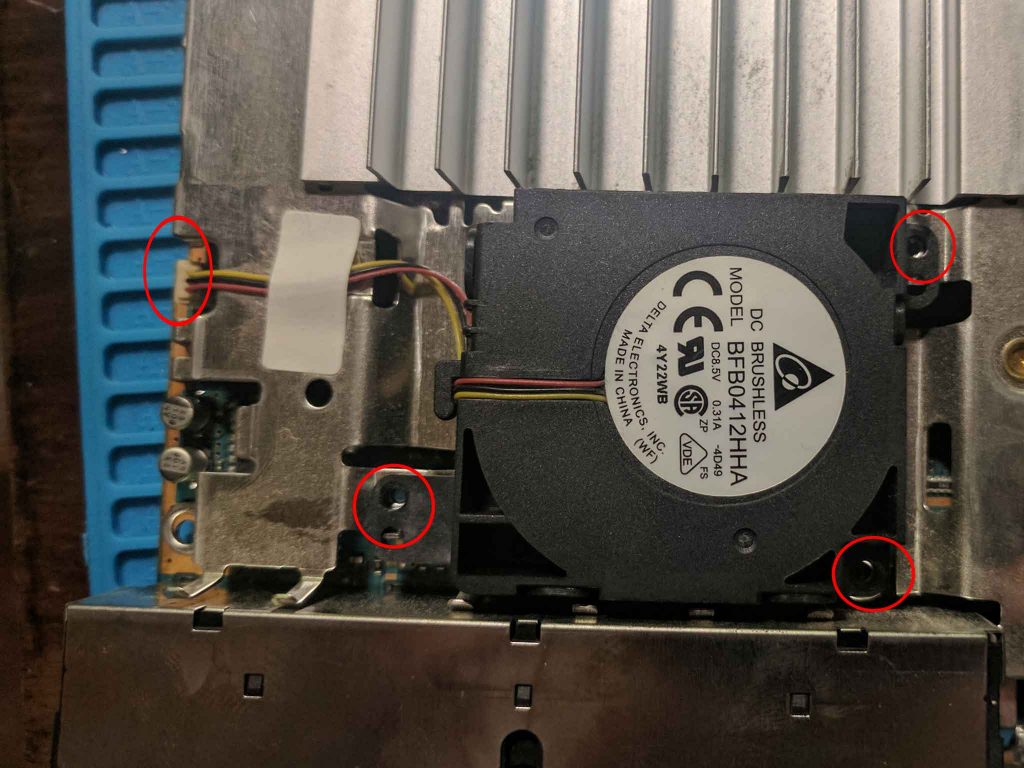
You can now lift the fan to remove it from the board.
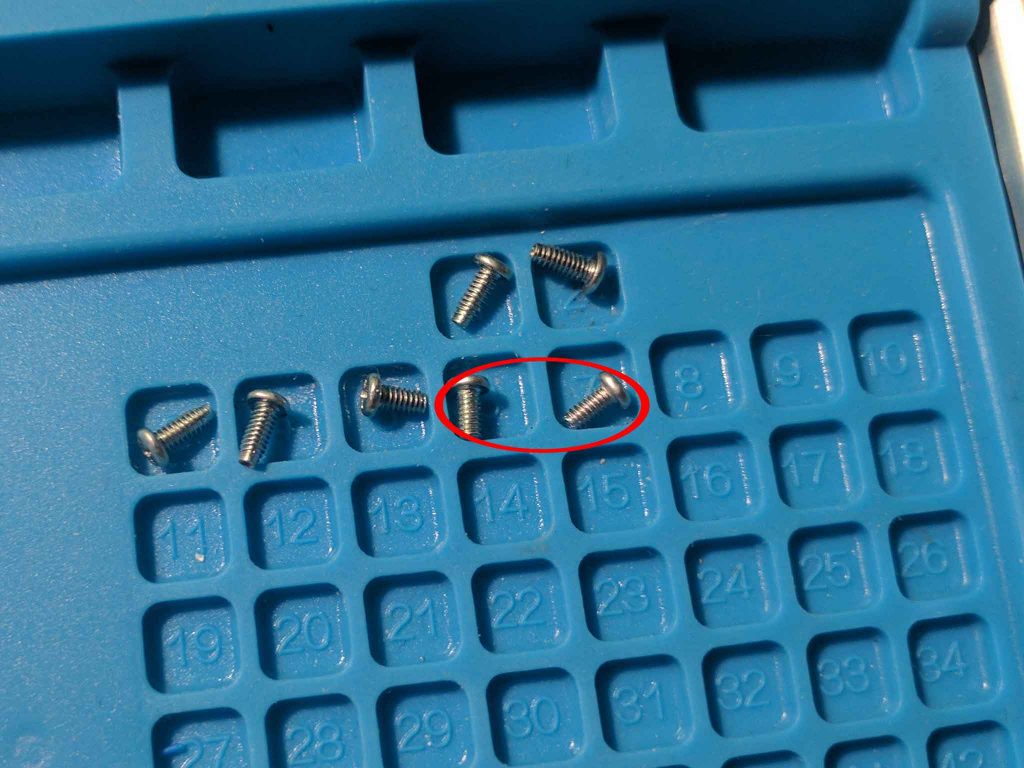
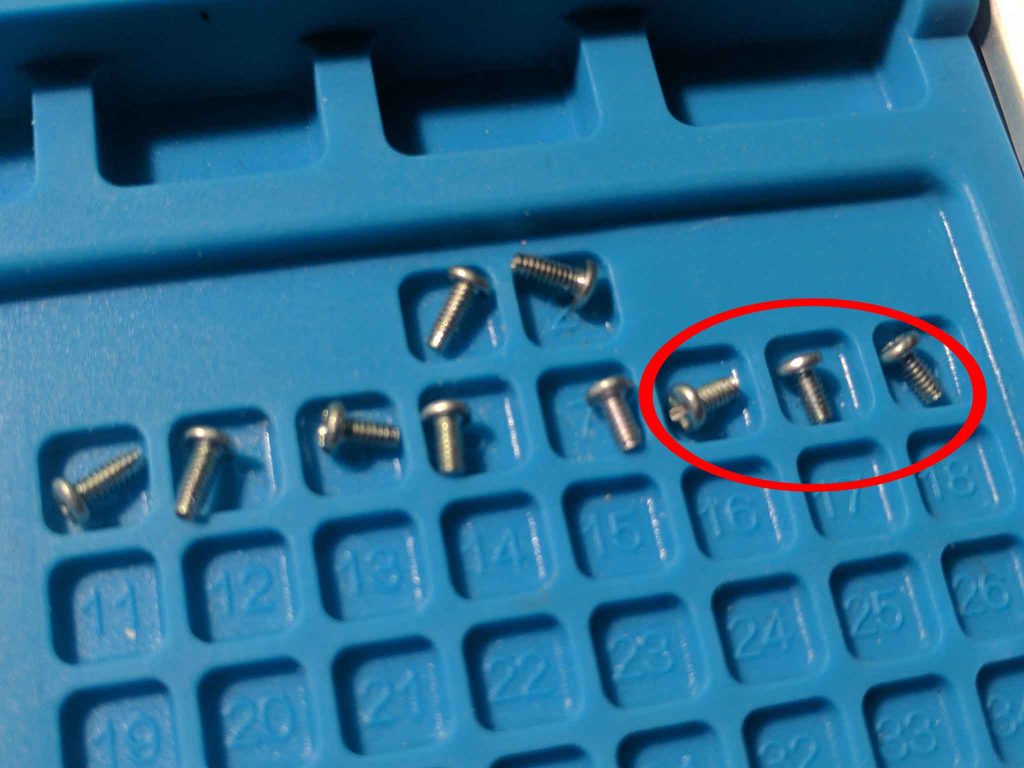
Below is an image of the three identical fan screws.
Step 8 – Top metal plate removal
Before you can remove the top metal plate you’ll need to remove the battery.
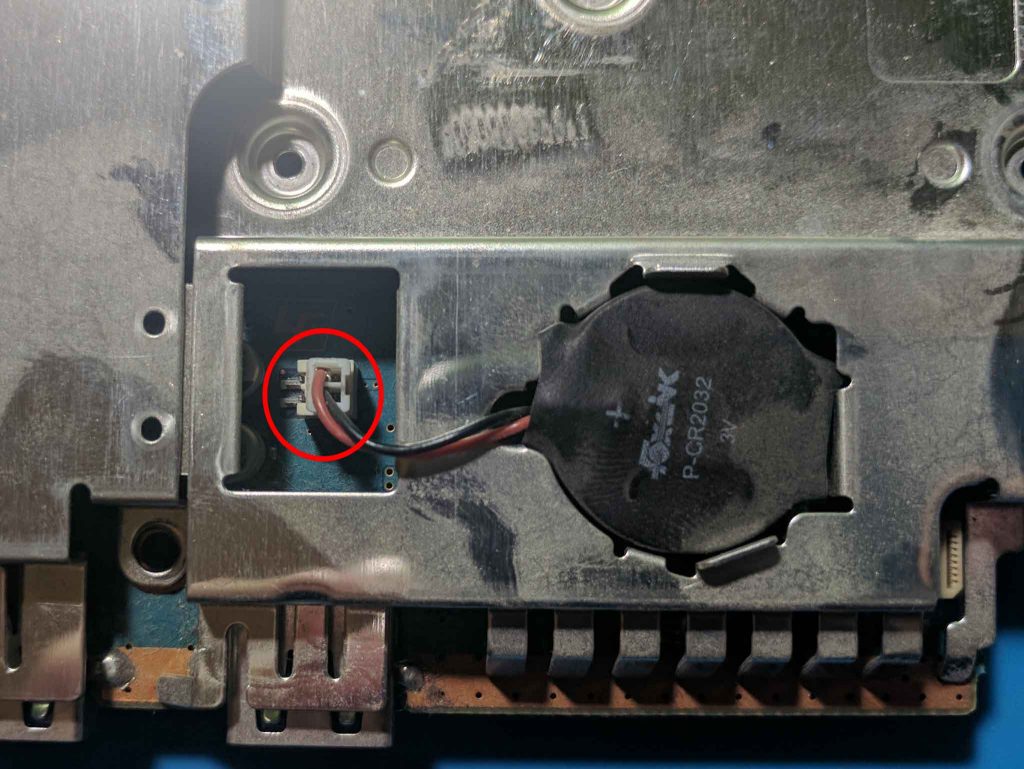
The battery is removed by simply unplugging it from the board. This is a component that may need to be replaced, since these batteries die eventually.
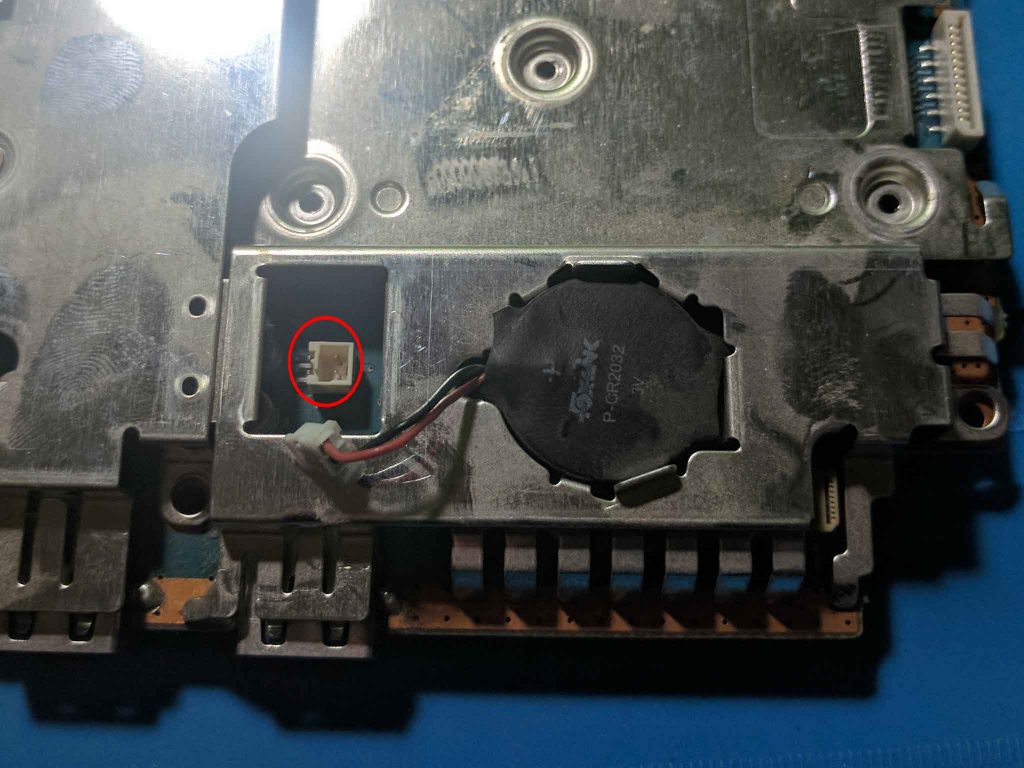
With the battery unplugged you can pull the top metal plate from the board to reveal the top of the motherboard.
09 – Back of disc drive lid
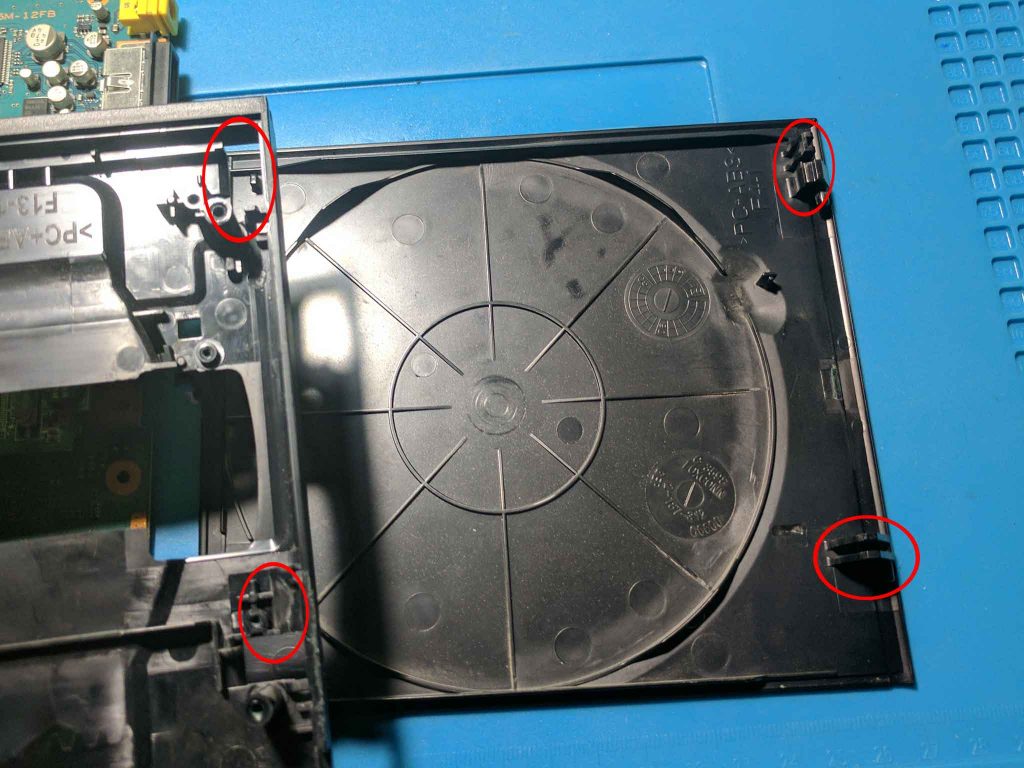
This is where most of the other guides online stop. I’ll be continuing and removing all of the plastic components from the outer plastic shell. I’m starting with the back of the disc drive lid area.
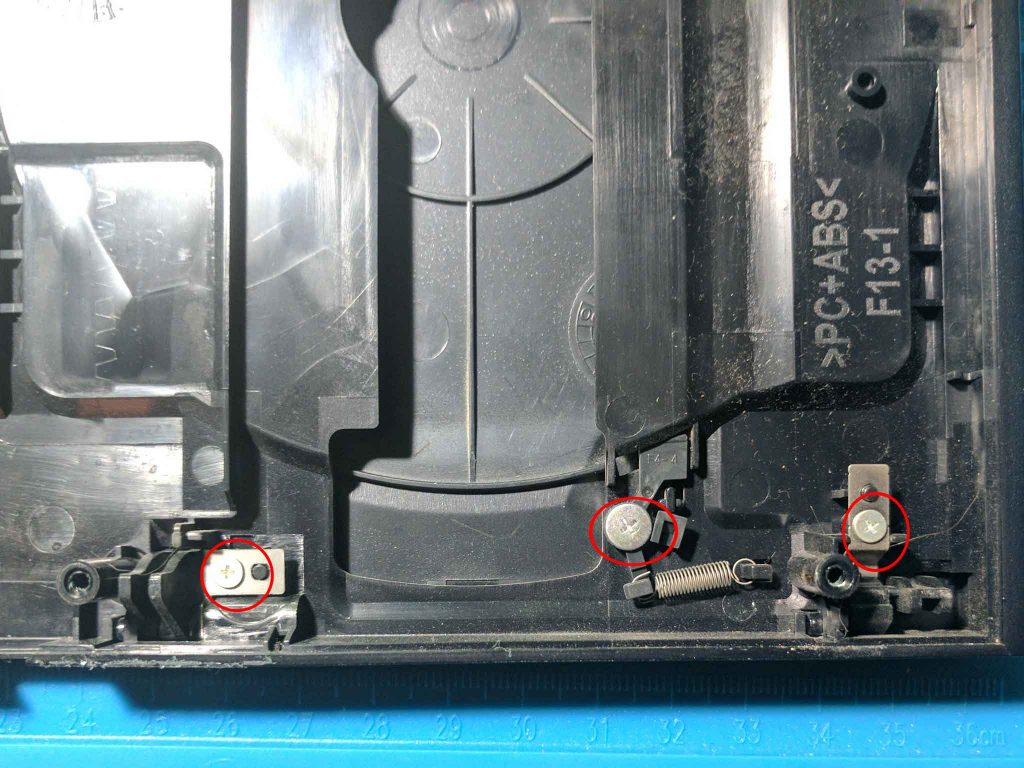
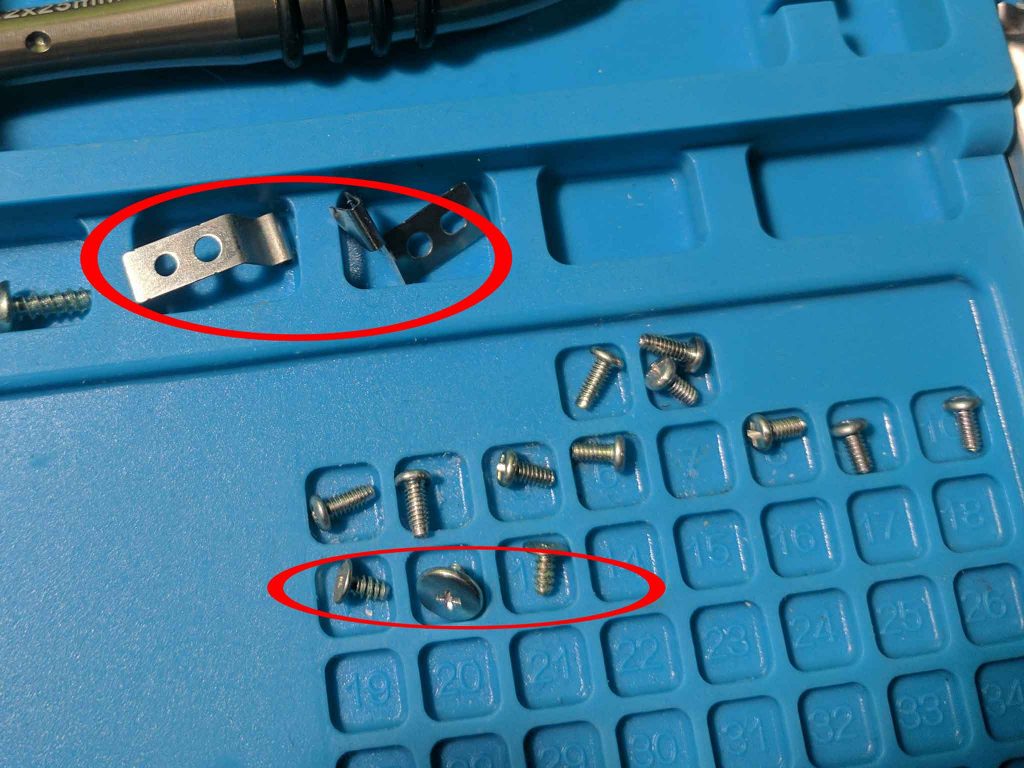
I removed the three screws shown in the pictures above and below.
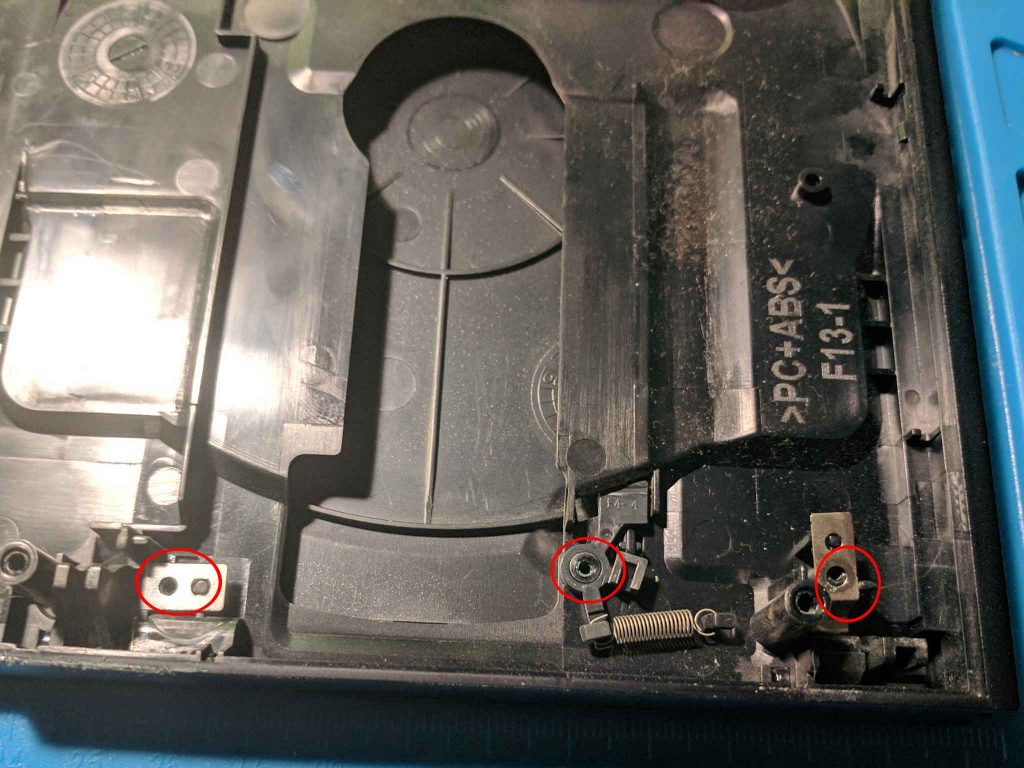
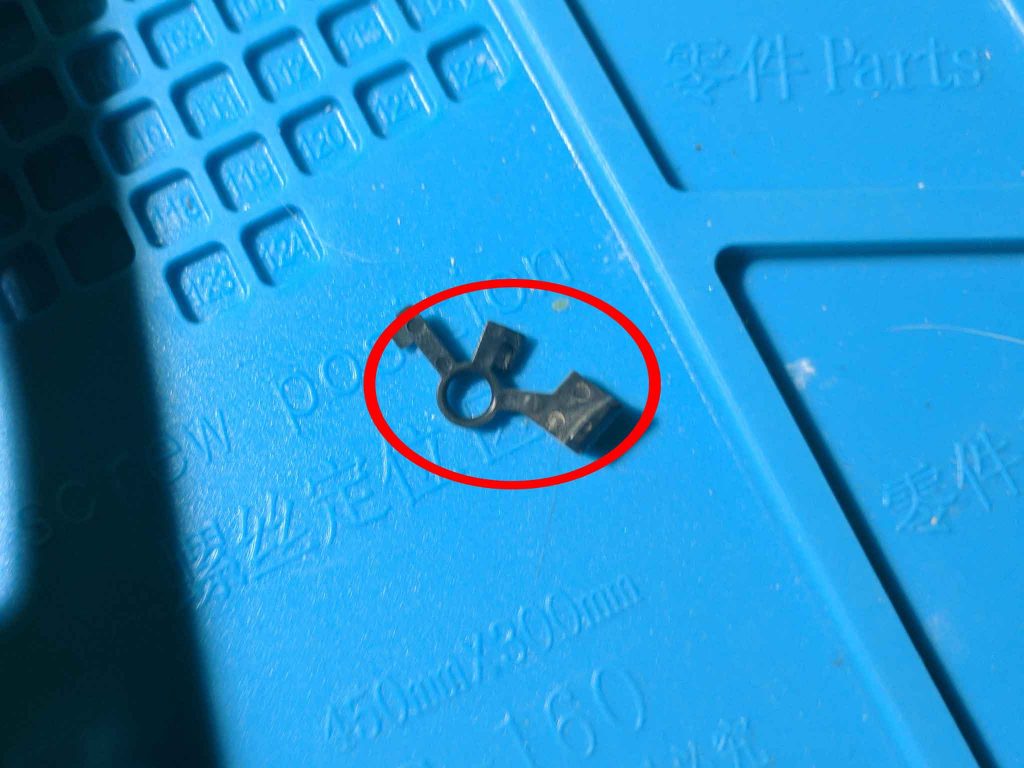
You can then remove the metal tab from the right side.
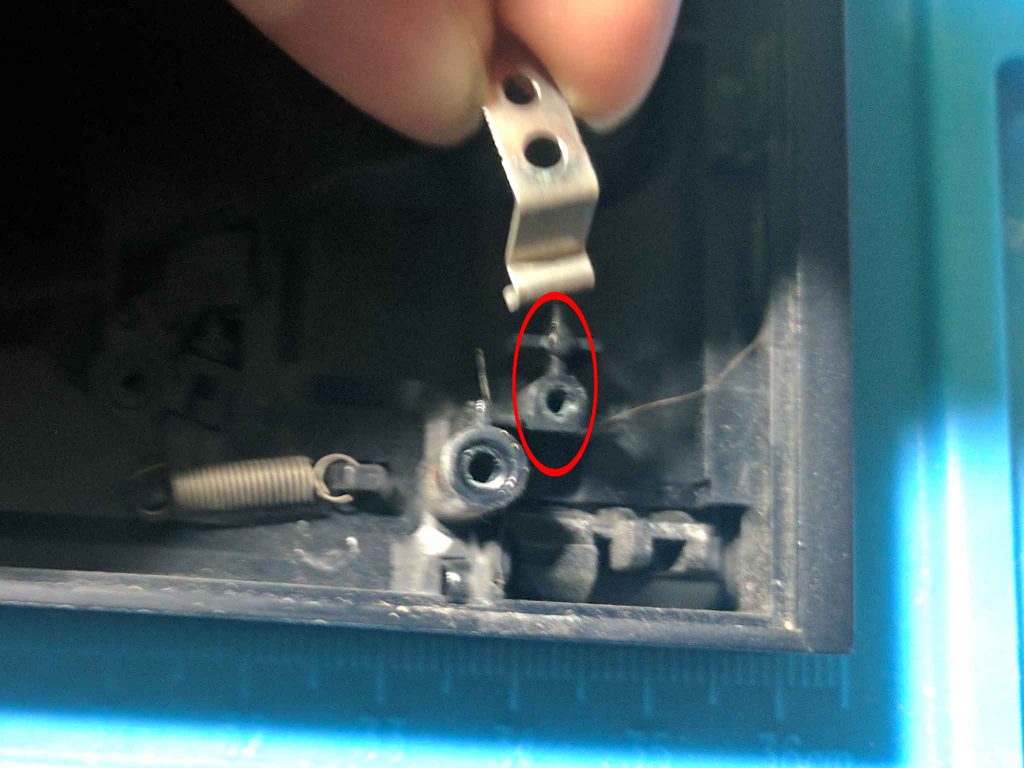
The metal tab on the left side can also be removed.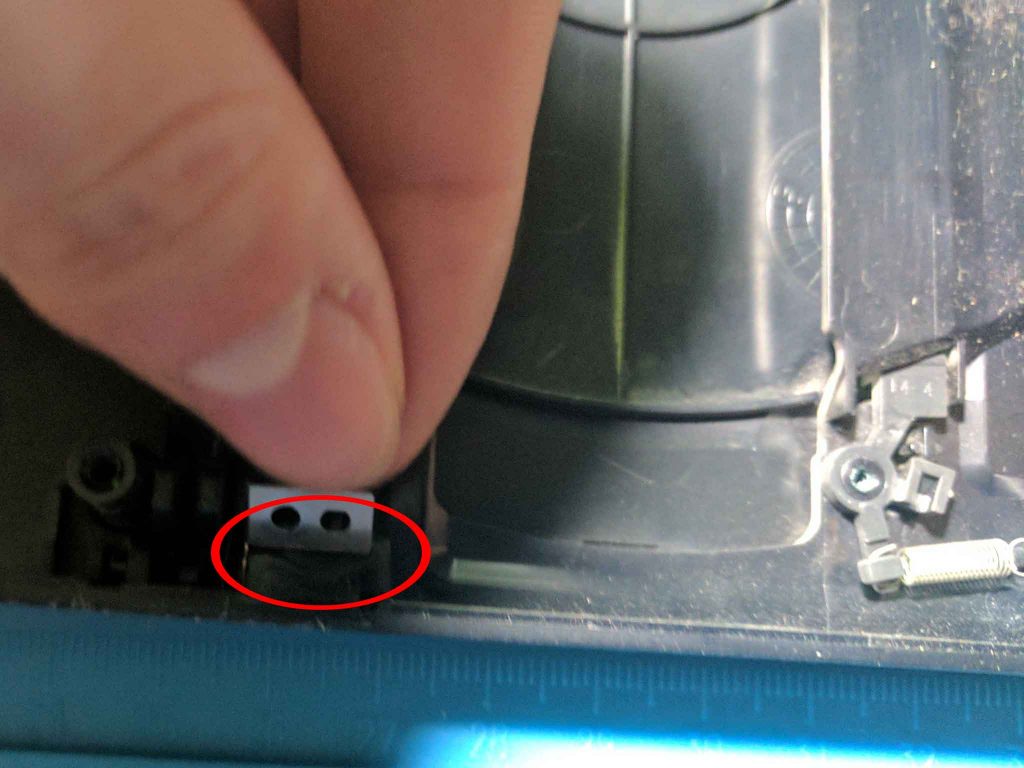
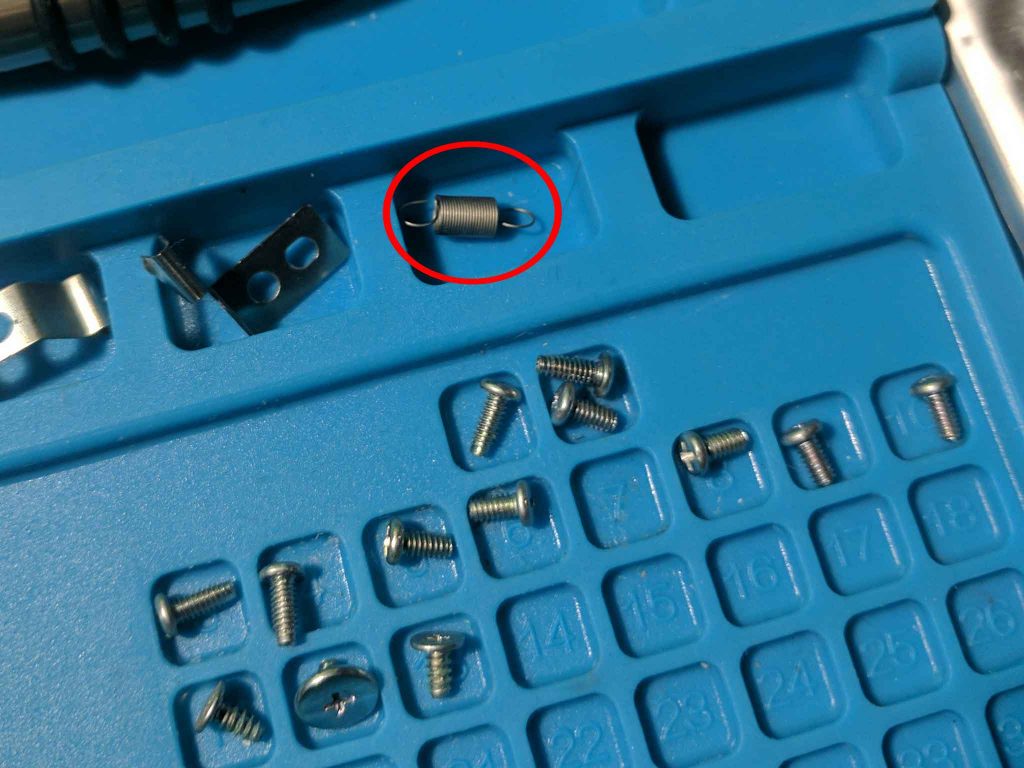
You can see the removed metal tabs and screws below.
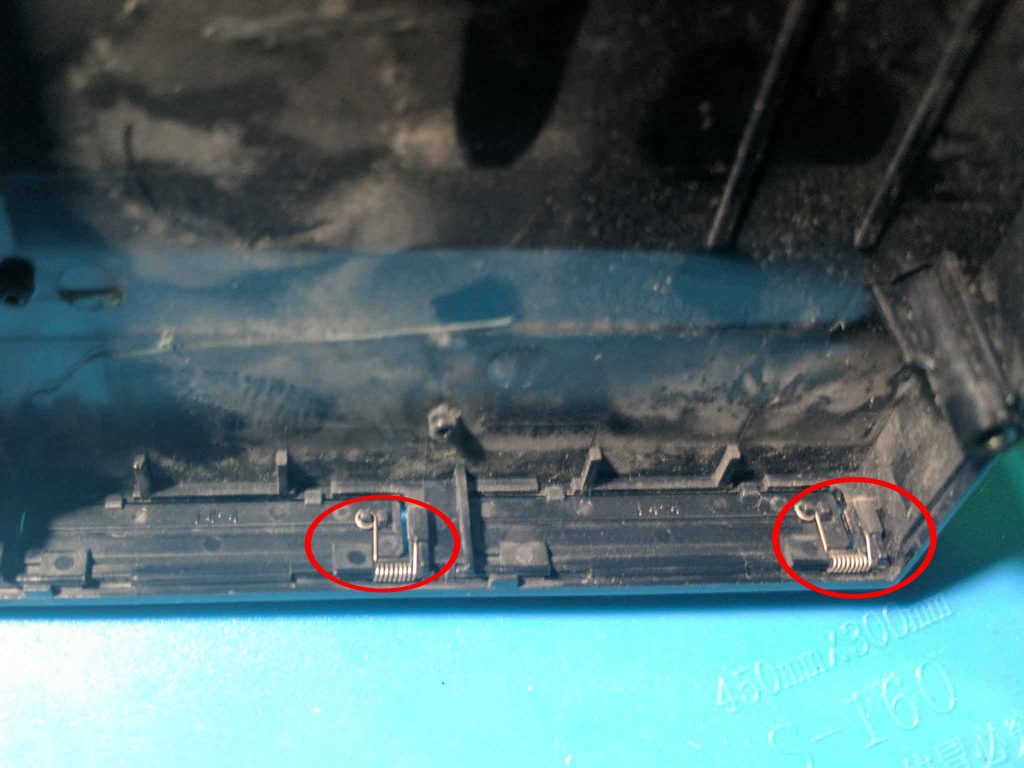
There is a spring that connects to a piece that stops the disc from spinning when the tray is opened. Lift upwards on the plastic piece.
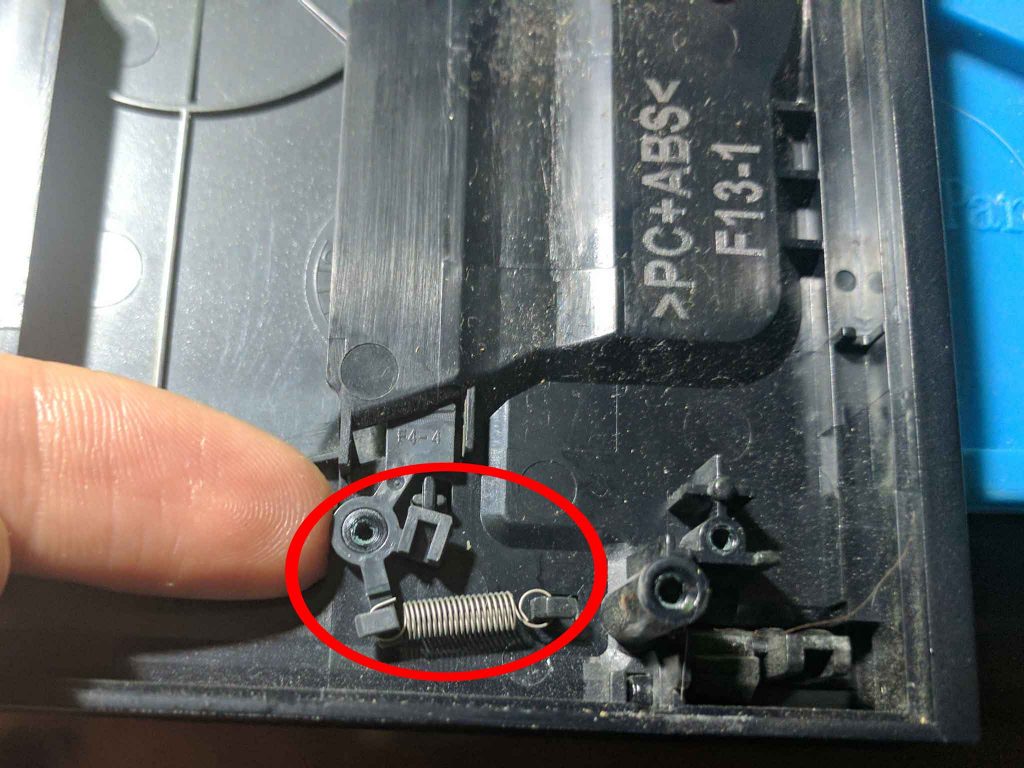
You can then remove the spring.
I wasn’t able to remove the plastic piece, but it came out on its own once the lid was removed in a later step.
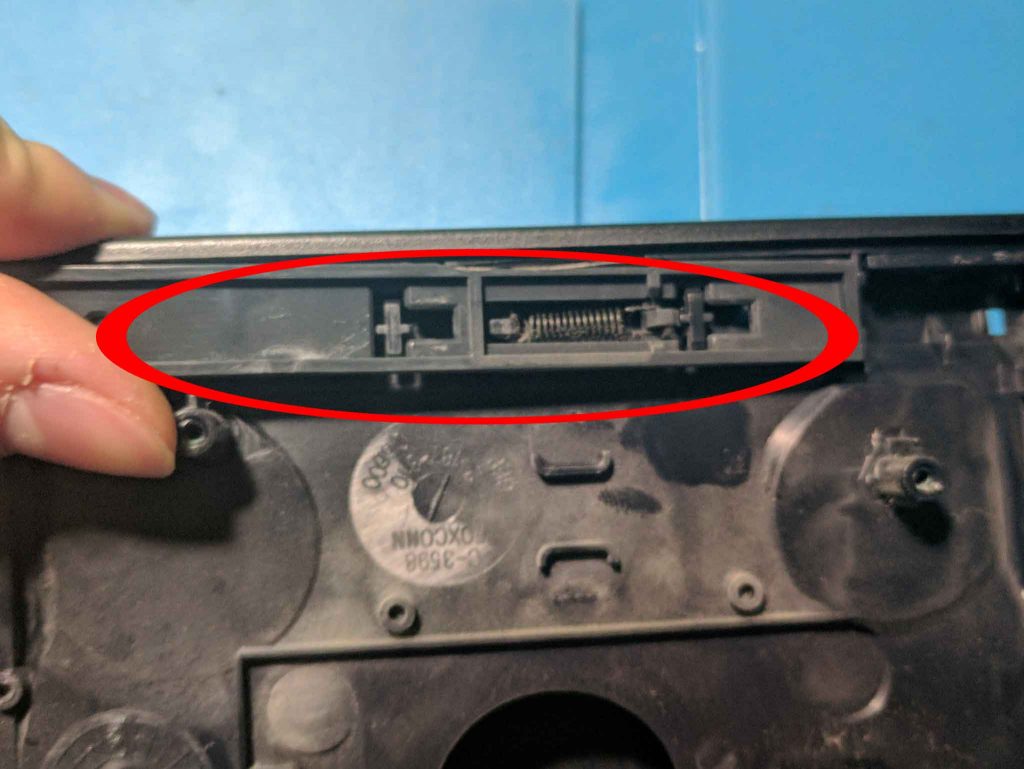
10 – Front of disc drive lid
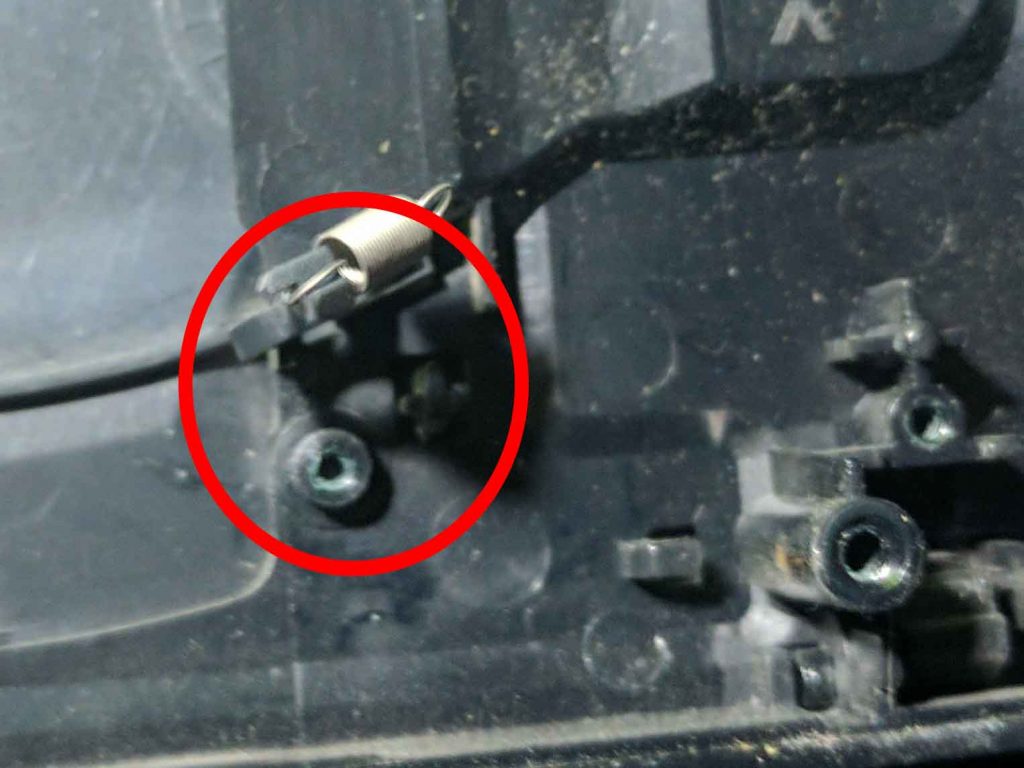
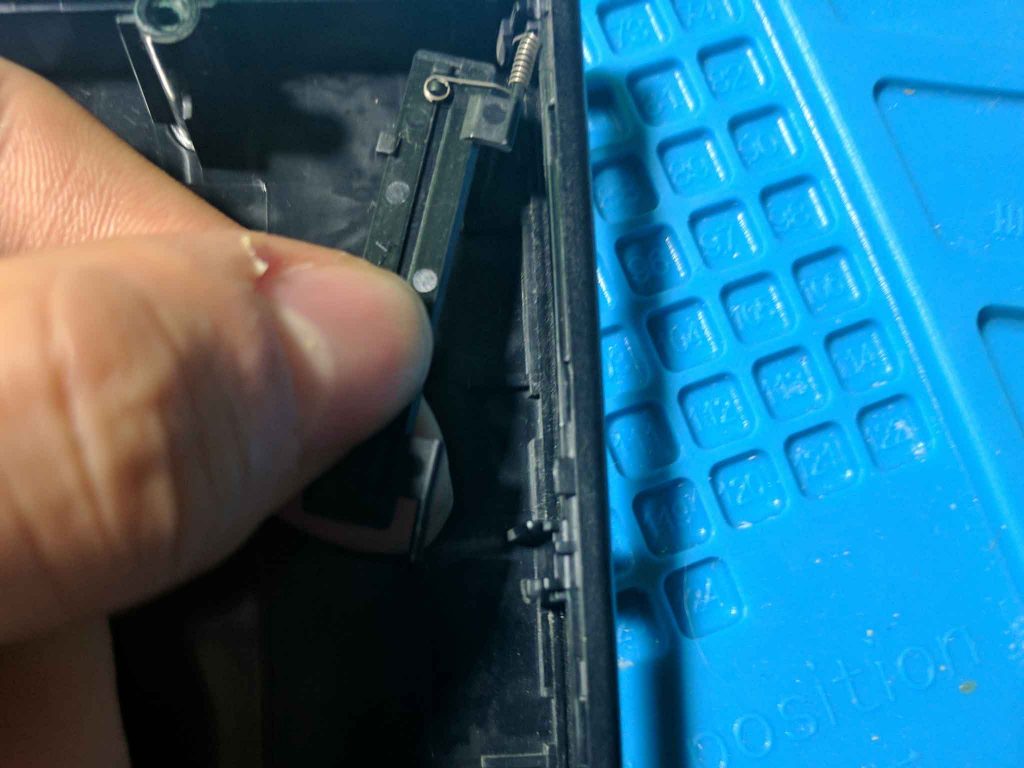
Towards the front of the disc drive lid you’ll see a plastic latch that needs removed.

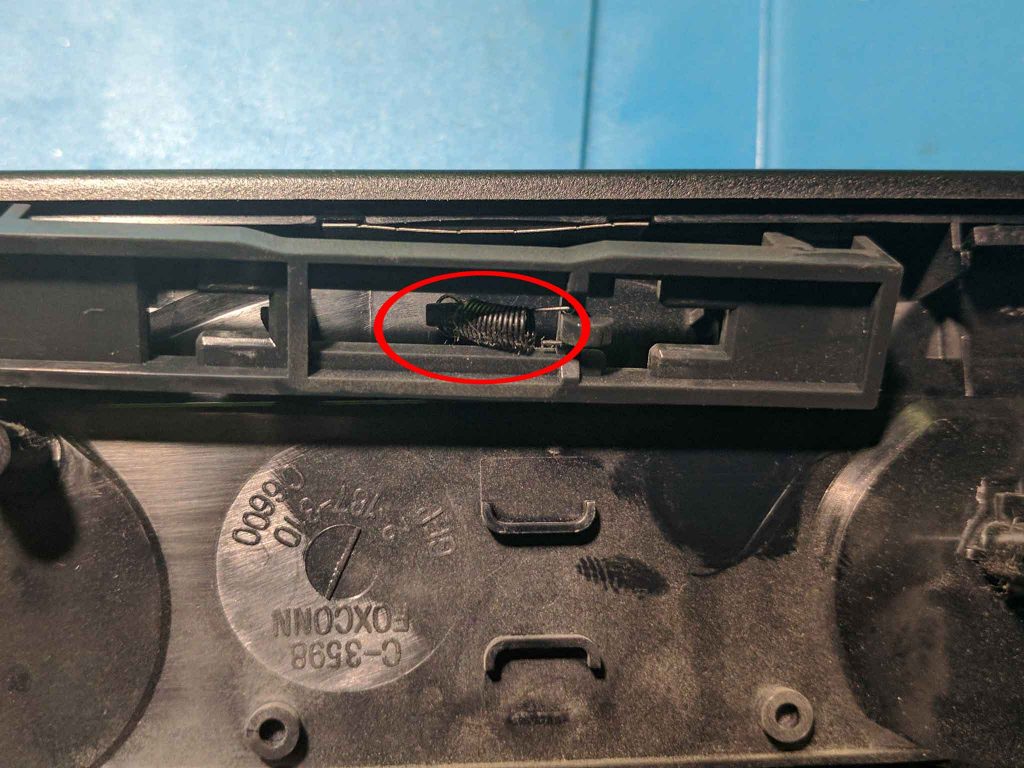
Start by sliding the latch.
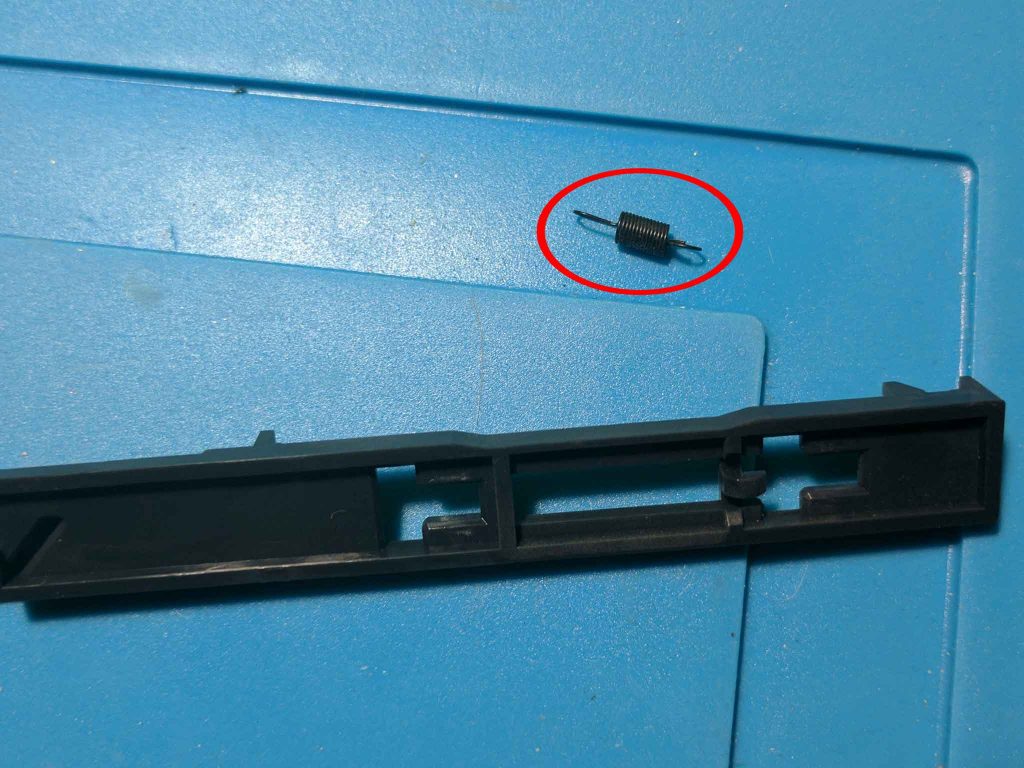
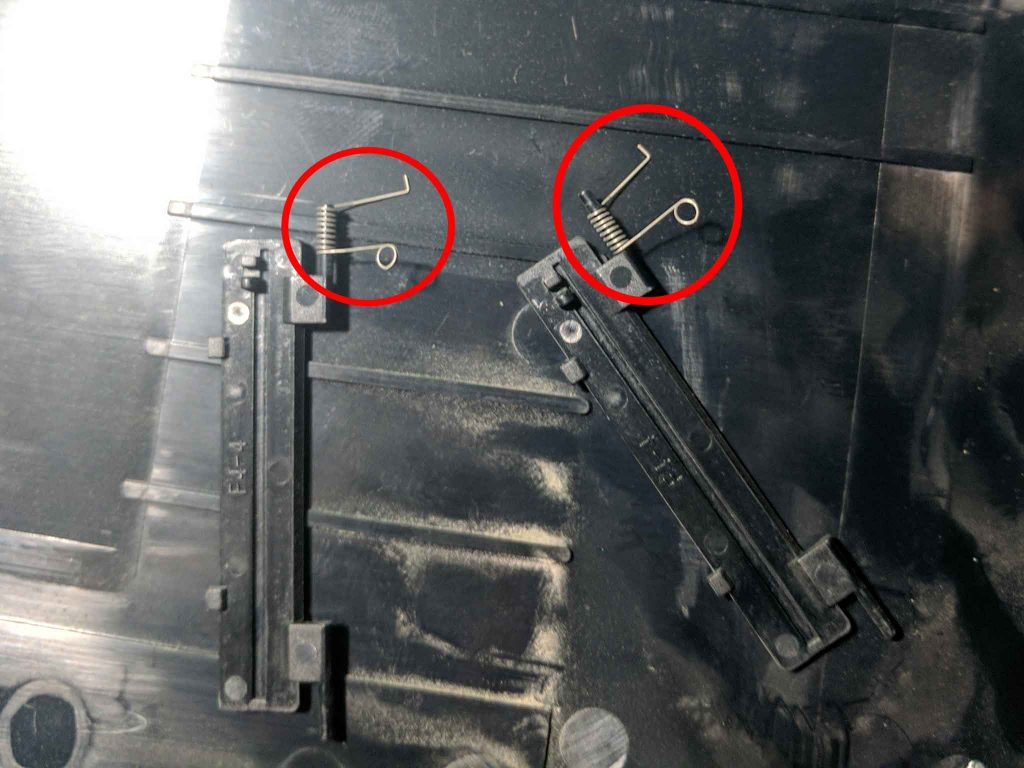
You can then lift the latch out away from the rest of the shell, and remove the spring.
You’re left with a spring, and the plastic latch.
11 – Disc drive lid removal
You can now remove the disc drive lid by carefully prying at the tabs on either side of the hinge. It should pop right out with a little bit of prying.
When I removed the lid the disc stopper popped out of place. There was also a spring that fell out that I didn’t notice until later, so I don’t have any pictures. It’s the spring that pushes the disc drive lid out when the eject latch is released.
12 – Memory card flap removal
The final step is to remove the memory card flaps. You should be able to flip them up, and pull them out.
Be careful since the plastic is very thin and flimsy. They should just snap right out.
You can see the two memory card flaps that have been removed in the image below.
Conclusion
After following all of the steps above you should have a fully disassembled PS2 slim. You should be able to follow the steps in reverse to put your PS2 back together. I included pictures of the screws along the way to help you remember which screws belong where.
[…] ← Previous […]
Hi Quade was following your mods. I just wanted to know what happened with that spring you said that fell out of the door part of the case without you knowing?
I’ve been trying to fit that black spring for some time now without any results!
Please share what happened with it.
You have to put that black part in from the outside (inside the disc tray), and then attach the spring.
What do I do if I lost the spring that is attached to the eject button mechanism? Do I have to find a new top shell to swap it out? I cant find just the spring anywhere
You’d probably need to take one out of another system.
great information
My P1 memory card slot isn’t working/reading.
I’ve got the top removed and am expecting to need to use the full display of your instructions.
If i take out the memory card slot will i be able to “clean” the interior ribbon wire as apparently possible with the fat ps2?
If possible i appreciate whatever help.
There is no ribbon cable for the controller/memory card ports on the slims. They are soldered directly to the board. You can take apart the system and clean out the contacts though.
So weird. I blew out some dried up roach skeletons and put it back together and both slots began working but the memory card itself became undetectable. My other memory card could be used in either slot for all of about half a day and now P1 is inoperative again.
I’m gonna try cleaning it a little more thoroughly and find some metal polish for the port.
It was a system from a pawn shop in eBay so might have to cut my losses.
Thanks
Hey William,
I took apart my Slim and a small square metal plate with a screw hole fell out when opening the case. I can’t quite tell where it goes and I didn’t see it in your pictures. Any ideas?
It goes into a slot on the side opposite to the disc drive. It goes half in the top lid and half in the bottom. It is used for the vertical screw in stand and isn’t necessary if you aren’t using the stand.
Thank you so much!
Hey Art, really helpful – appreciate this! I’m troubleshooting my PS2 slim which isn’t reading discs- just stays at the starting “browser” window when turned on. I got the device from a friend who used it a little bit, then had in his closet for a couple years. I fully replaced the laser; after install it glides down as it should without issue when holding down the door-closed nubs, then flashes the red light for a moment and stays there, but the motor never spins after it’s done that to actually read the disc that’s in. No noise (grinding, etc.)… Read more »
I’m sorry, this was to William Quade! Not Art. Thanks William!
Hi, did you remove the anti-static points on the laser? I had this problem too last year and i fixed it that way.
Thanks Quade for the tutorial, and modchip guide….its really helpful…
i have ps2 slim 70006, its ON but no display, do you know what problem usually occur? (sorry bad english)