SCPH-101 PSone teardown guide
In my last post I covered taking apart a PS2 slim. This post is a similar guide, but for Sony’s first slim console, the PSone. My goal is to have a SCPH-101 PSone teardown guide that’s more complete than the others available online.
I had already taken apart this PSone several times before taking these pictures, so yours may look slightly different. In particular, my PSone has a modchip installed which you can see in some of the pictures. I wrote another post on how I installed the modchip.
I found the process of taking apart the system to be very easy, this guide should help you better put back together the system by following these steps in reverse.
Step 1 – Bottom screw removal
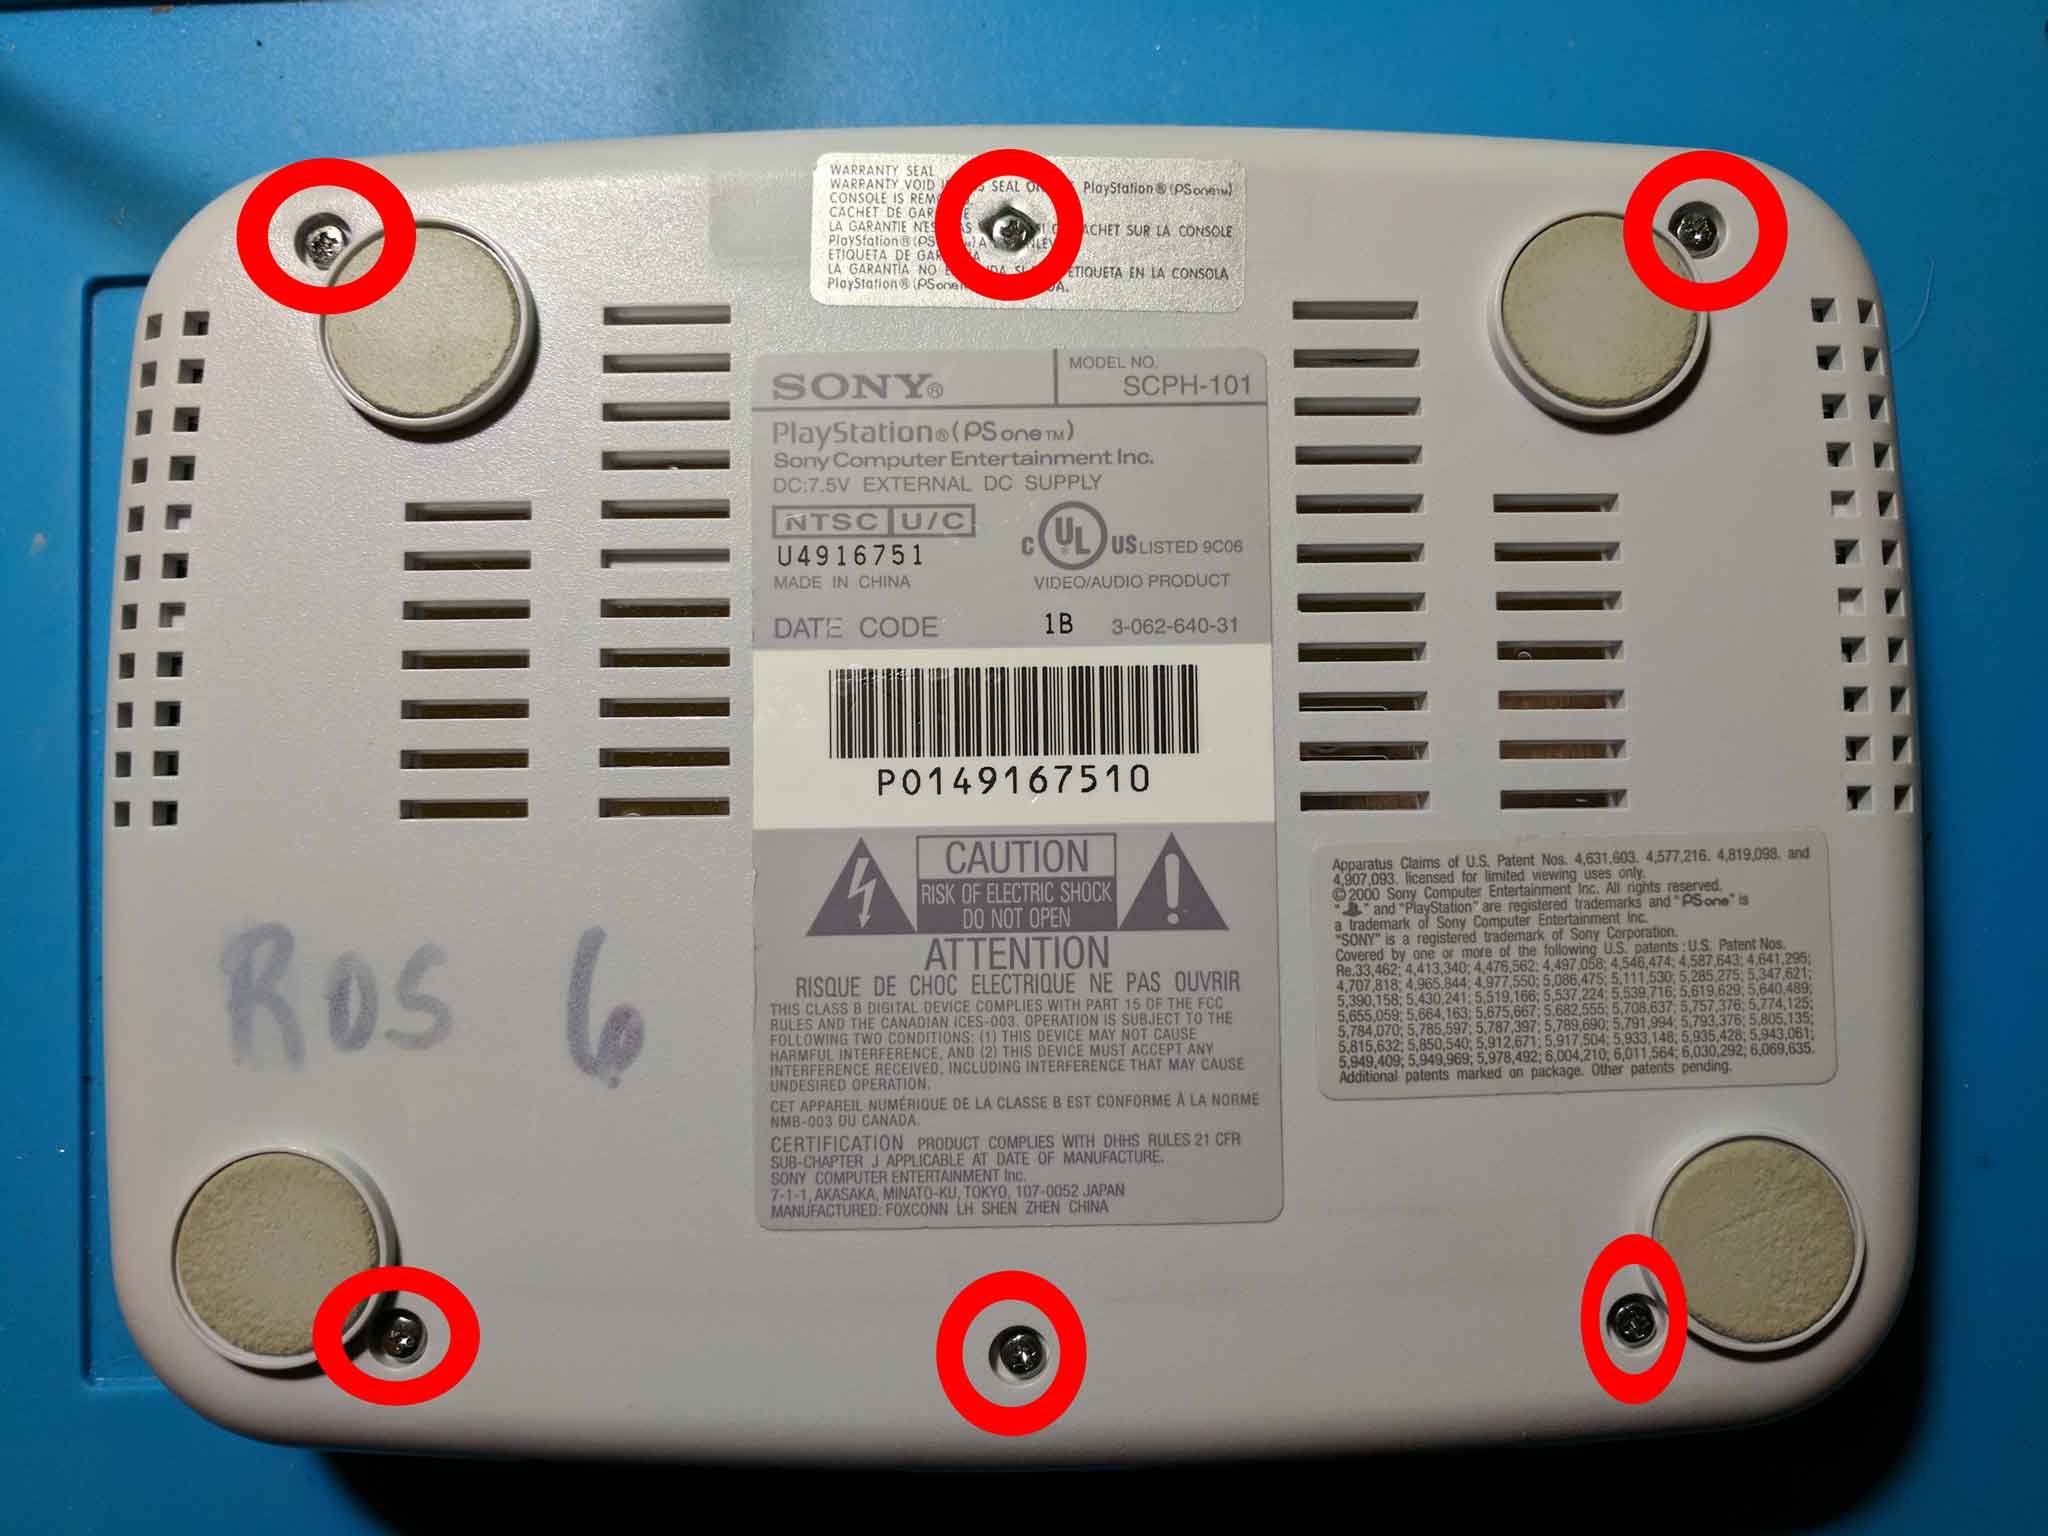
To begin you’ll need to remove the six screws on the bottom of the PSone as shown in the picture below. There is one hidden screw underneath the warranty sticker, you can use a screwdriver to feel for the hole, and then poke through it.
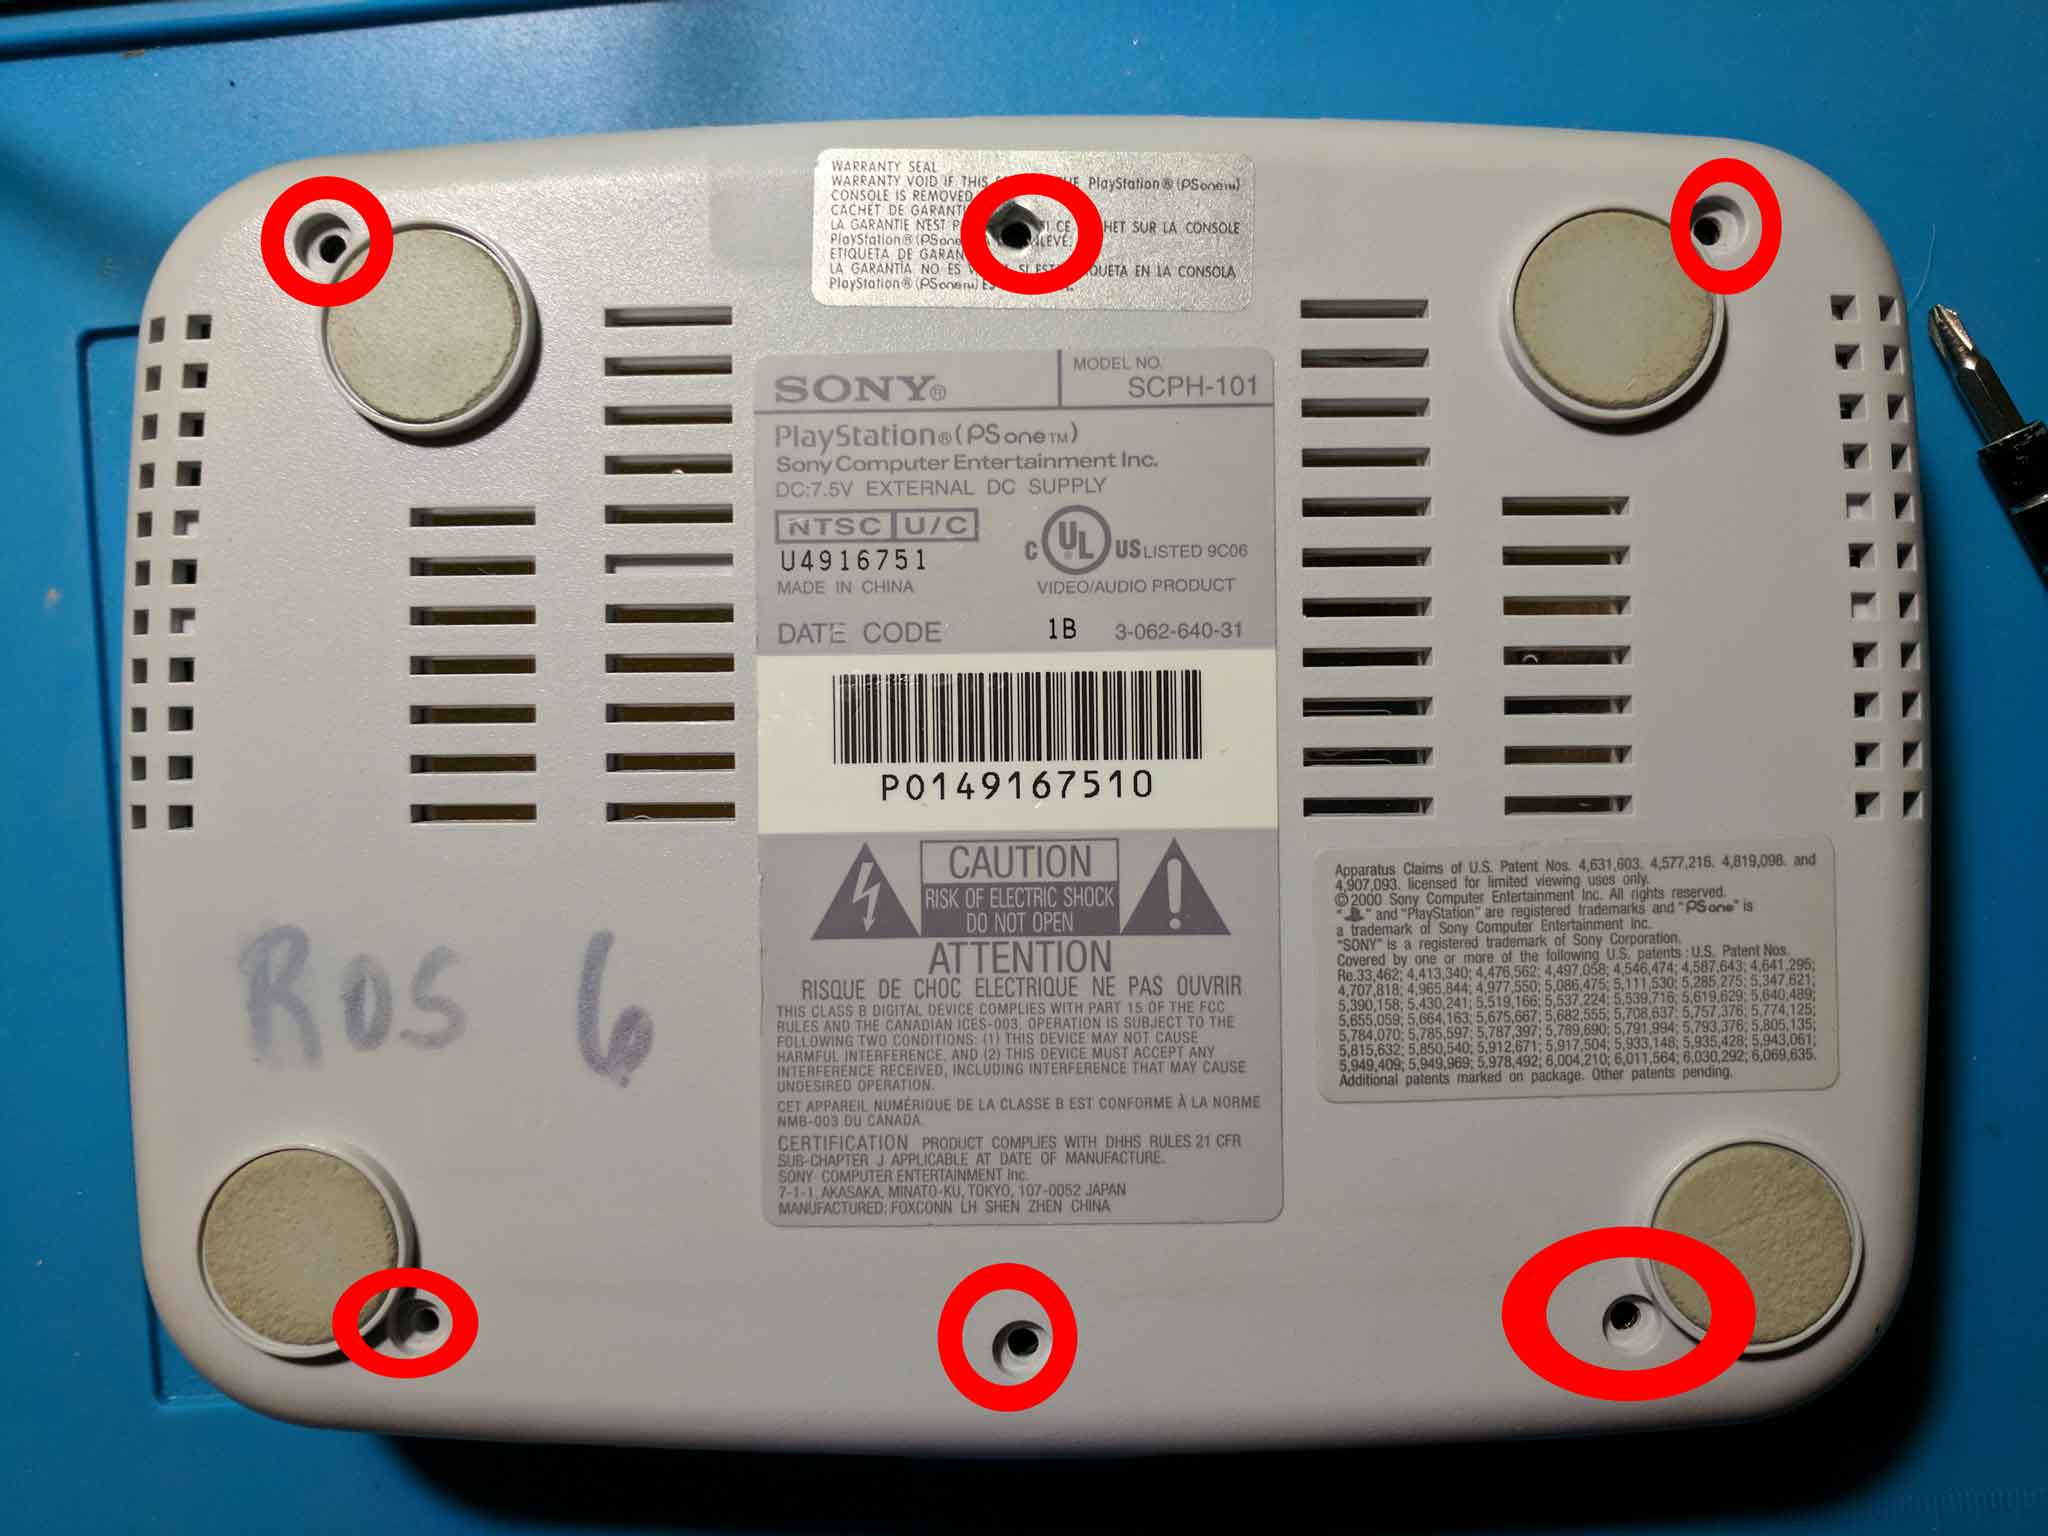
Below are the empty holes once the six screws have been removed.
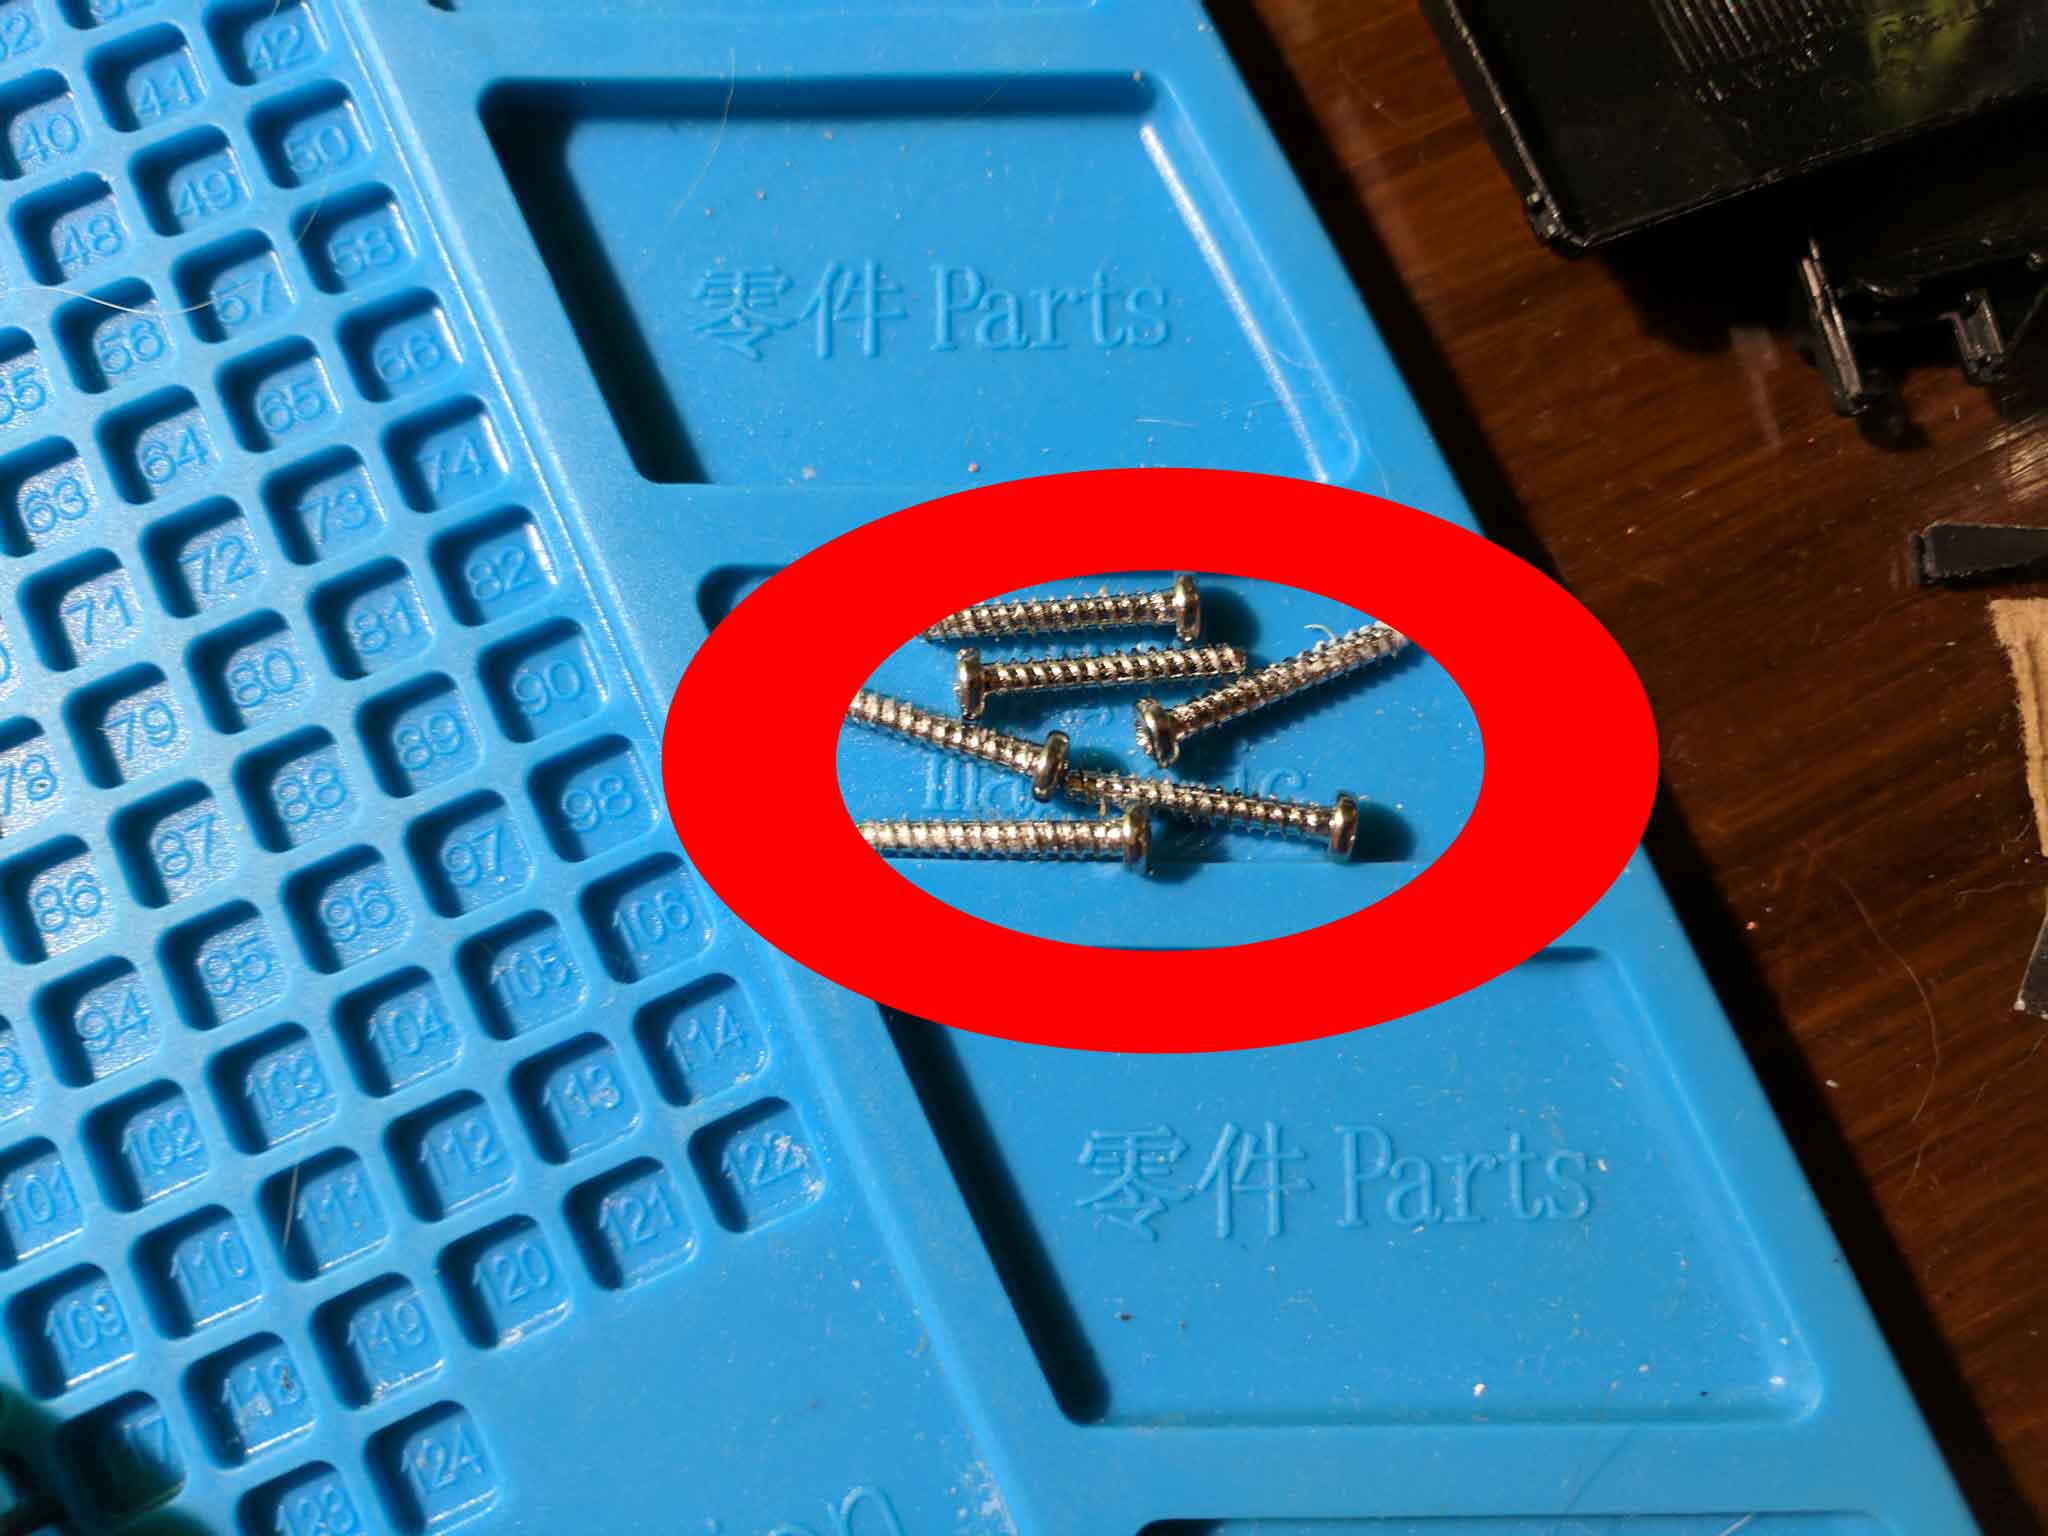
All six screws are identical, so you can keep them together.
Step 2 – Top plastic housing removal
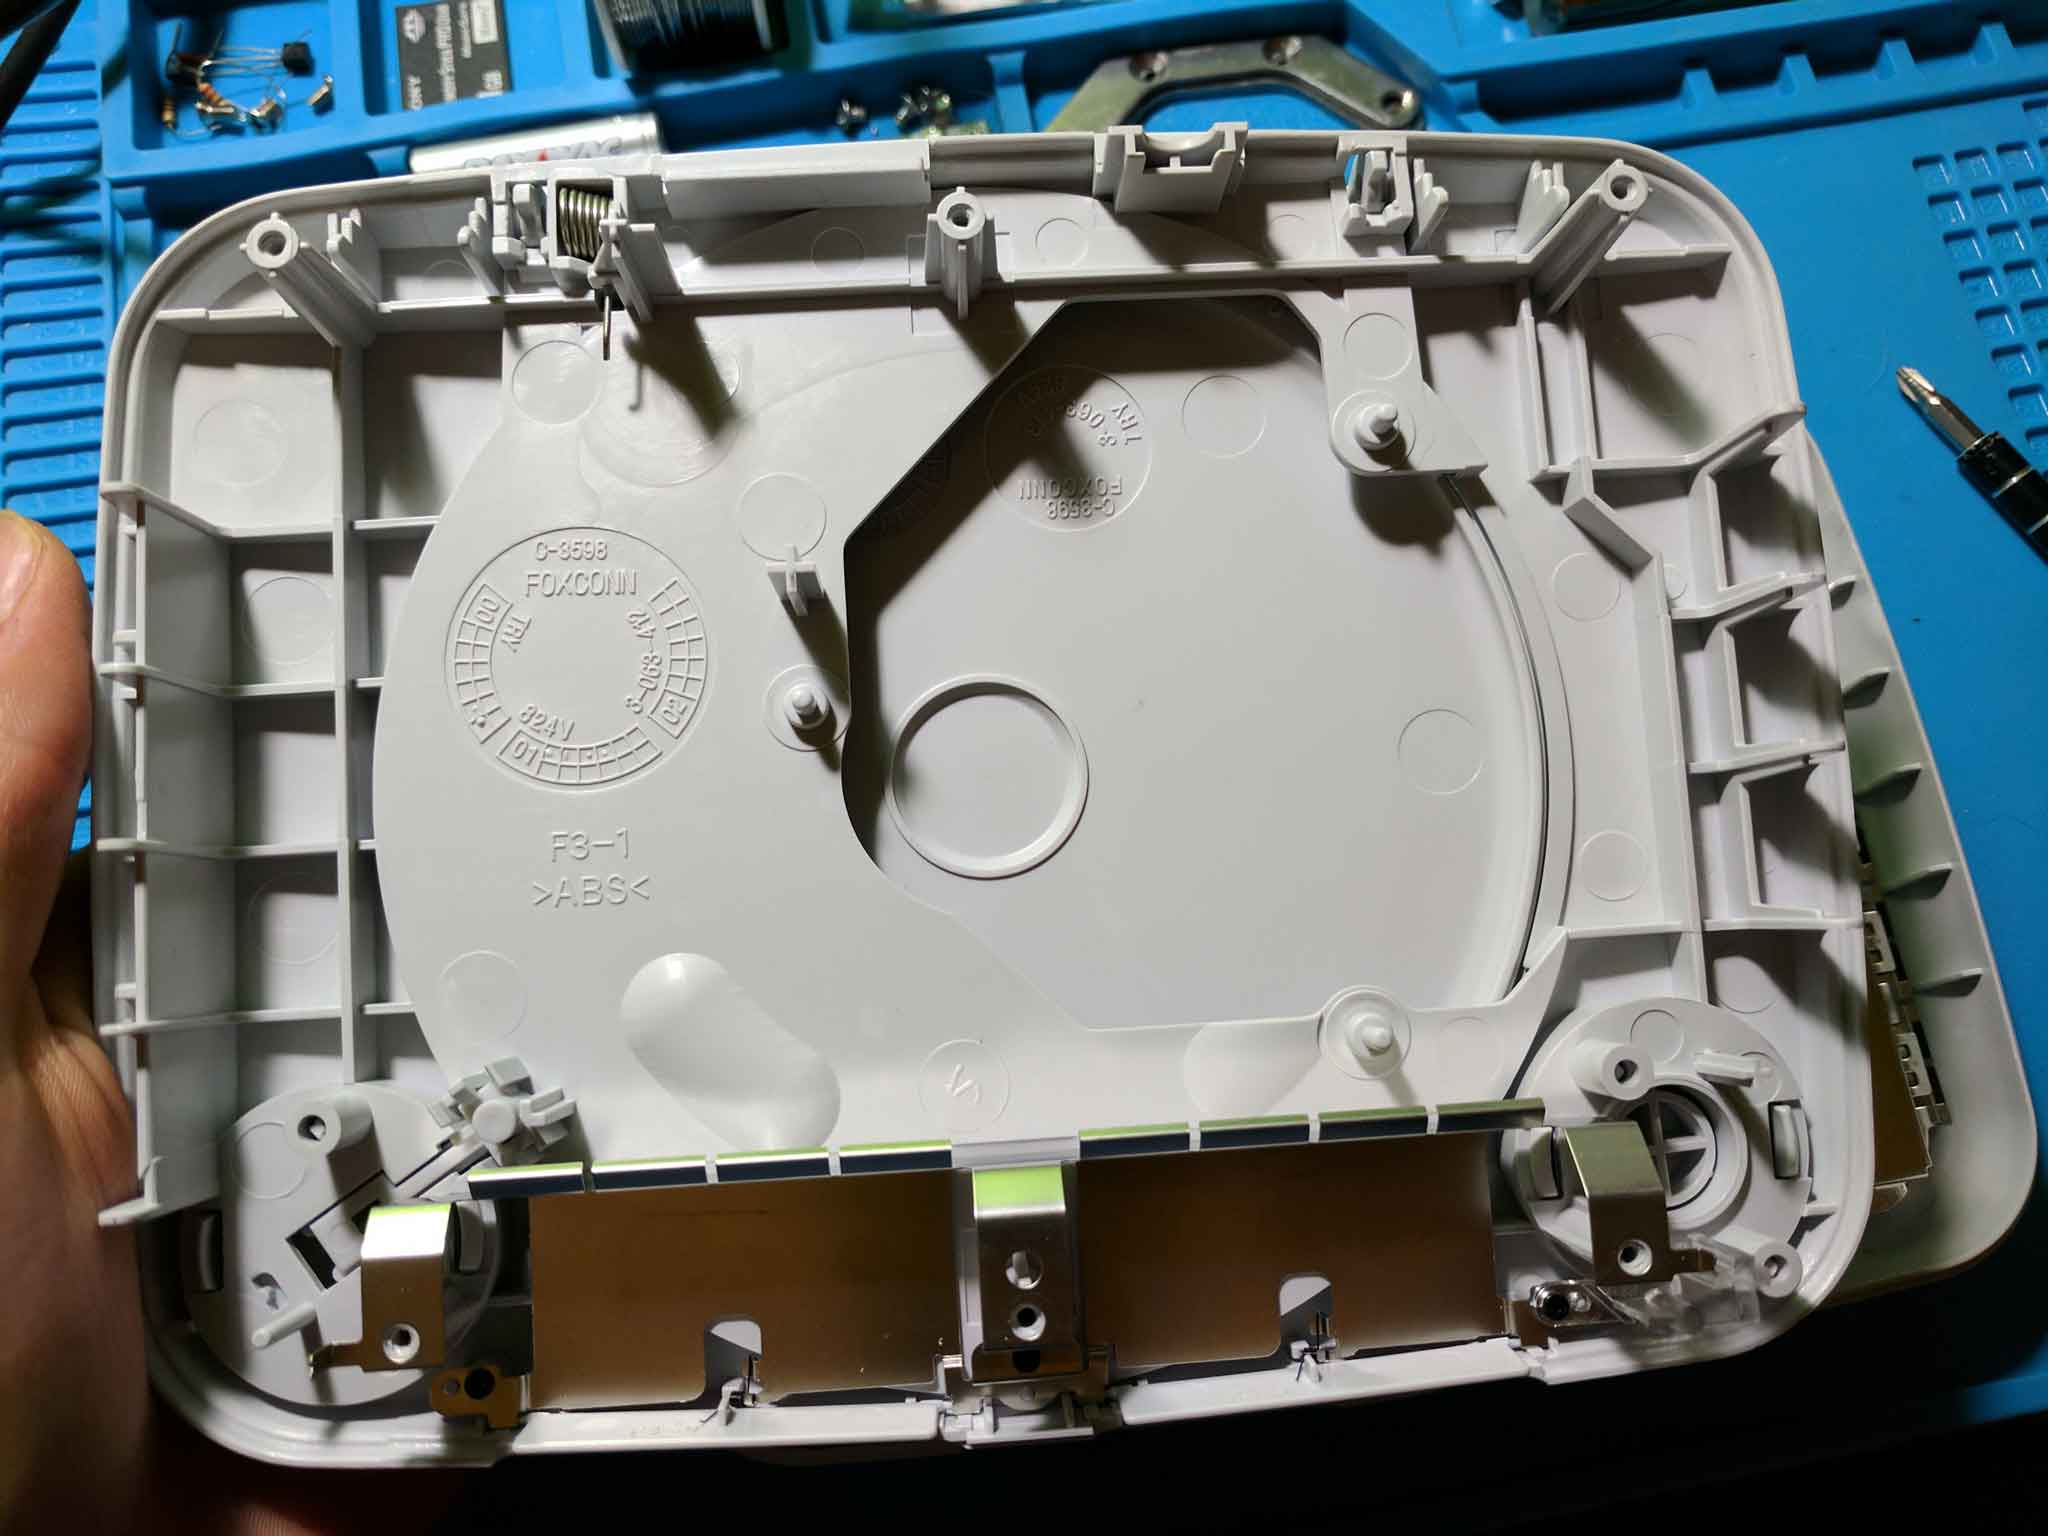
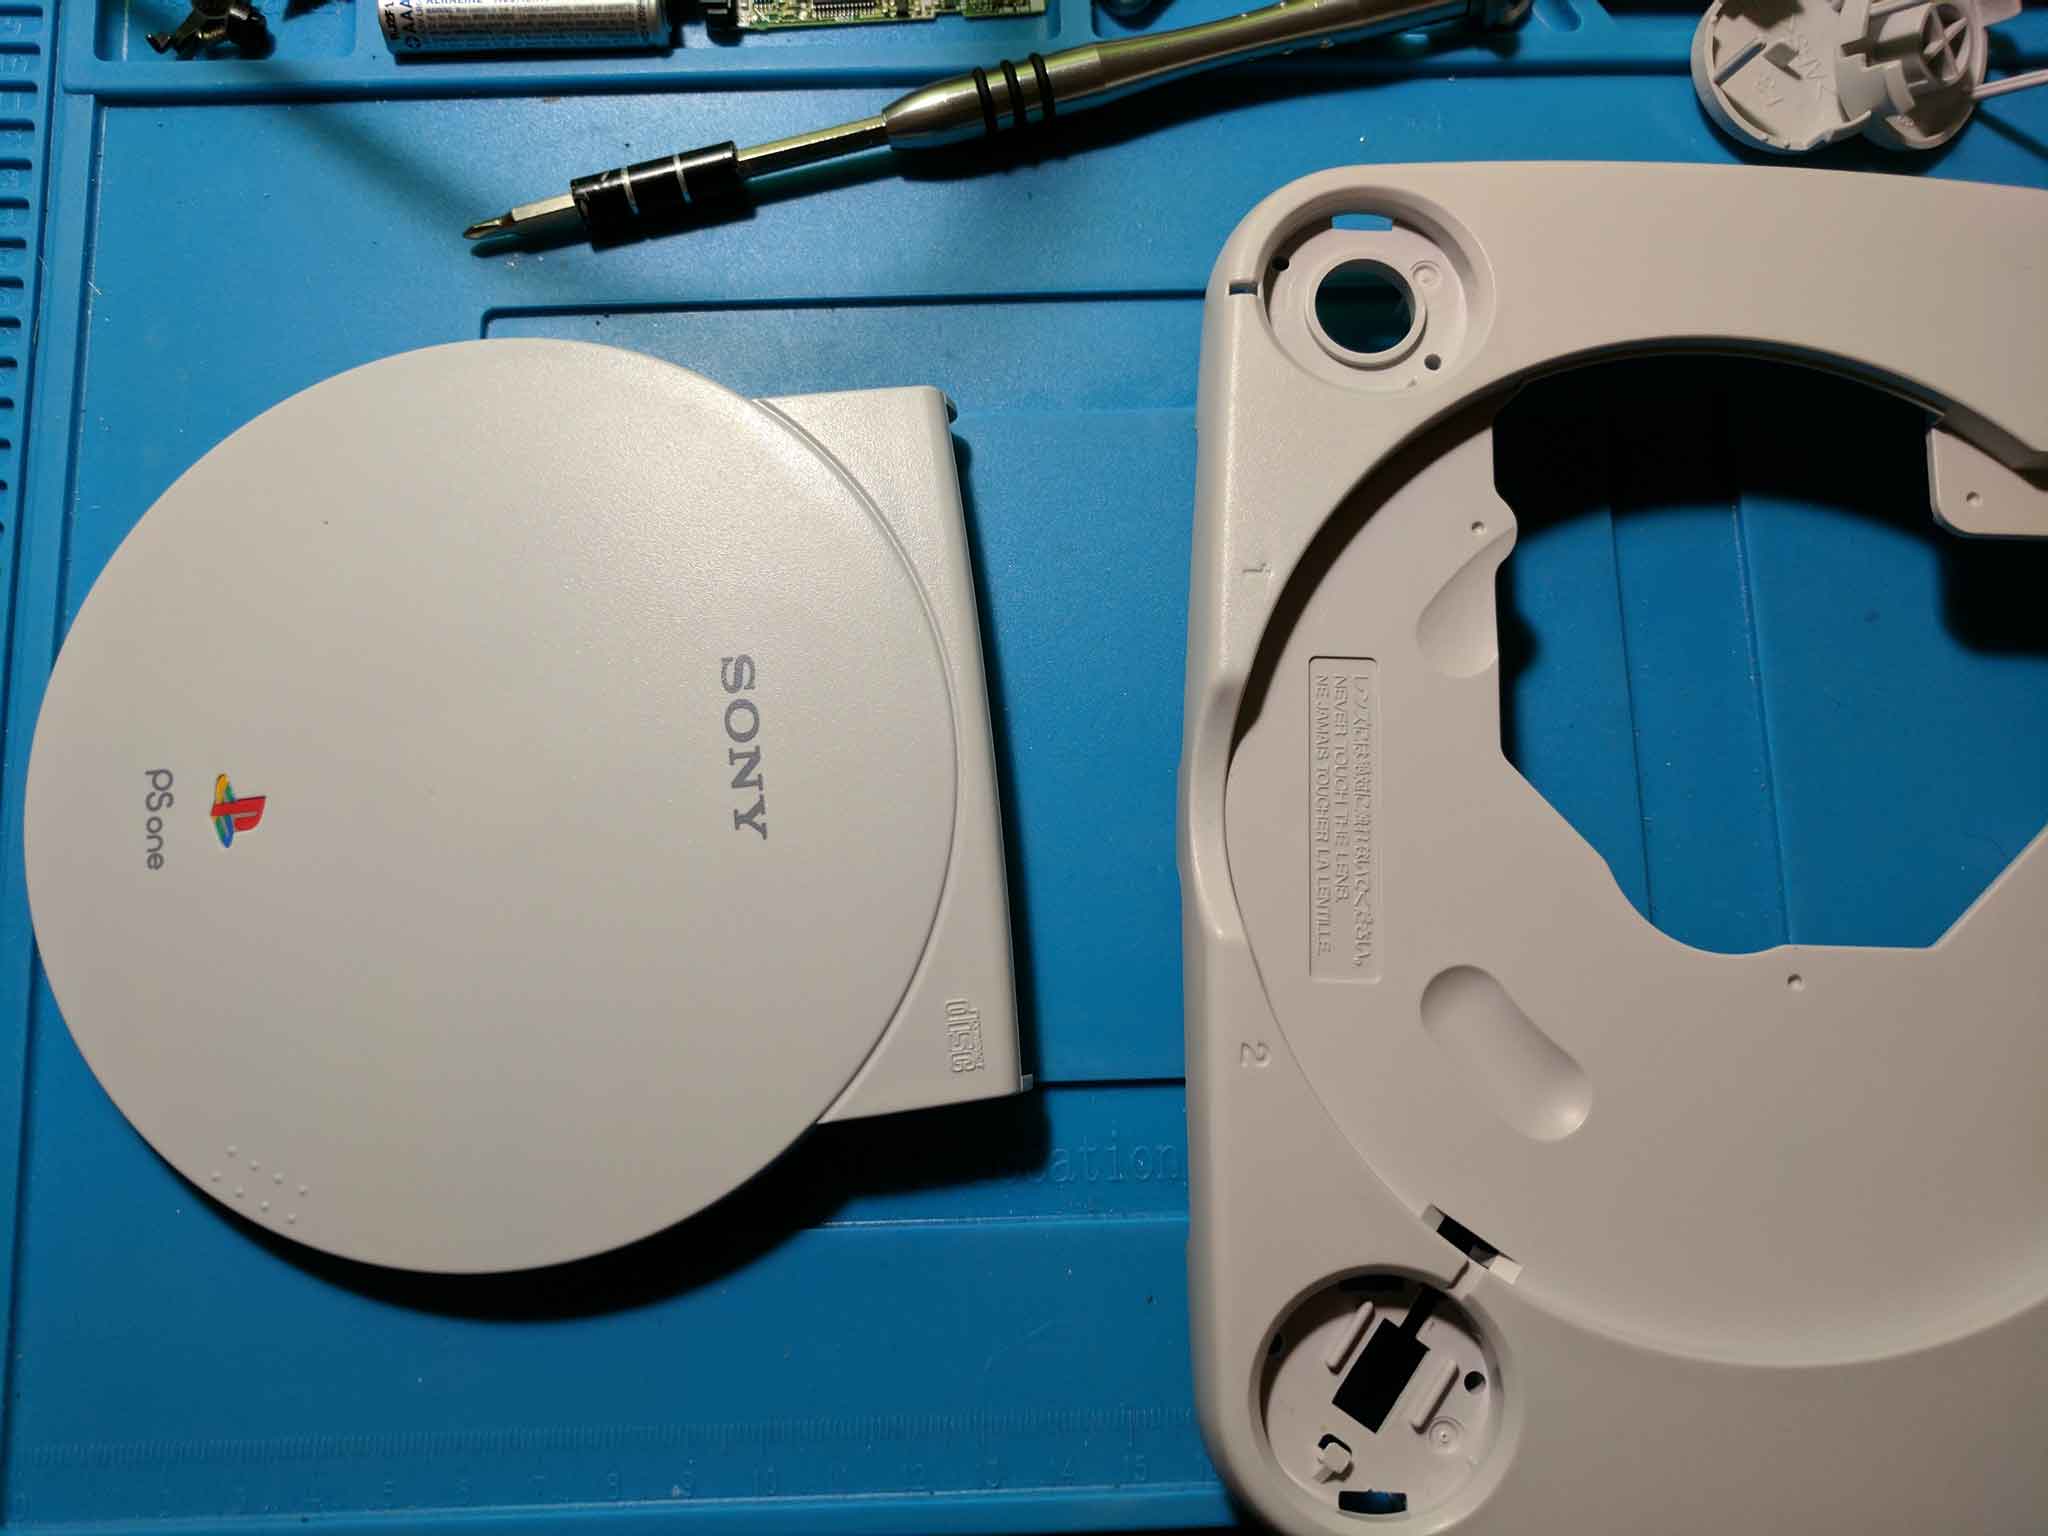
With the six bottom screws removed you should be able to simply lift the top plastic housing off of the PSone. The housing, lid, and memory card flaps will all separate from the bottom half of the shell. The top half is pictured below.
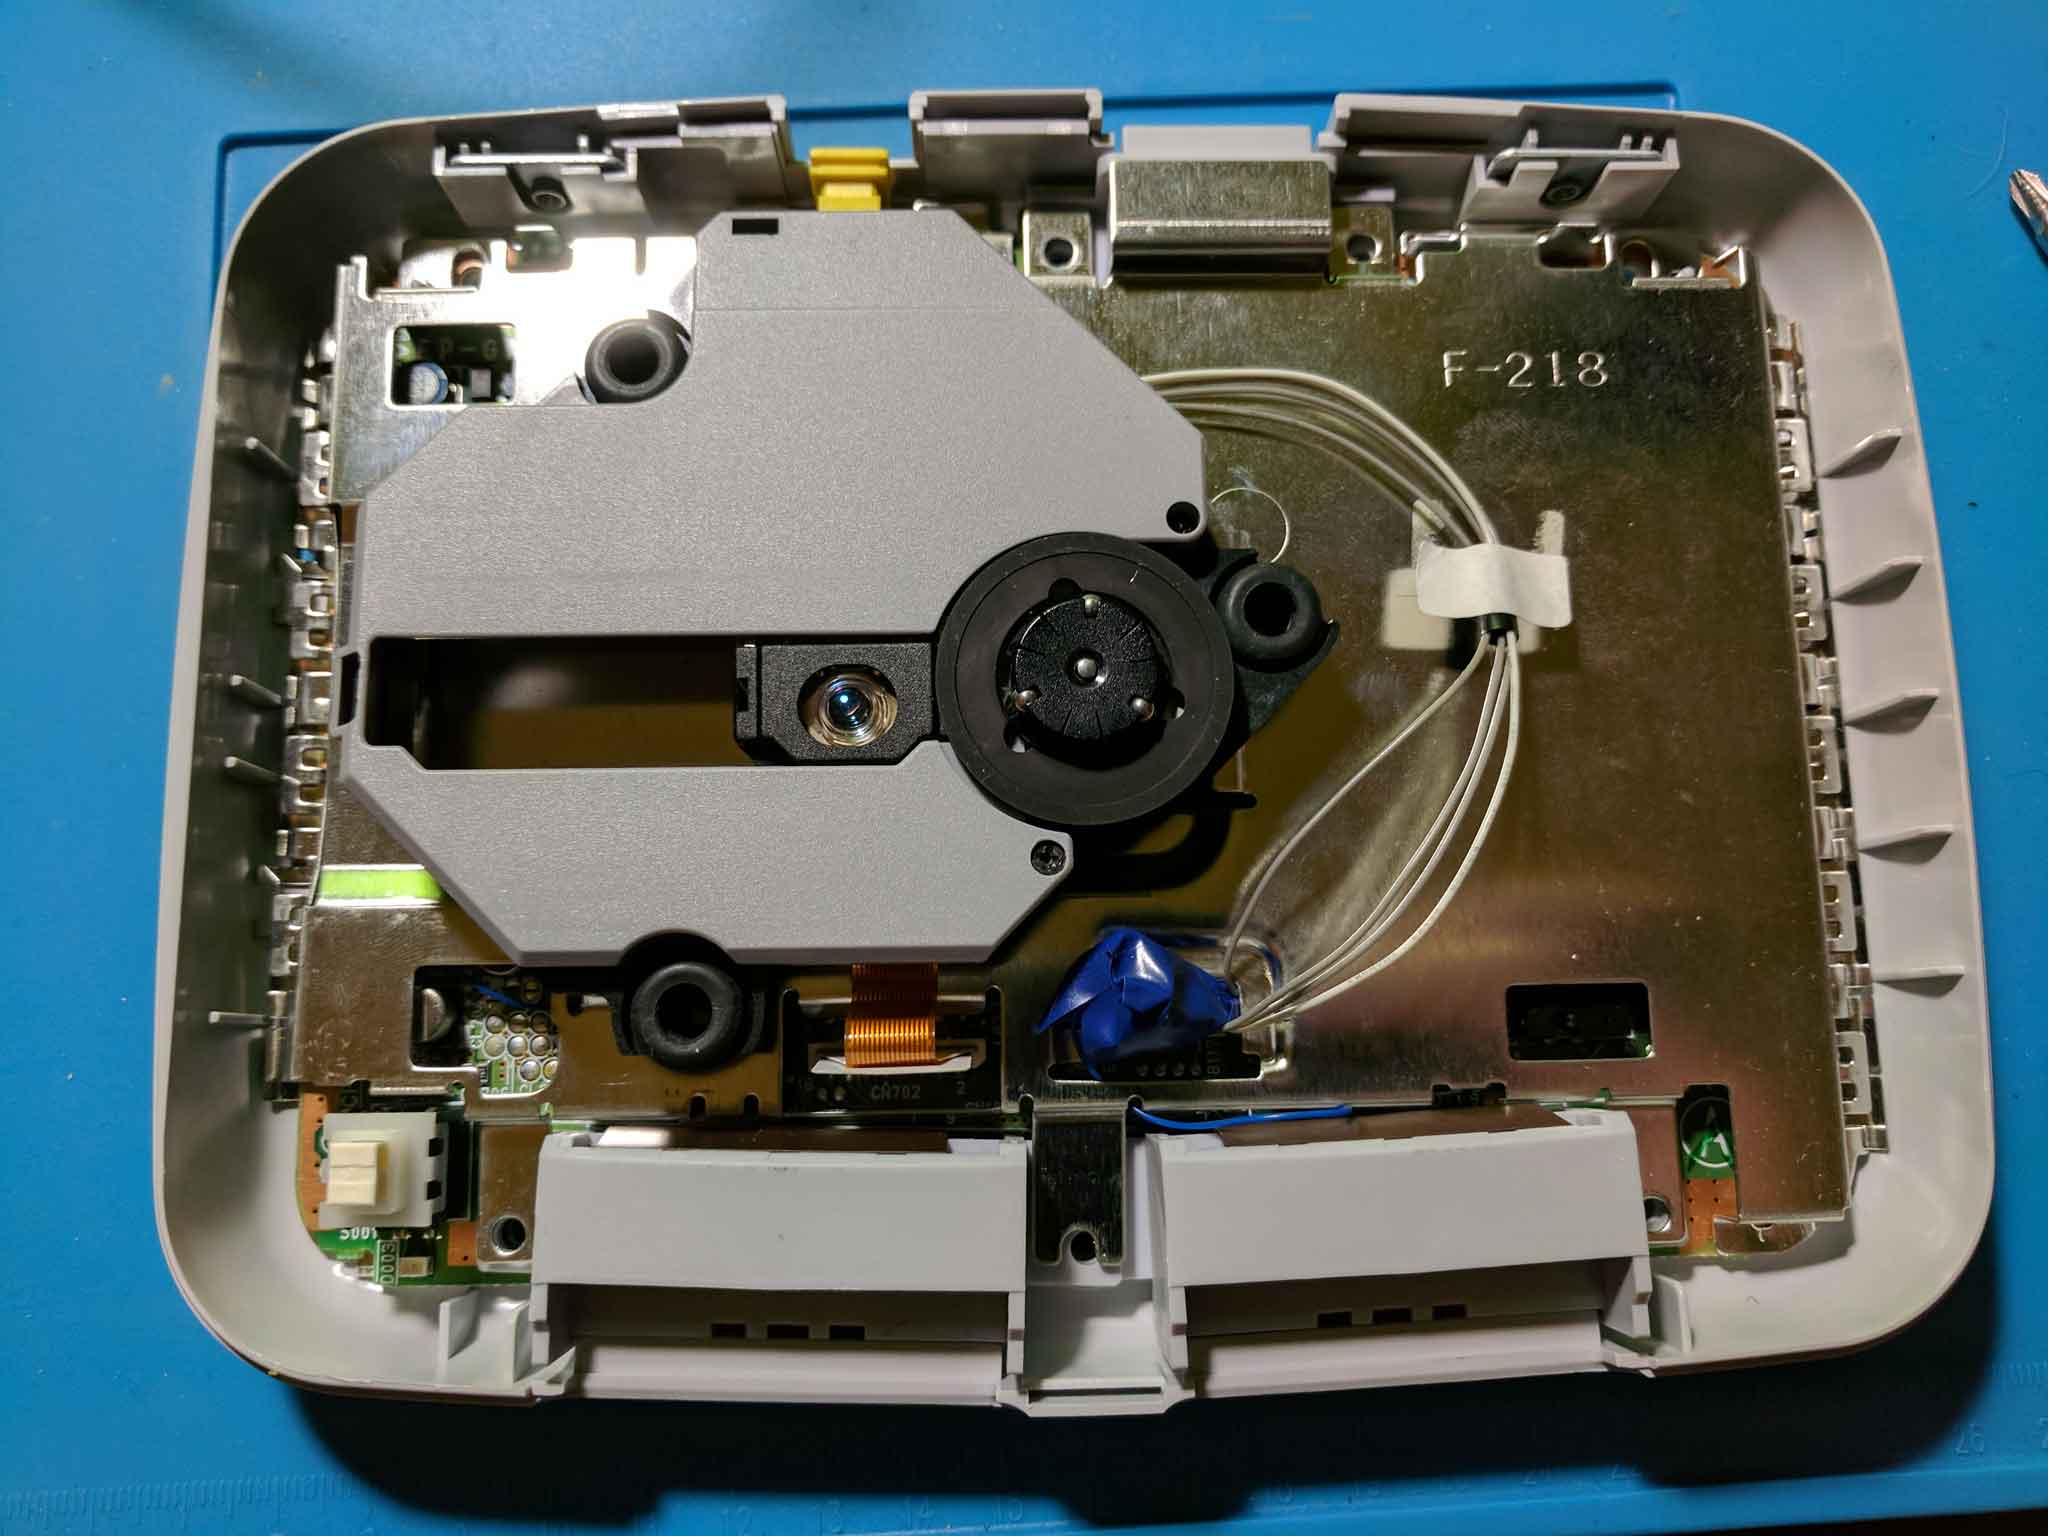
Below is a picture of the bottom half of the shell. This is the first picture where you can see the modchip I installed, it is hidden under the blue electrical tape at the bottom.
Step 3 – Disc drive removal
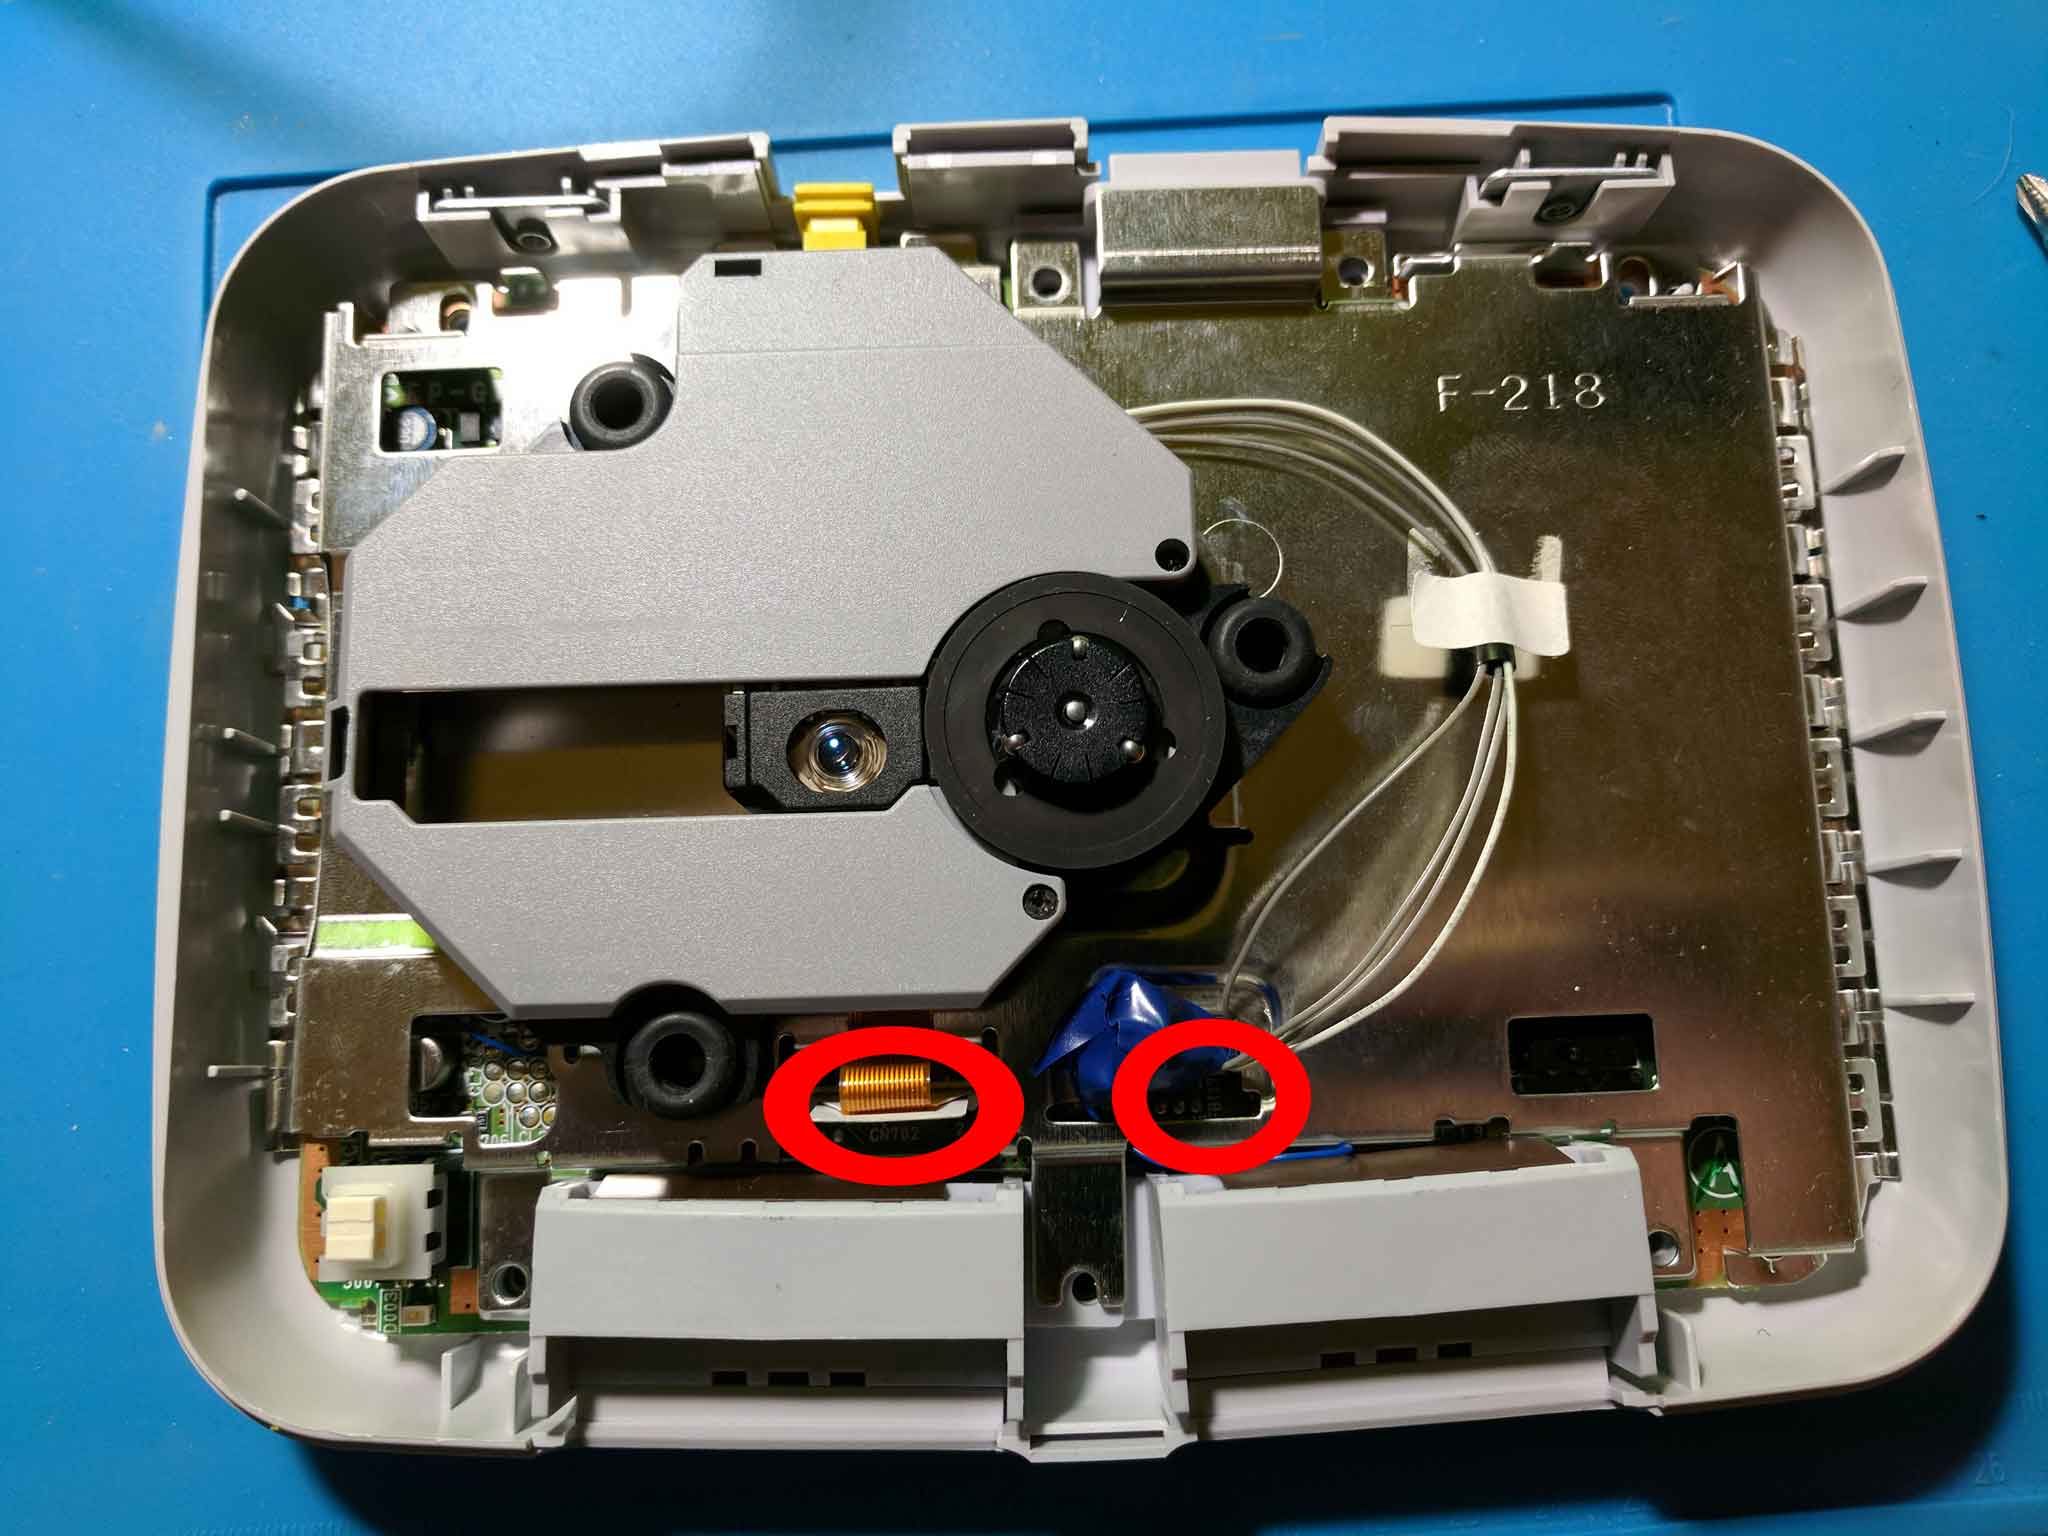
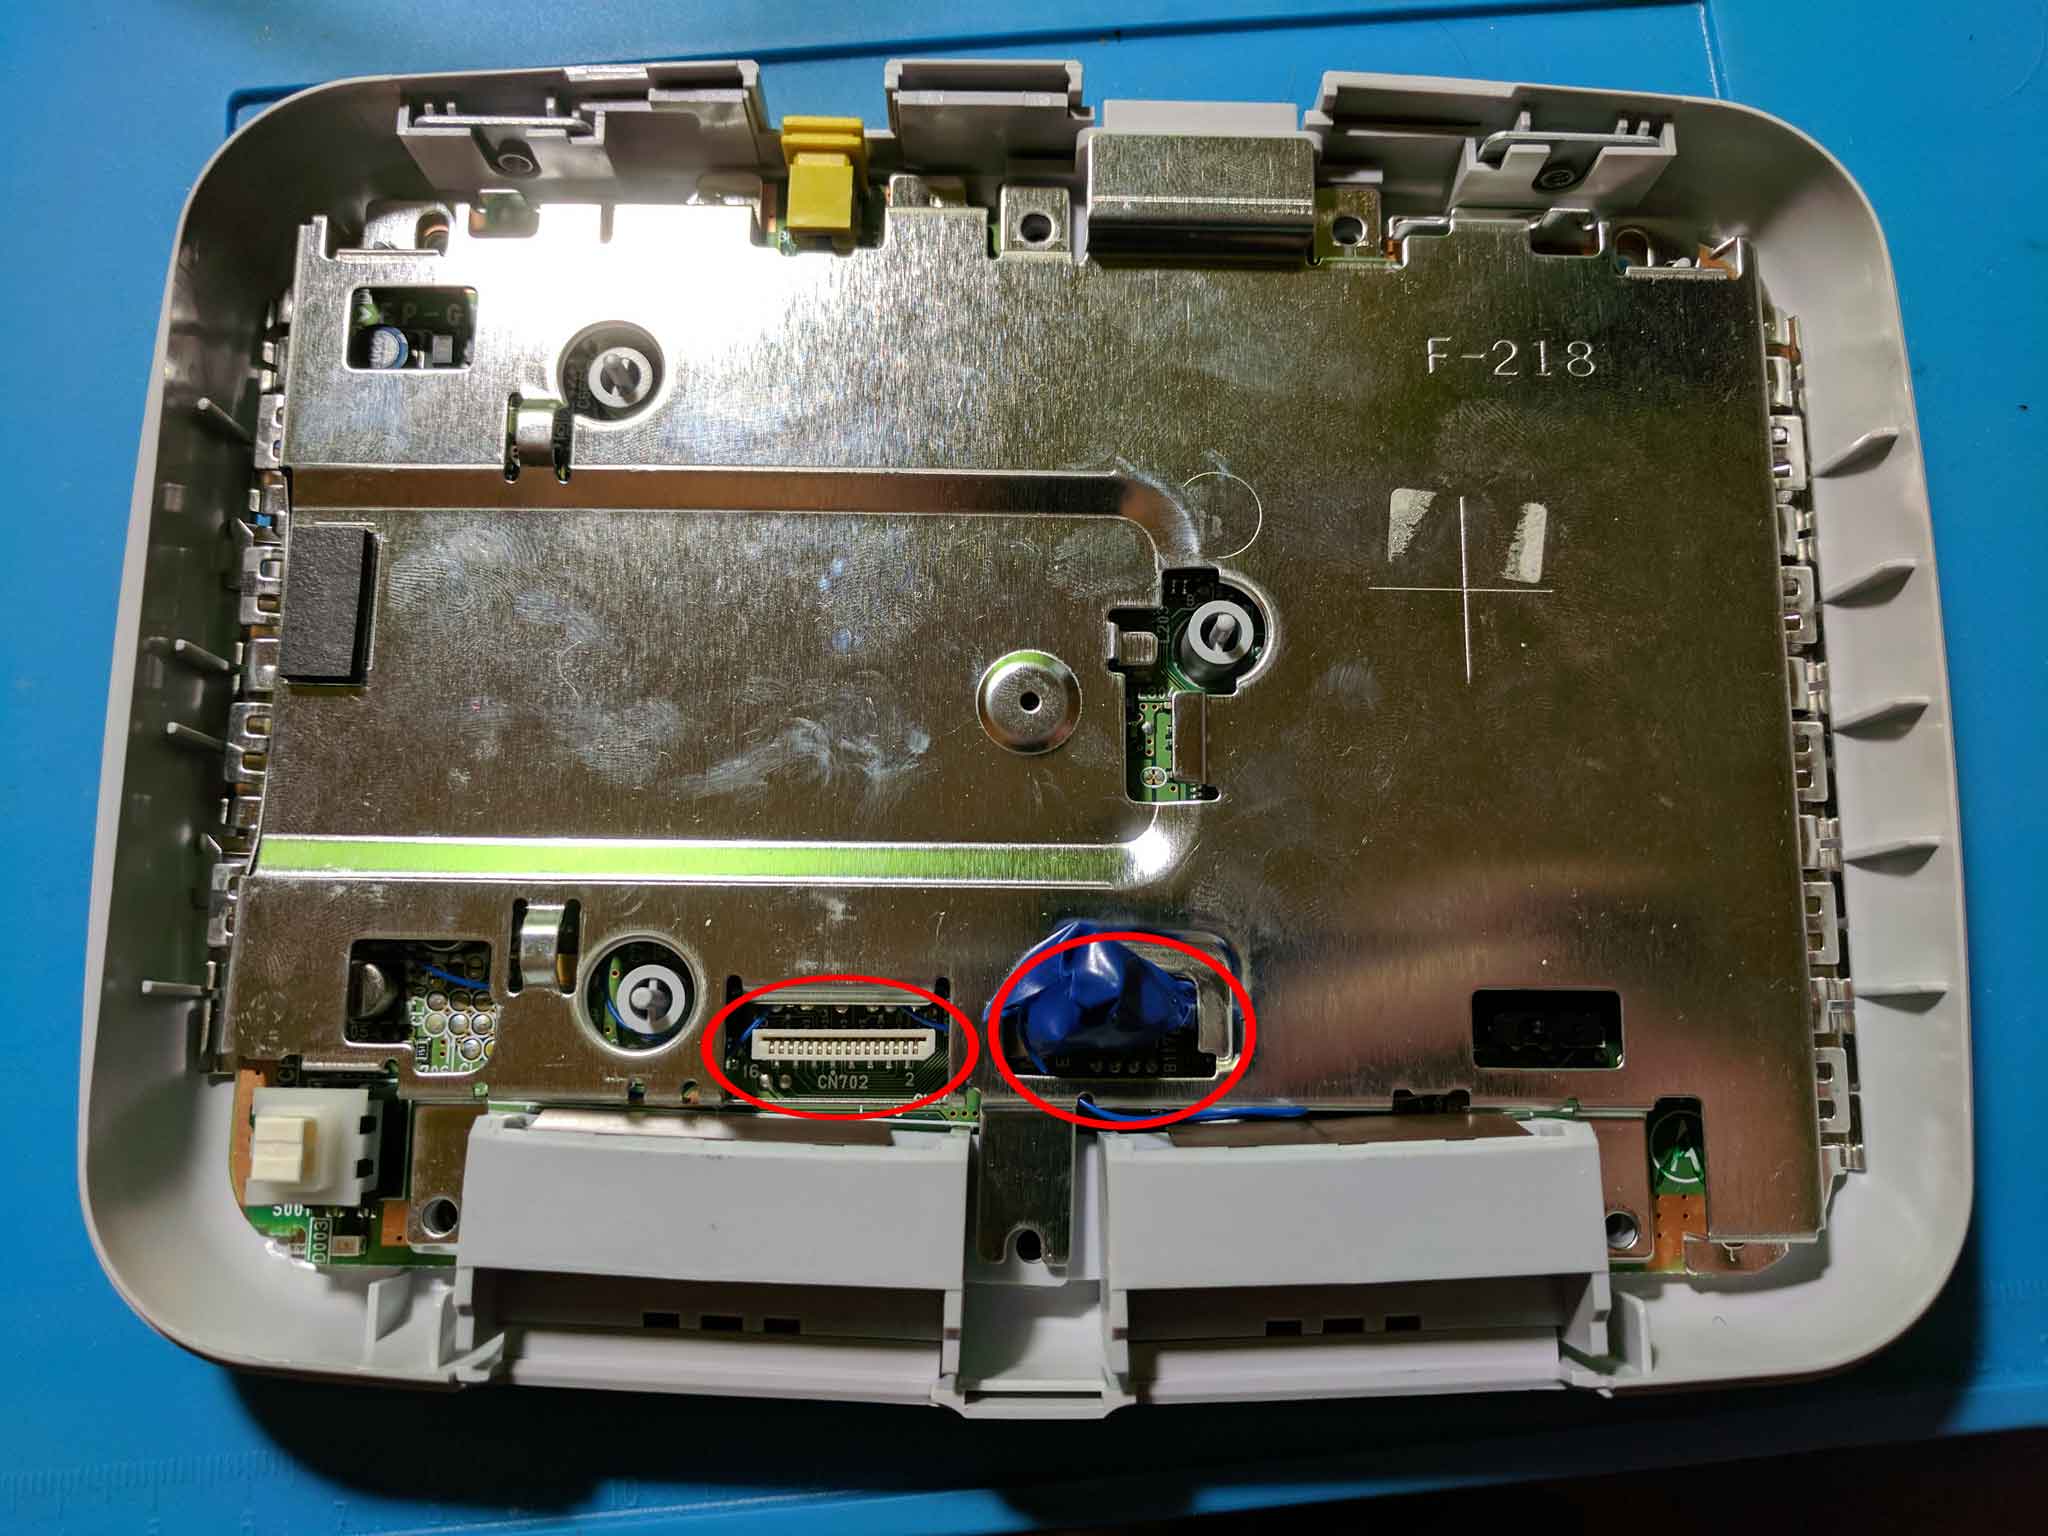
The next step is to remove the disc drive. It is really easy to remove because it isn’t being held in by any screws. You will just need to remove two cables pictured below.
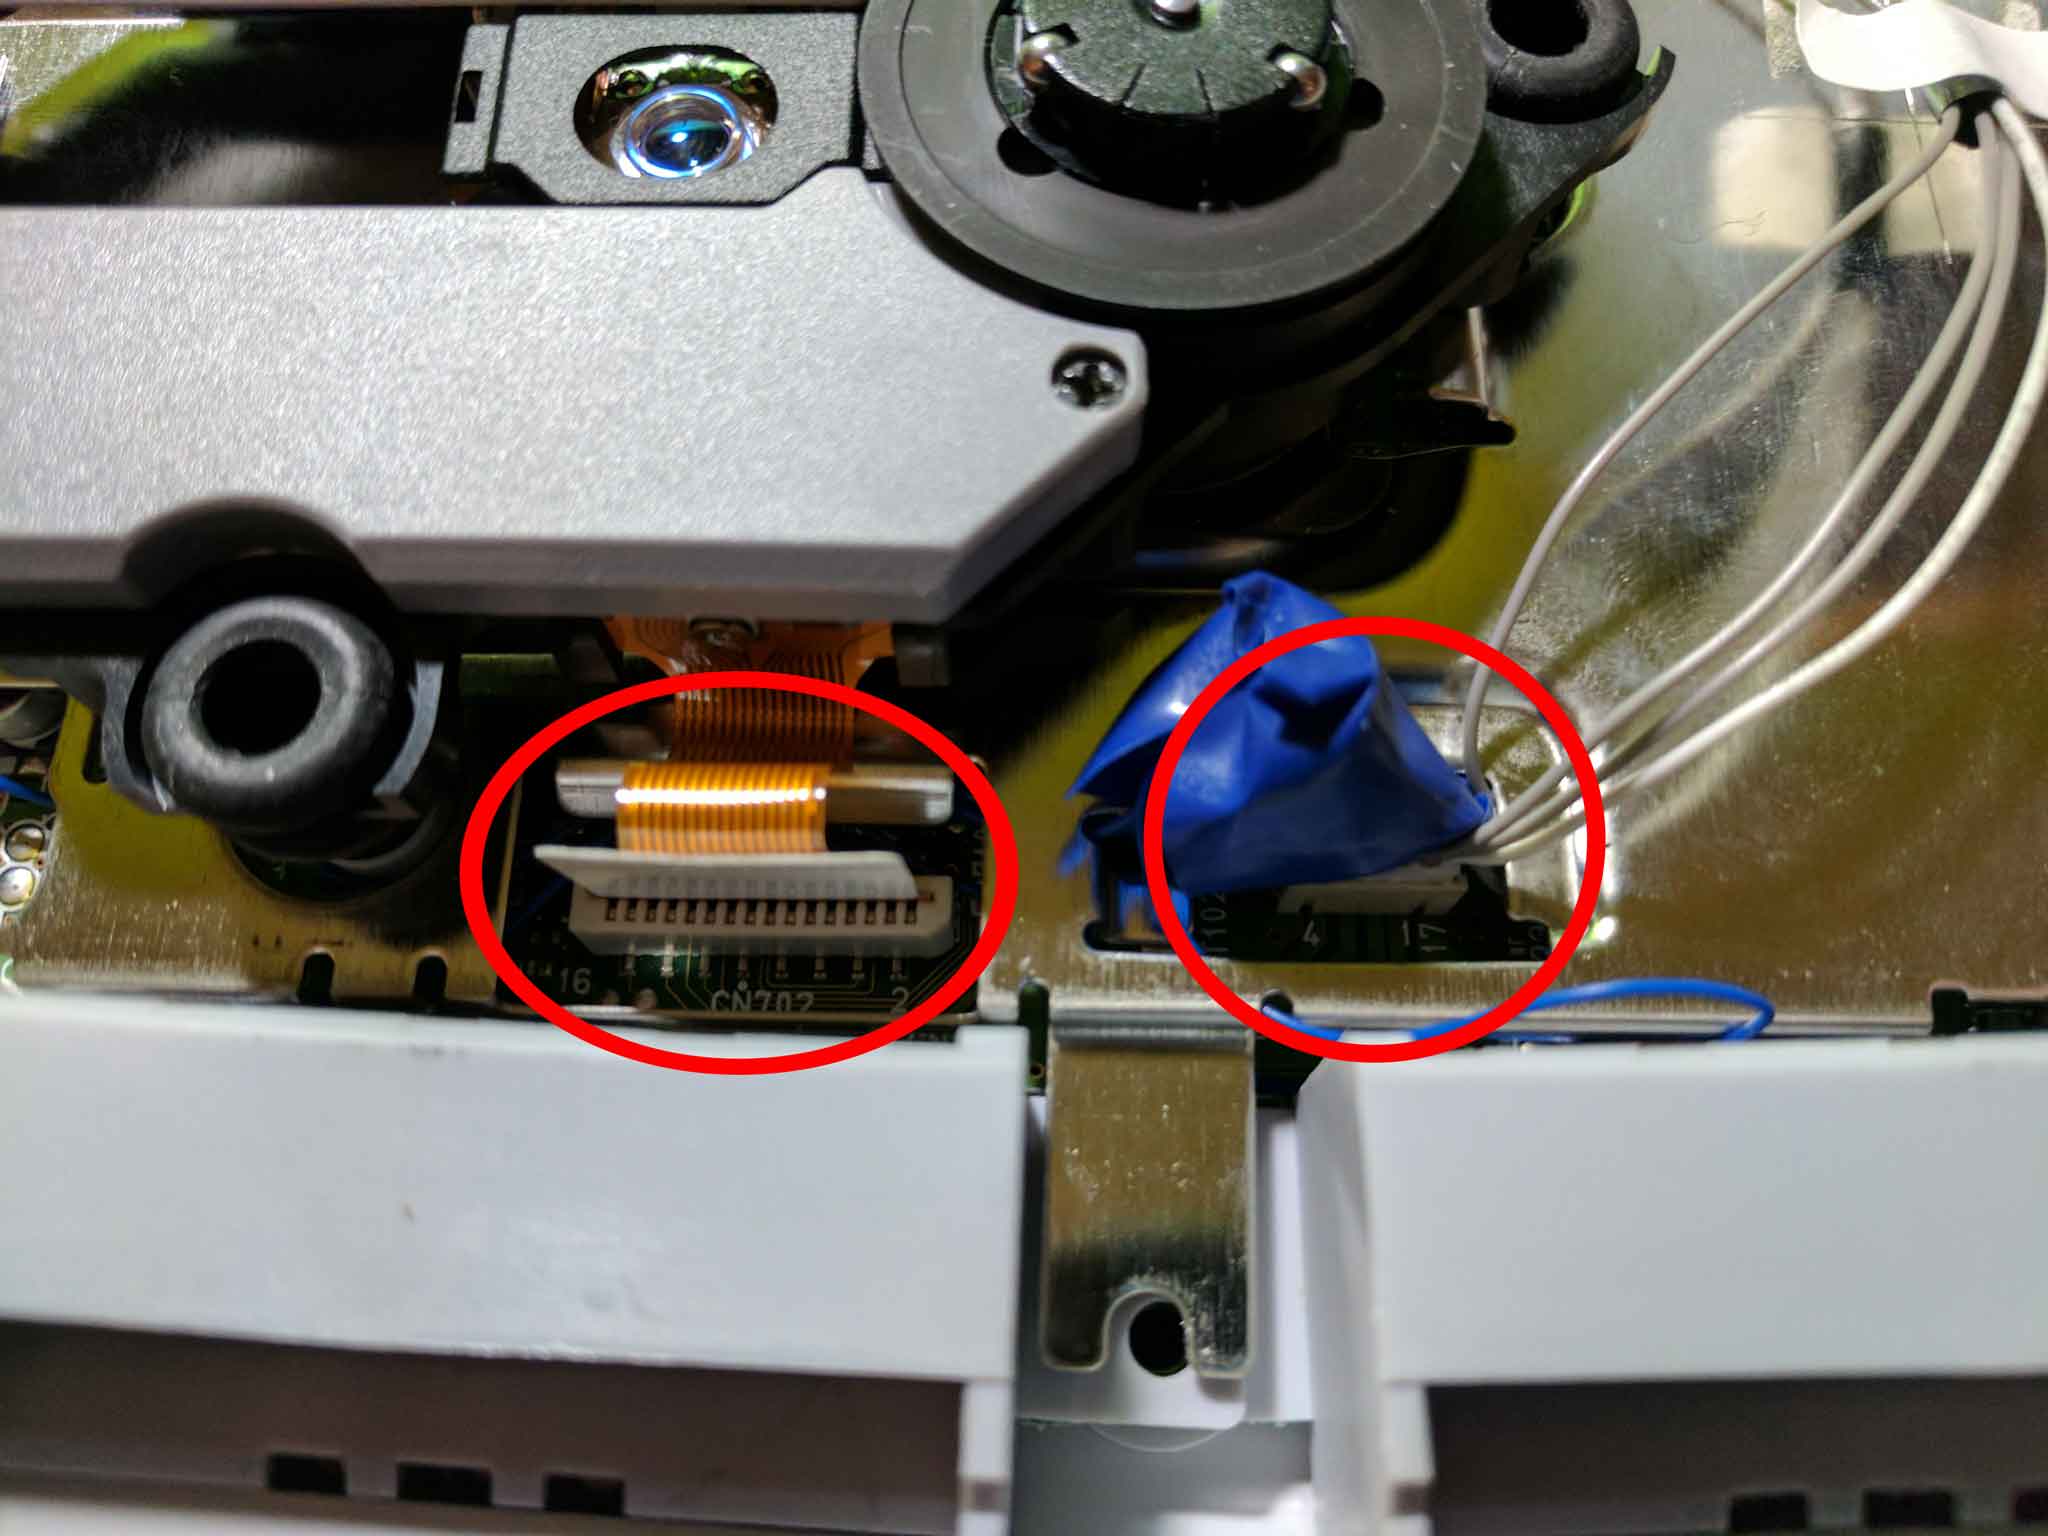
Below is a closer up image of the two wires. They both are removed by simply pulling them upwards. You should be able to more easily access your right cable because you won’t have a modchip in the way.
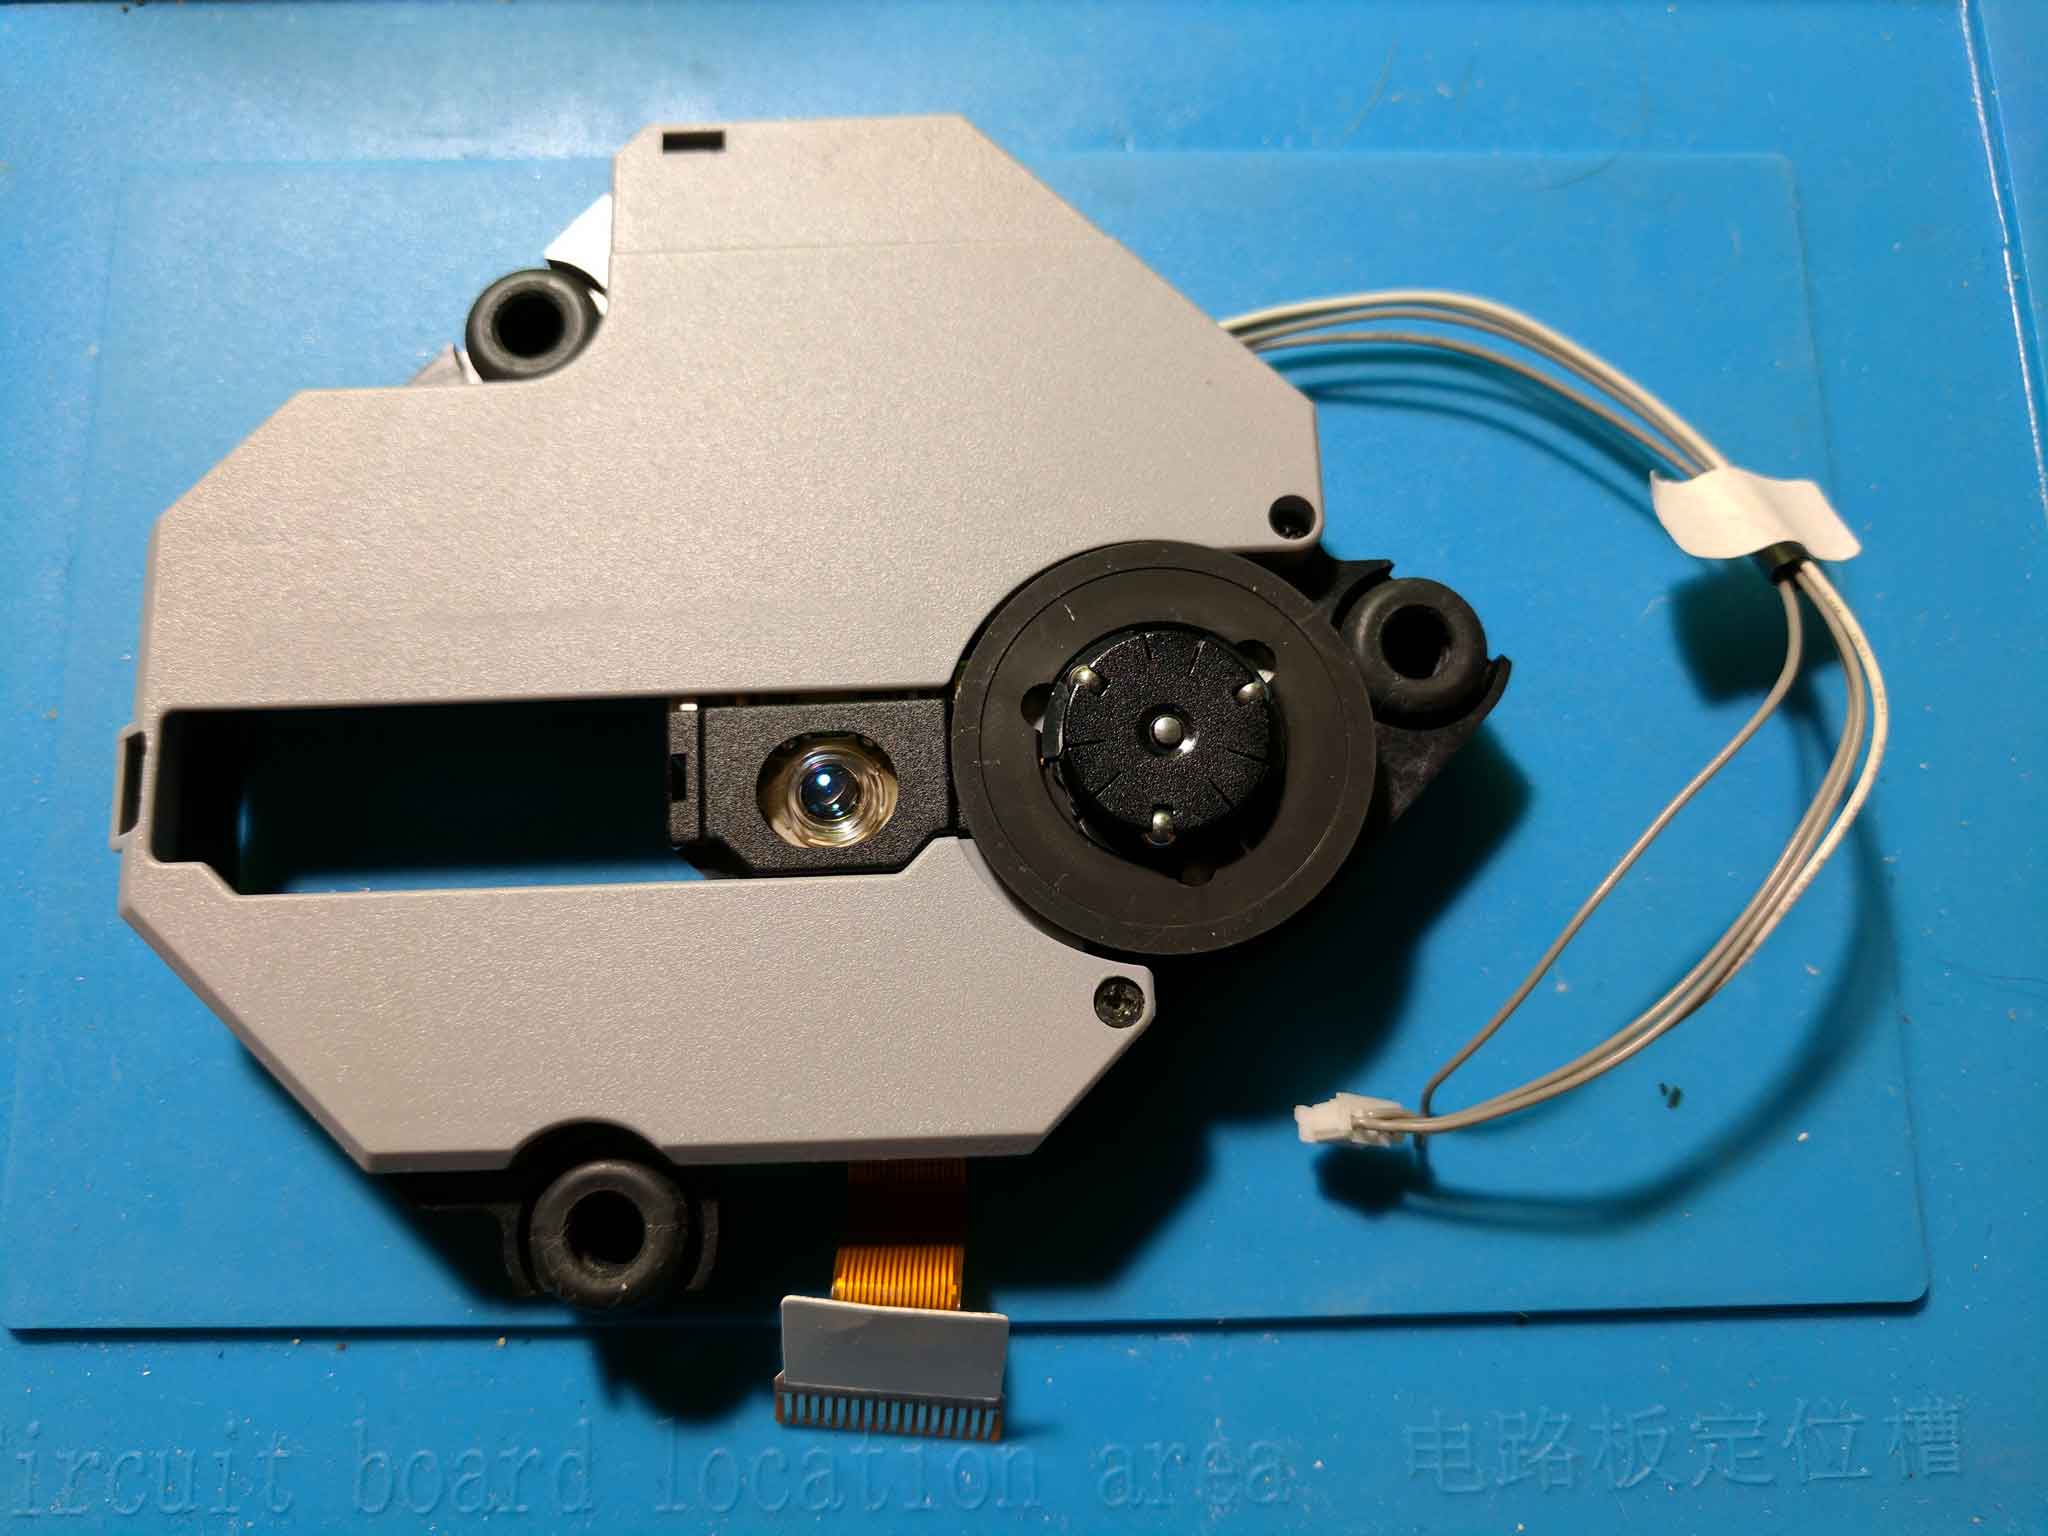
When the ribbon cables are removed the disc drive can be lifted away. Below is an image of the separated disc drive.
With the disc drive removed you have access to the top metal plate which covers the PSone’s motherboard. It can be lifted off of the board.
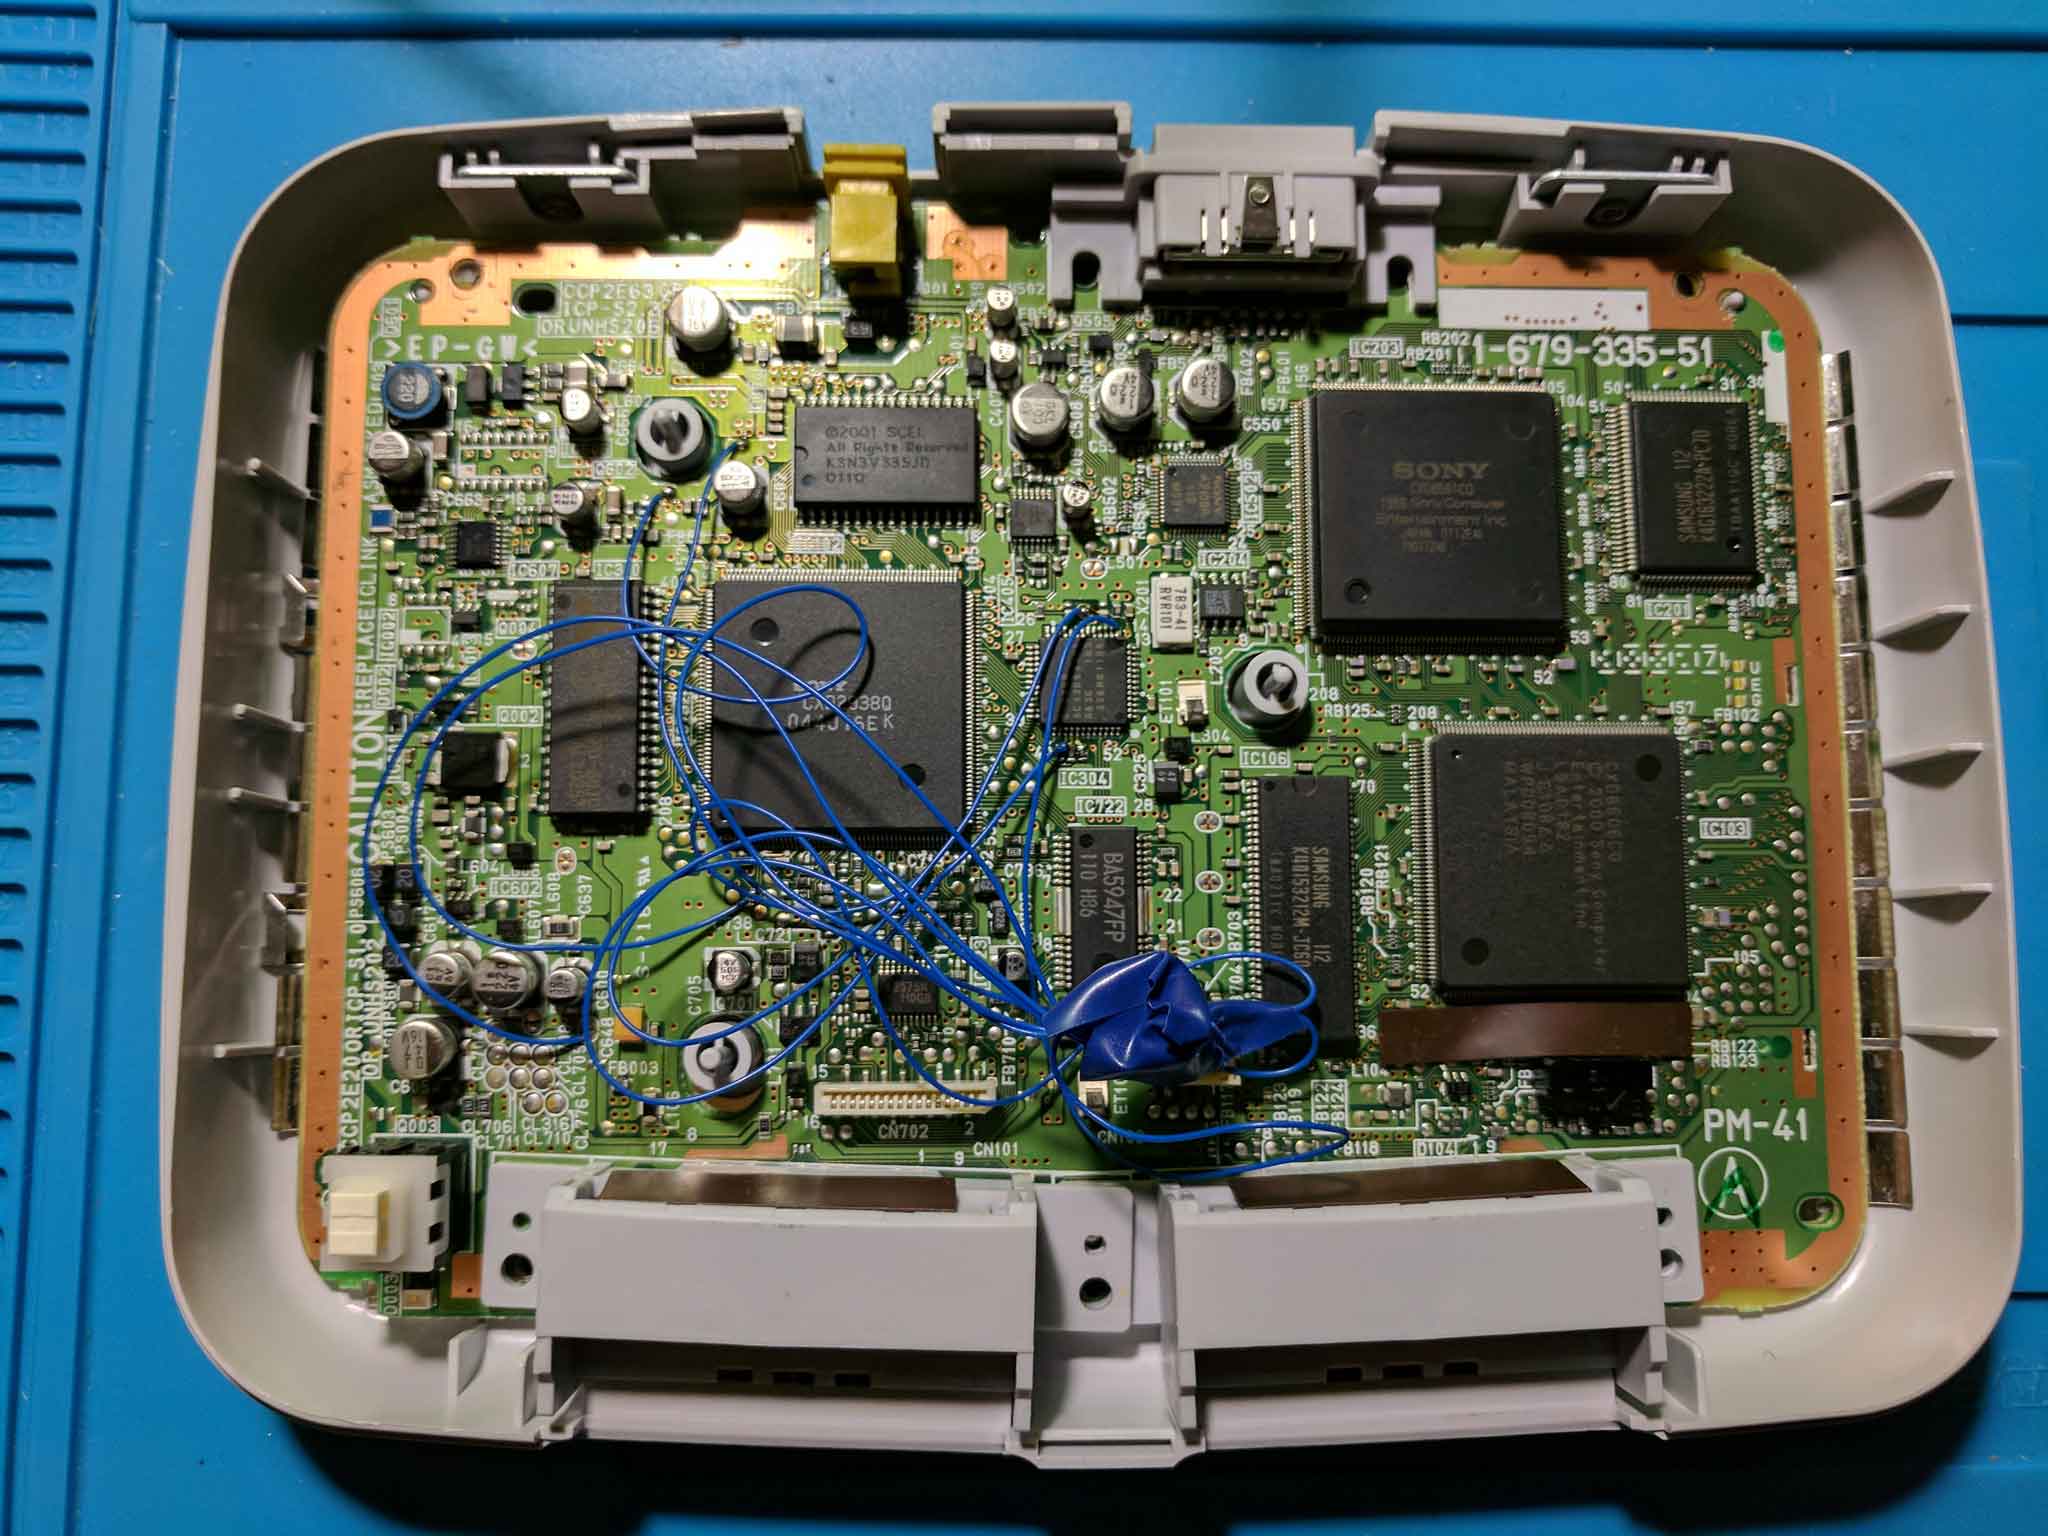
Below is an image of the PSone’s motherboard once the top metal plate has been removed.
Step 4 – Bottom plastic housing removal
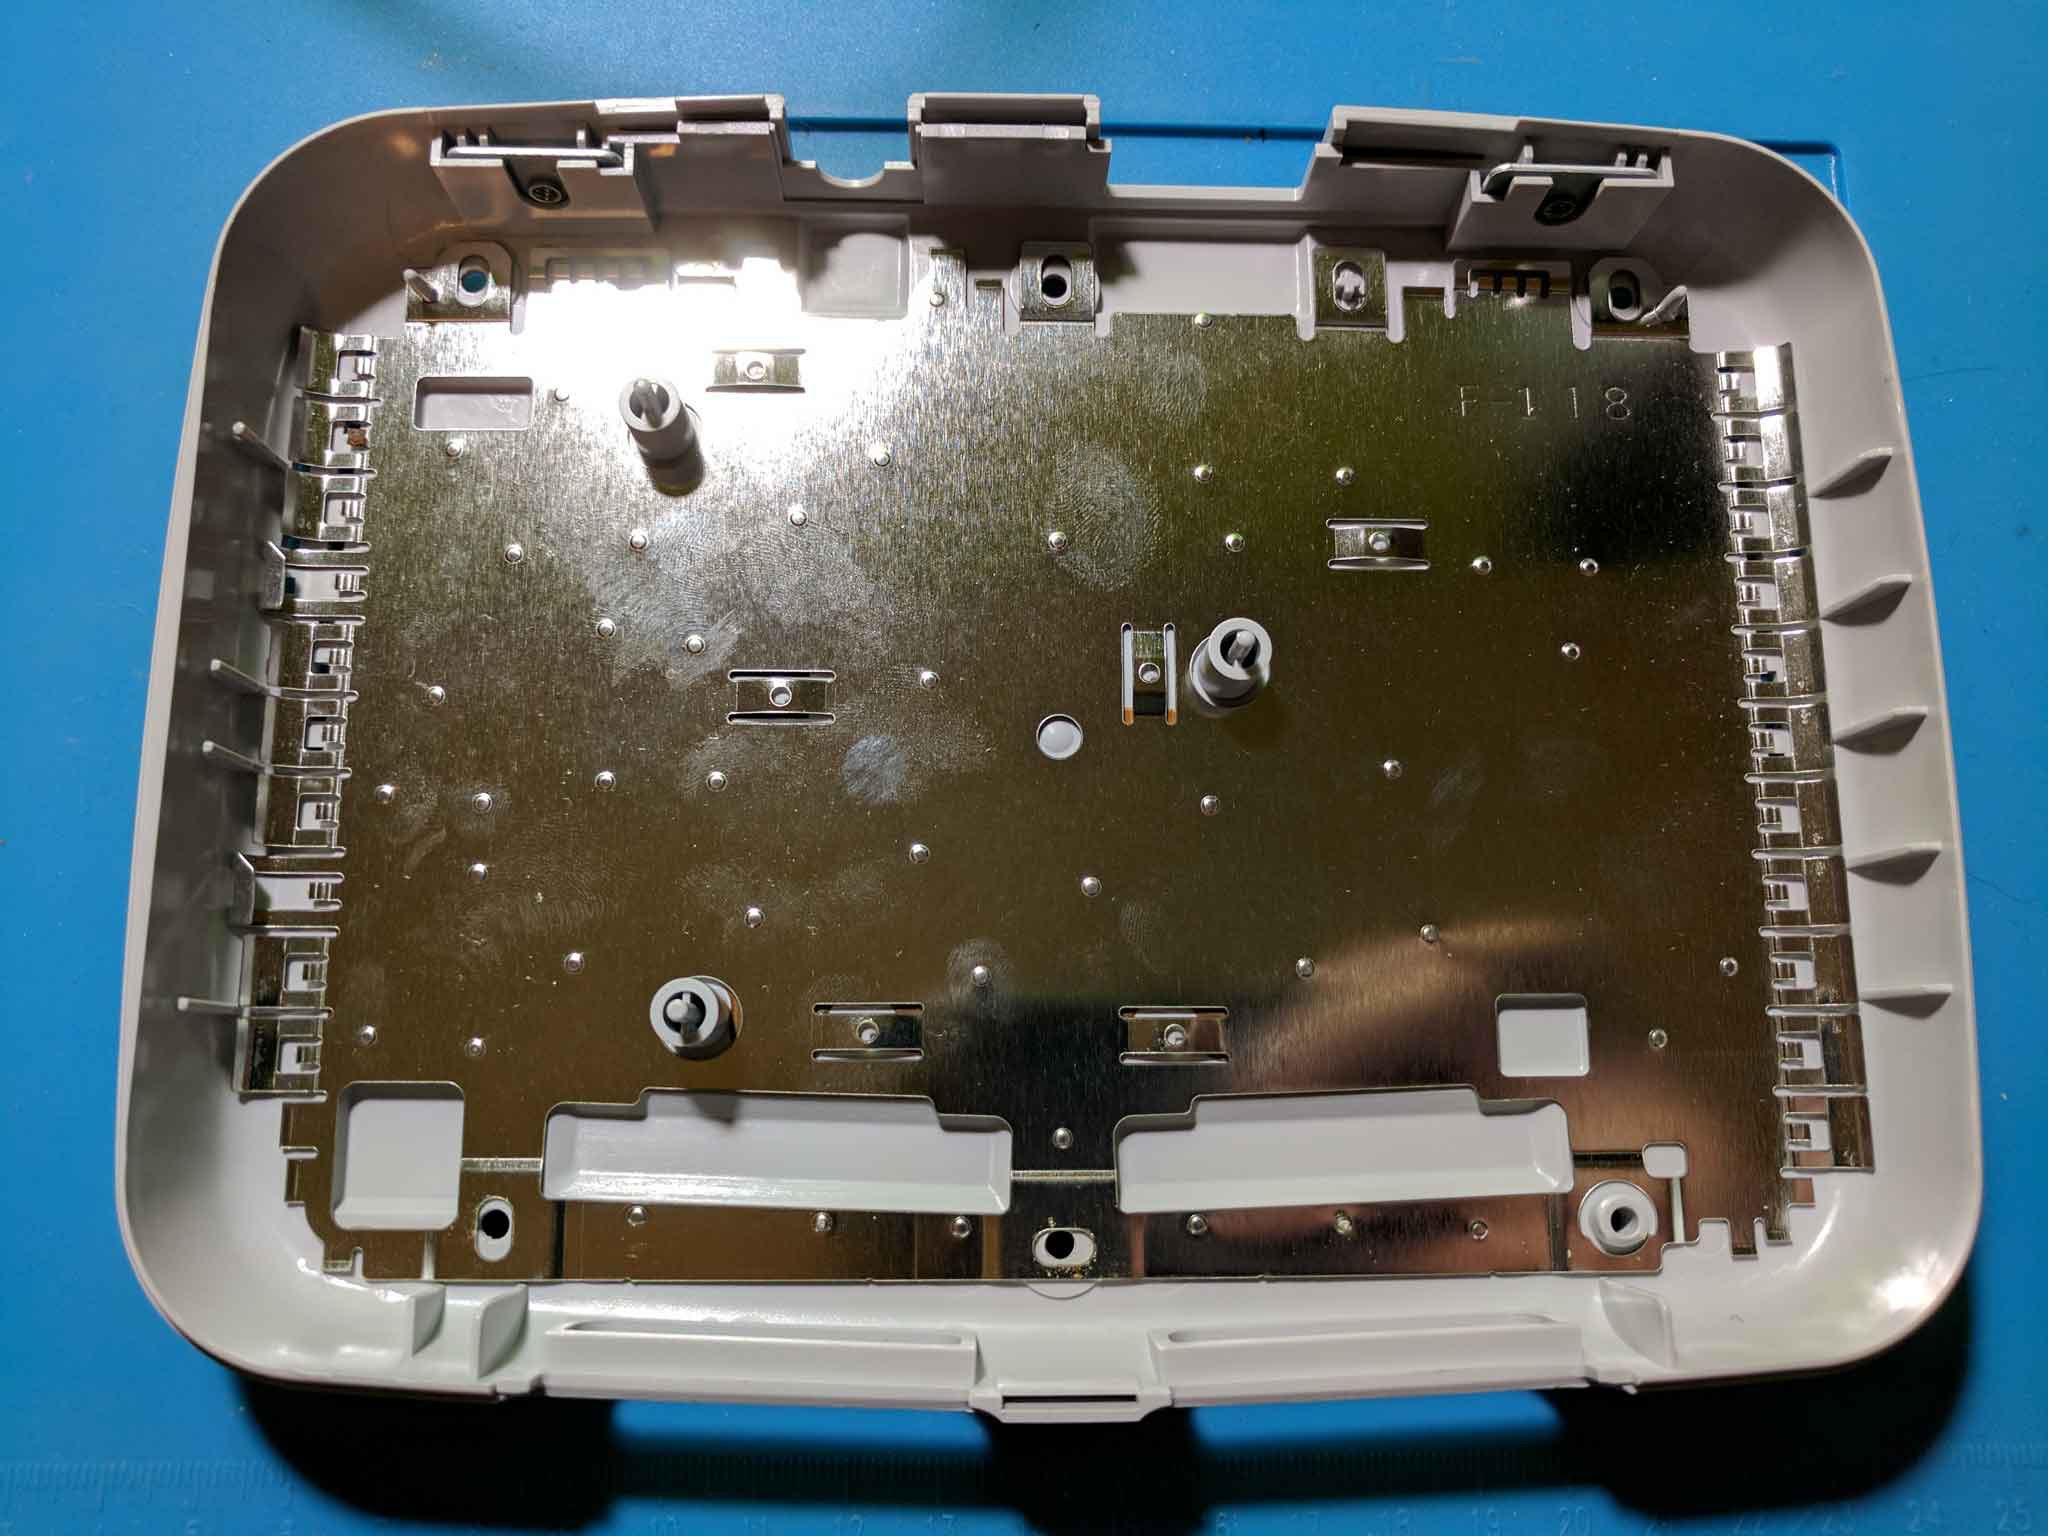
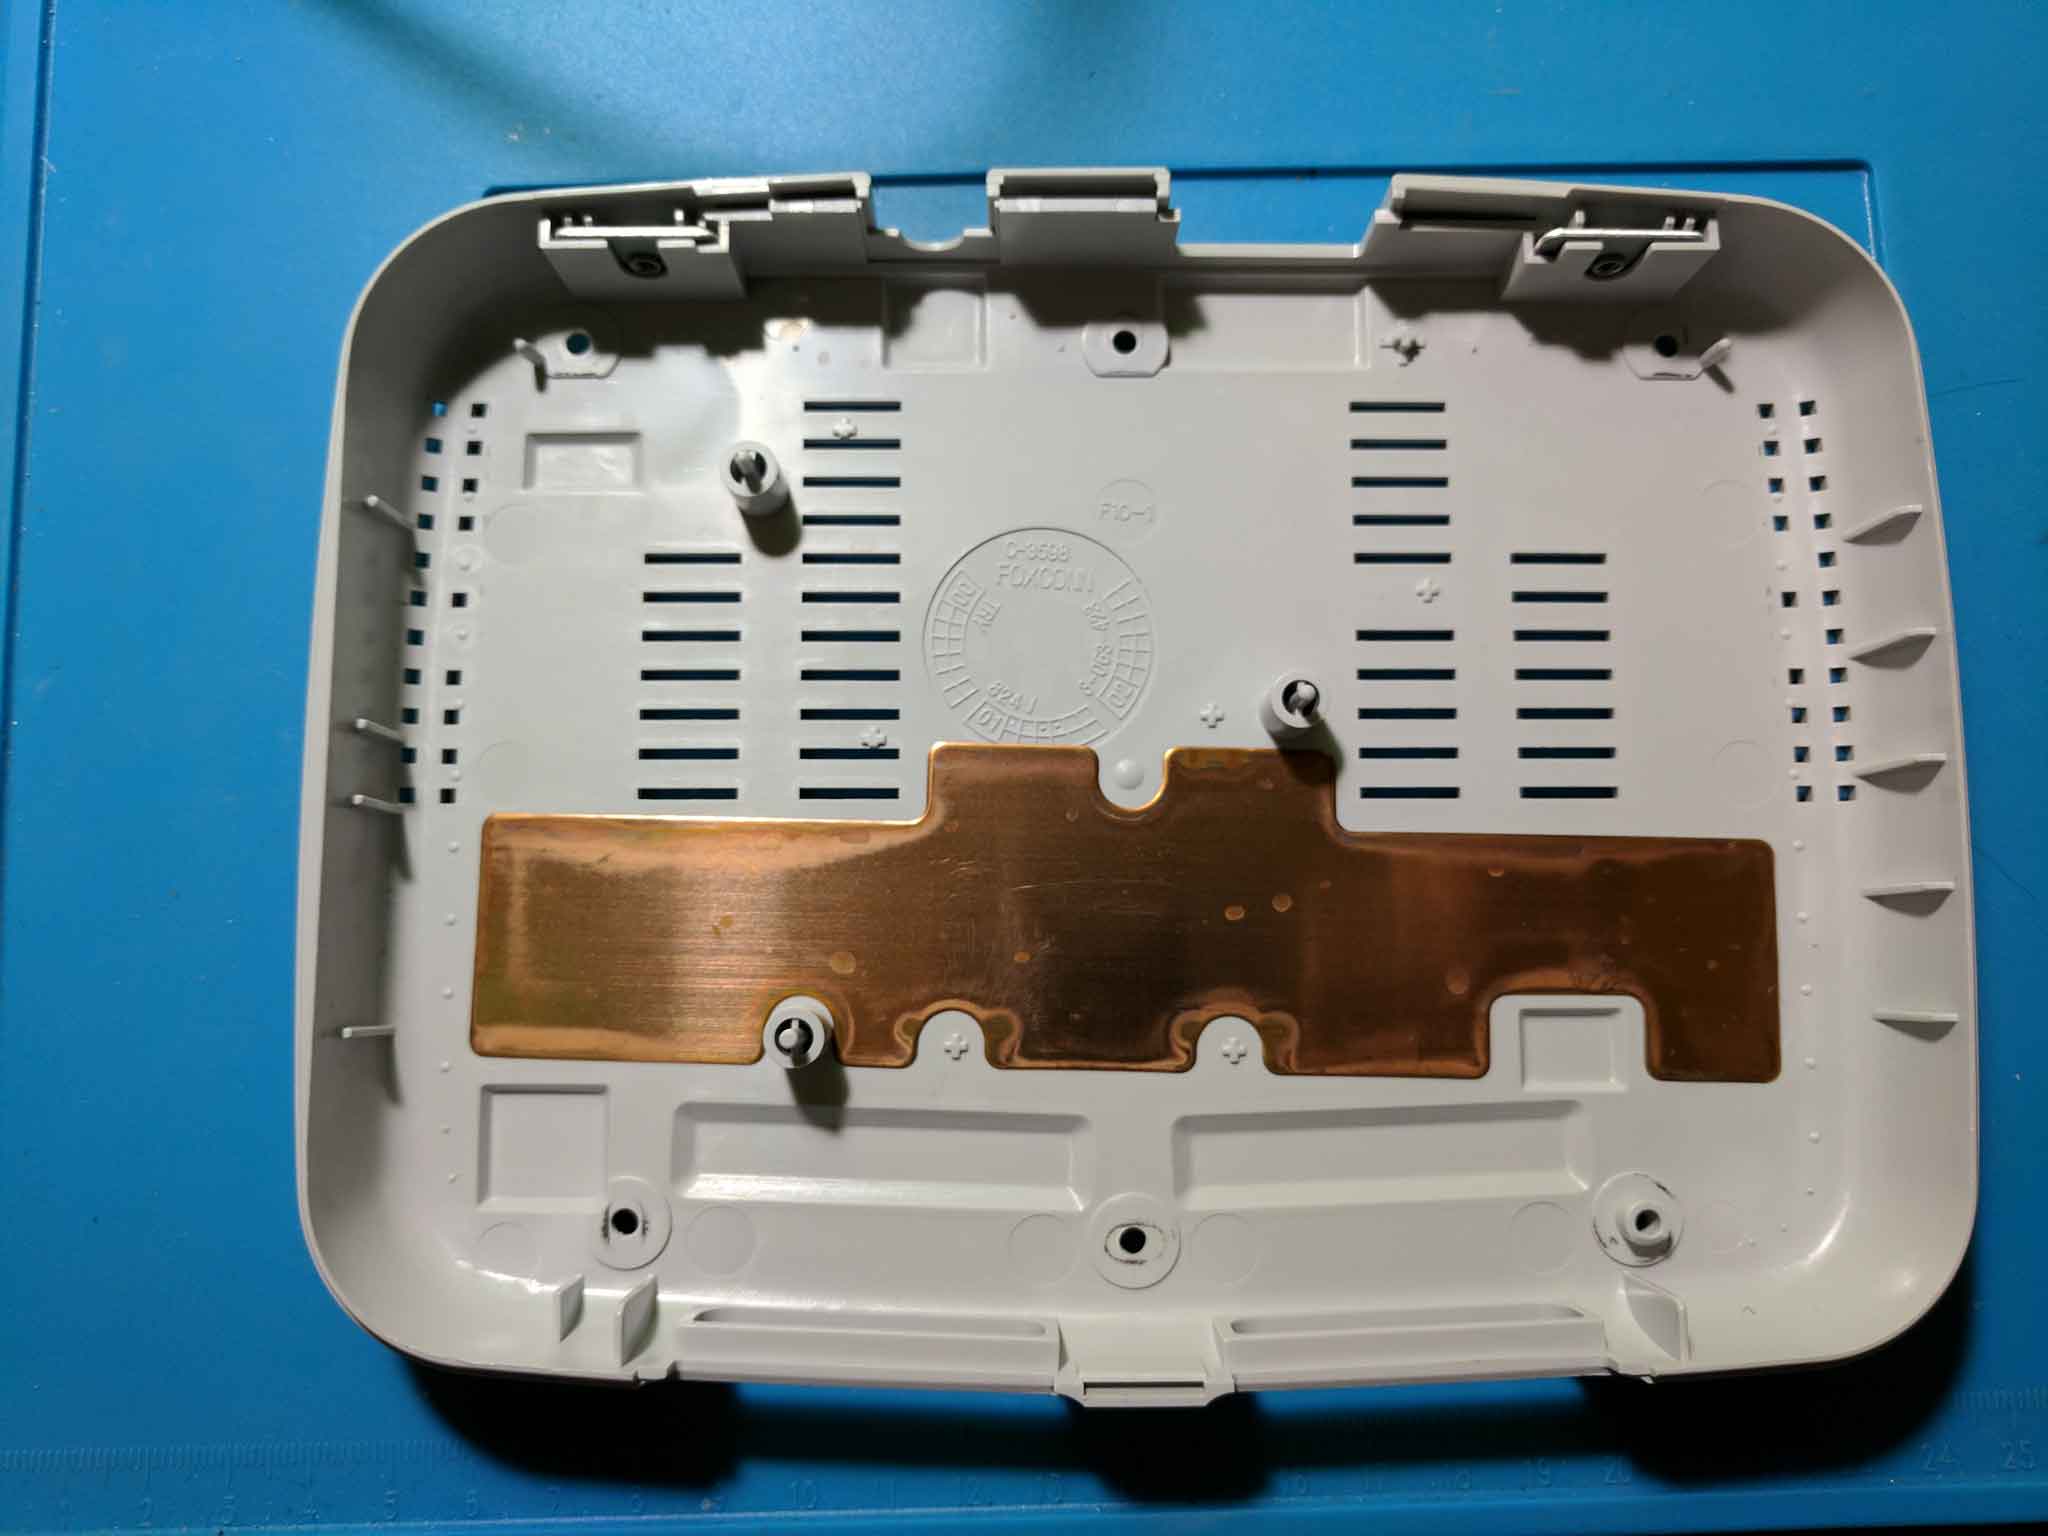
You should now be able to lift the motherboard away from the bottom plastic housing to reveal the bottom metal plate pictured below. This bottom metal plate can be lifted away from the bottom plastic housing.
With the bottom metal plate removed you can see the bottom plastic shell.
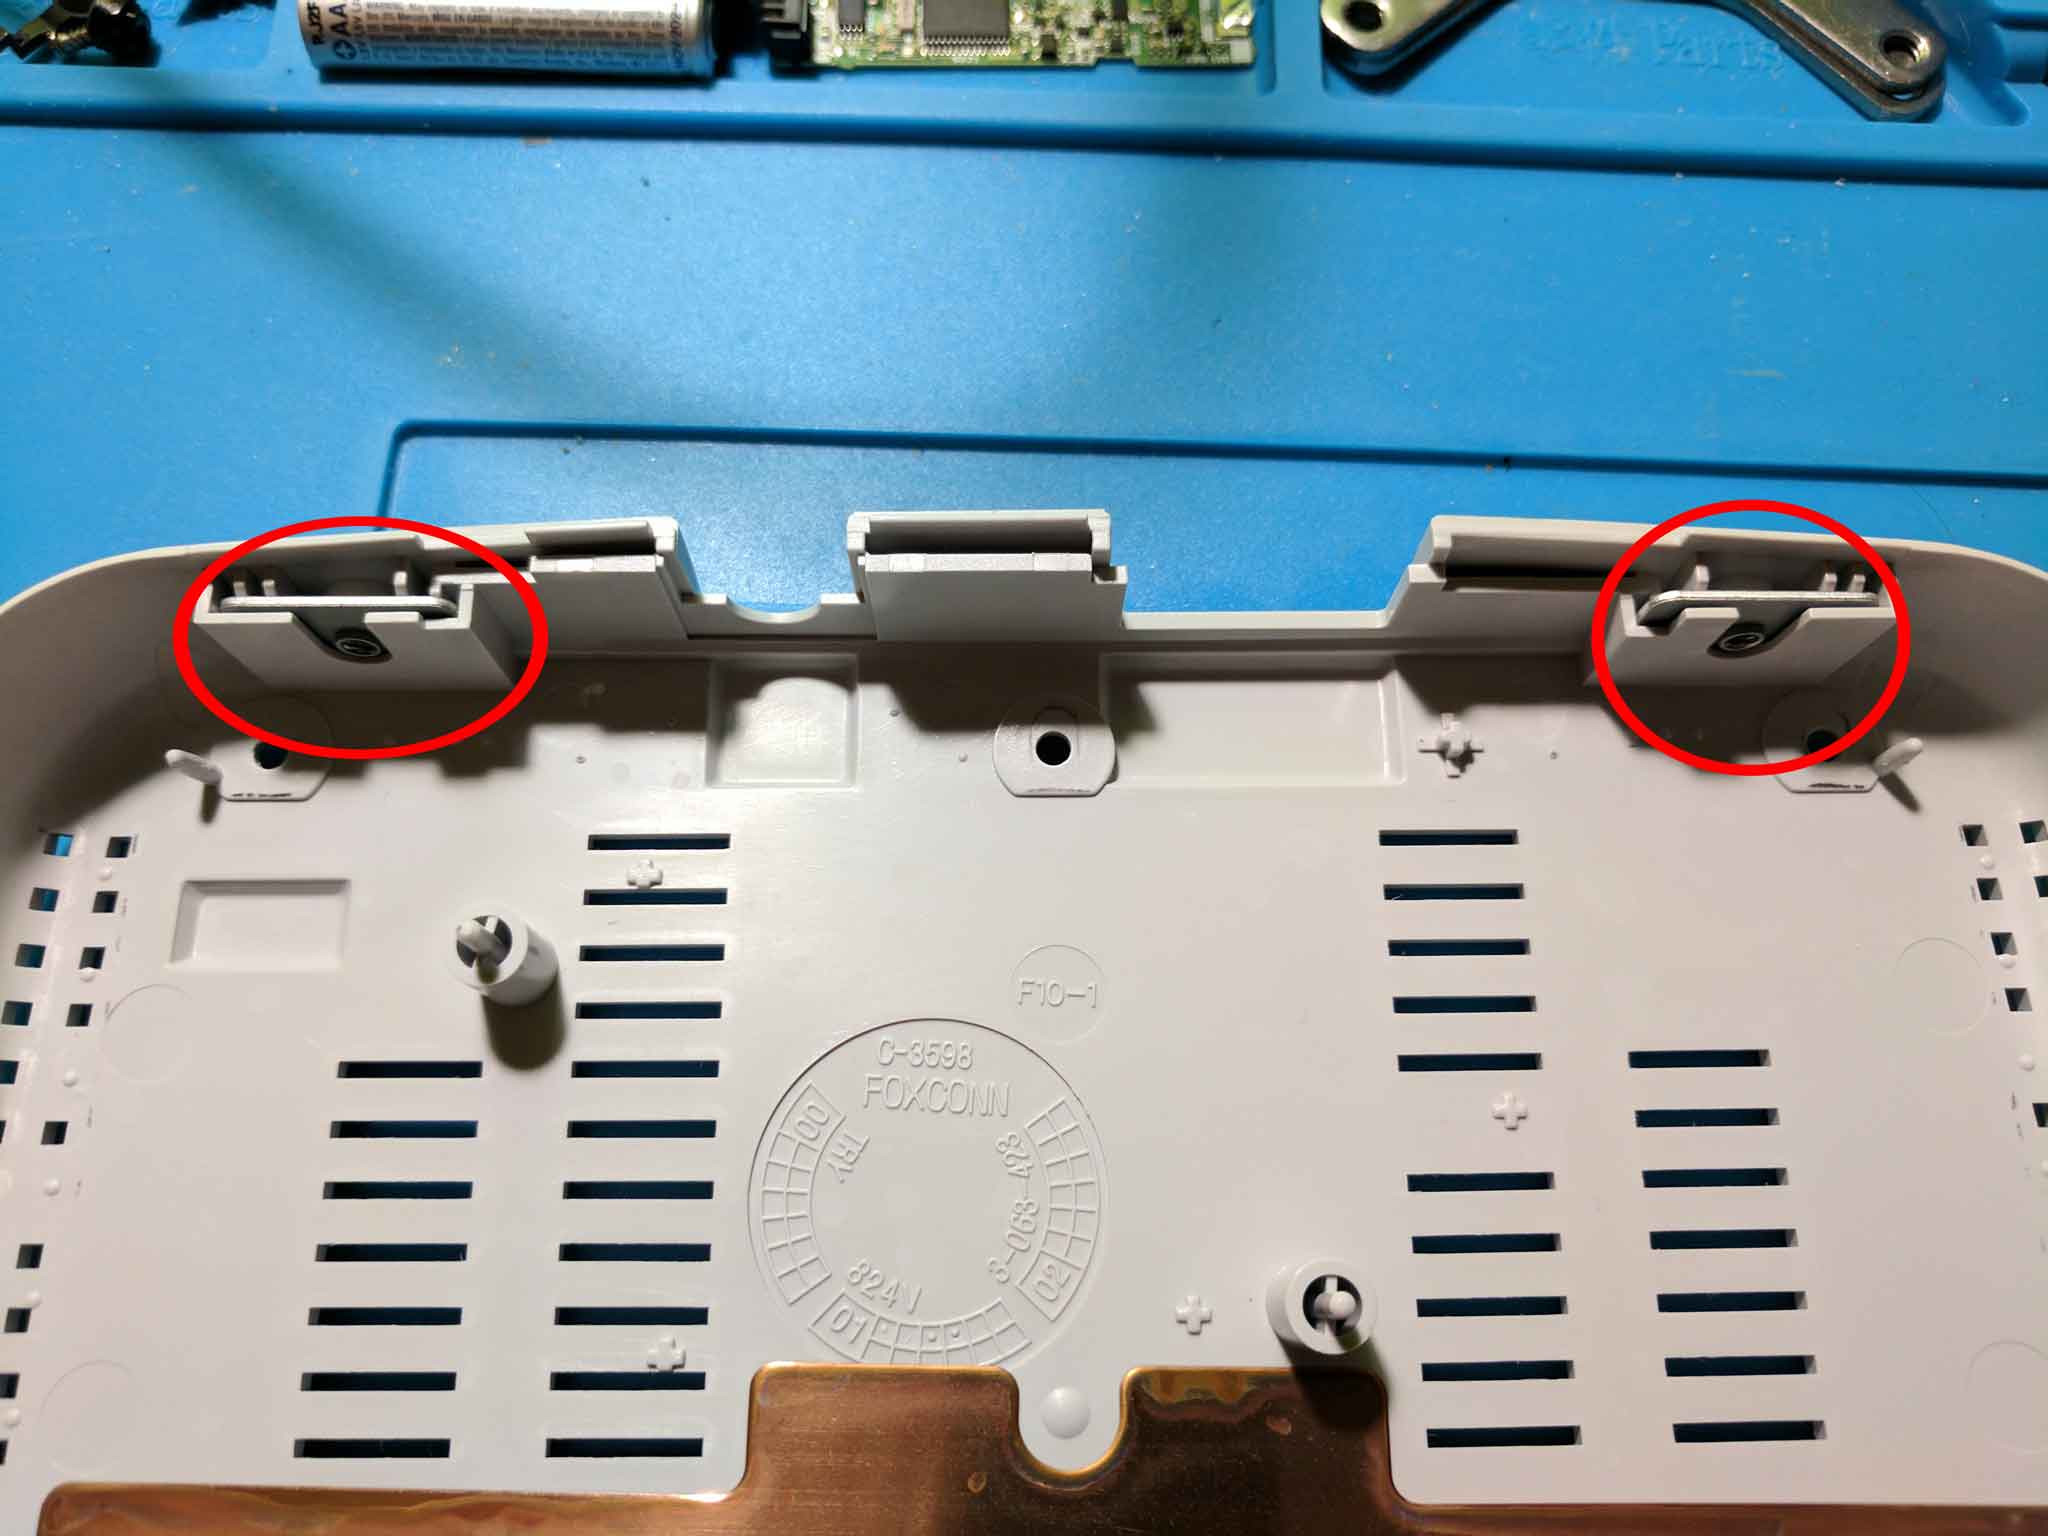
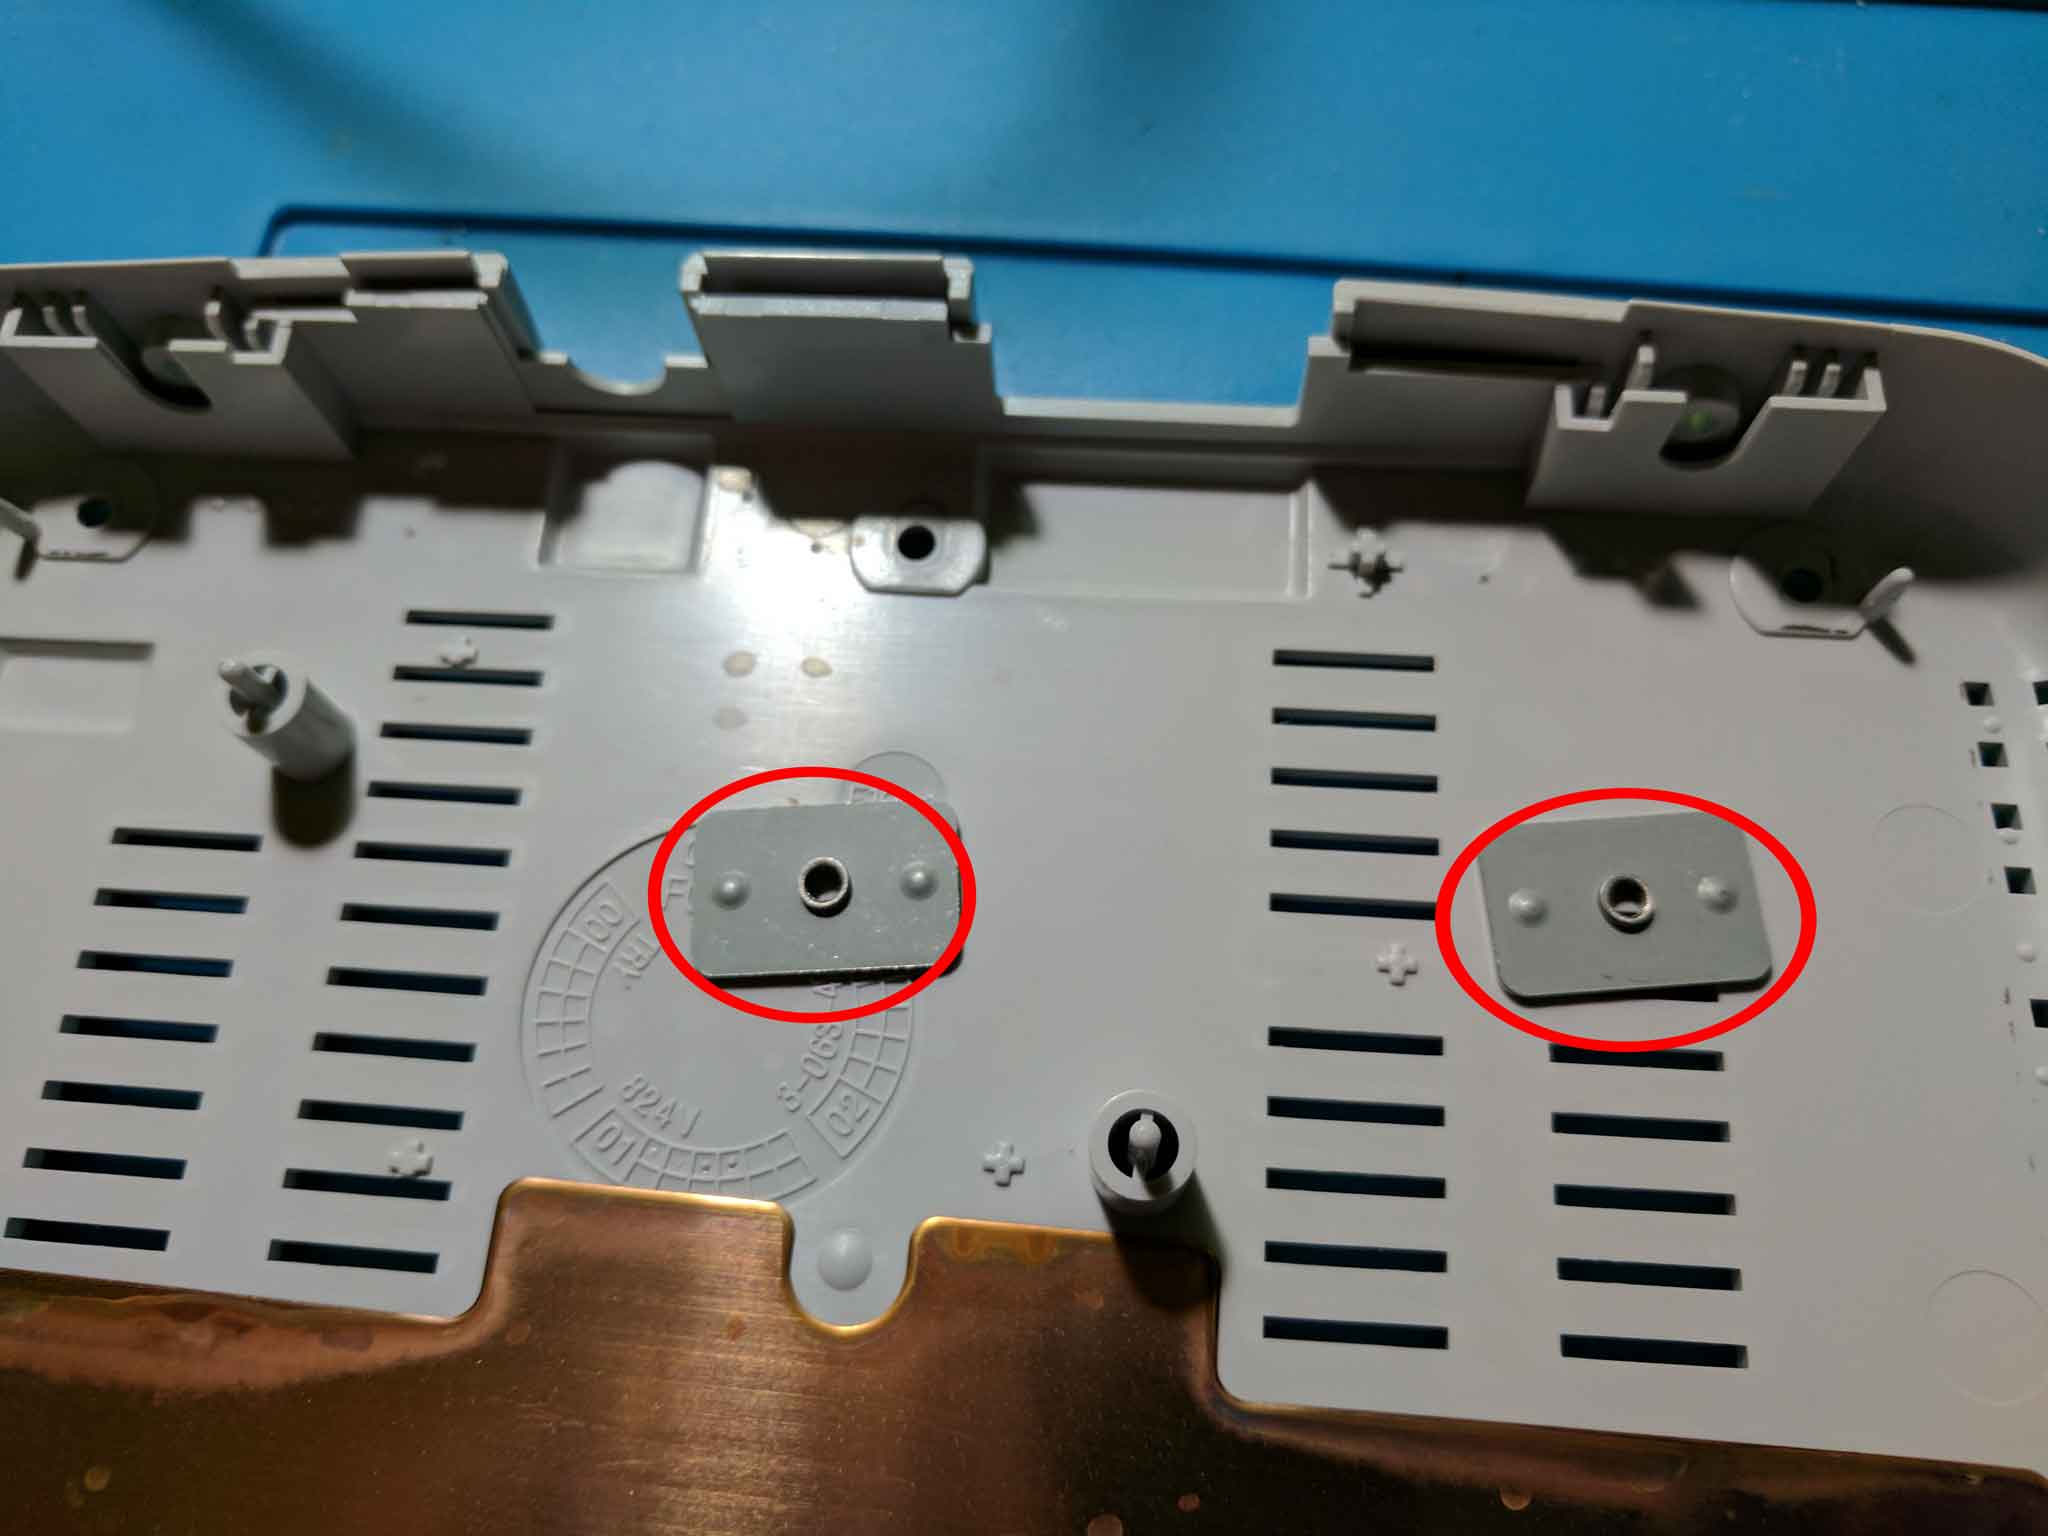
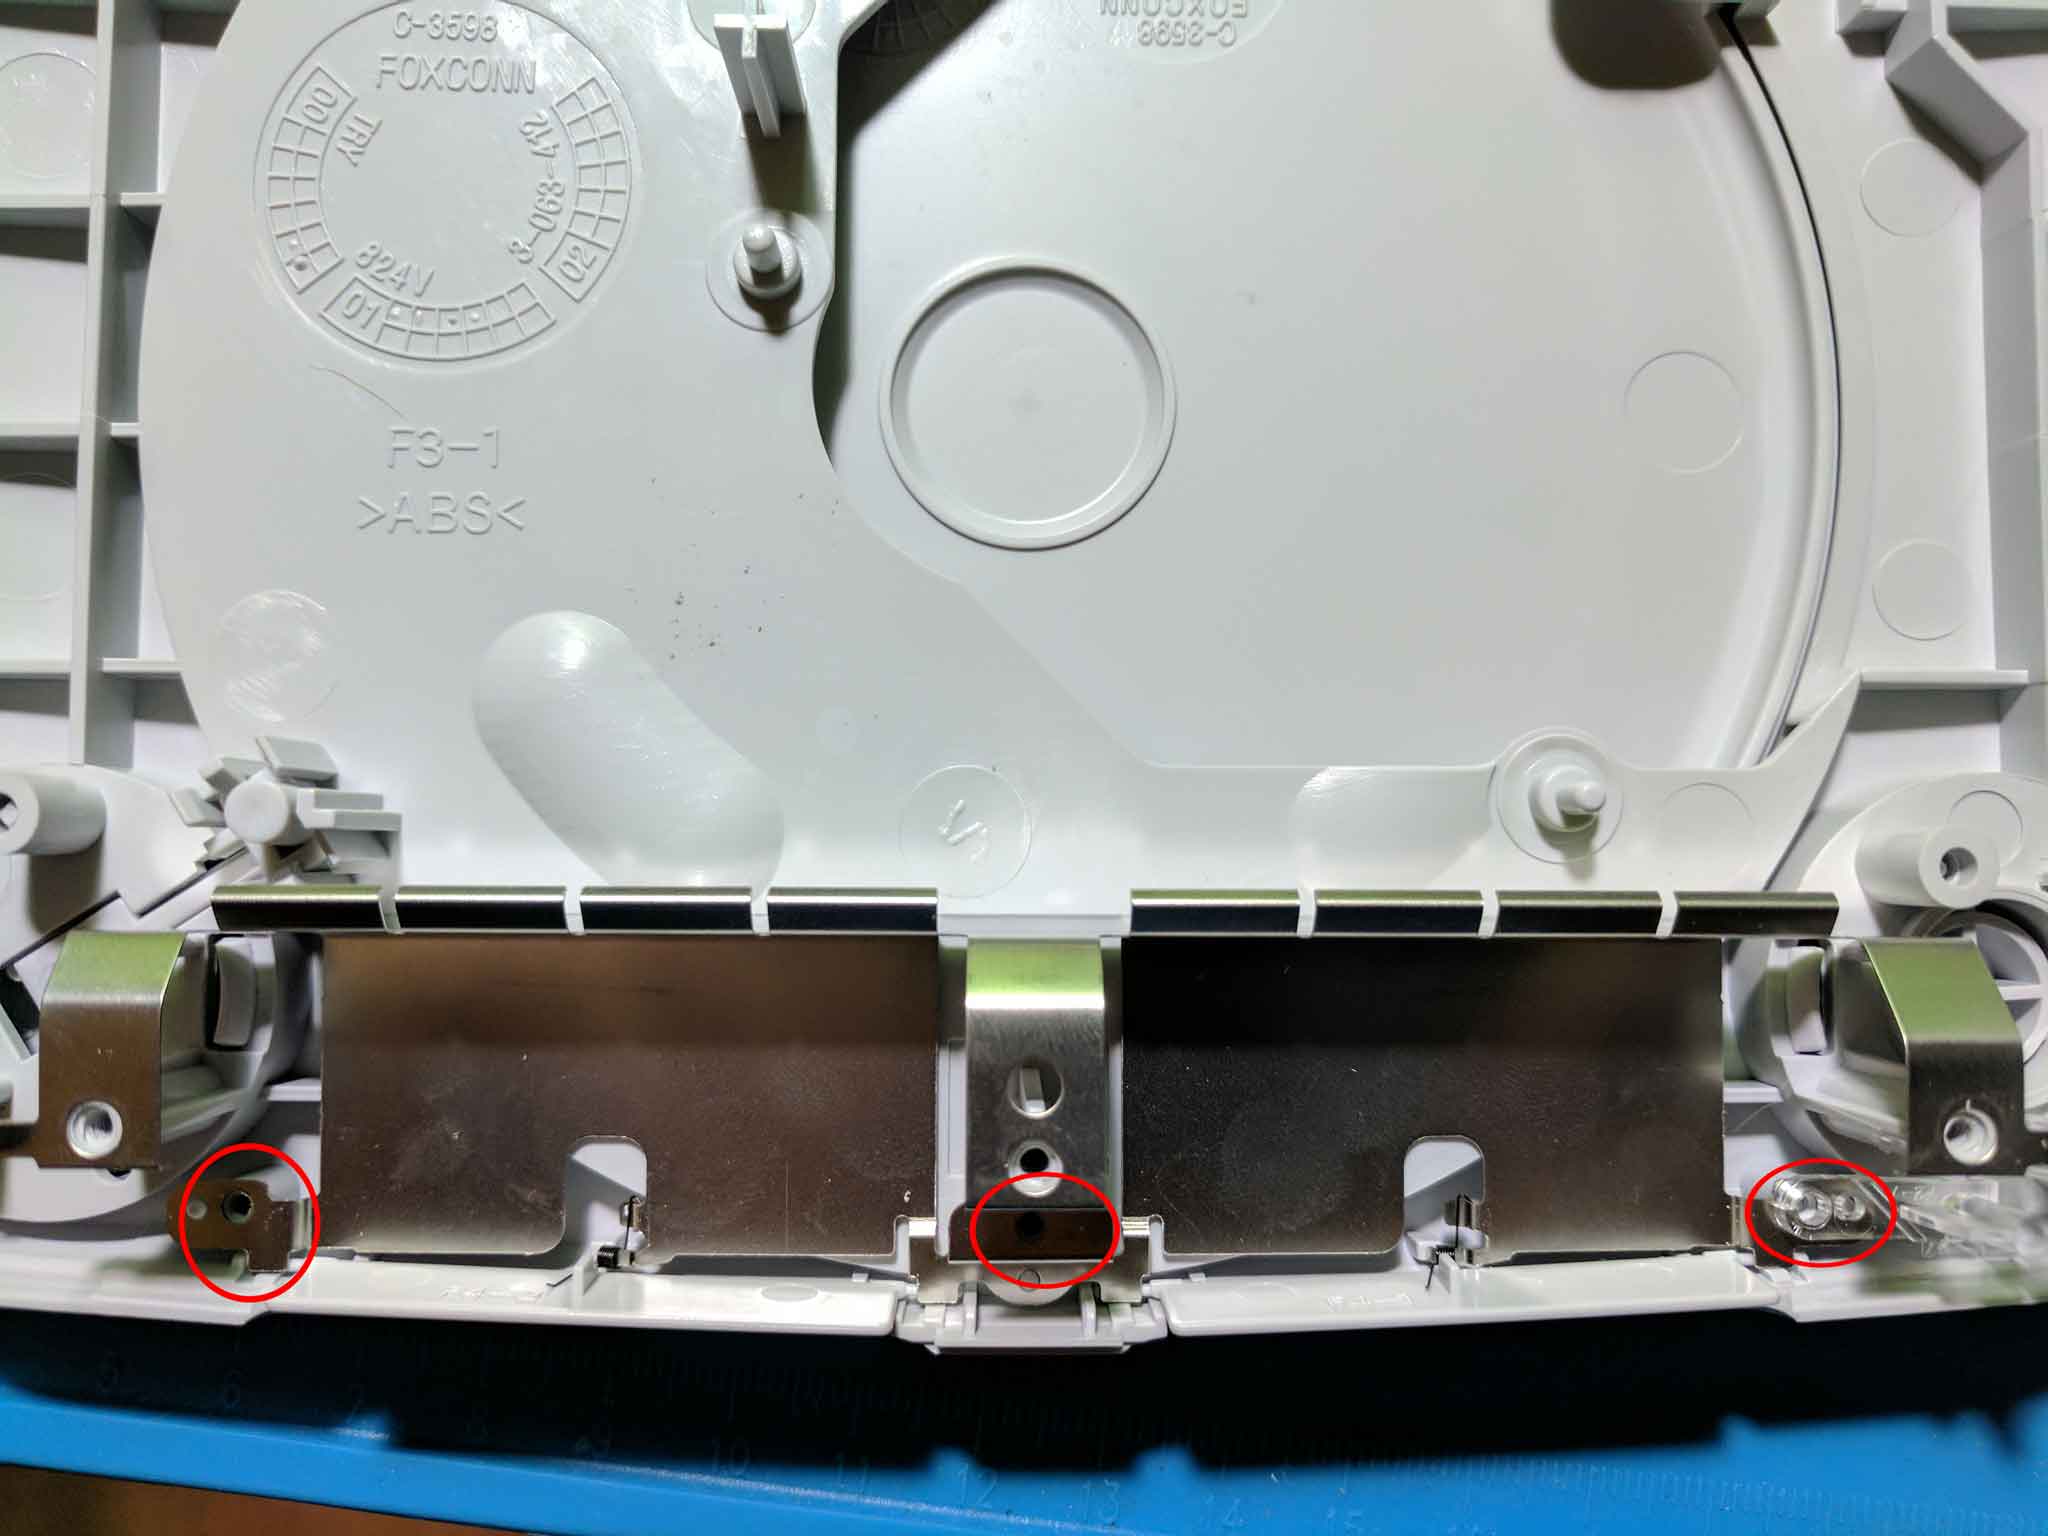
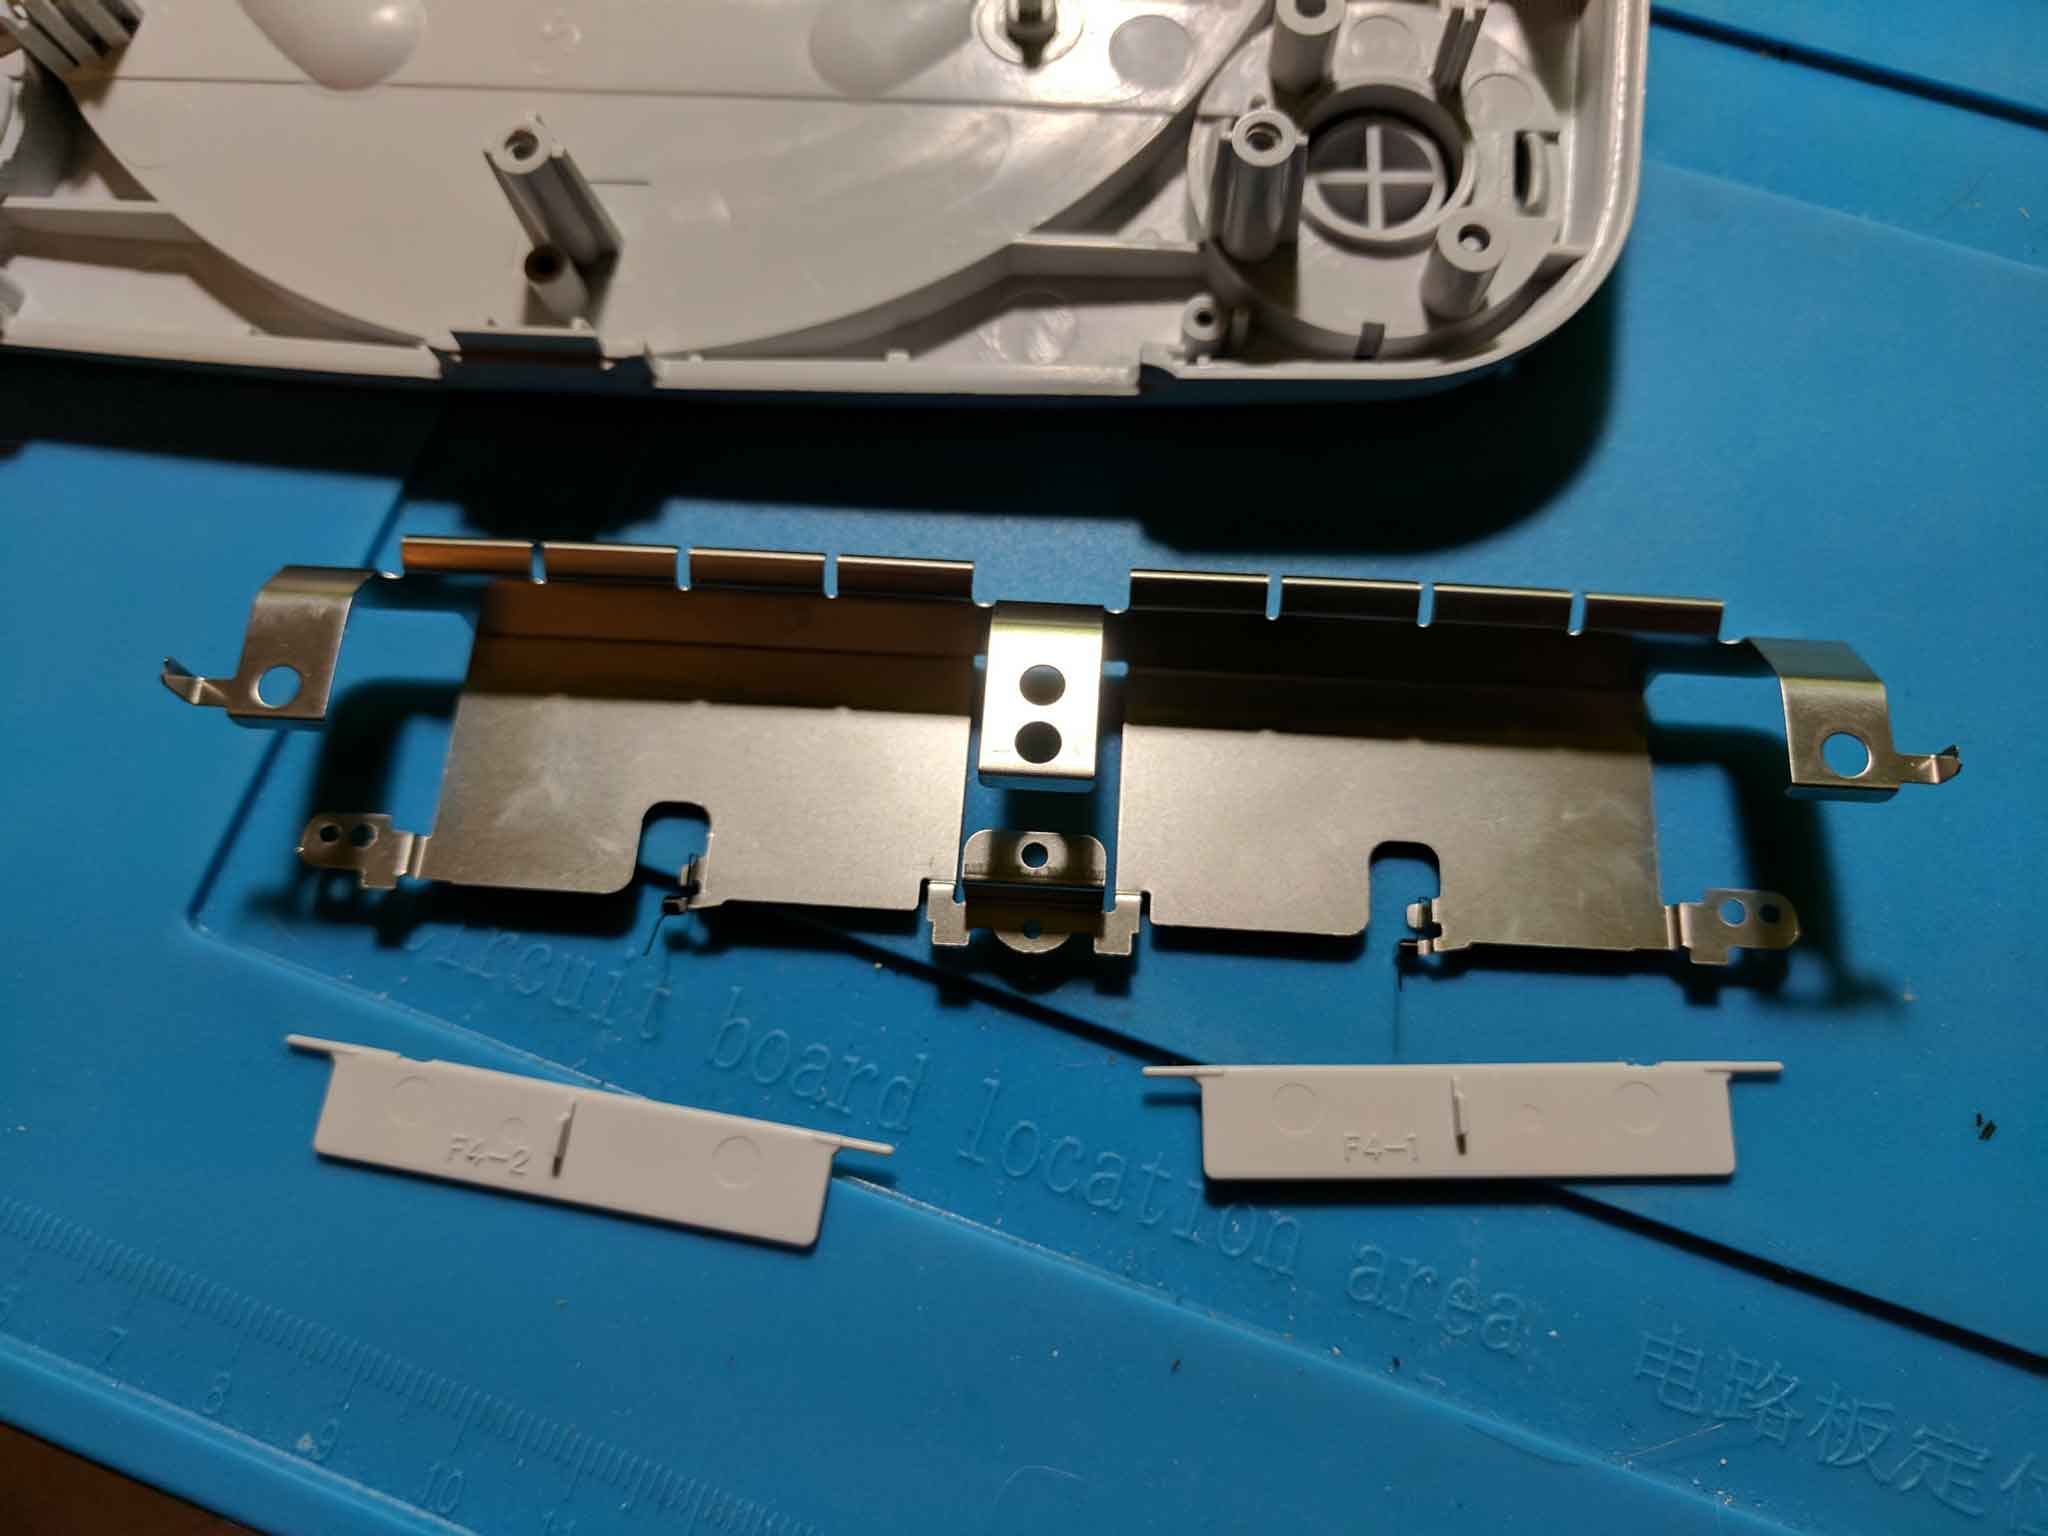
There are two metal pieces positioned on either side of the port area on the back of the plastic housing. They can be lifted out of their slots.
Below is an image of those two metal pieces once they have been removed from the bottom plastic housing.
Step 5 – Memory card flap removal
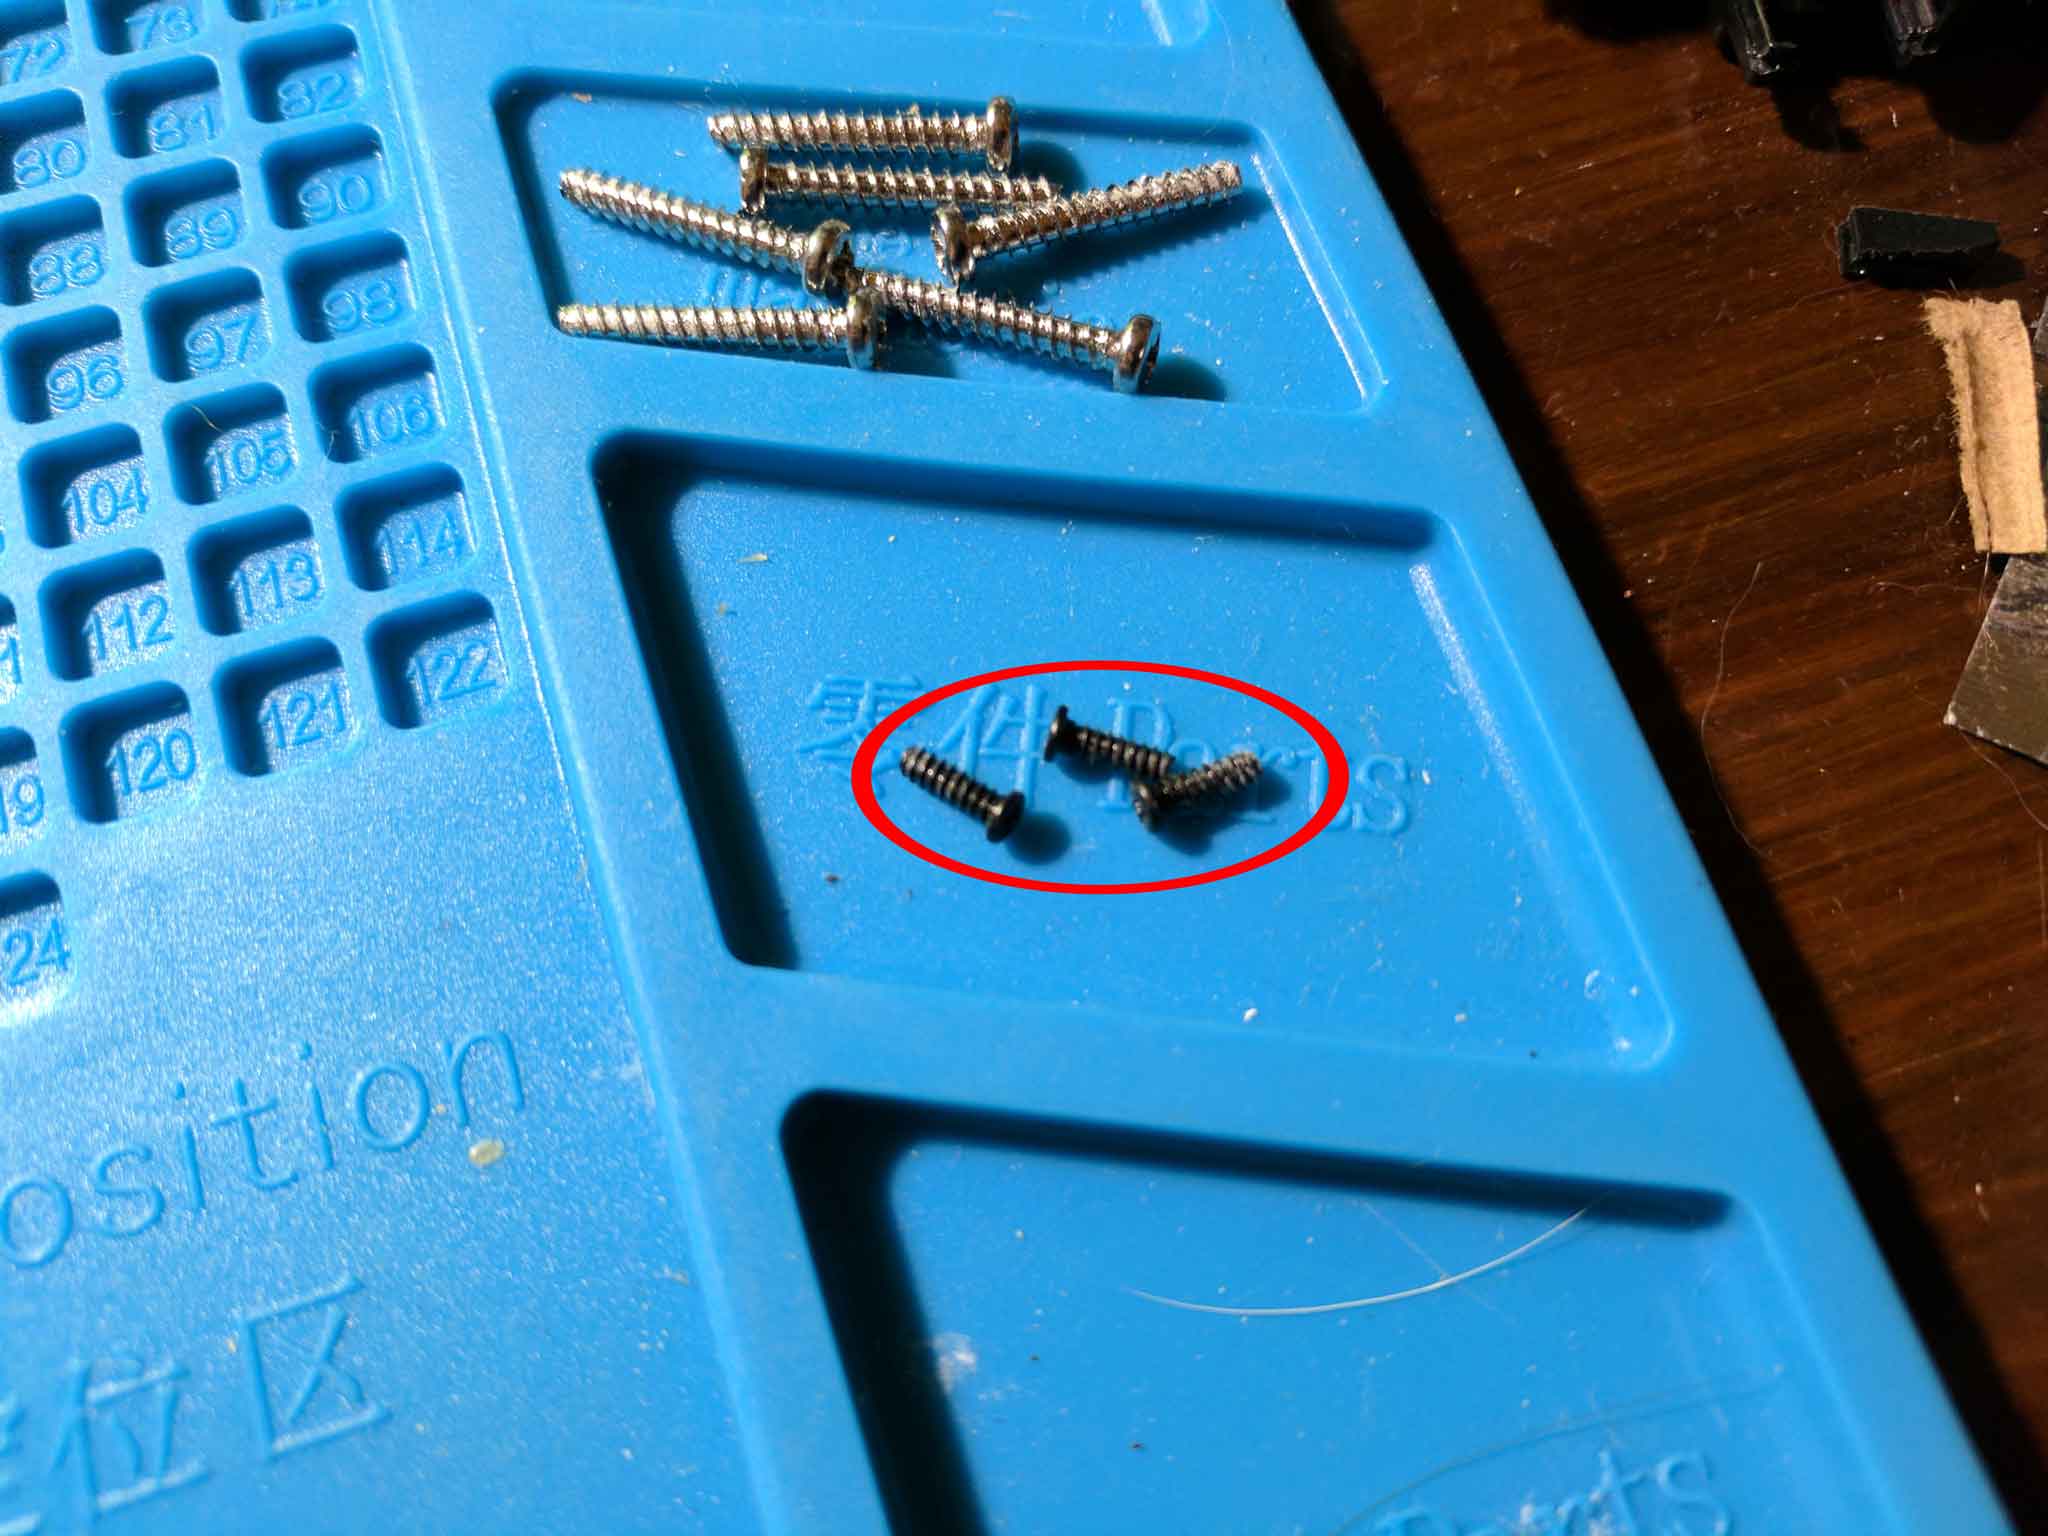
The memory card flaps are held in place by three screws. They are circled in the image below.
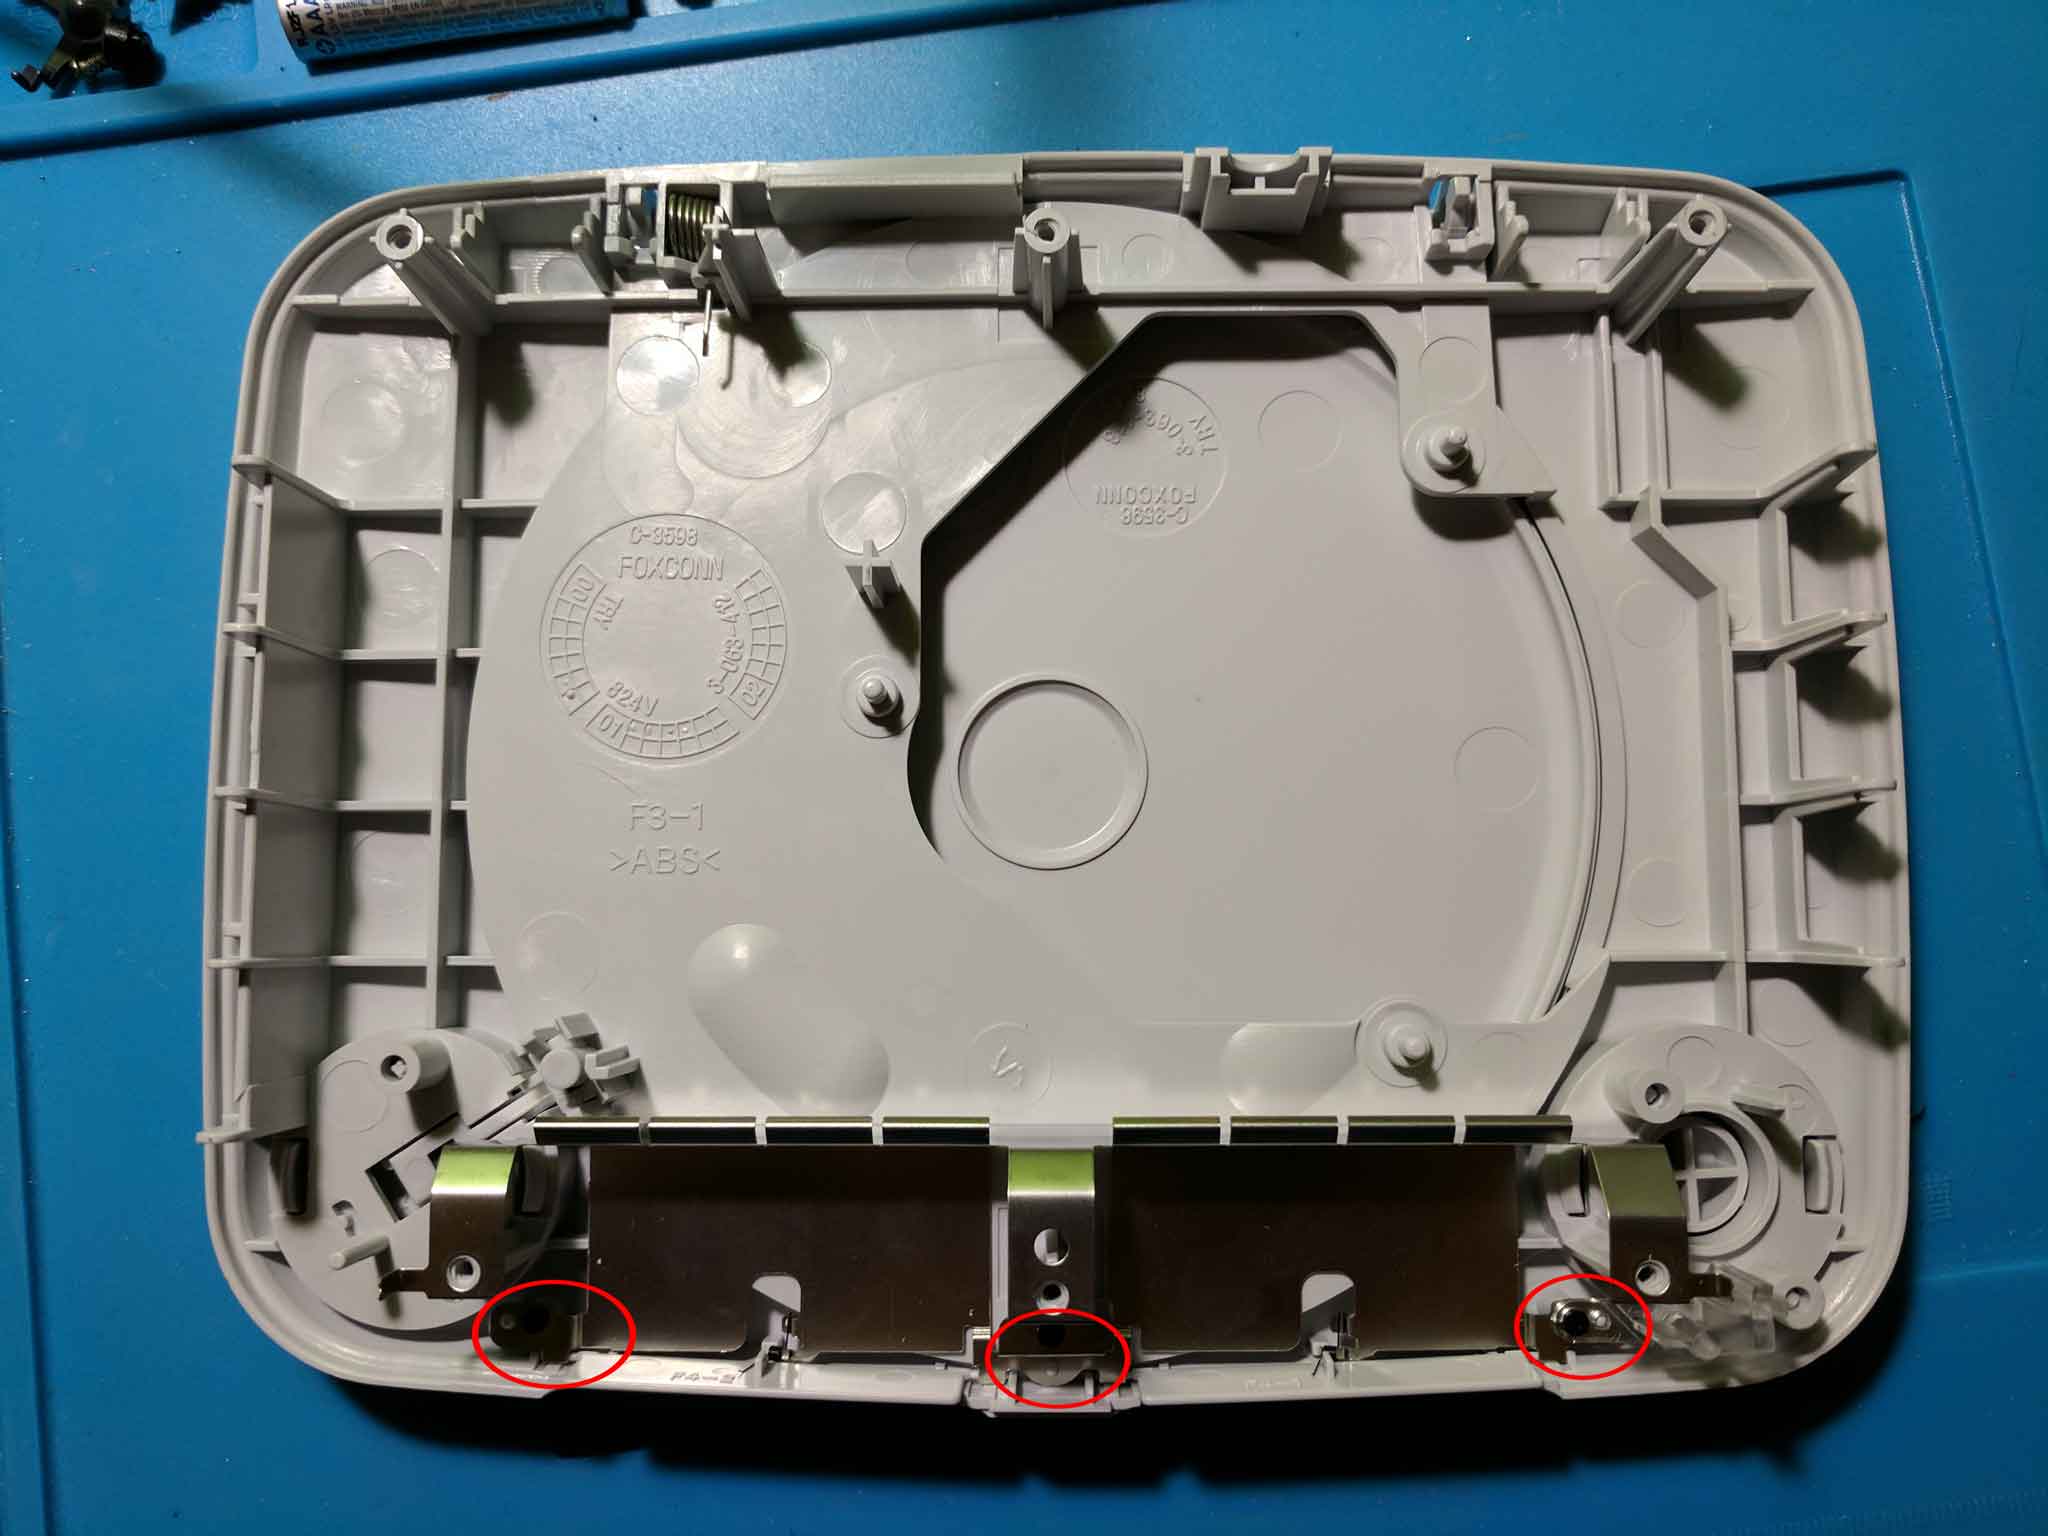
Below is a closer up image of the area once the three screws have been removed.
The three screws are identical so you can keep them together.
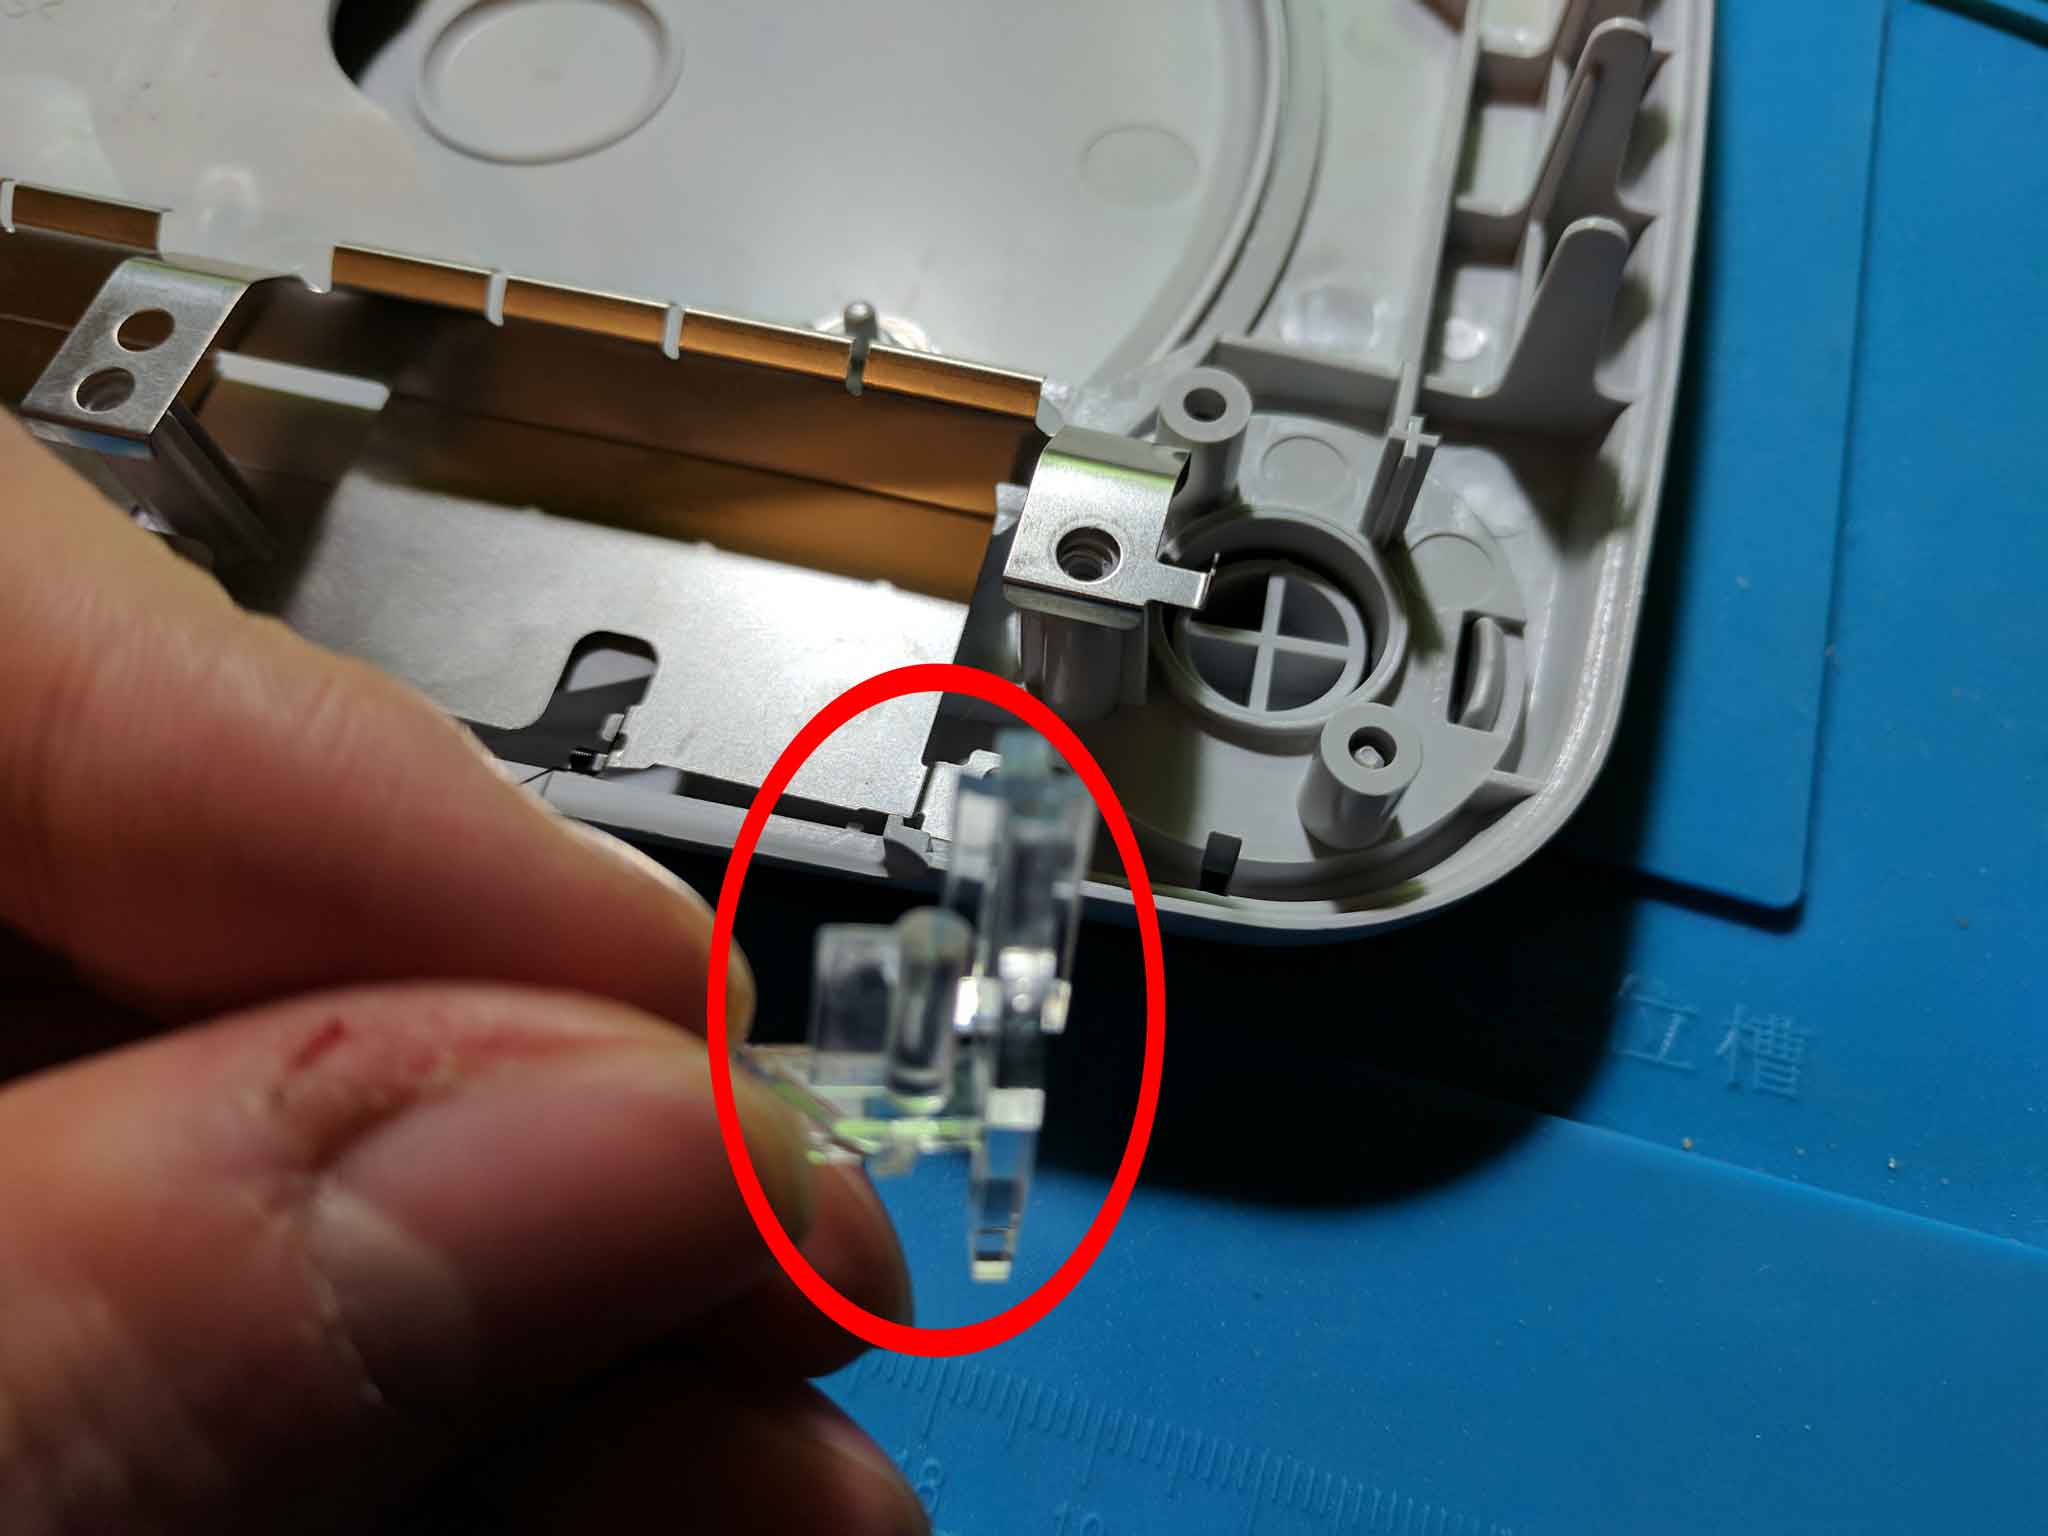
To the right of the memory card flaps there is a transparent plastic piece that is used to guide the power LED light to the outside of the console.
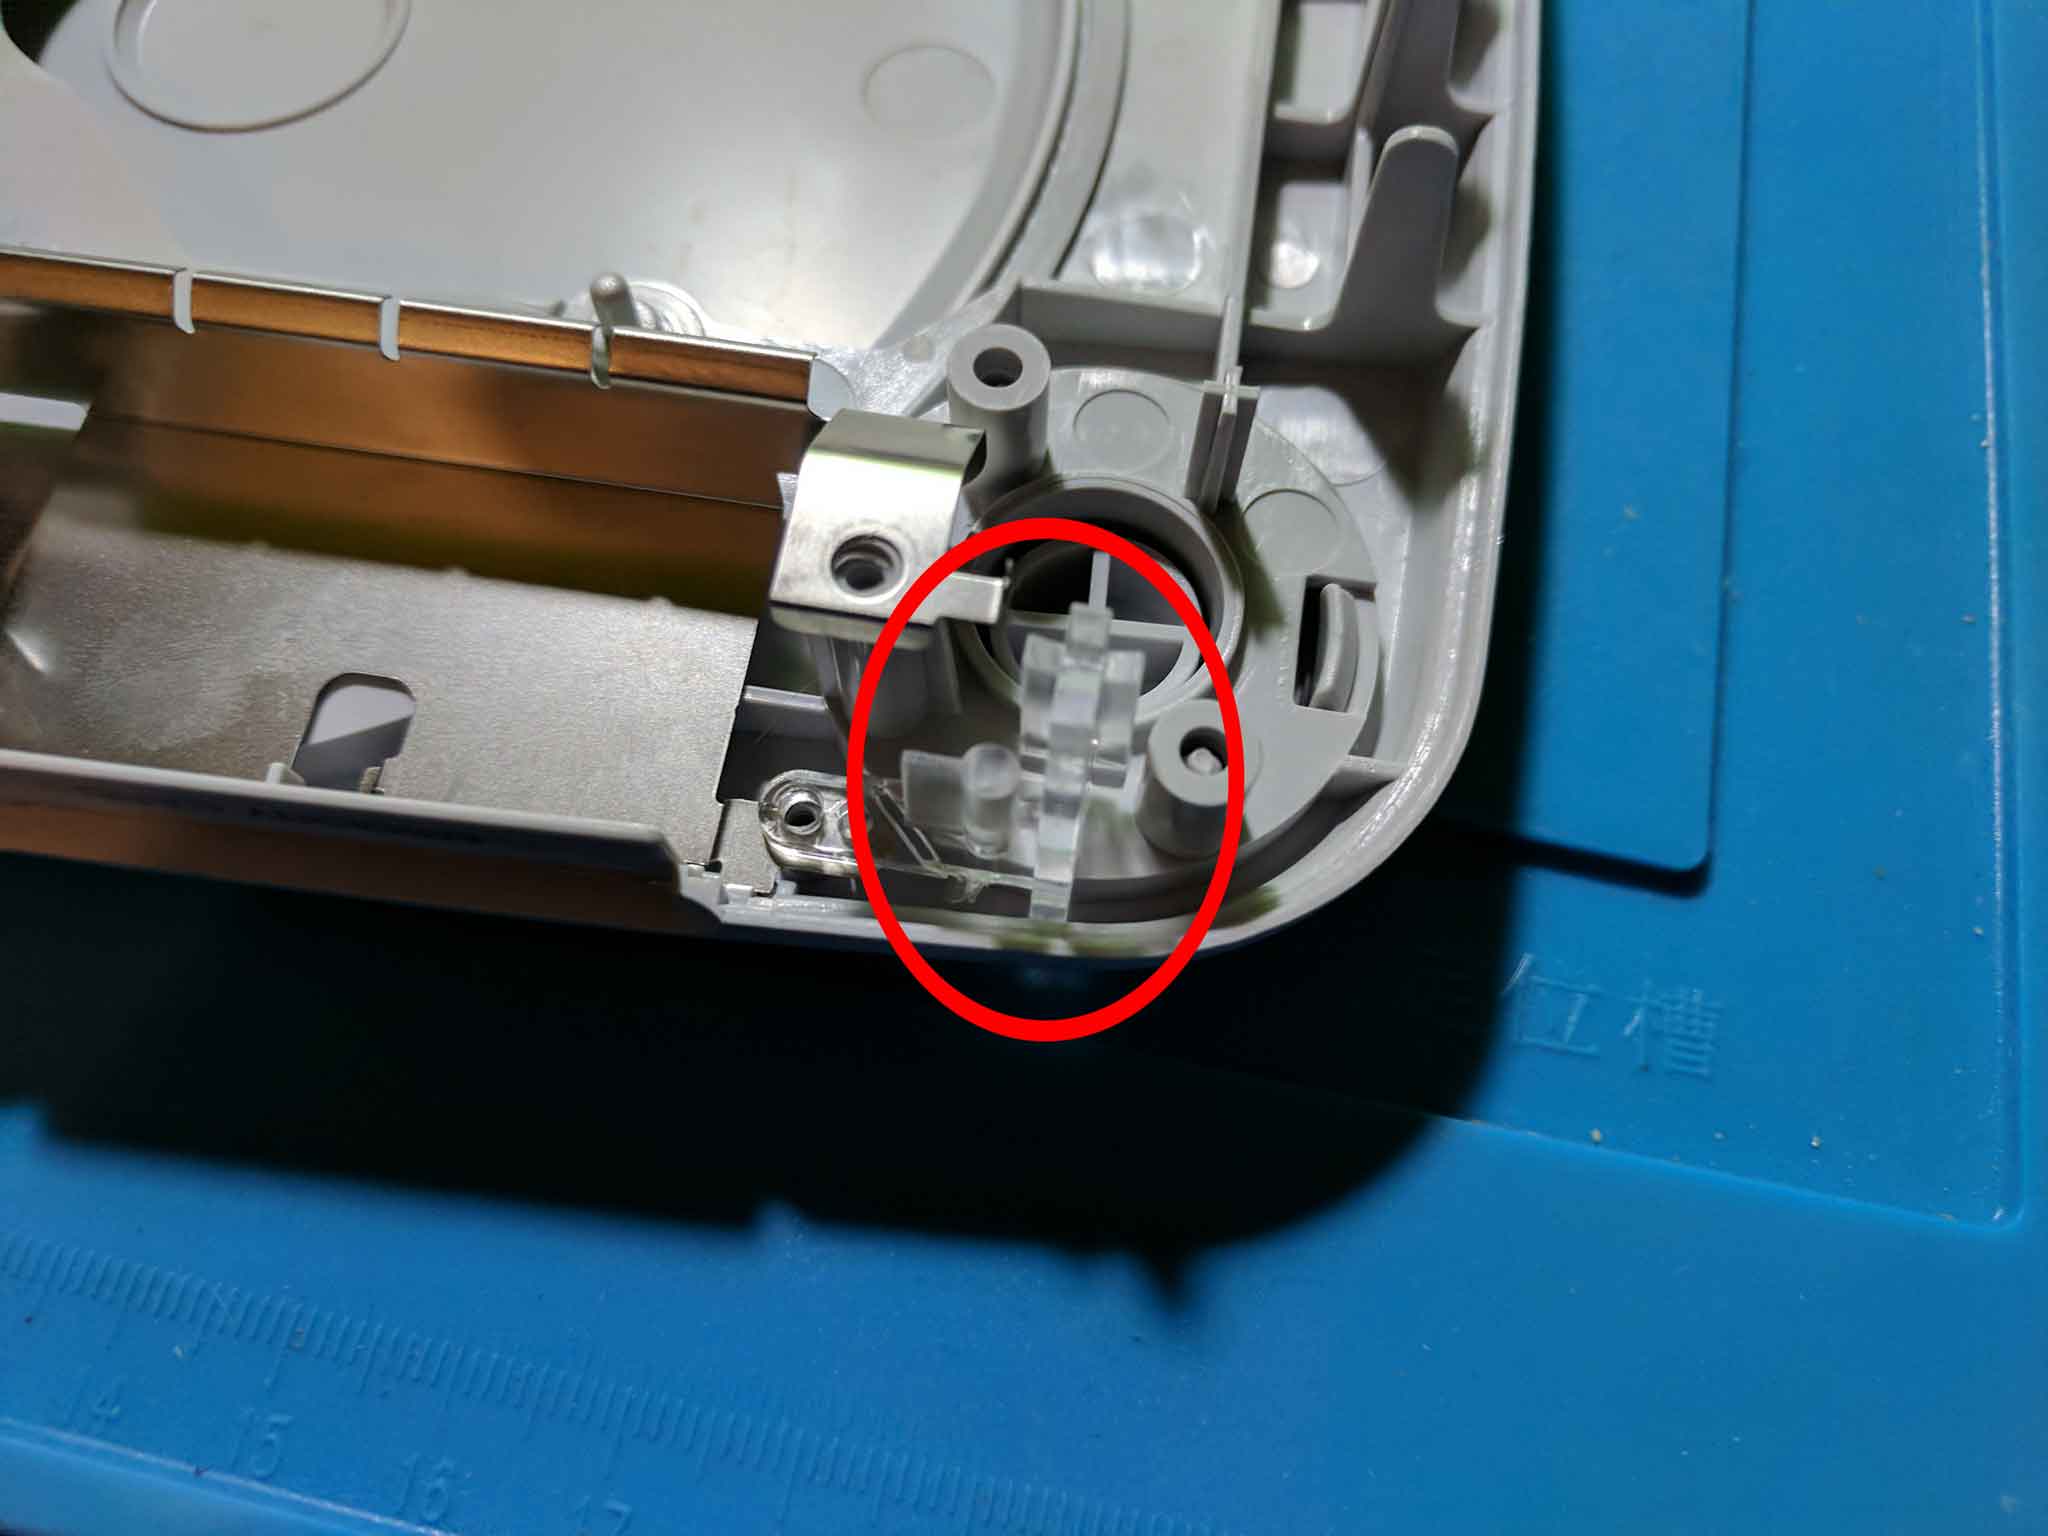
This plastic piece can be lifted out of its slot.
The memory card flaps slot into the metal tabs in front of the small springs. Below is an image of one of those flaps removed.
You can remove both flaps, along with the metal piece holding them in place.
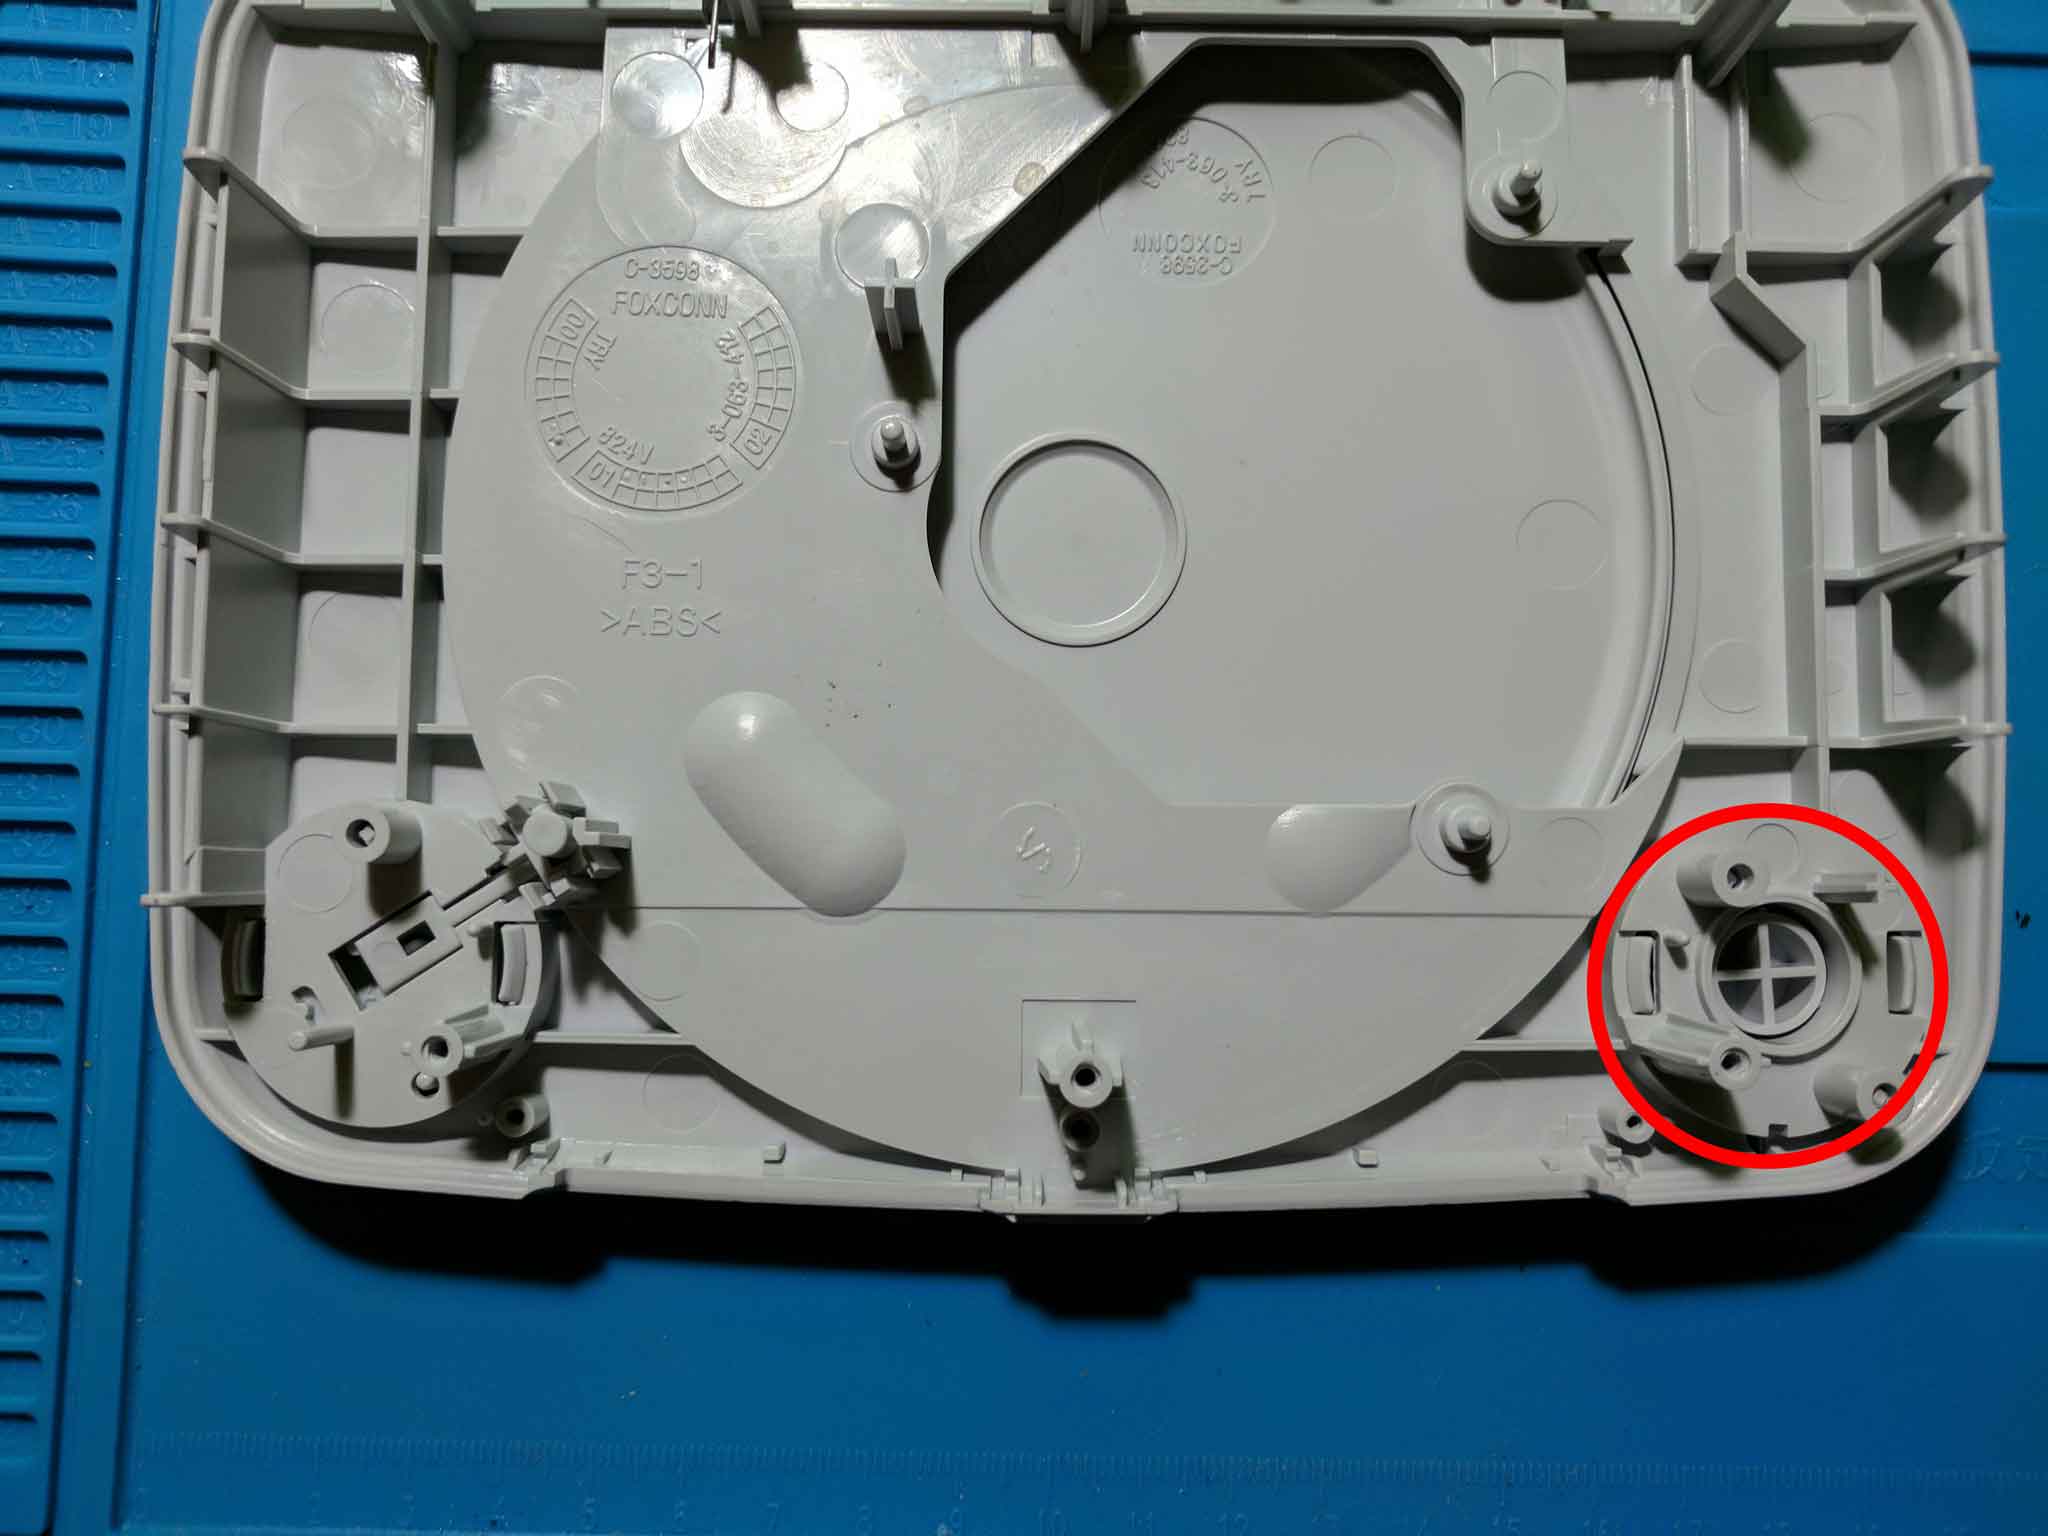
Step 6 – Power button removal
The power button is really easy to remove. Simply push the two tabs towards each other while pushing the button out through the center. You should be able to use something like your fingers, pliers, or even a screwdriver.
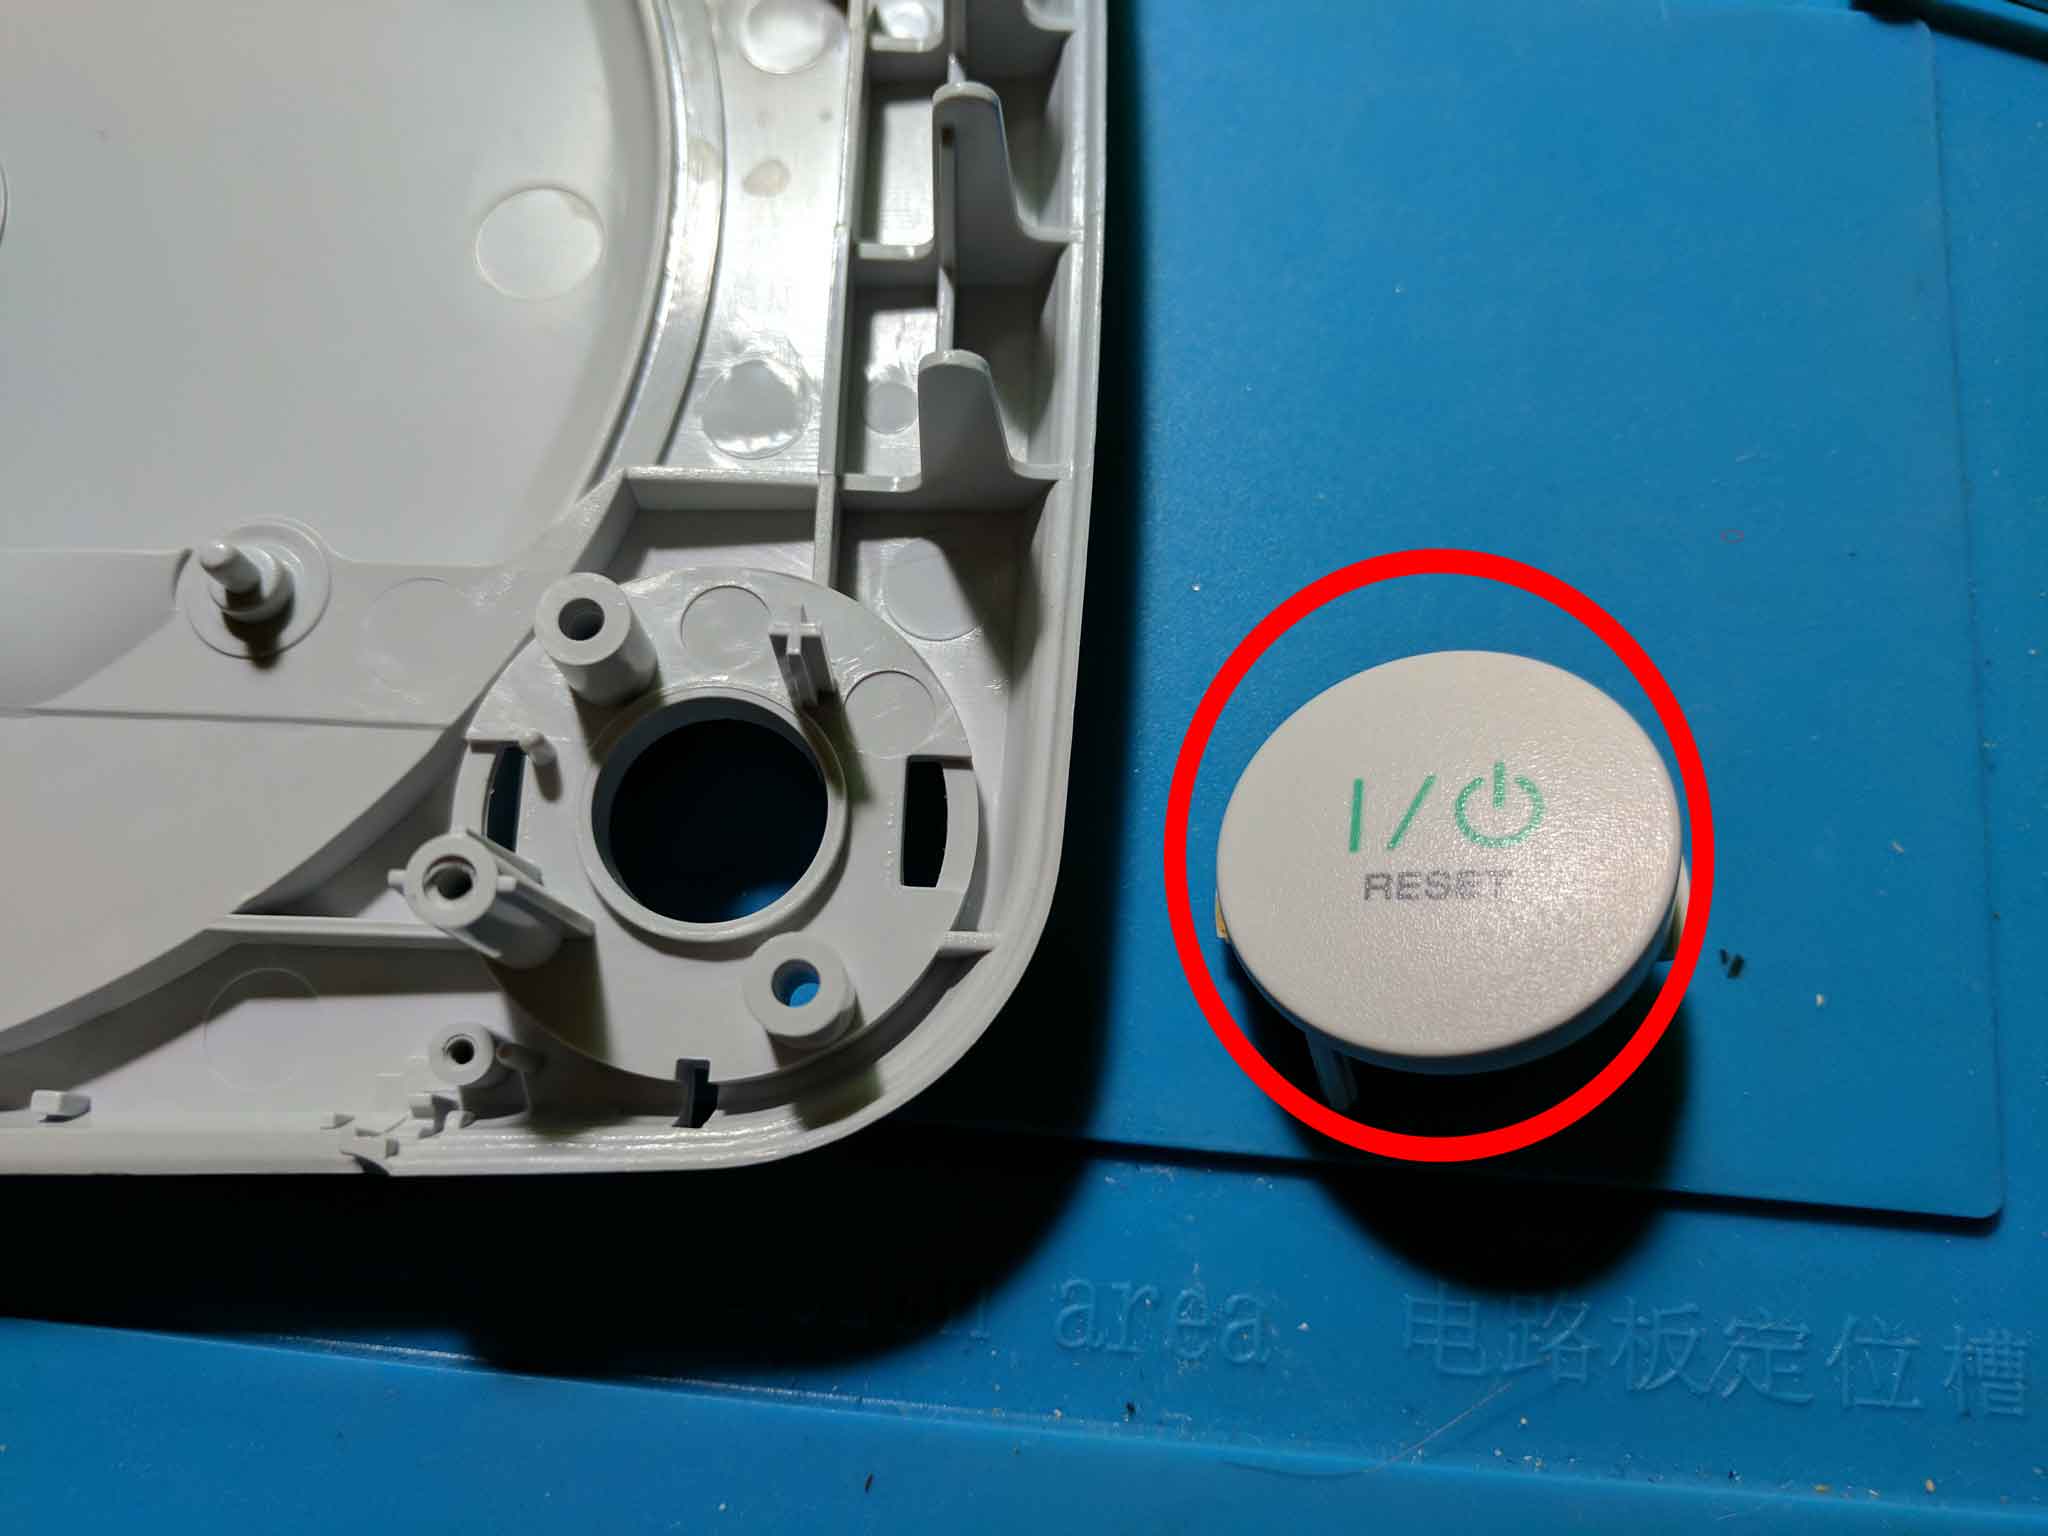
Below is an image of the power button once it has been removed.
Step 7 – Eject button removal
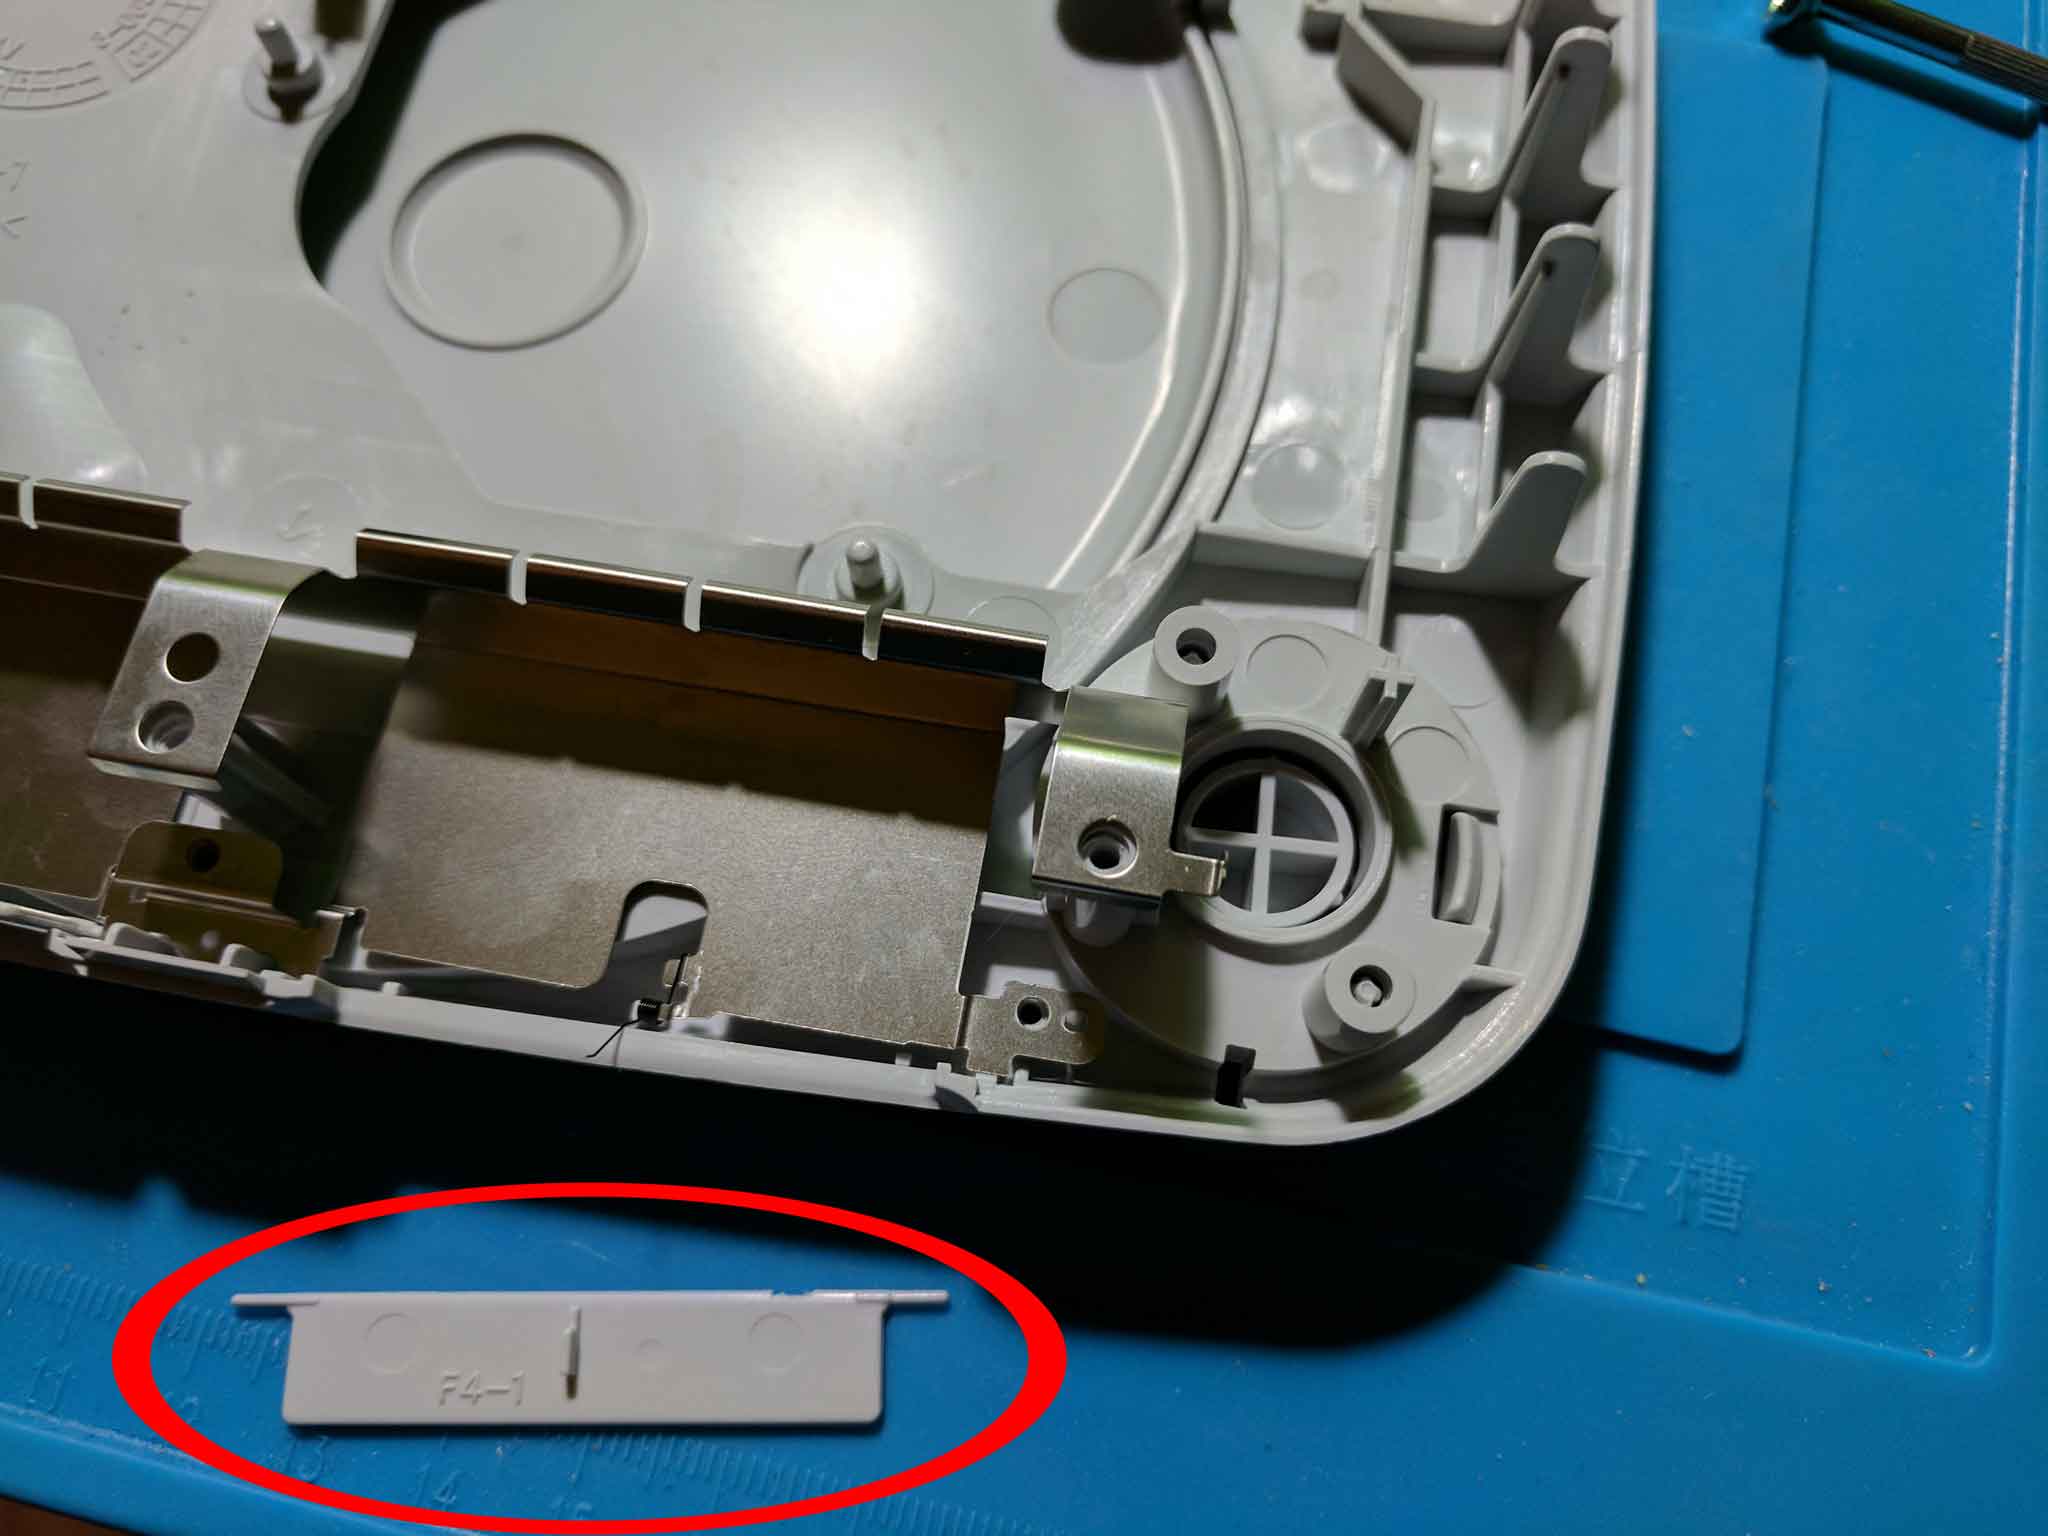
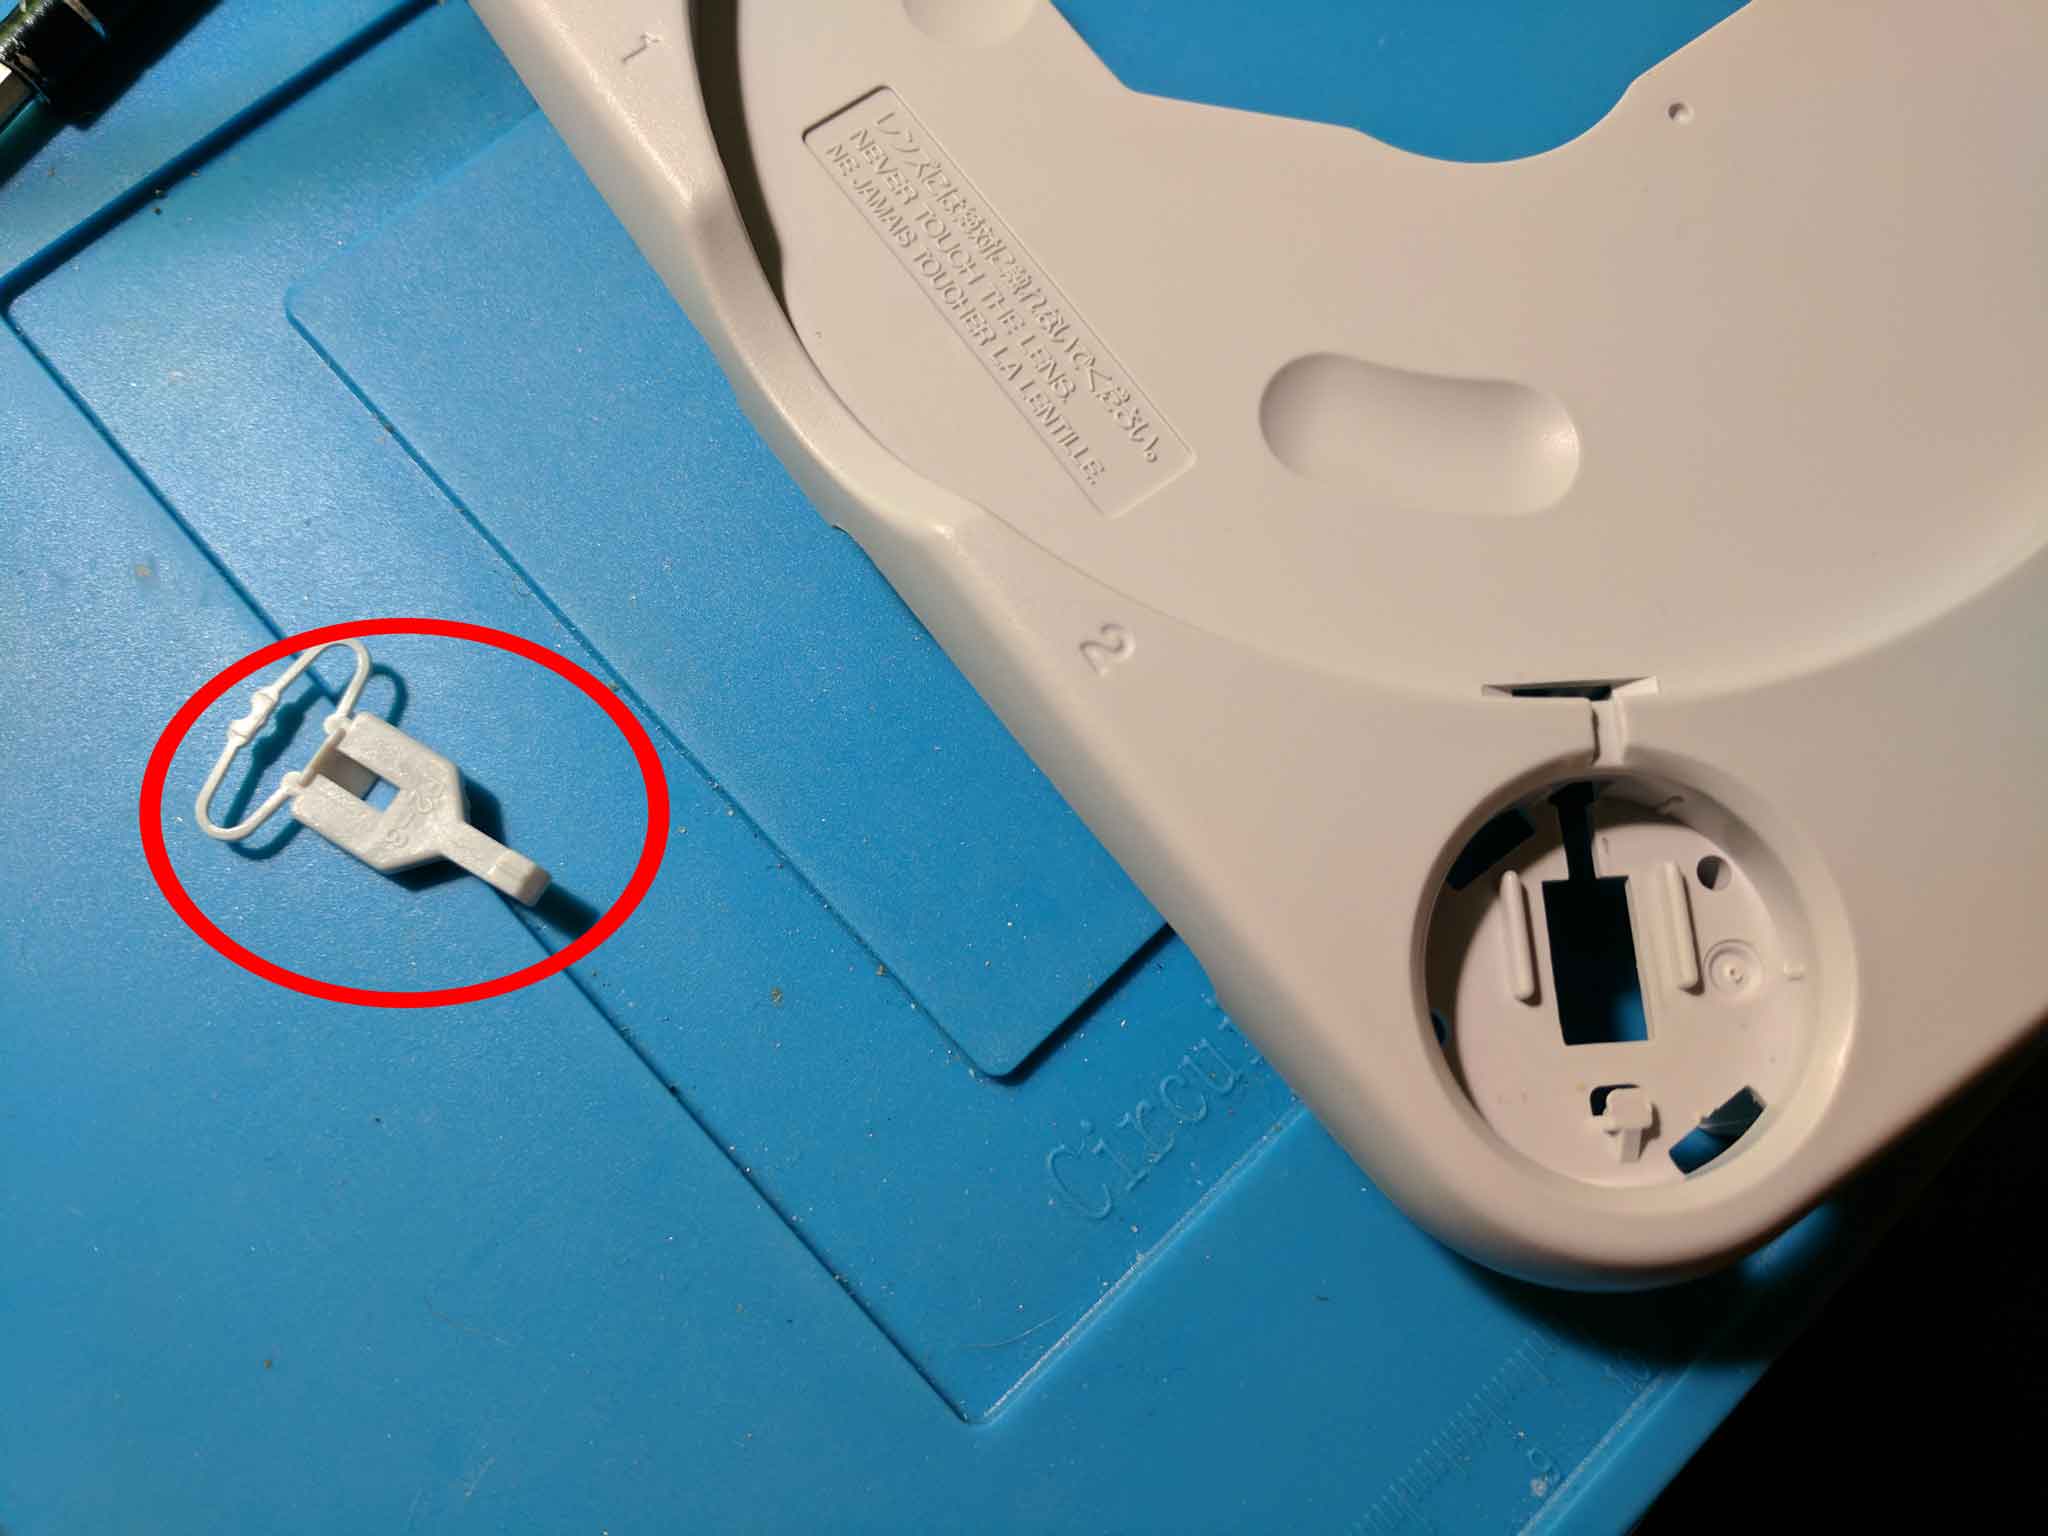
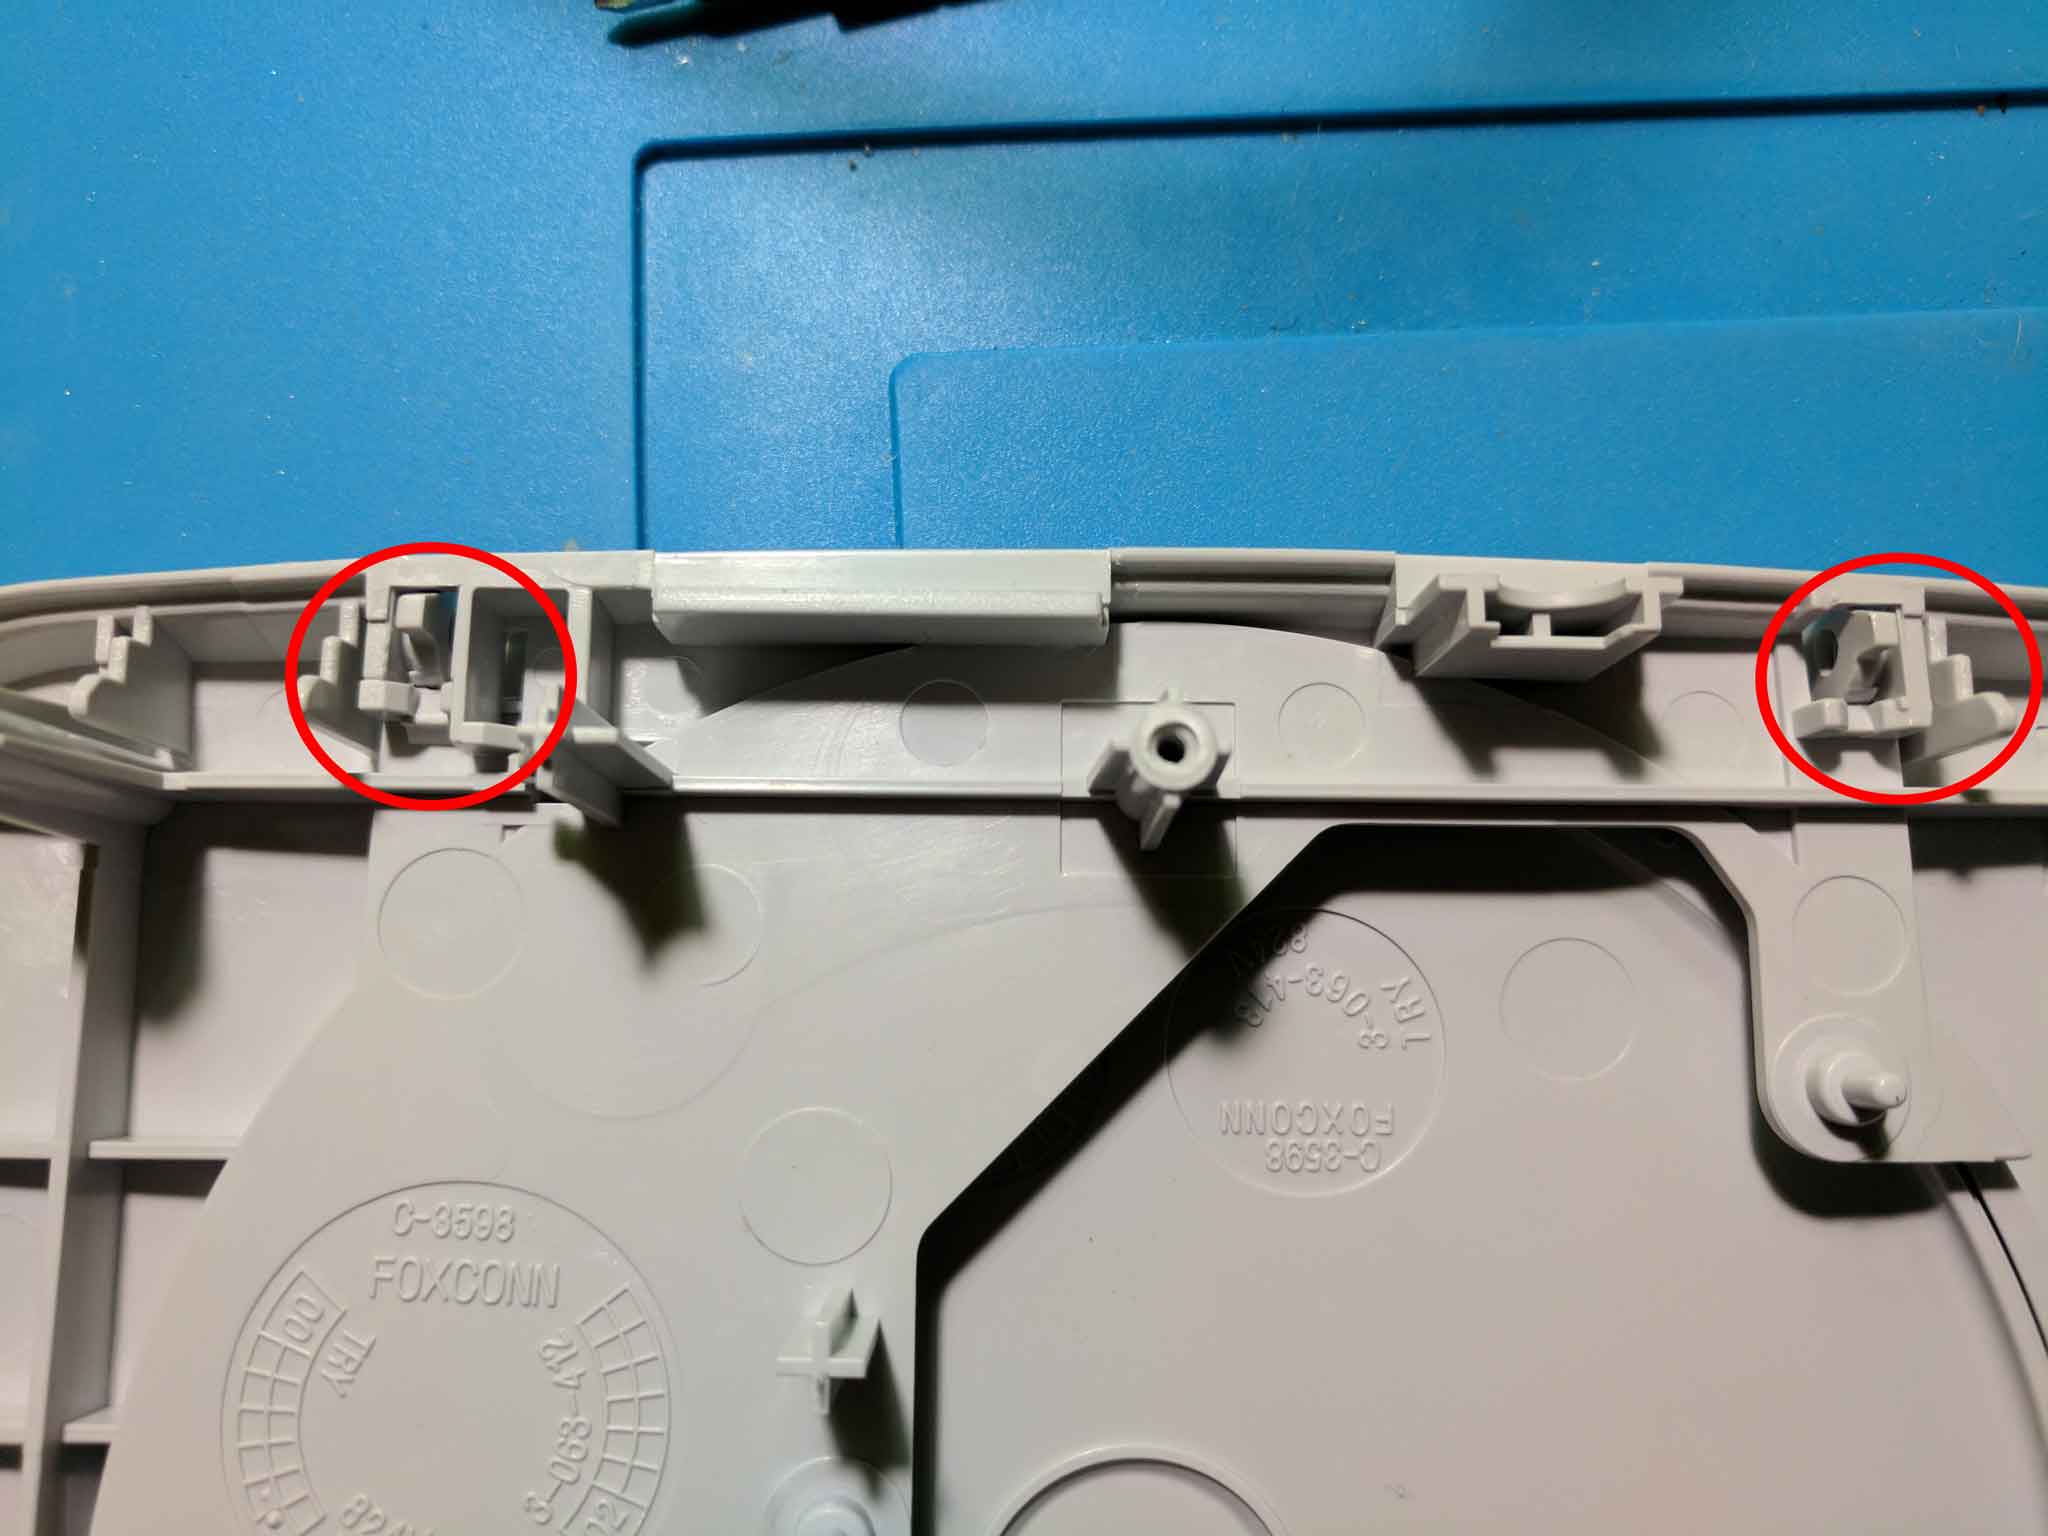
Removing the eject button is a little more tricky than removing the power button. Begin by removing the plastic piece shown in the image below. You will need to push back the tabs on either size while lifting the piece out.
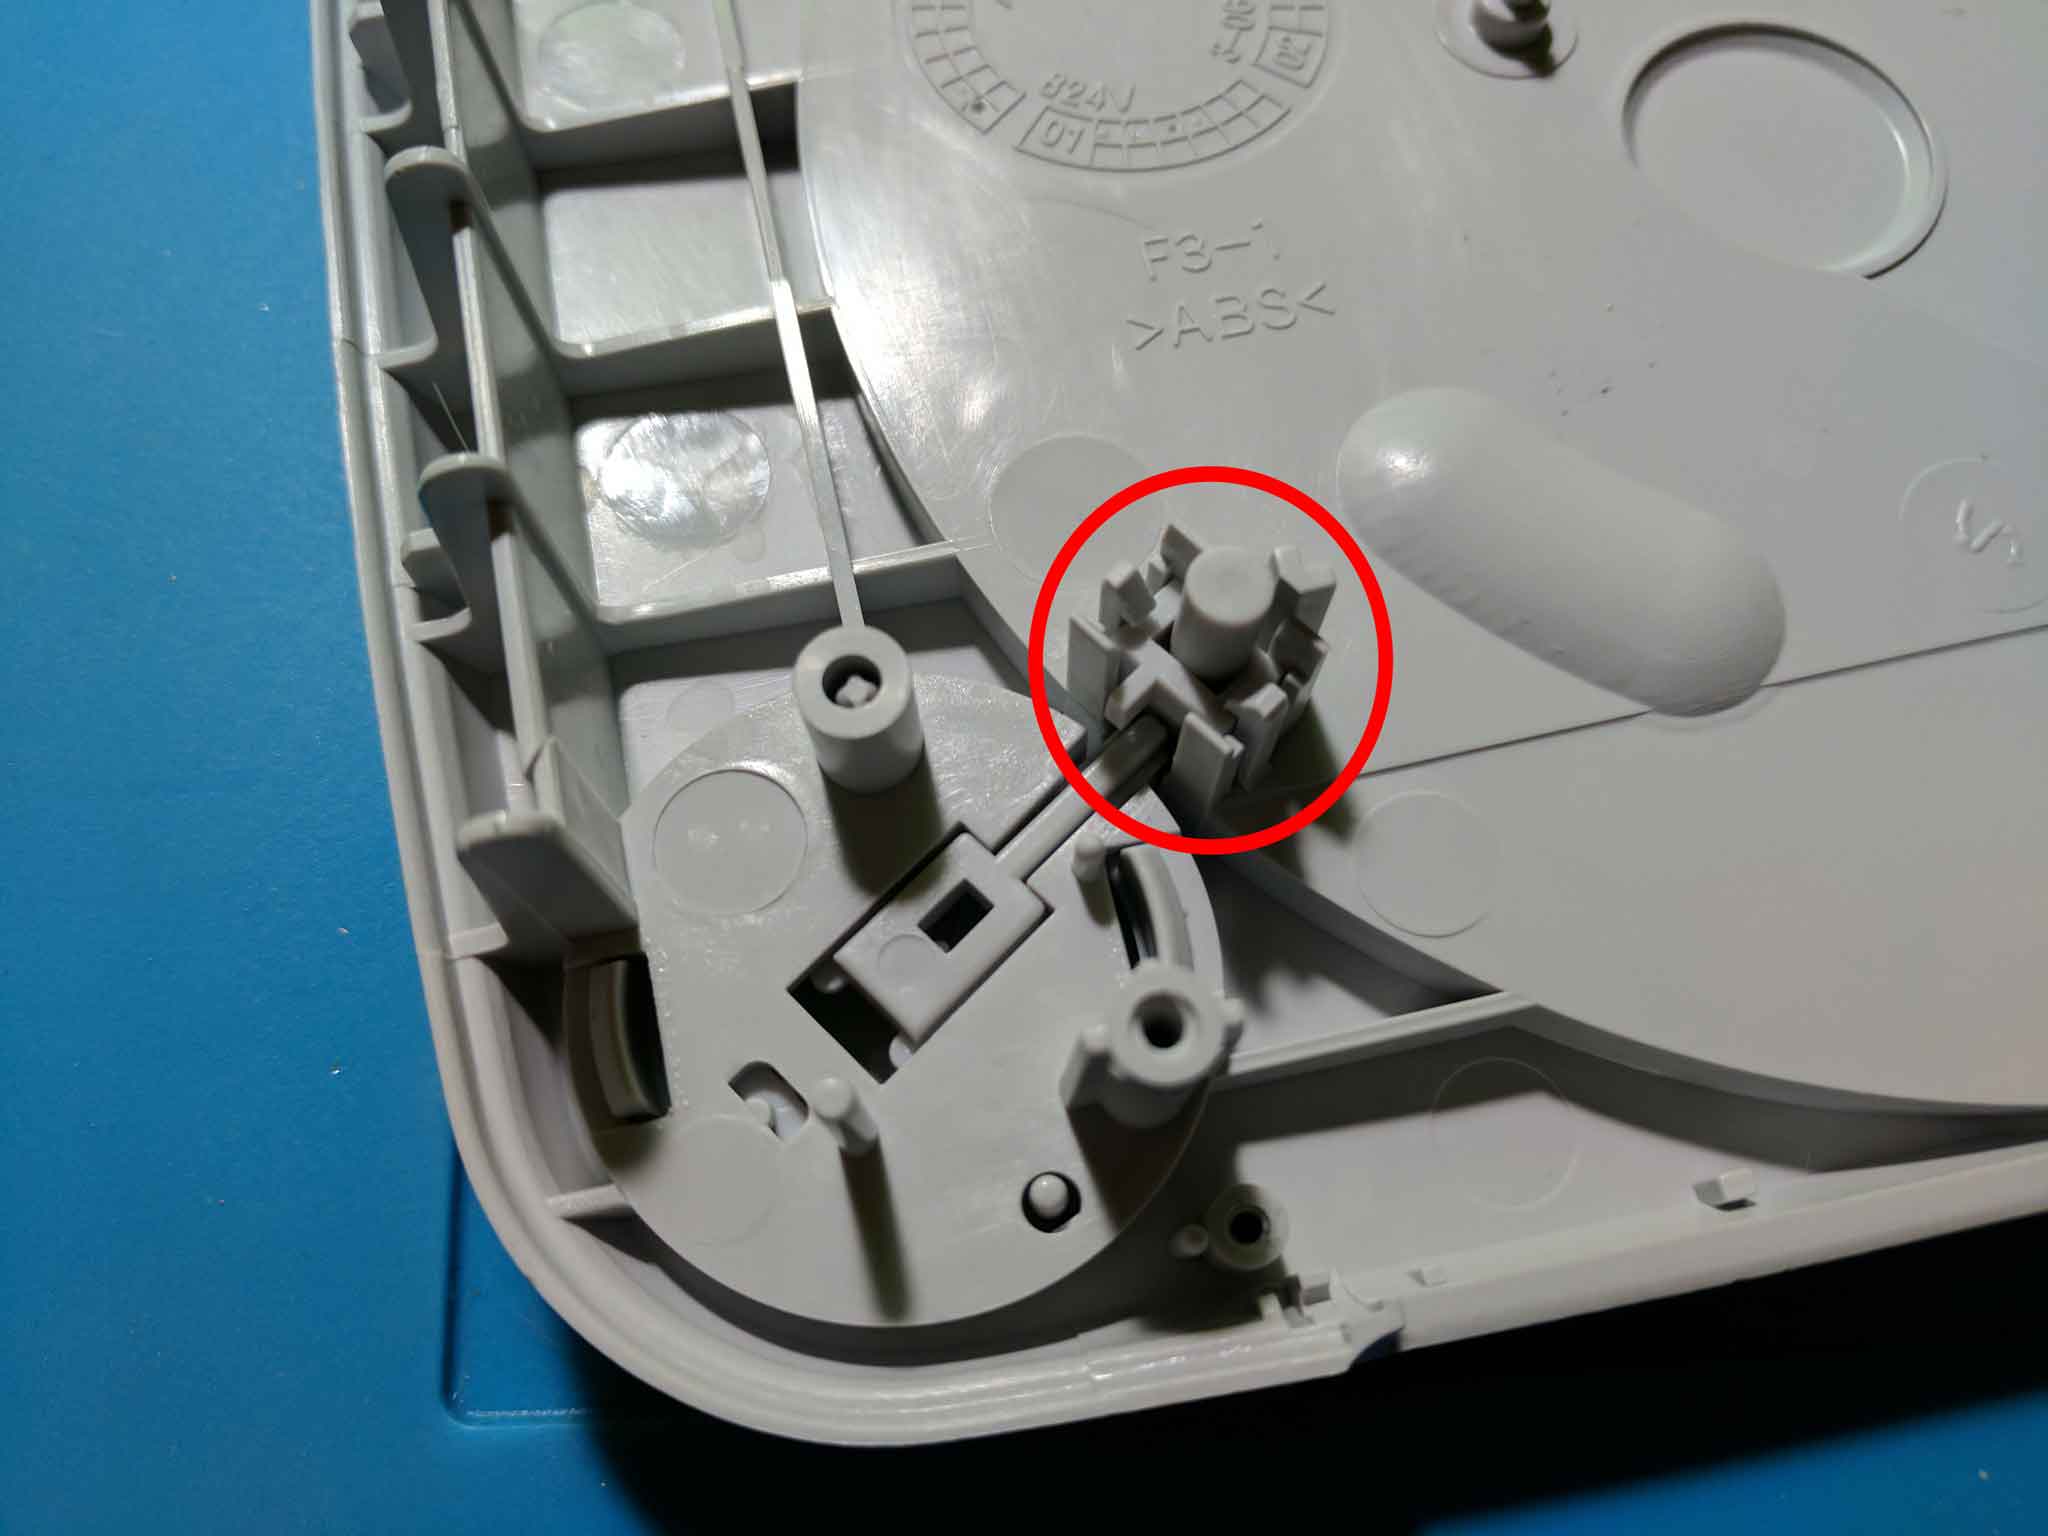
Below is an image of the plastic piece once it has been removed.
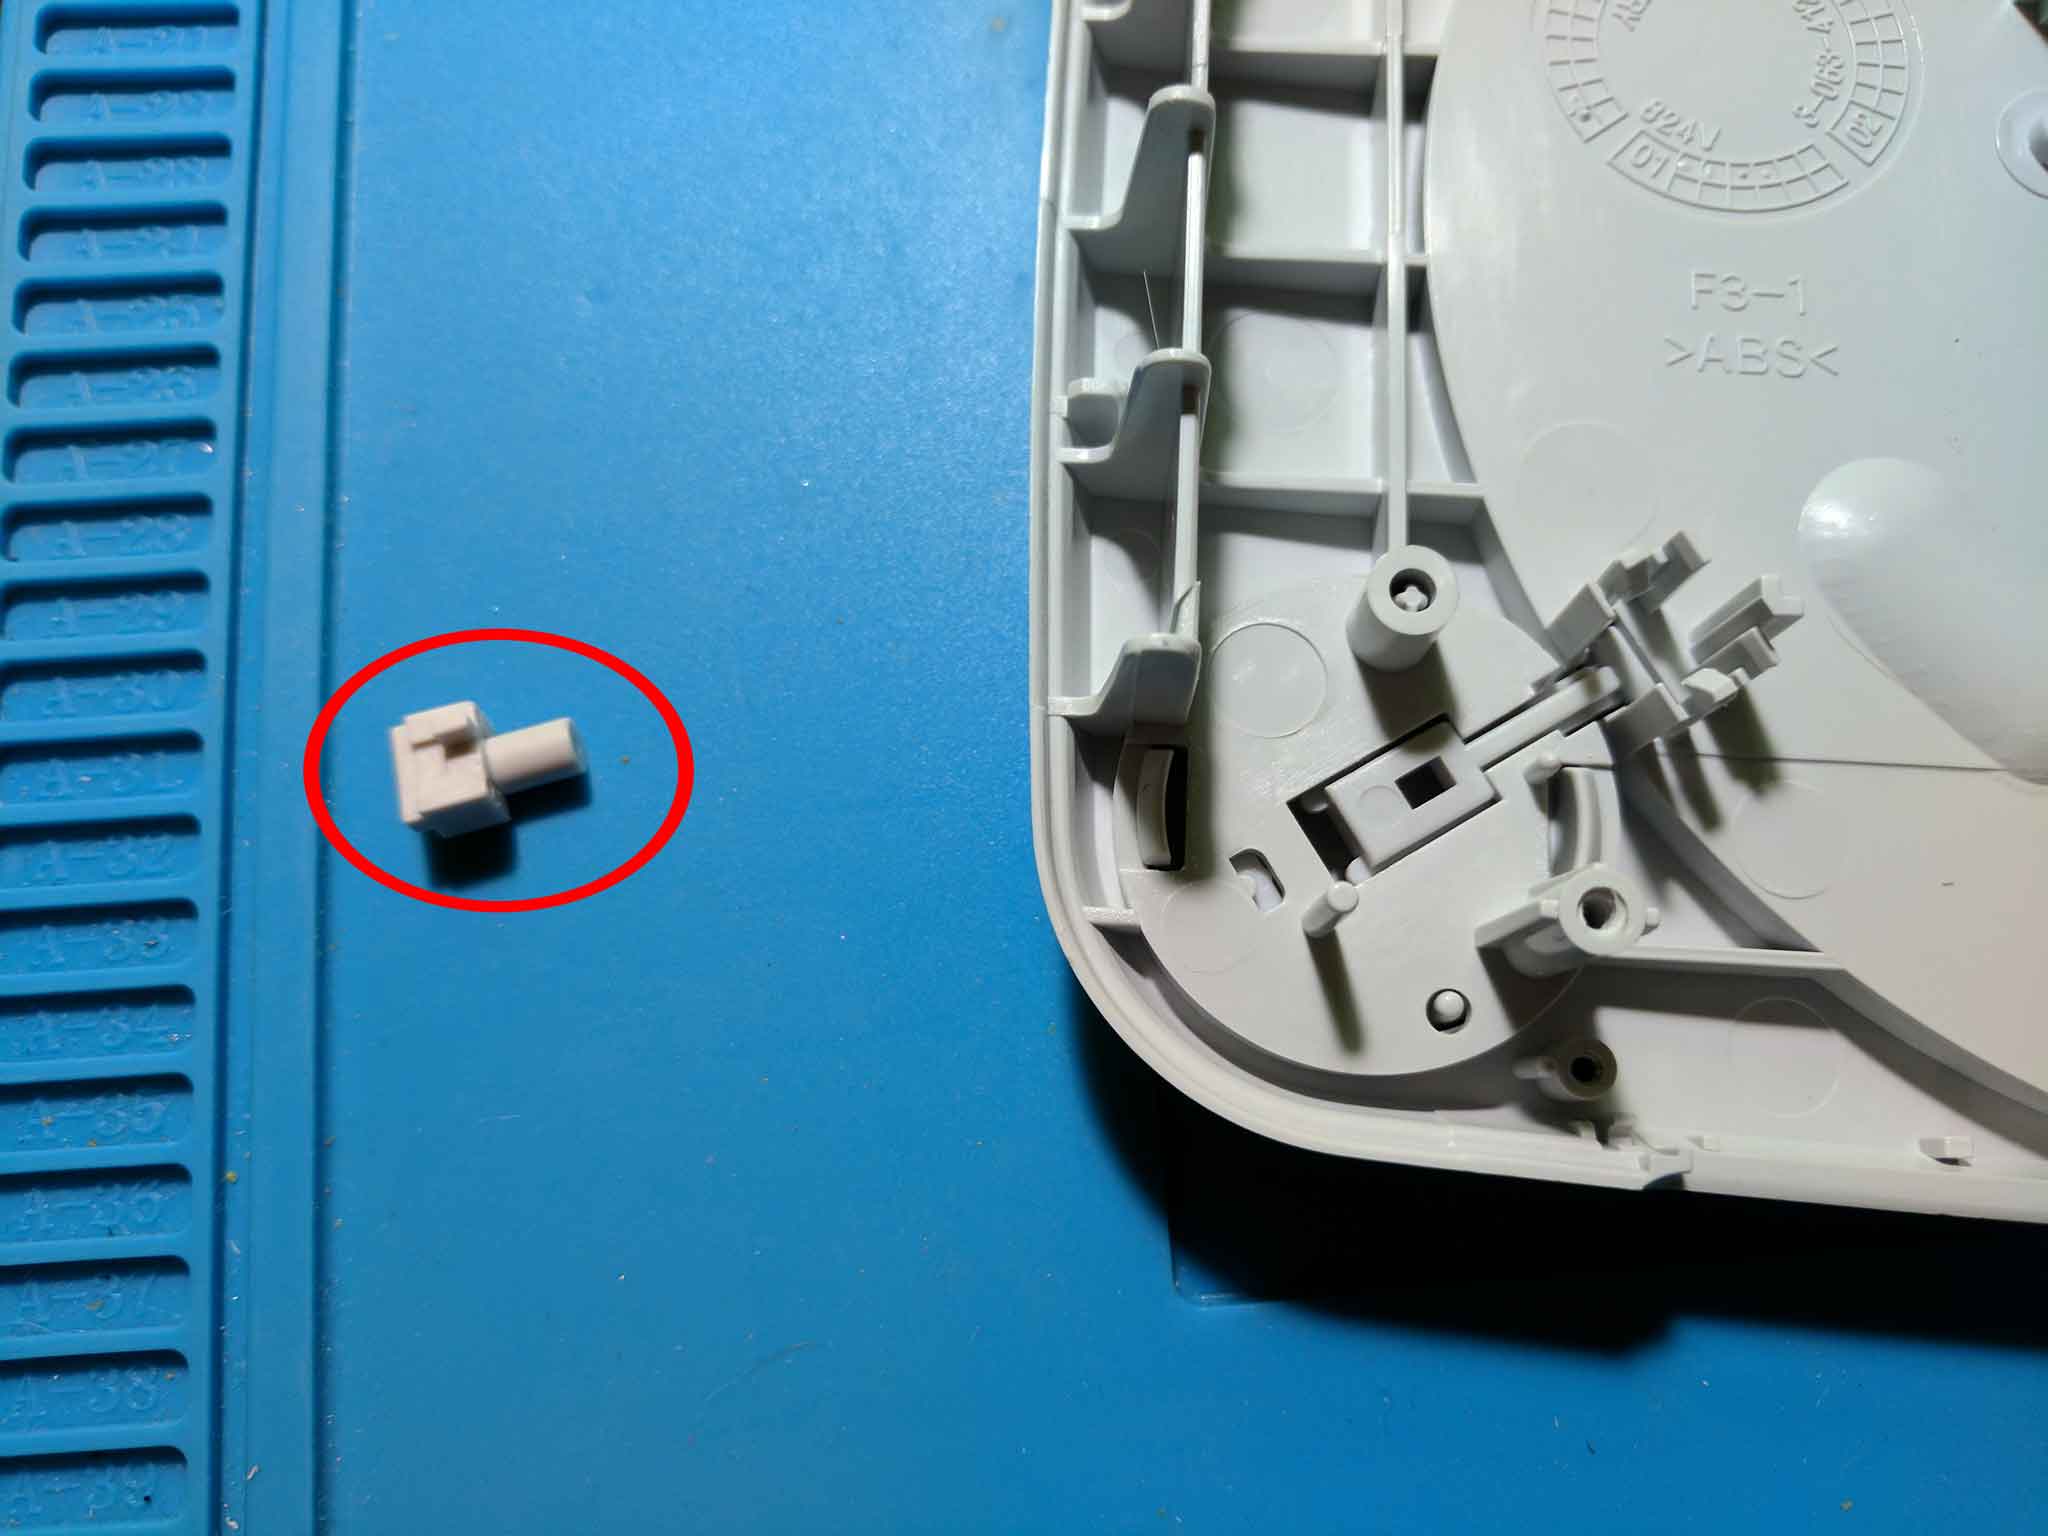
With the plastic piece removed you can remove the eject button. Just like with the power button, press the two tabs inwards, and push the eject button out of the hole. Below is an image of the removed eject button.
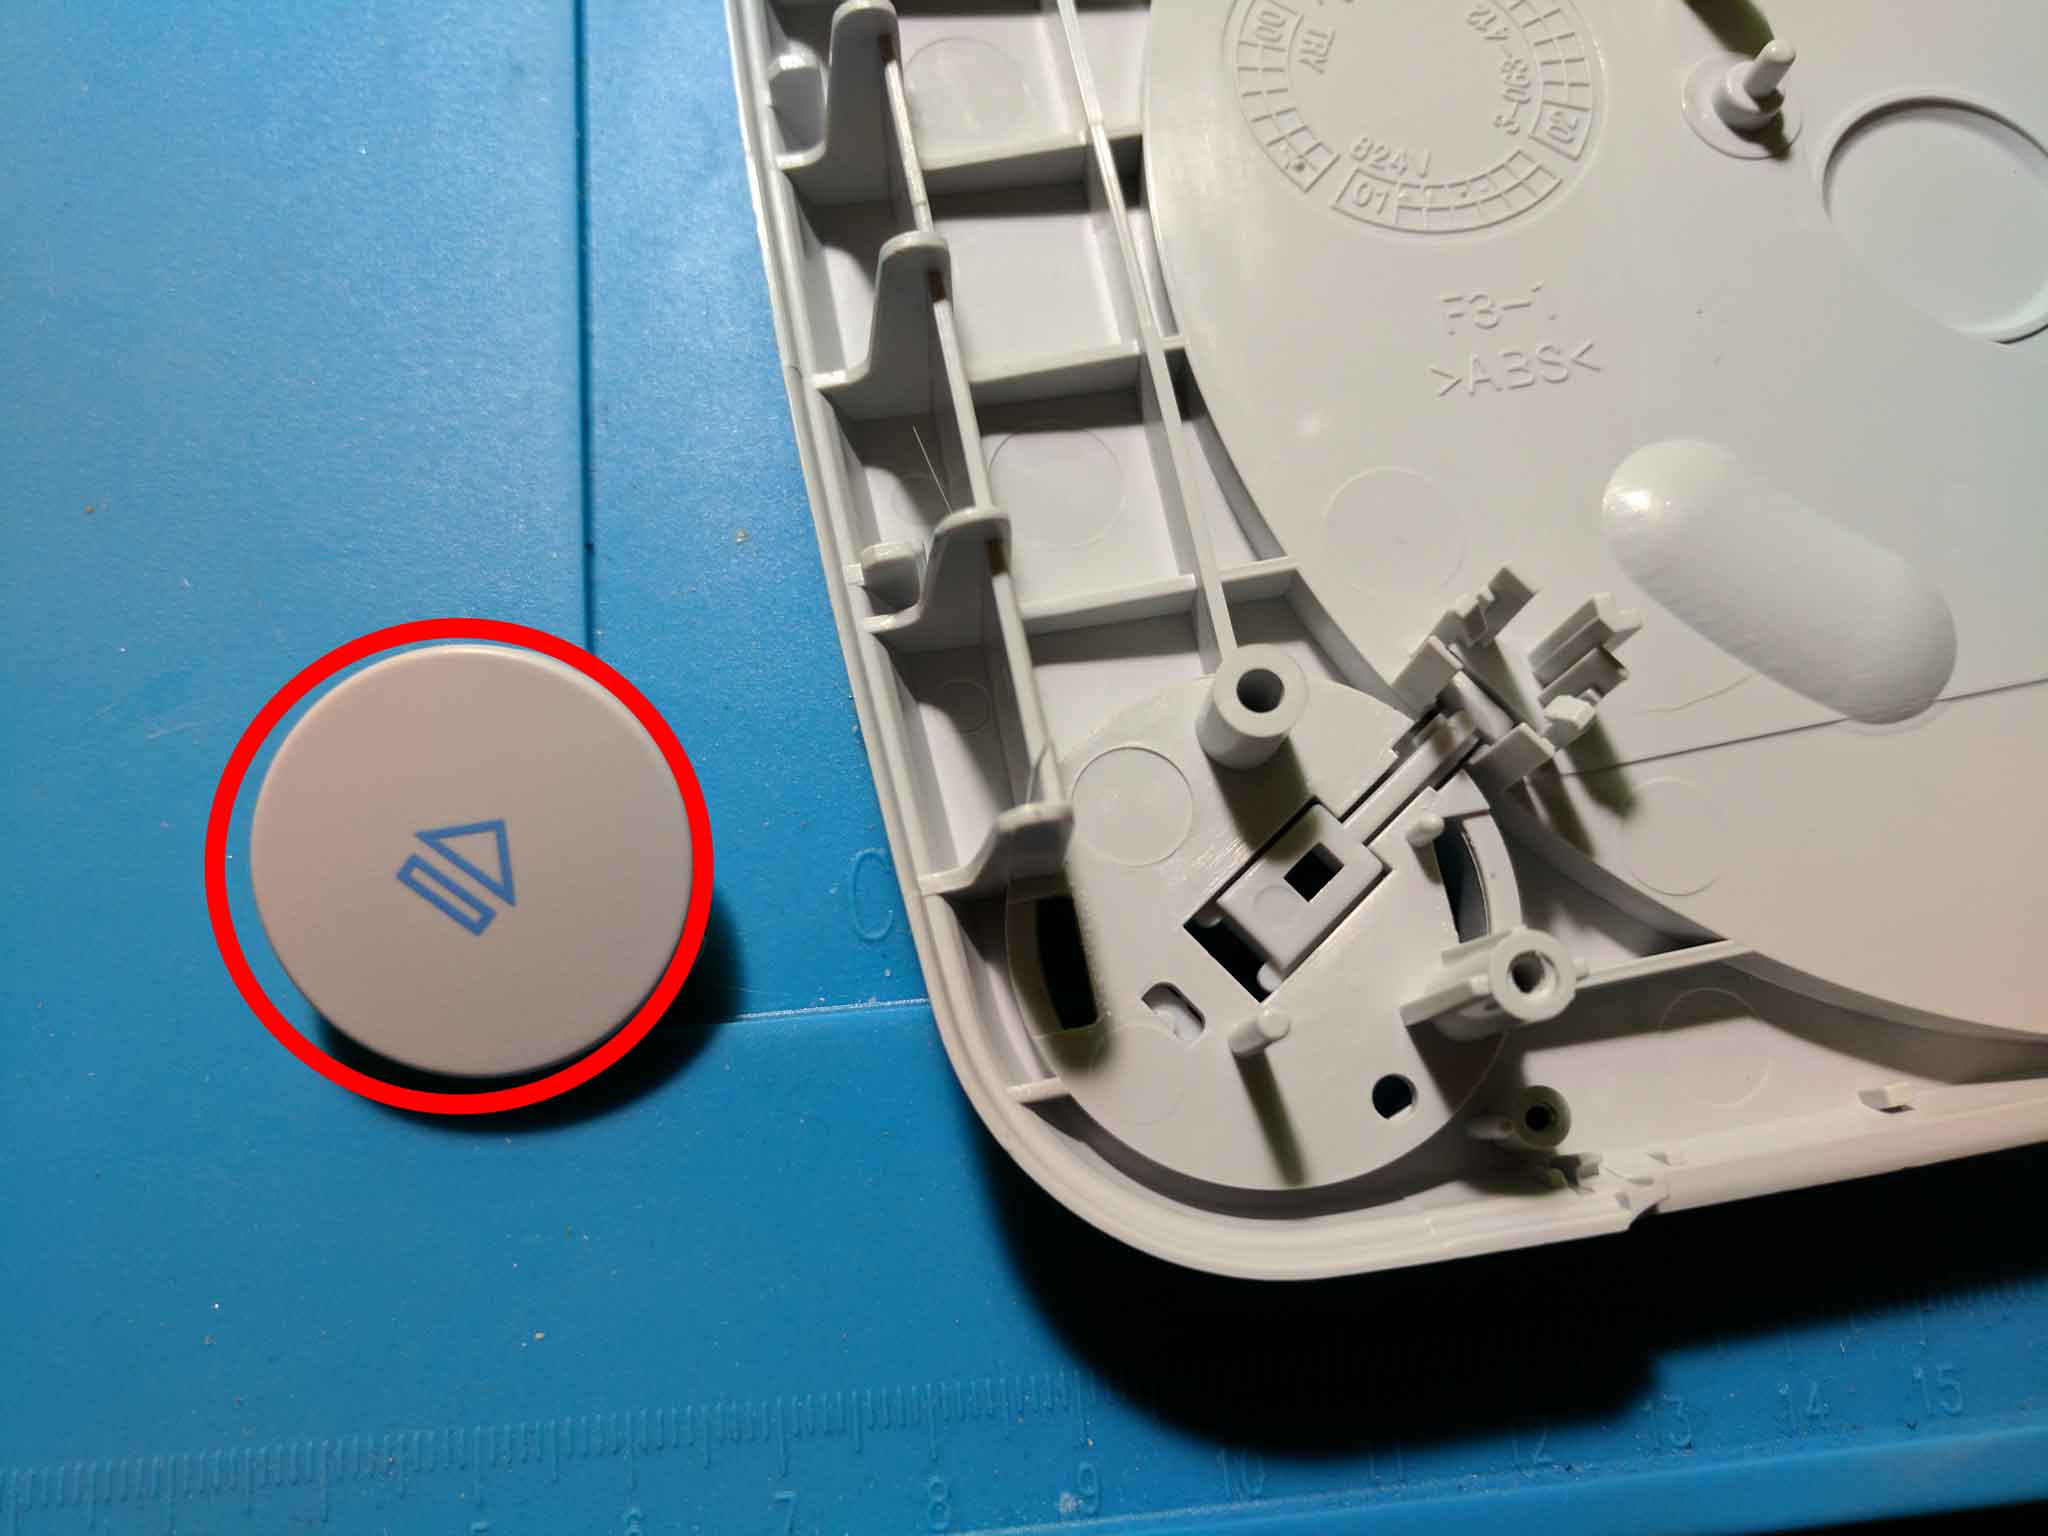
There is a plastic piece underneath the eject button that needs to be removed. To remove it you need to push the piece out from underneath the tab.
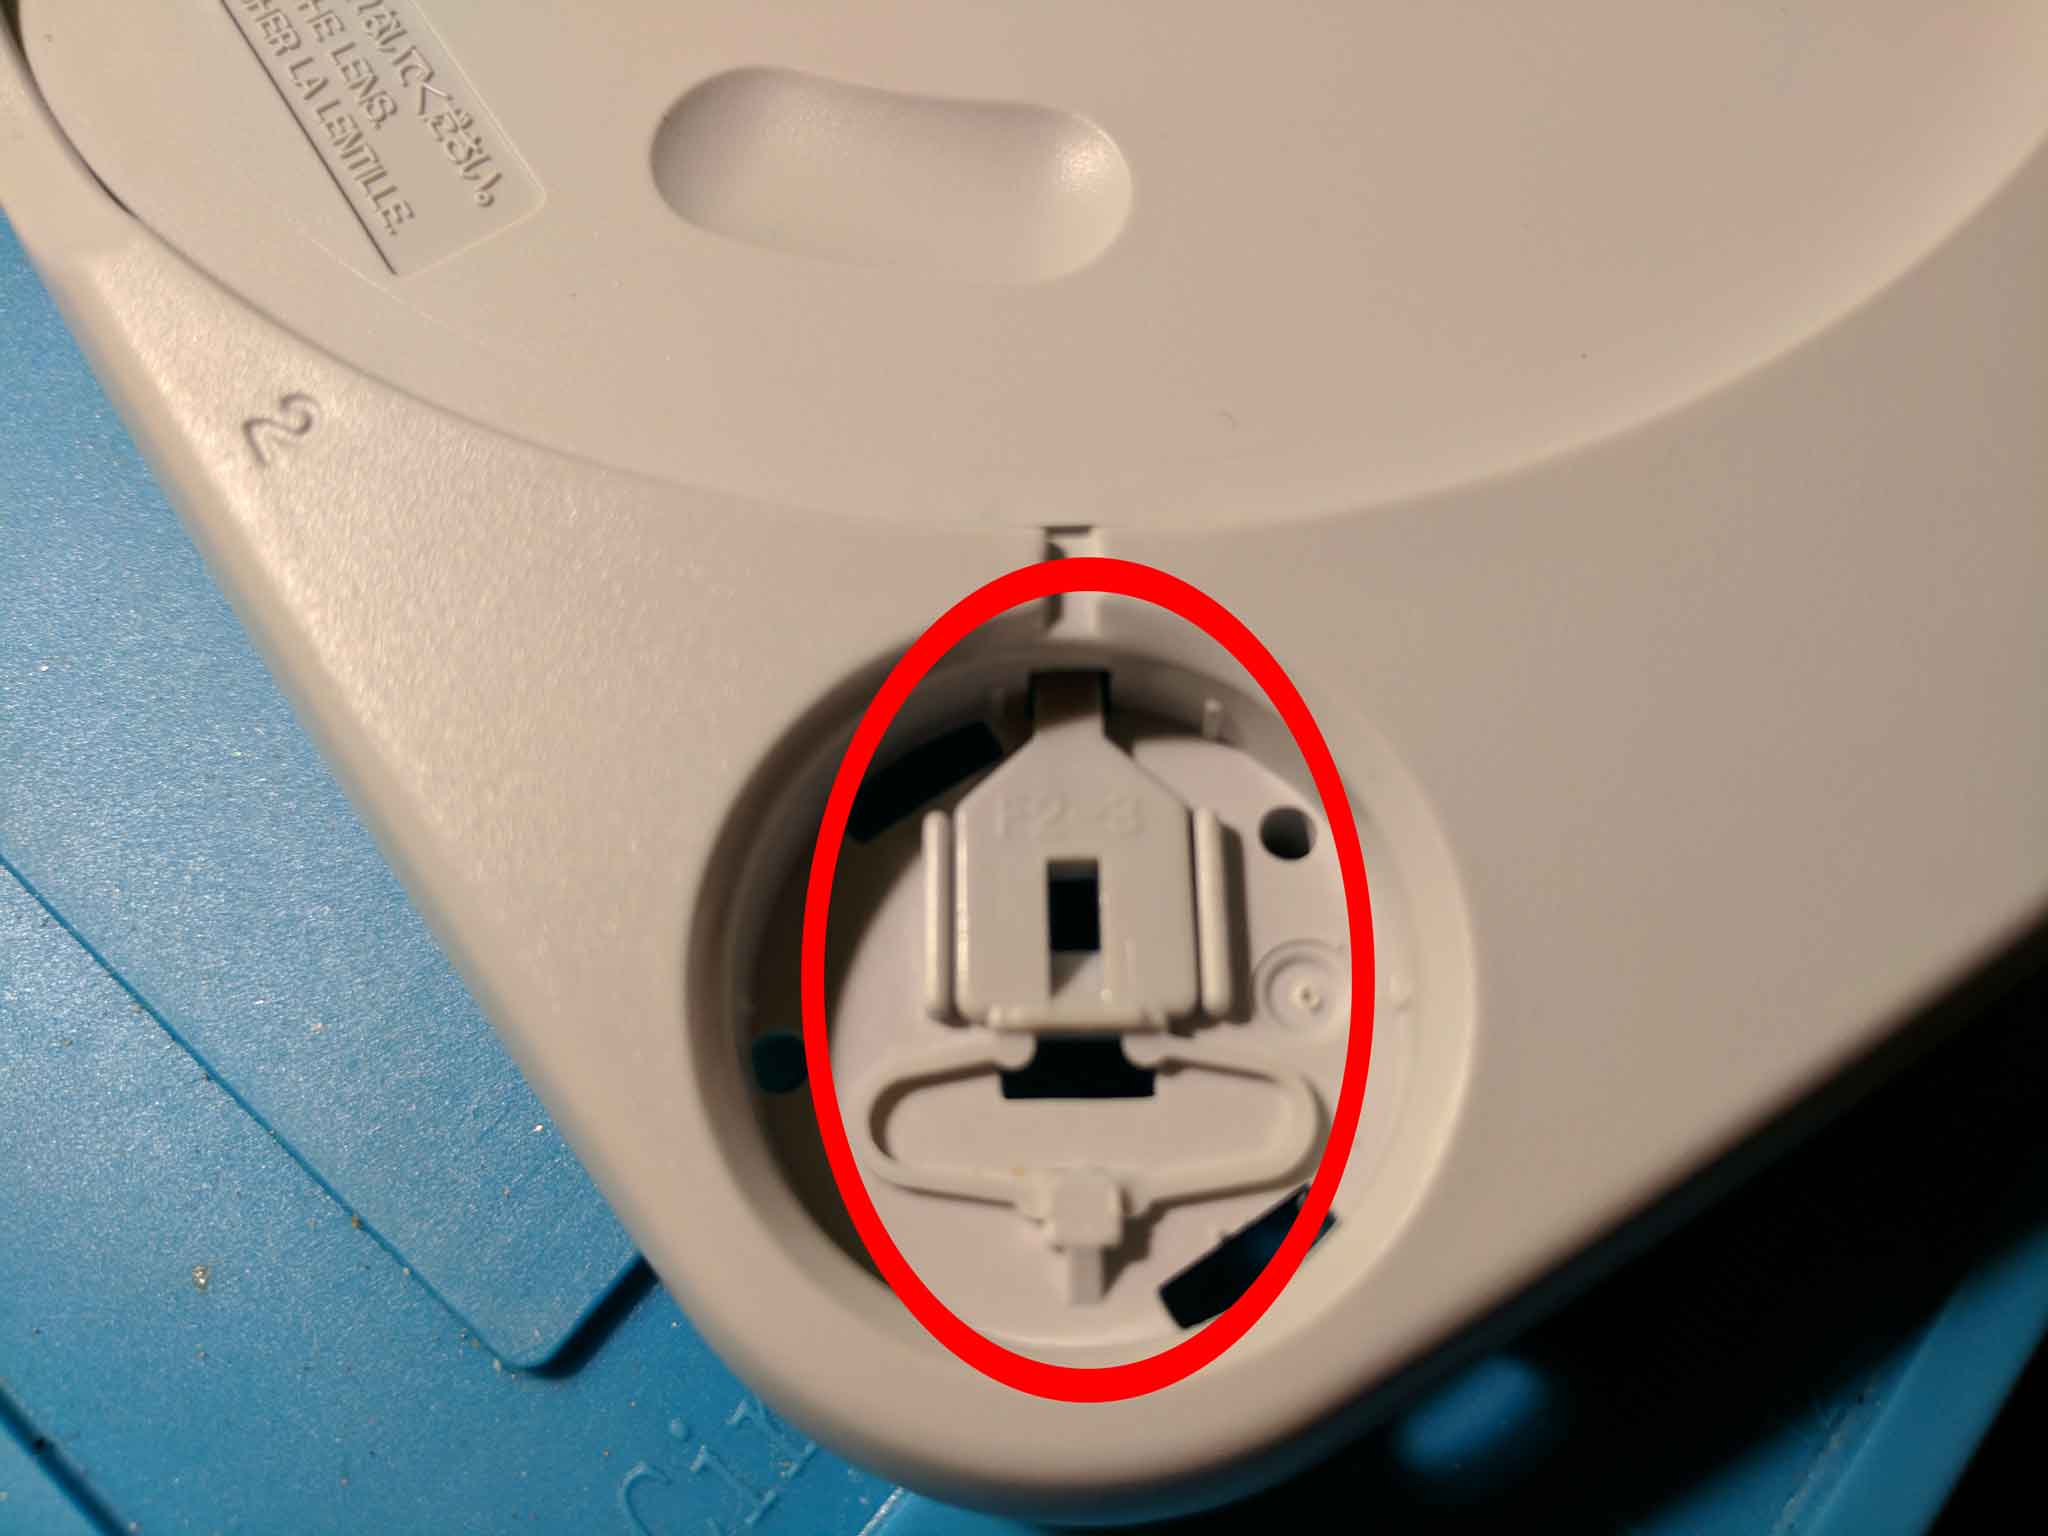
Below is an image of that plastic piece once it has been removed.
Step 8 – Disc tray lid removal
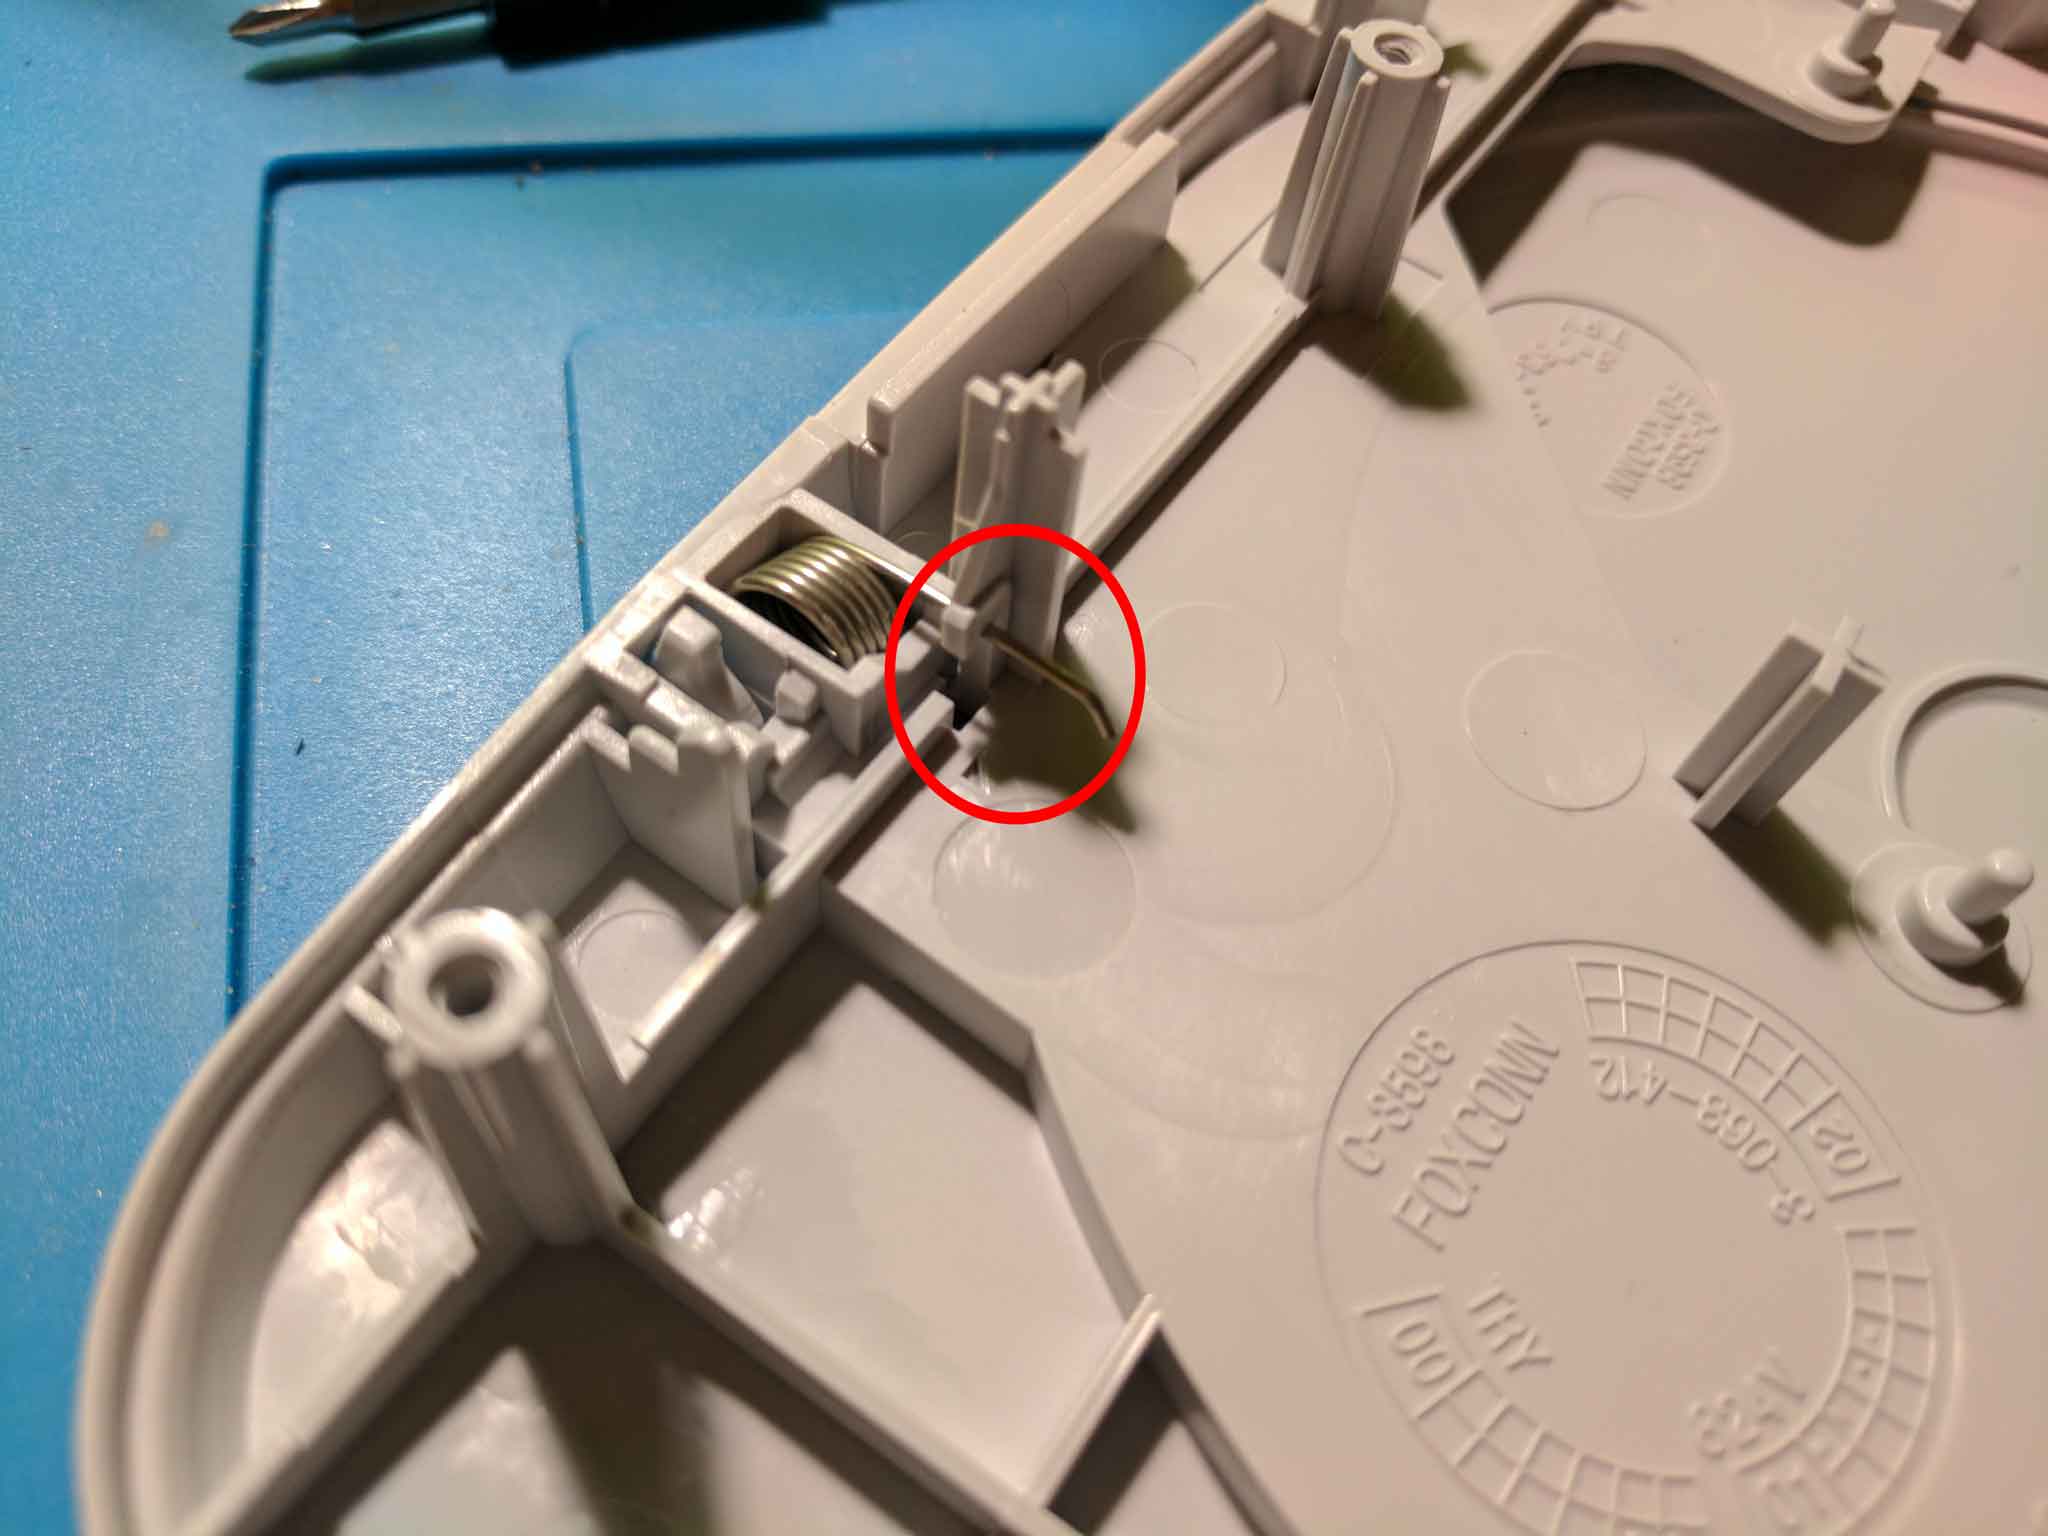
To remove the disc tray lid you will need to first remove the spring attached to it. Push the leg of the spring out from underneath the plastic holding it in place.
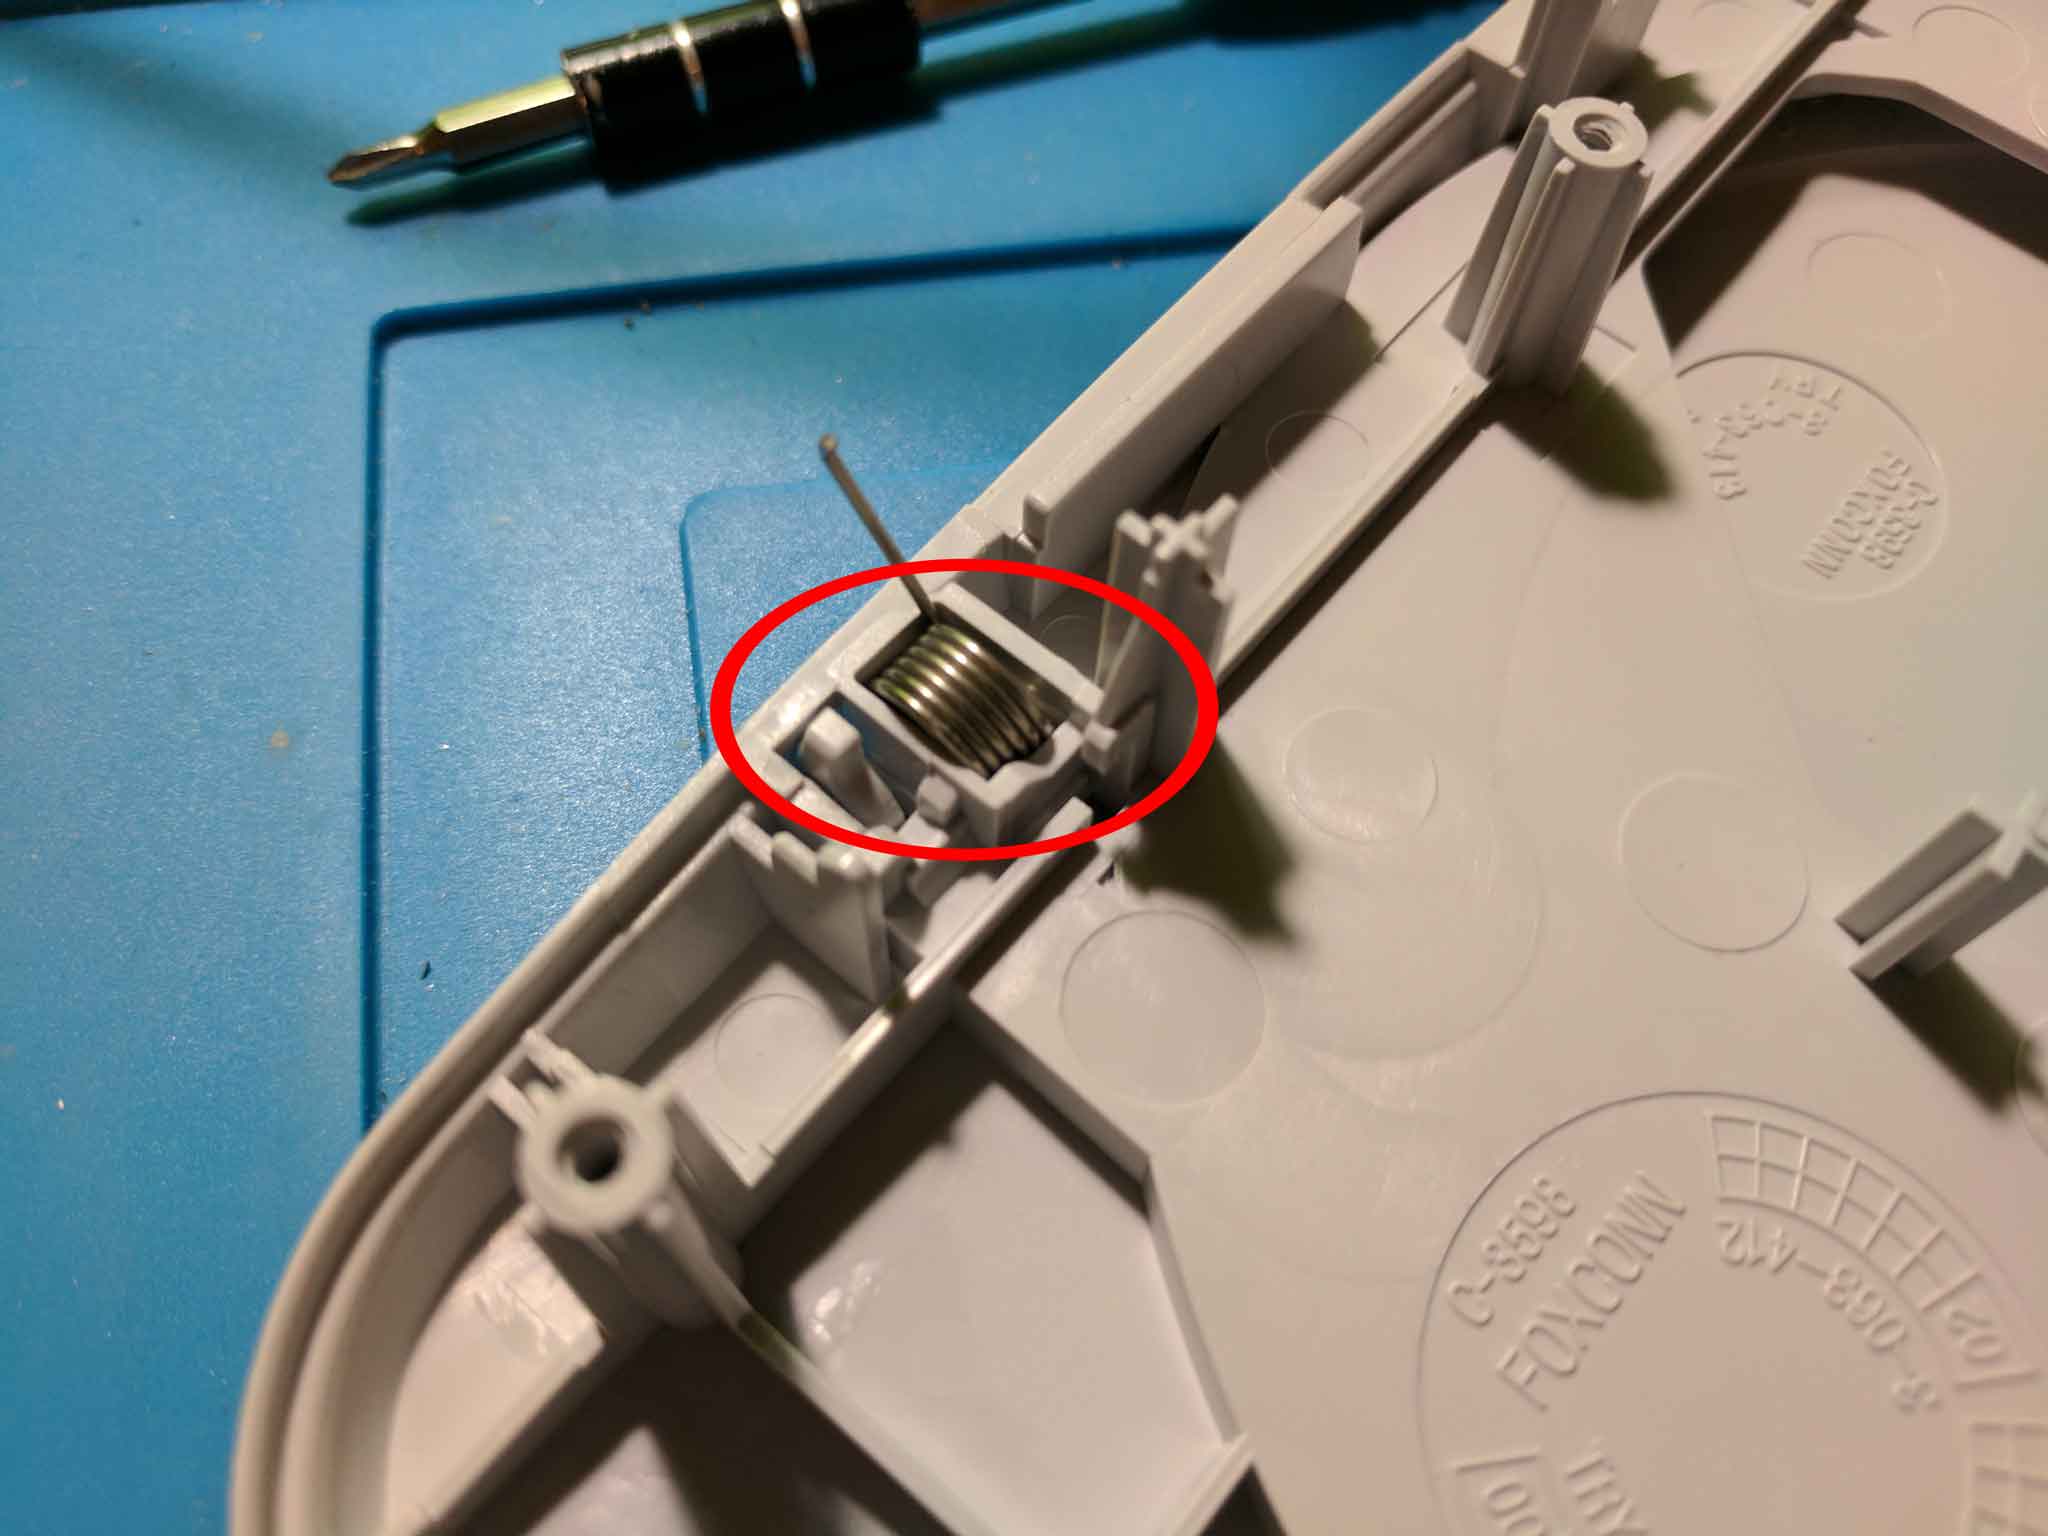
The spring can now be lifted out from its hole.
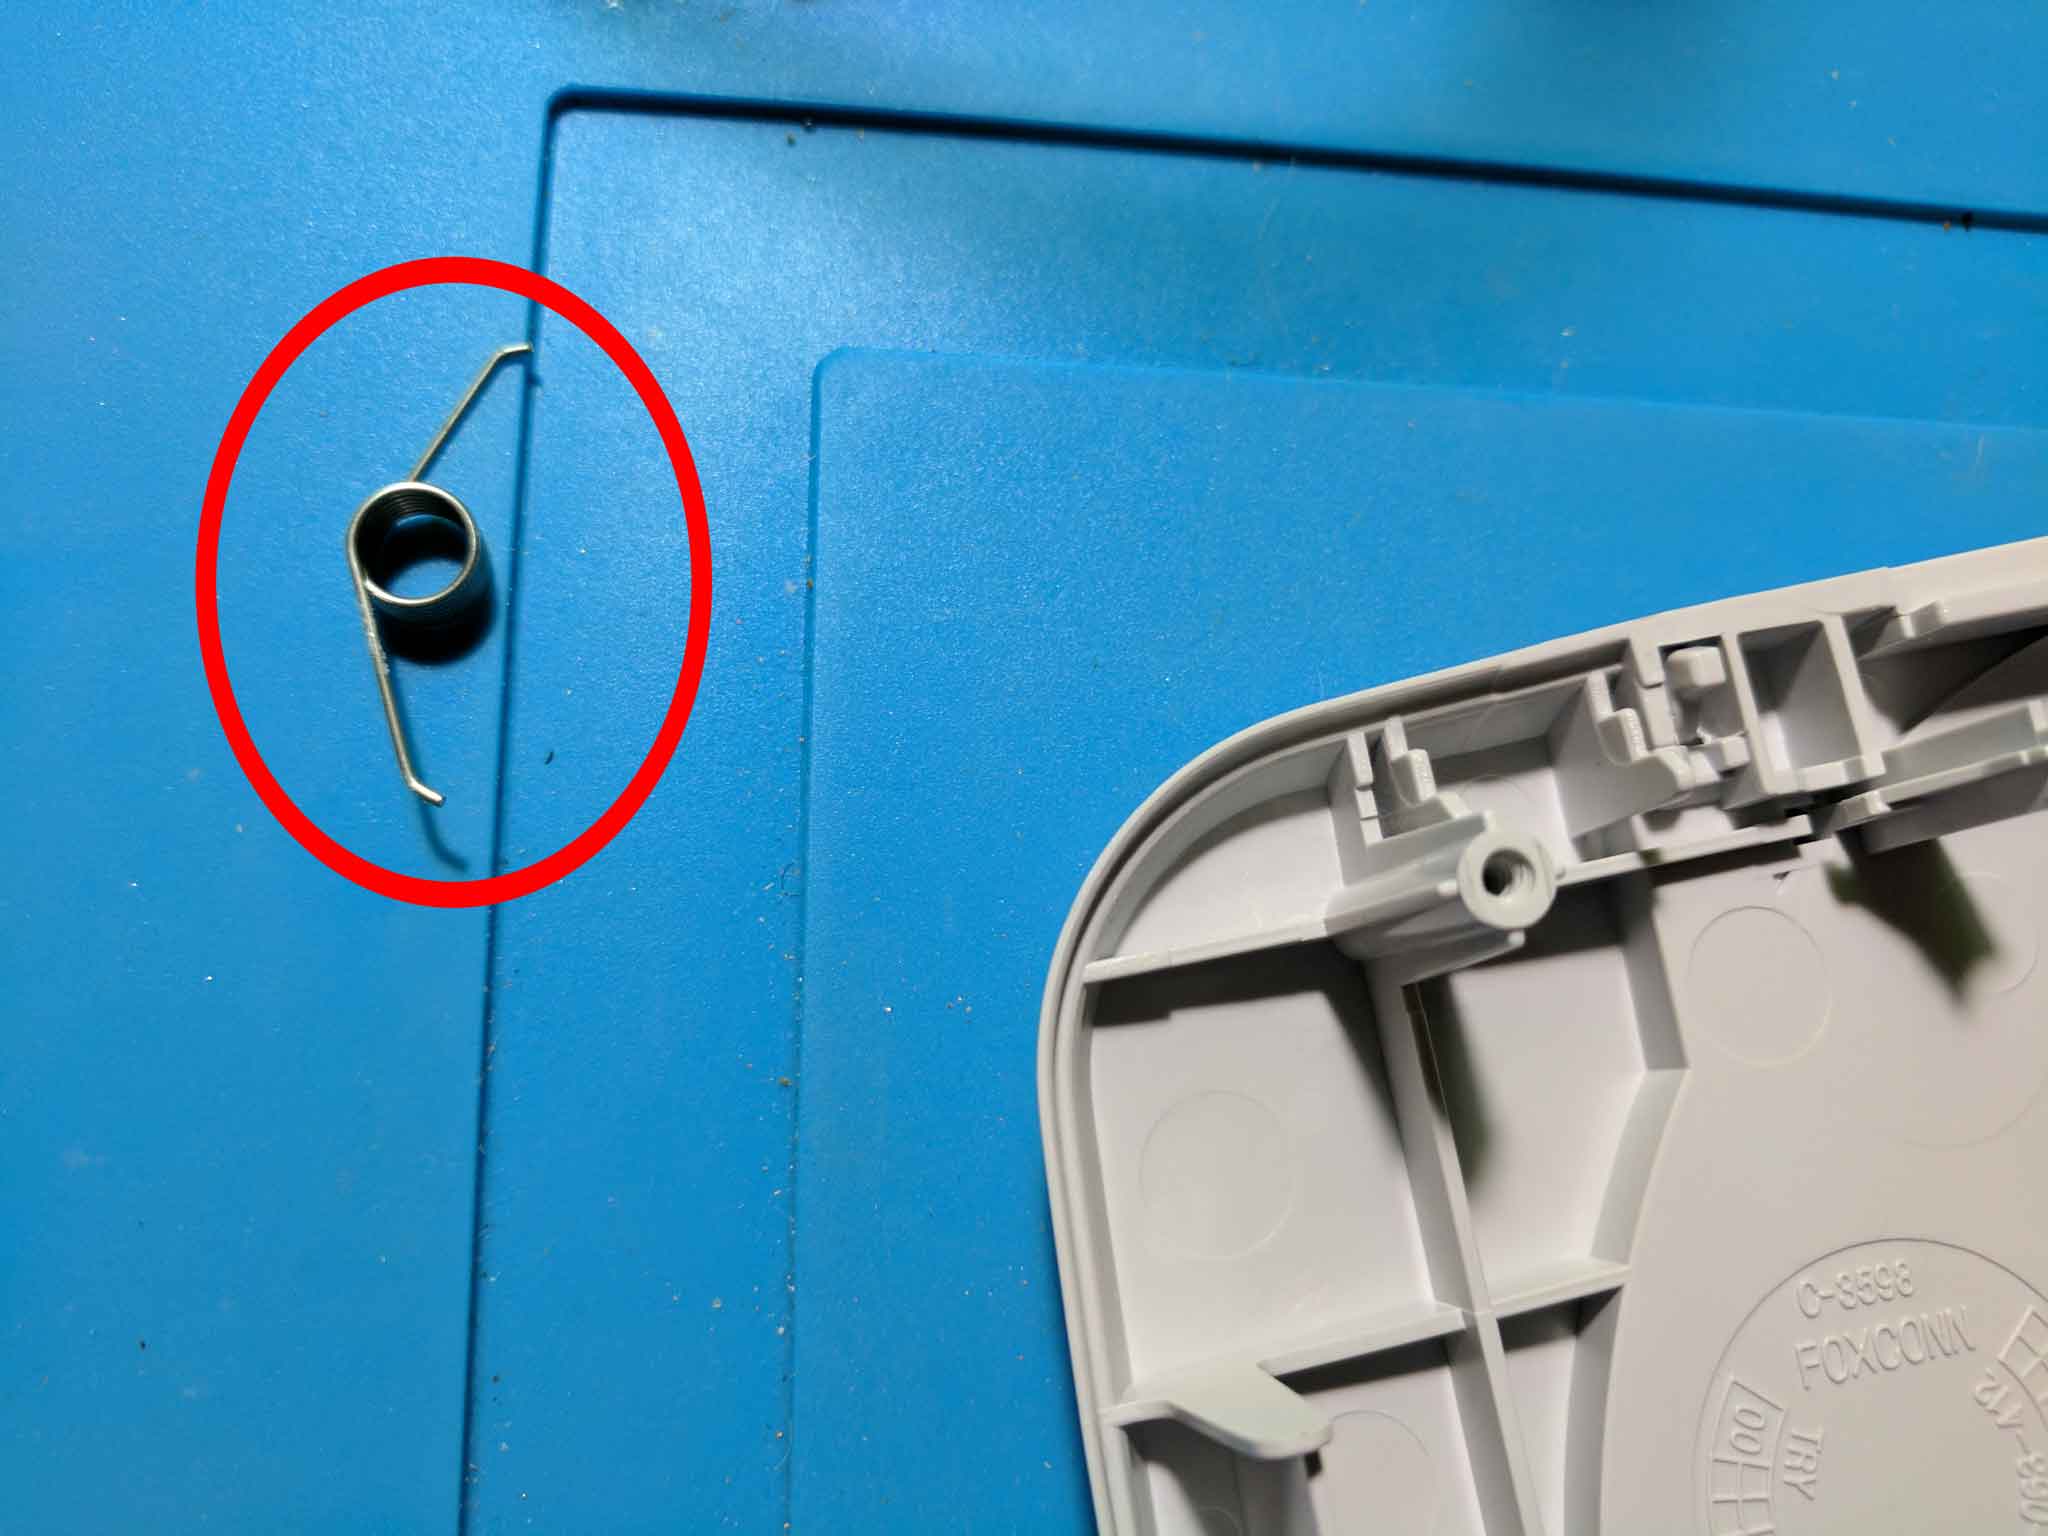
Below is an image of the removed spring.
With the spring removed you can remove the lid. Pry both plastic tabs inwards while pushing the lid out.
Below is an image of the lid once it has been removed.
Conclusion
After following all of the steps above you should have a fully disassembled PSone. You should be able to follow the steps in reverse order to put your PSone back together. I included pictures of the screws along the way to help you remember which screws belong where.
[…] my last two teardown guides I covered taking apart a PSone, and a PS2 slim. This post is similar, but for Microsoft’s second slim revision of their Xbox […]