SCPH-70012 PS2 Modbo 4.0 modchip installation (V12 NTSC board)
In April I installed an MM3 modchip into my original PlayStation console. Modchips also exist for the PlayStation 2 and allow for things like playing games from other regions, playing PS1 and PS2 backups, and running homebrew applications. This blog post covers the installation of the Modbo 4.0 modchip into my SCPH-70012 PS2 slim console.
Update: I put together a Modbo modchip installation guide that covers all board revisions. You can find that guide here.
Things you’ll need
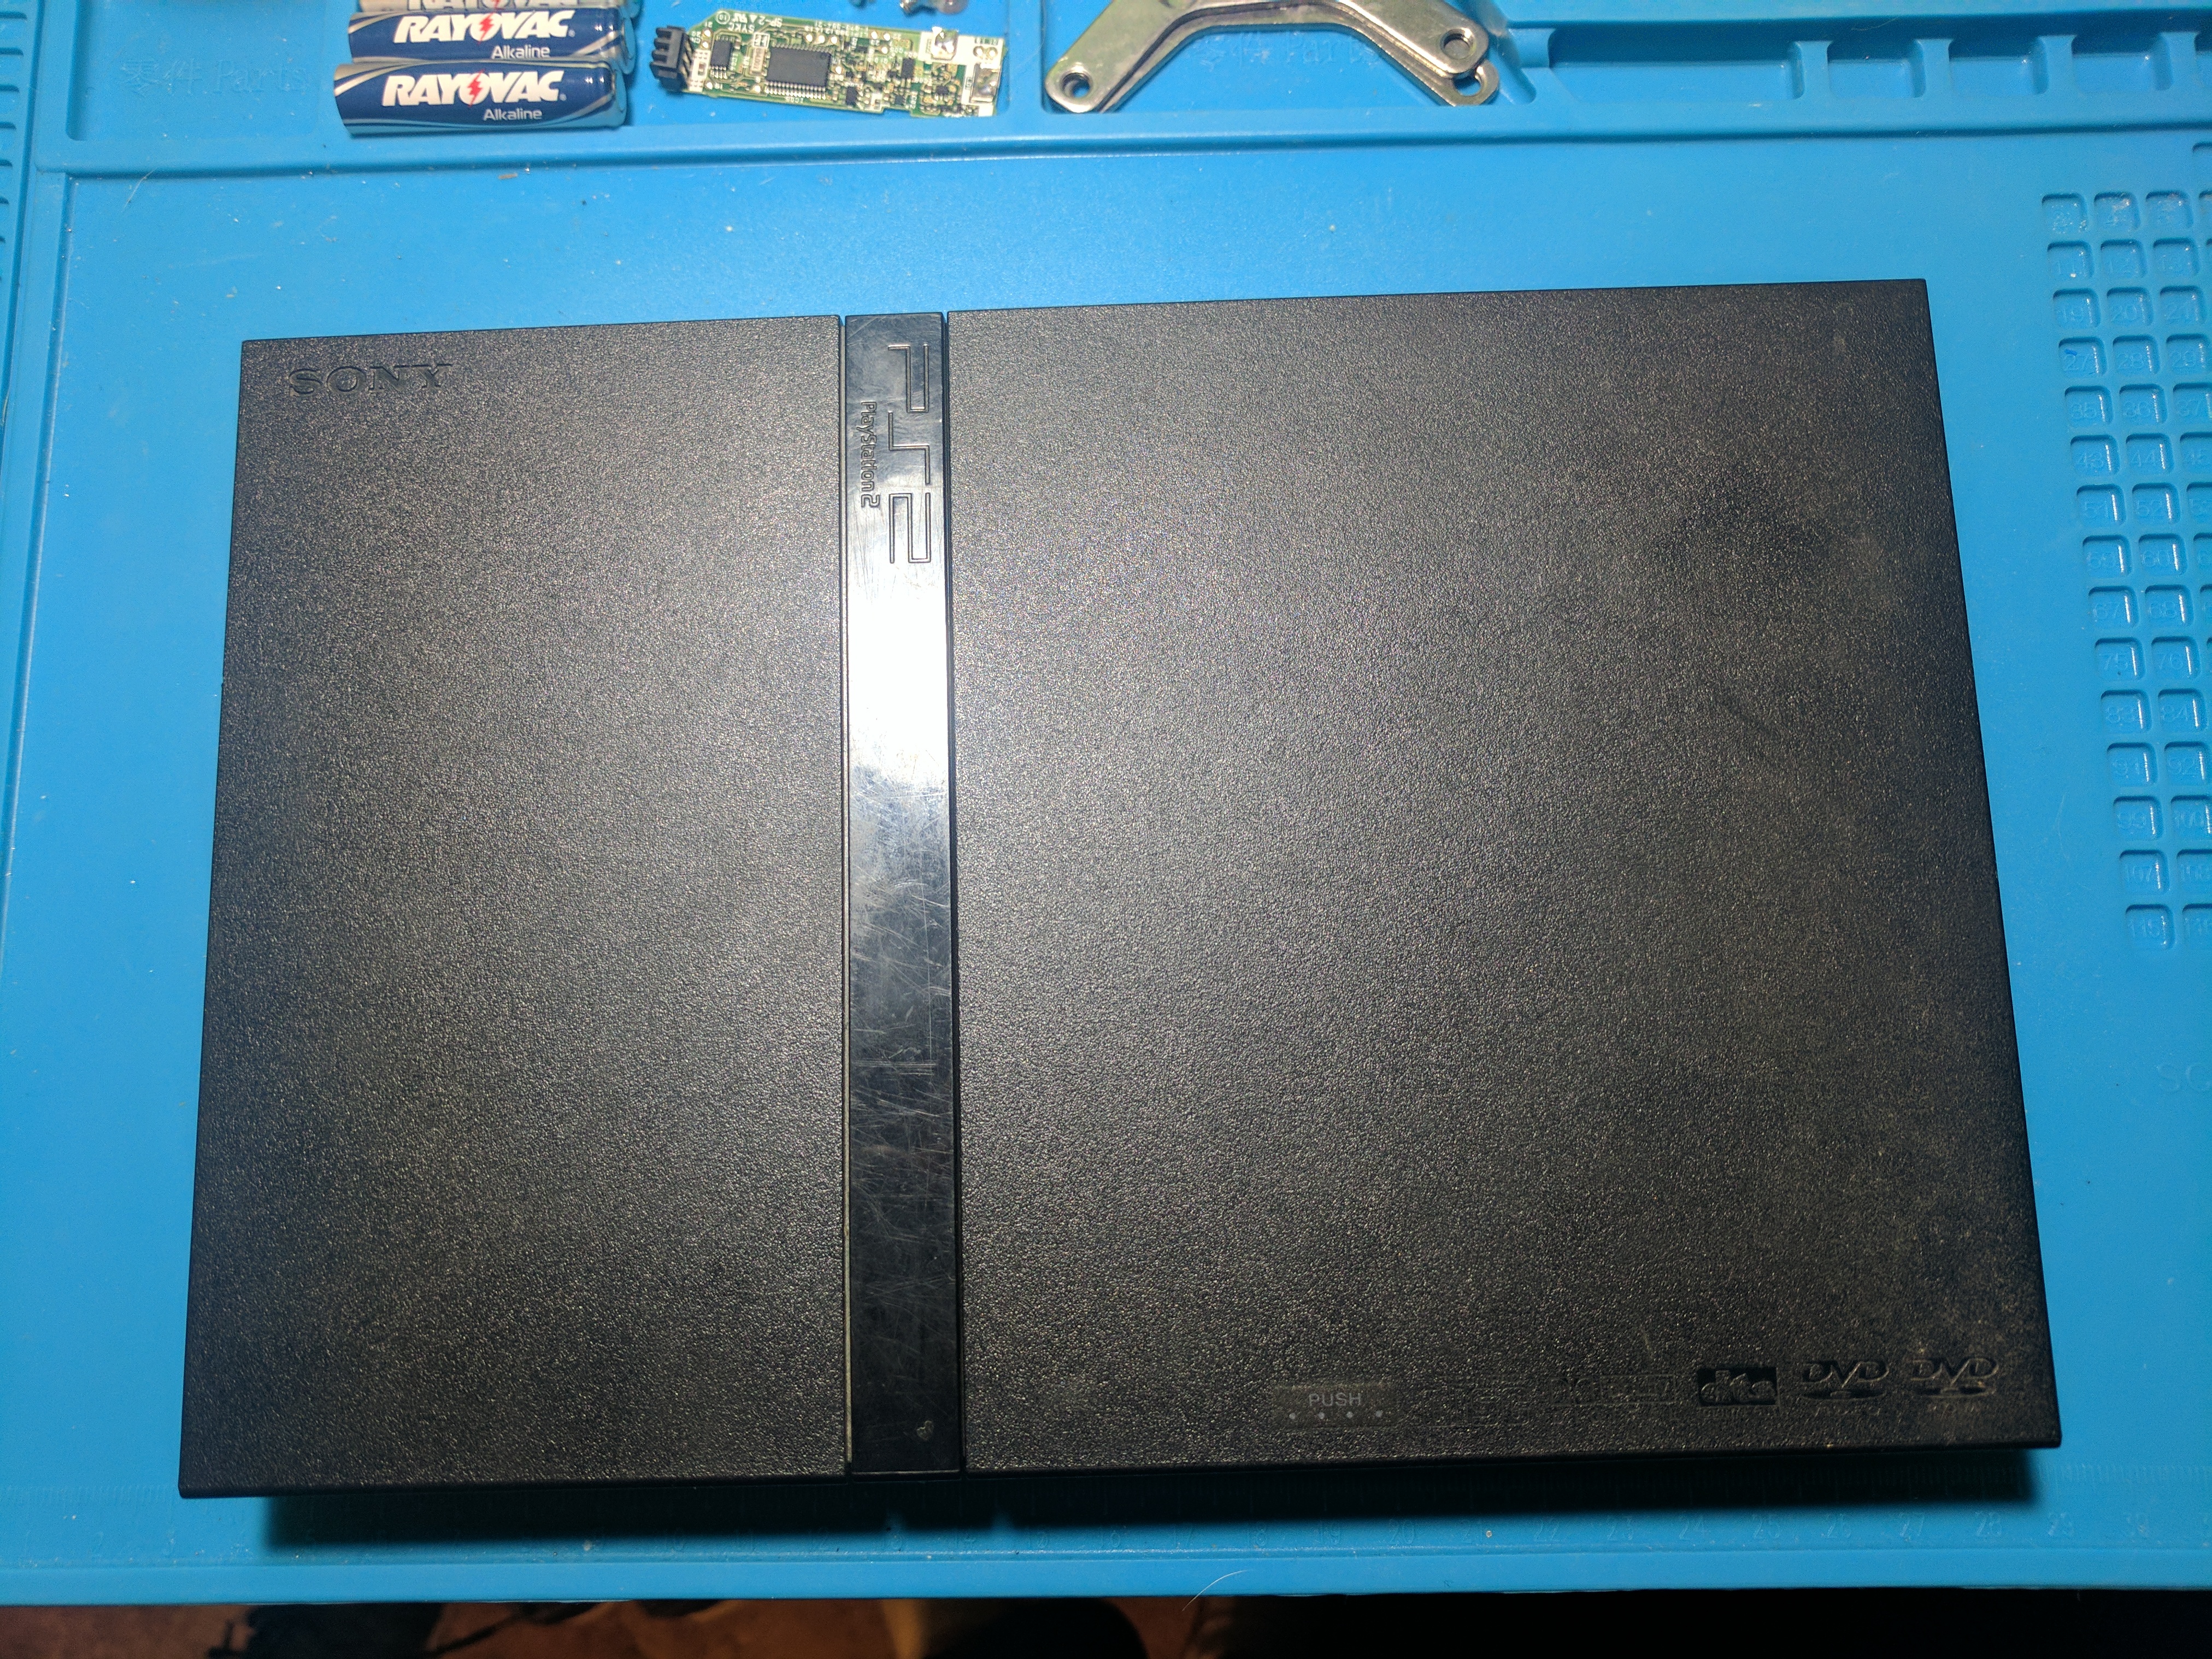
- An SCPH-70012 PS2 slim console
- Tools to take apart the PS2 slim
- A Modbo 4.0 or Modbo 5.0 modchip. They are pin compatible, I bought my chip from EurAsia.
- 30 AWG kynar insulated wire wrapping wire
- A soldering iron and solder
I initially installed a Modbo 4.0 chip, but ended up swapping it out for a Modbo 5.0 chip. The Modbo 5.0 chip allows booting homebrew directly off of USB flash drives, which is important since the PS2 slim doesn’t have support for an internal hard drive.
I’d also like to mention that I was able to install the modchip with a pretty standard 1.6mm chisel tip on my Hakko FX-888D soldering iron. In other words you don’t need a super special tip for your soldering iron. You just need patience, good eyes, and a steady hand.
Soldering tips
At the time of writing this post I have installed a modchip into two different PS1 systems, two different PS2 systems, and soldered a Teensy to a PS3 slim. I’ve learned a lot along the way, so I’d like to share some tips that may help your modchip installation experience be a smoother one.
Since these tips apply across a lot of posts, I’ve put them into a single page that is linked to from multiple posts.
Modchip installation diagram

Above is an an image of the installation diagram for the Modbo 3.0 diagram for NTSC V12 PS2 slim consoles. This diagram is the same for Modbo 4.0 and Modbo 5.0 chips. If you need a diagram for another version of the PS2 just leave a comment and I’ll upload a copy for you.
As you can see from the diagram there are a total of 21 wires that need to be soldered from the PS2 to the modchip. The chip comes with double sided tape that you use to stick it to the board.
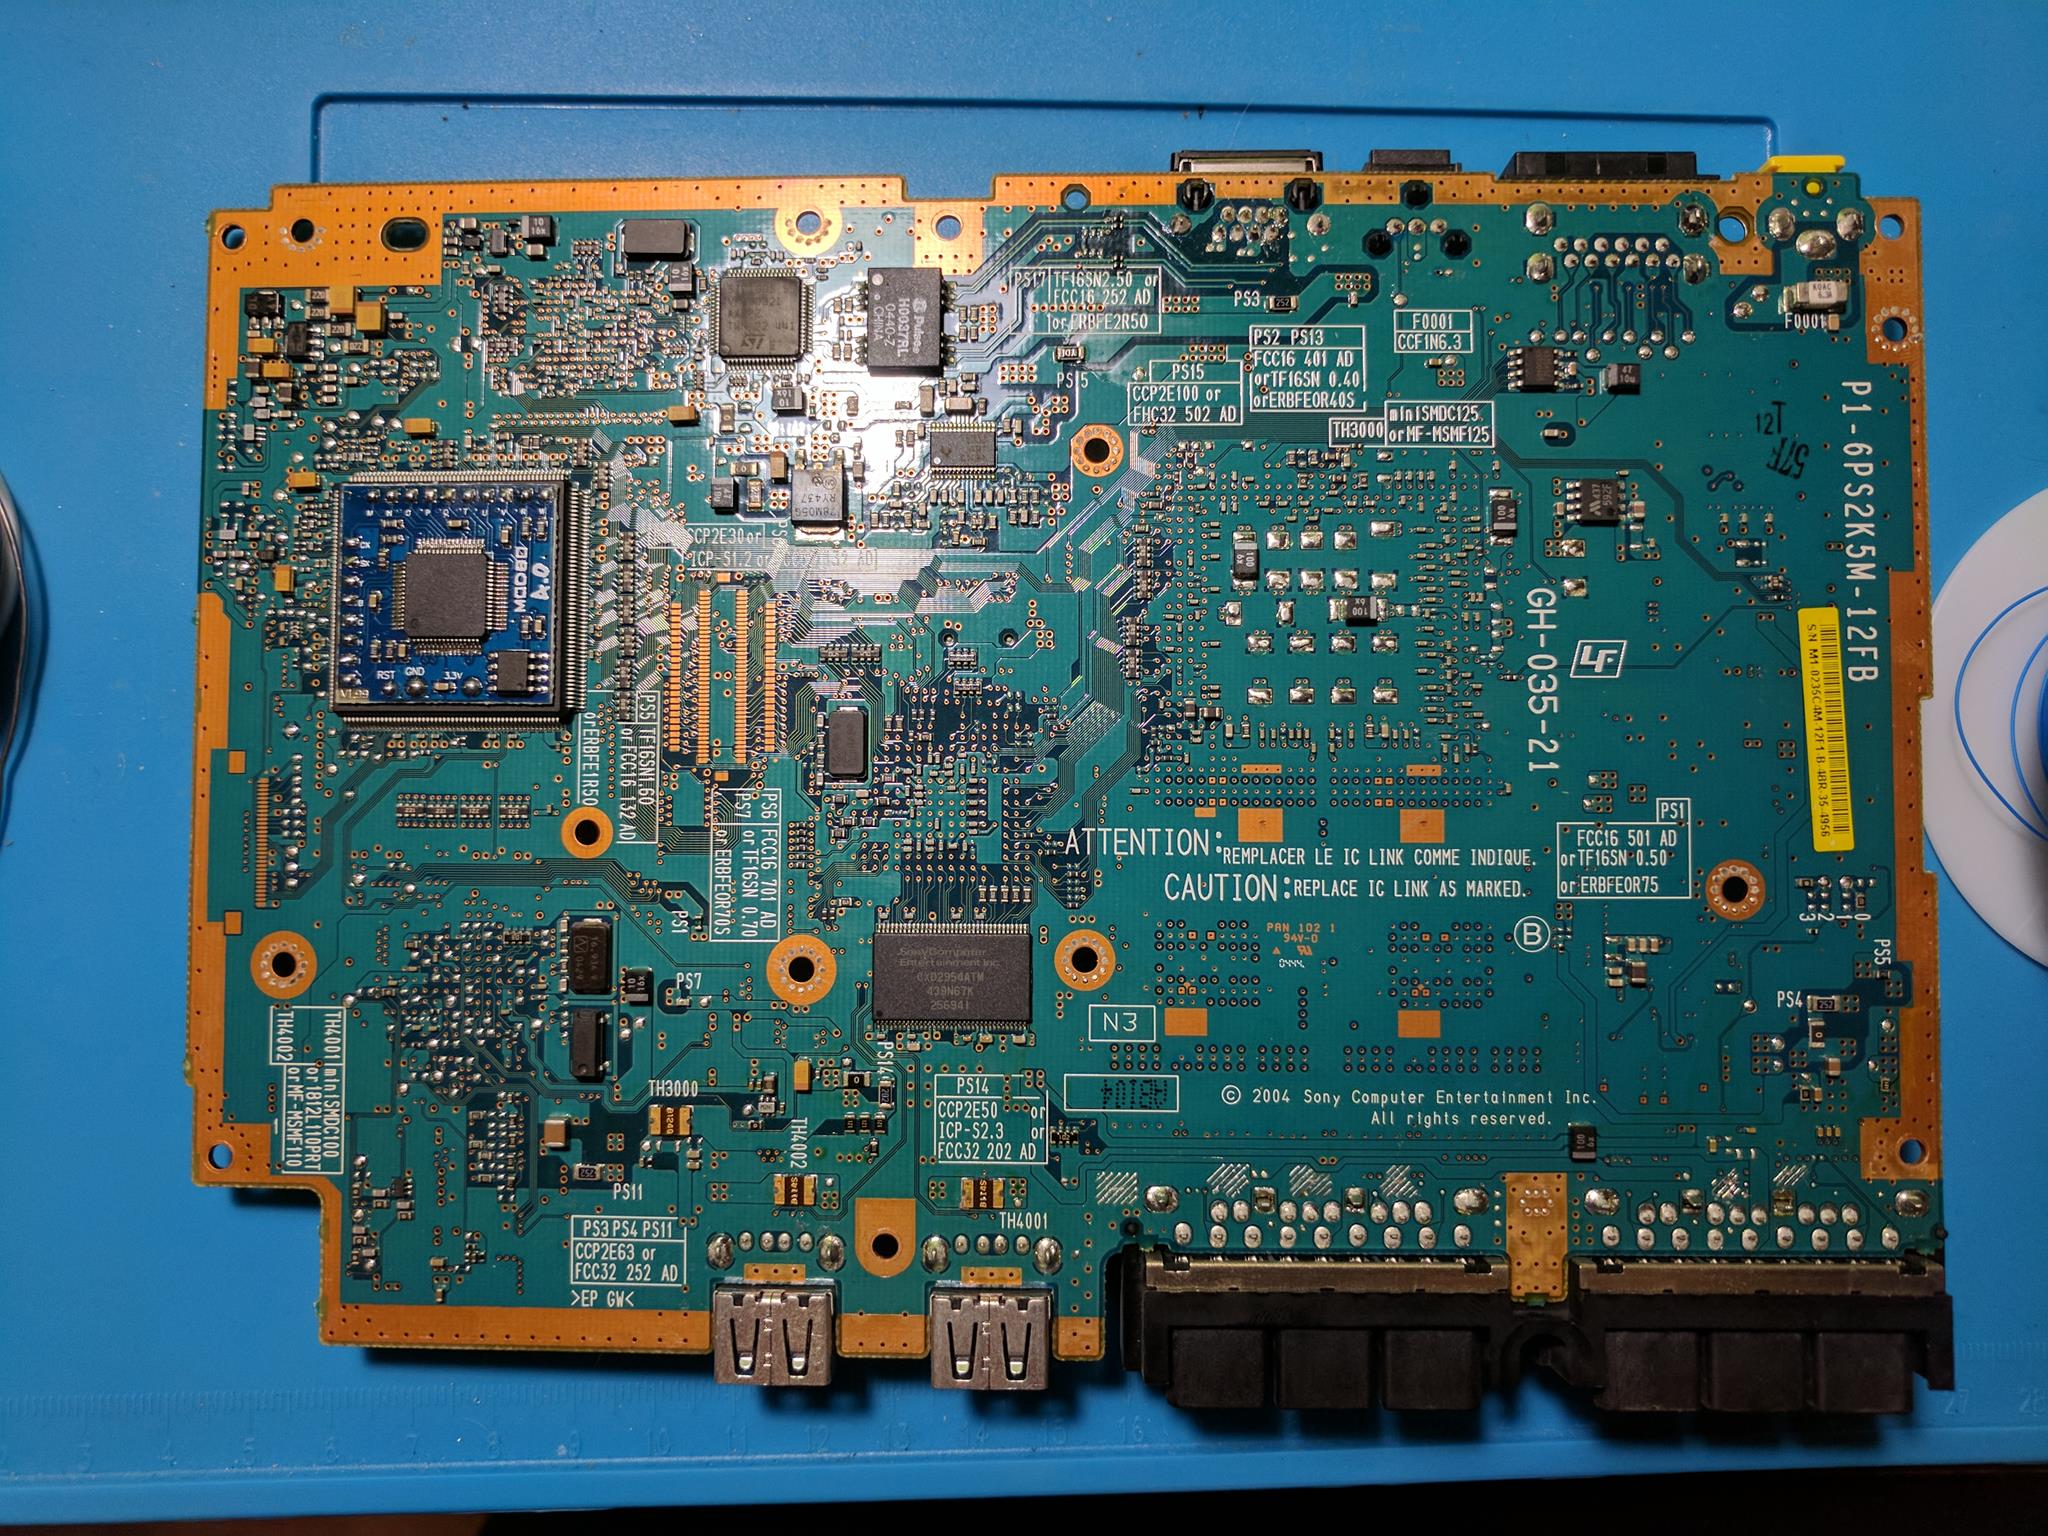
I chose to mount my modchip on top of the large chip in the middle of where all of the wires needed to go. I’d recommend finding a lower point on the board instead, since I had to cut away some of the metal shield later on to get the system put back together. You can see an image of the board and where I mounted my modchip above.
Modchip installation
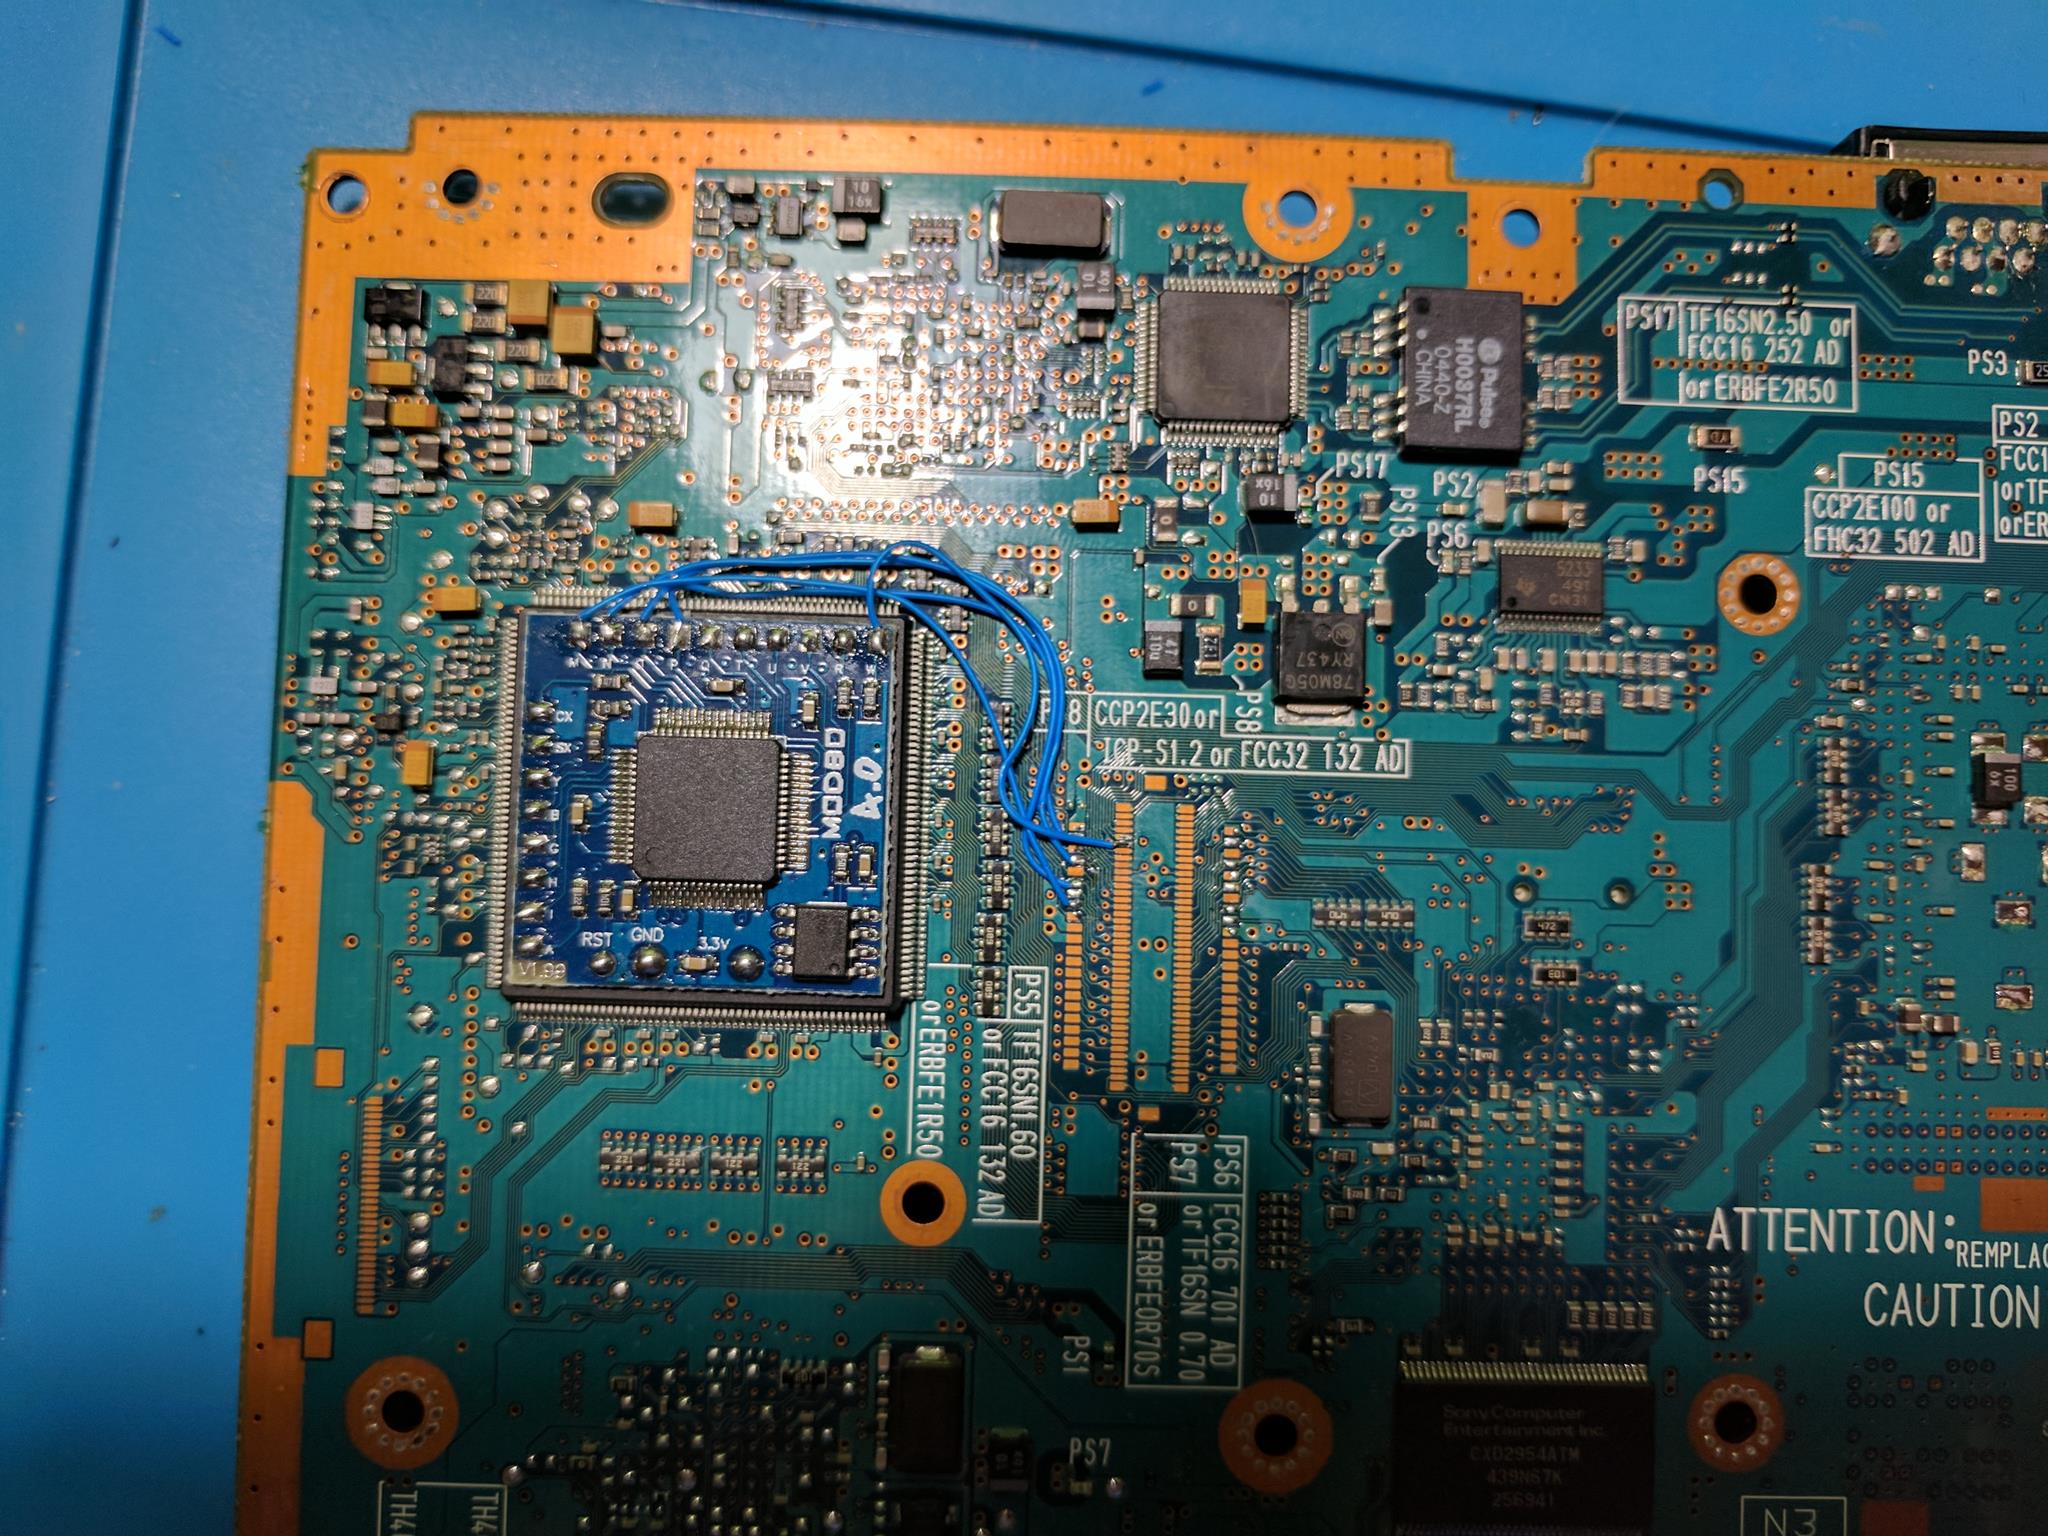
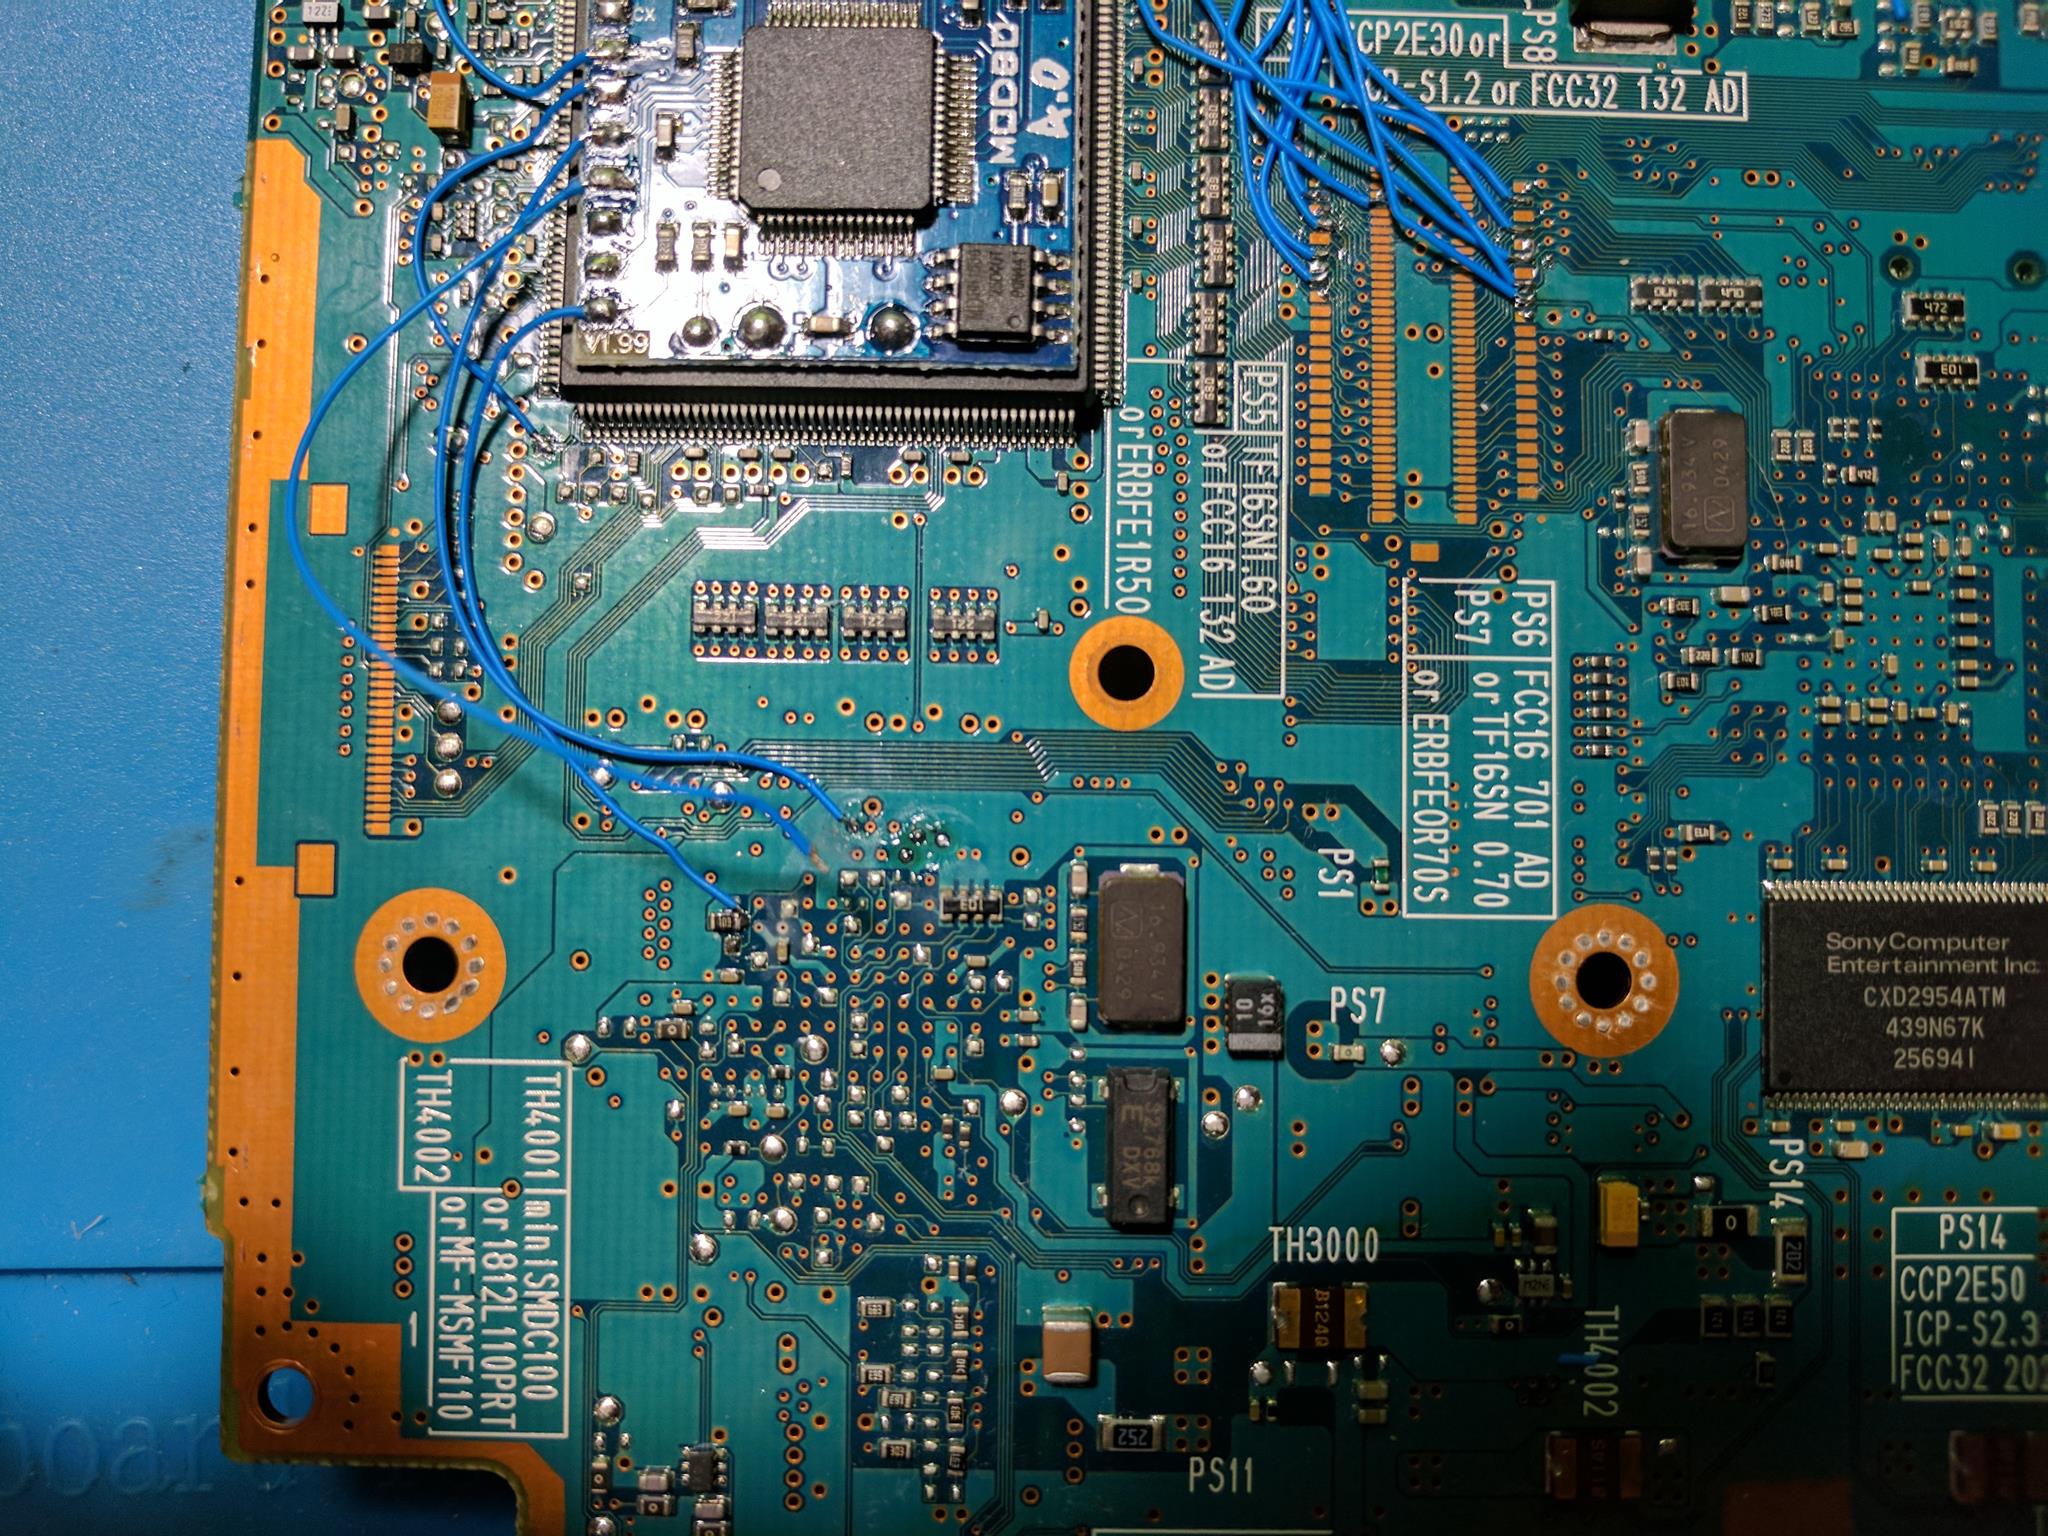
With the modchip mounted I soldered each wire to the board. I started with the pads to the right of the chip, and then followed a counter clockwise pattern around the modchip once I finished soldering wires to the pads. Above is an image of what my installation looked like after I finished with the pads.
I had the most trouble when it came time to solder wires to the holes, or vias, that are located under the modchip. Getting solder to stick to the holes was tricky, I’d recommend using some flux to help get the solder flowing. I inserted an image of wires attached so some of the holes above.
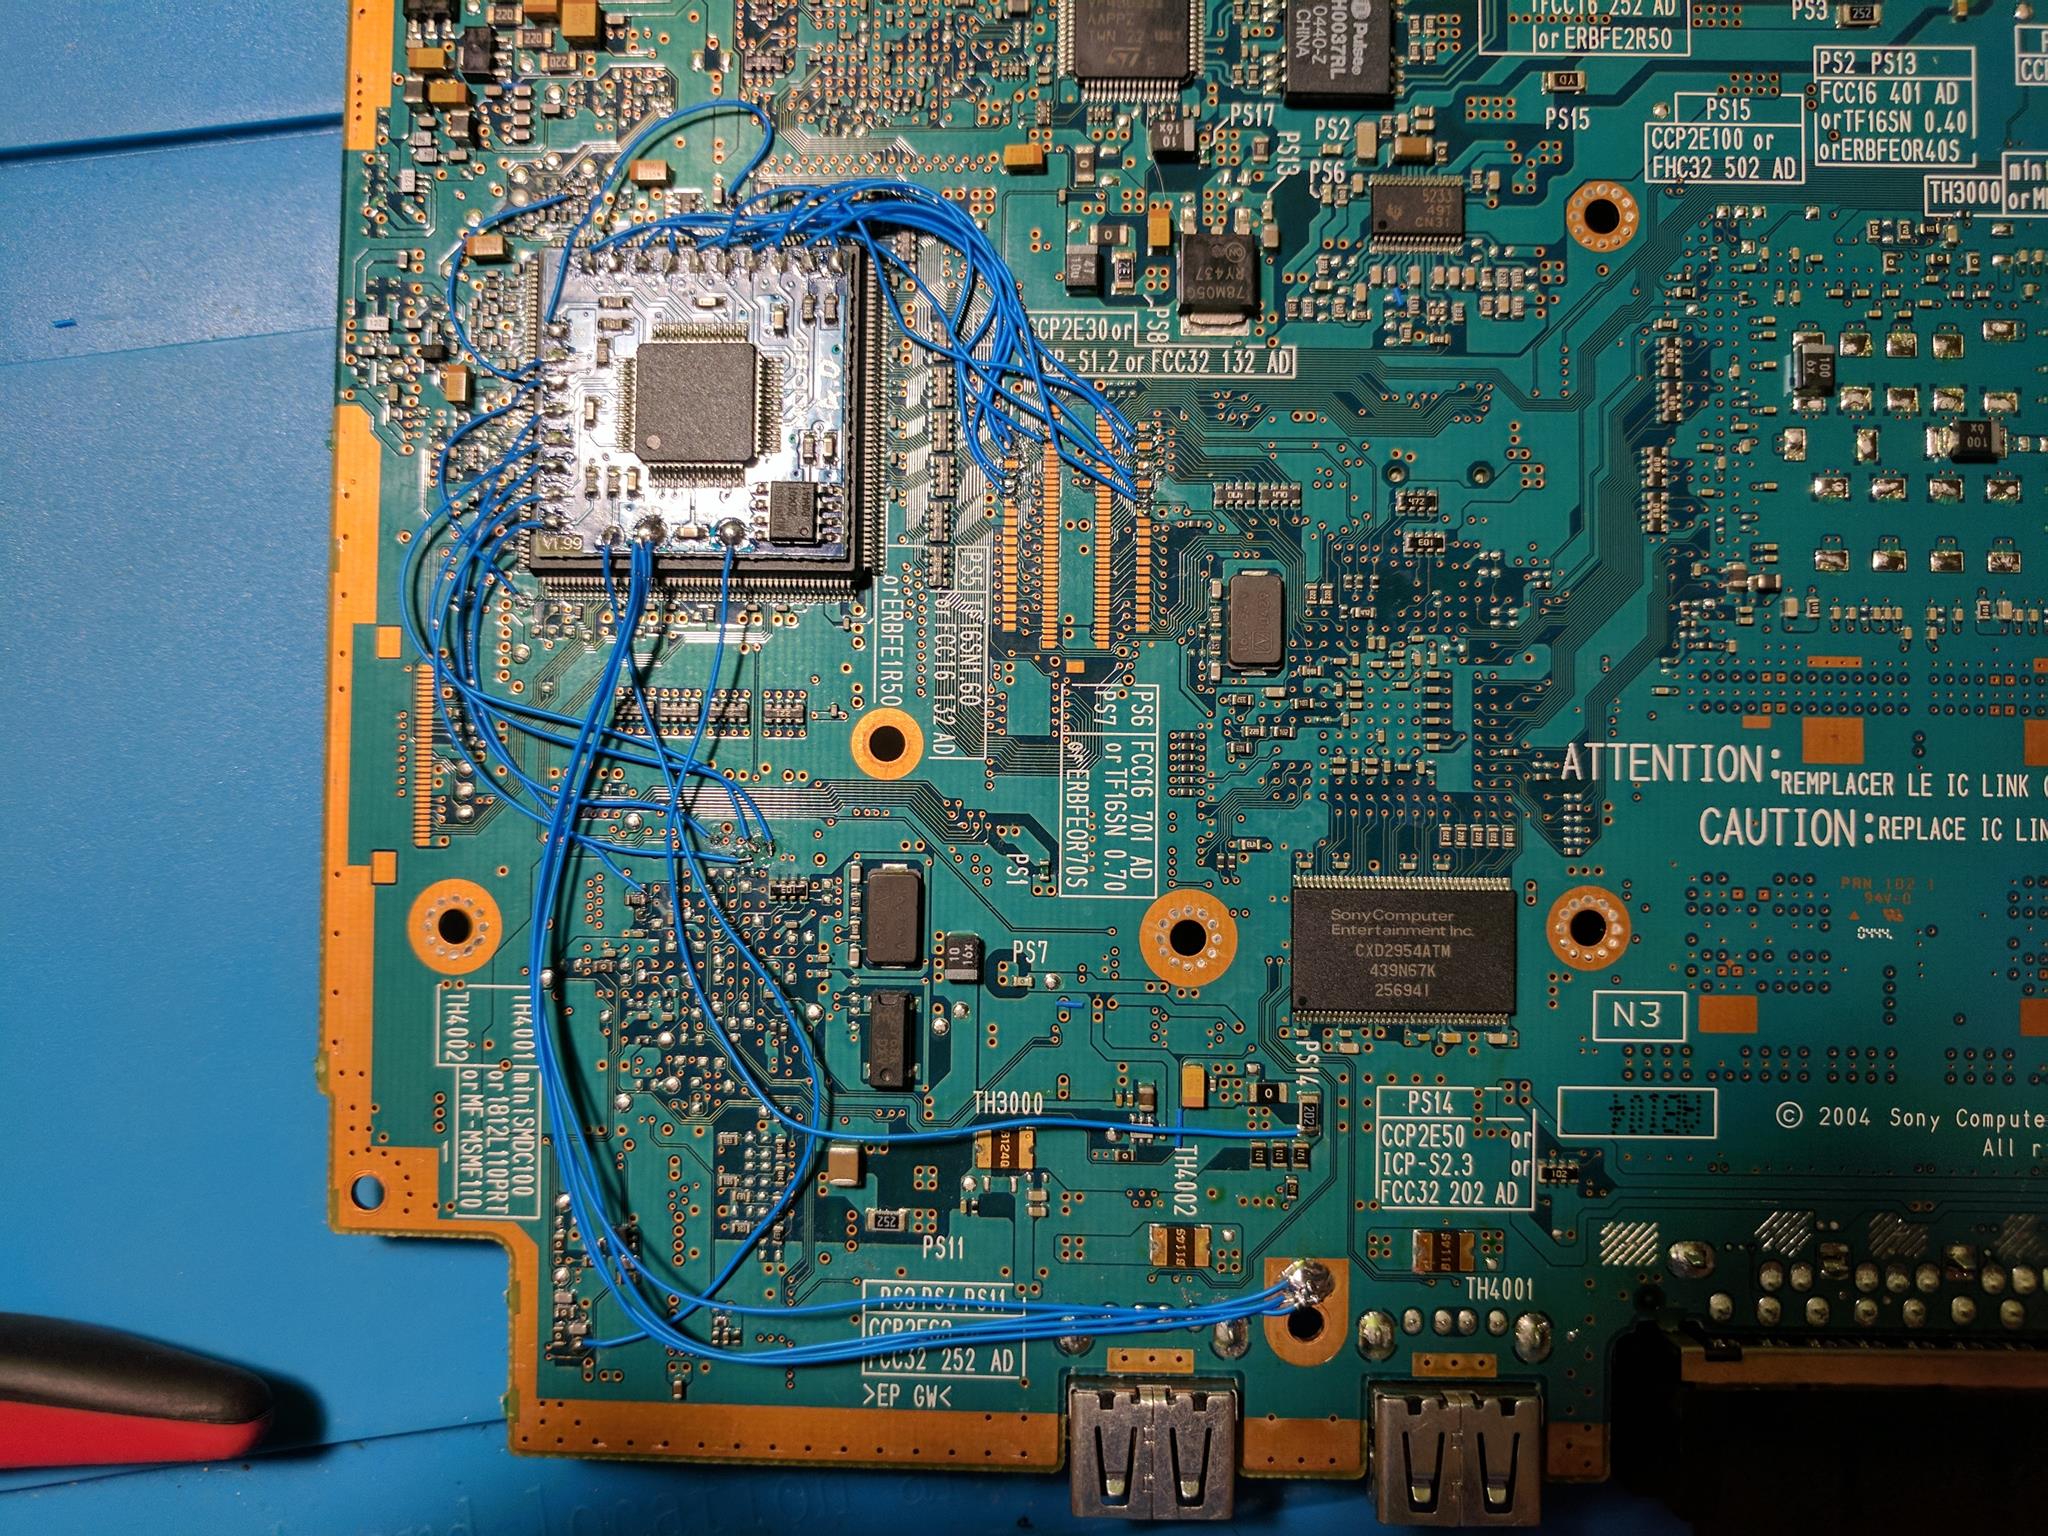
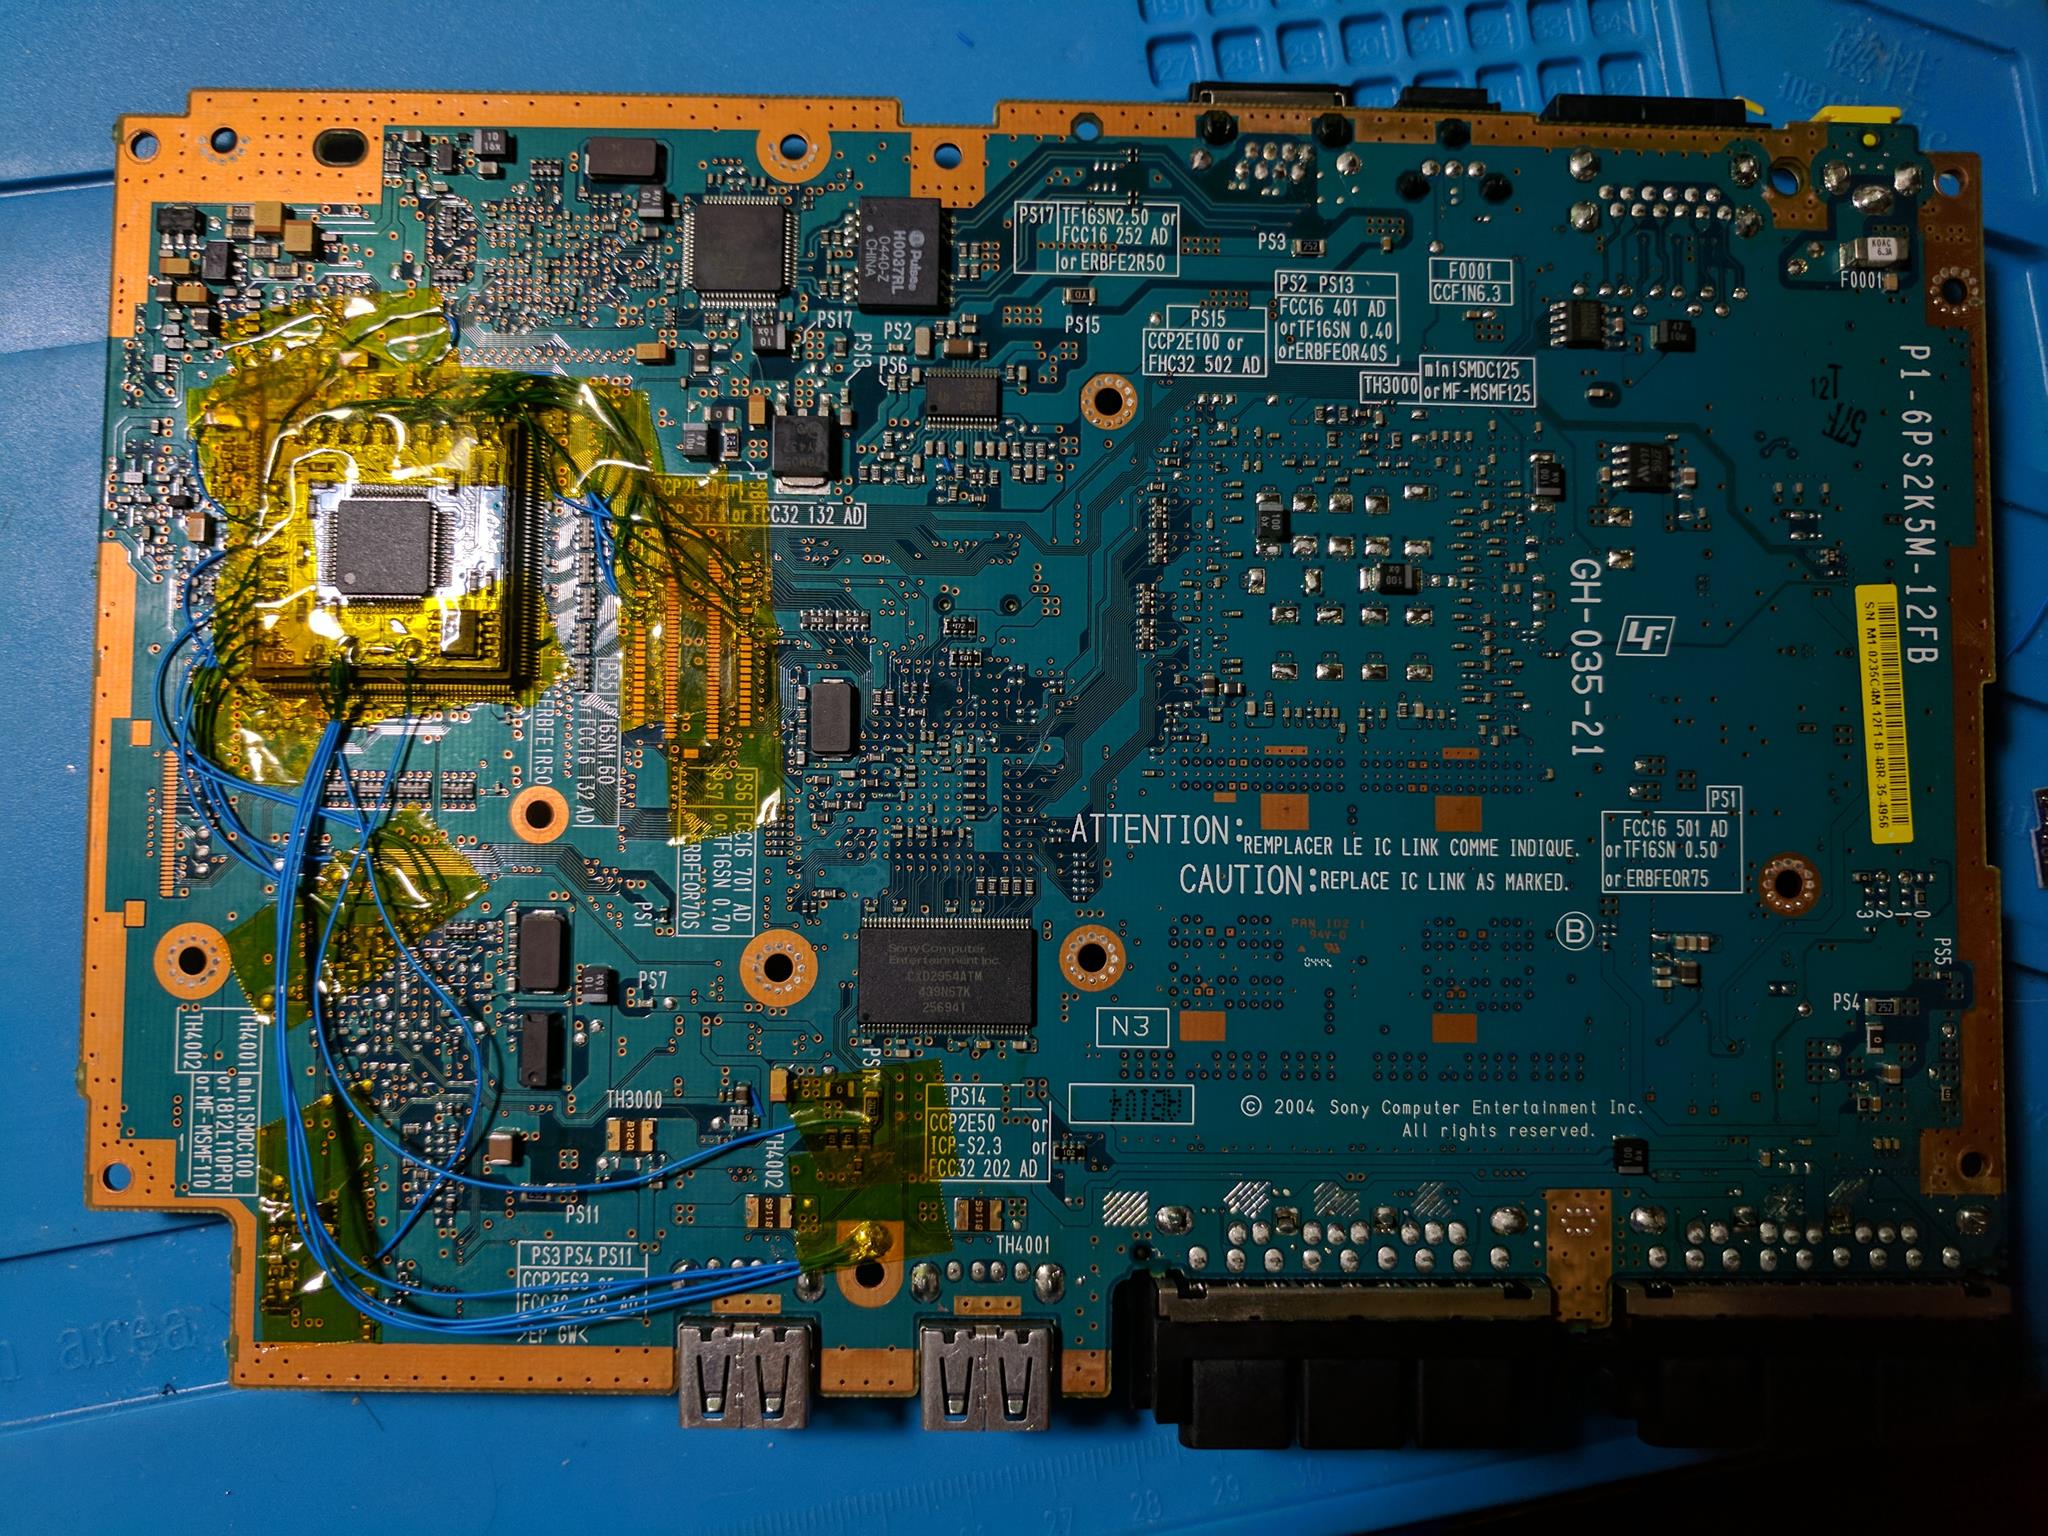
Eventually I finished soldering all of the wires to the board, and the image above is the result. As you can see I routed four ground wires to the ground pad in the diagram. I’d actually recommend routing the ground to whichever screw hole is closest to the modchip. It’s also a good idea to use more wires for the 3.3V line as well.
Putting everything back together
Once I had soldered the modchip to the board, I could put the console back together. I started by taping over all of the points I soldered to, including most of the modchip. Taping prevents any of the connections from being shorted with the case, and also helps hold the wires in place.
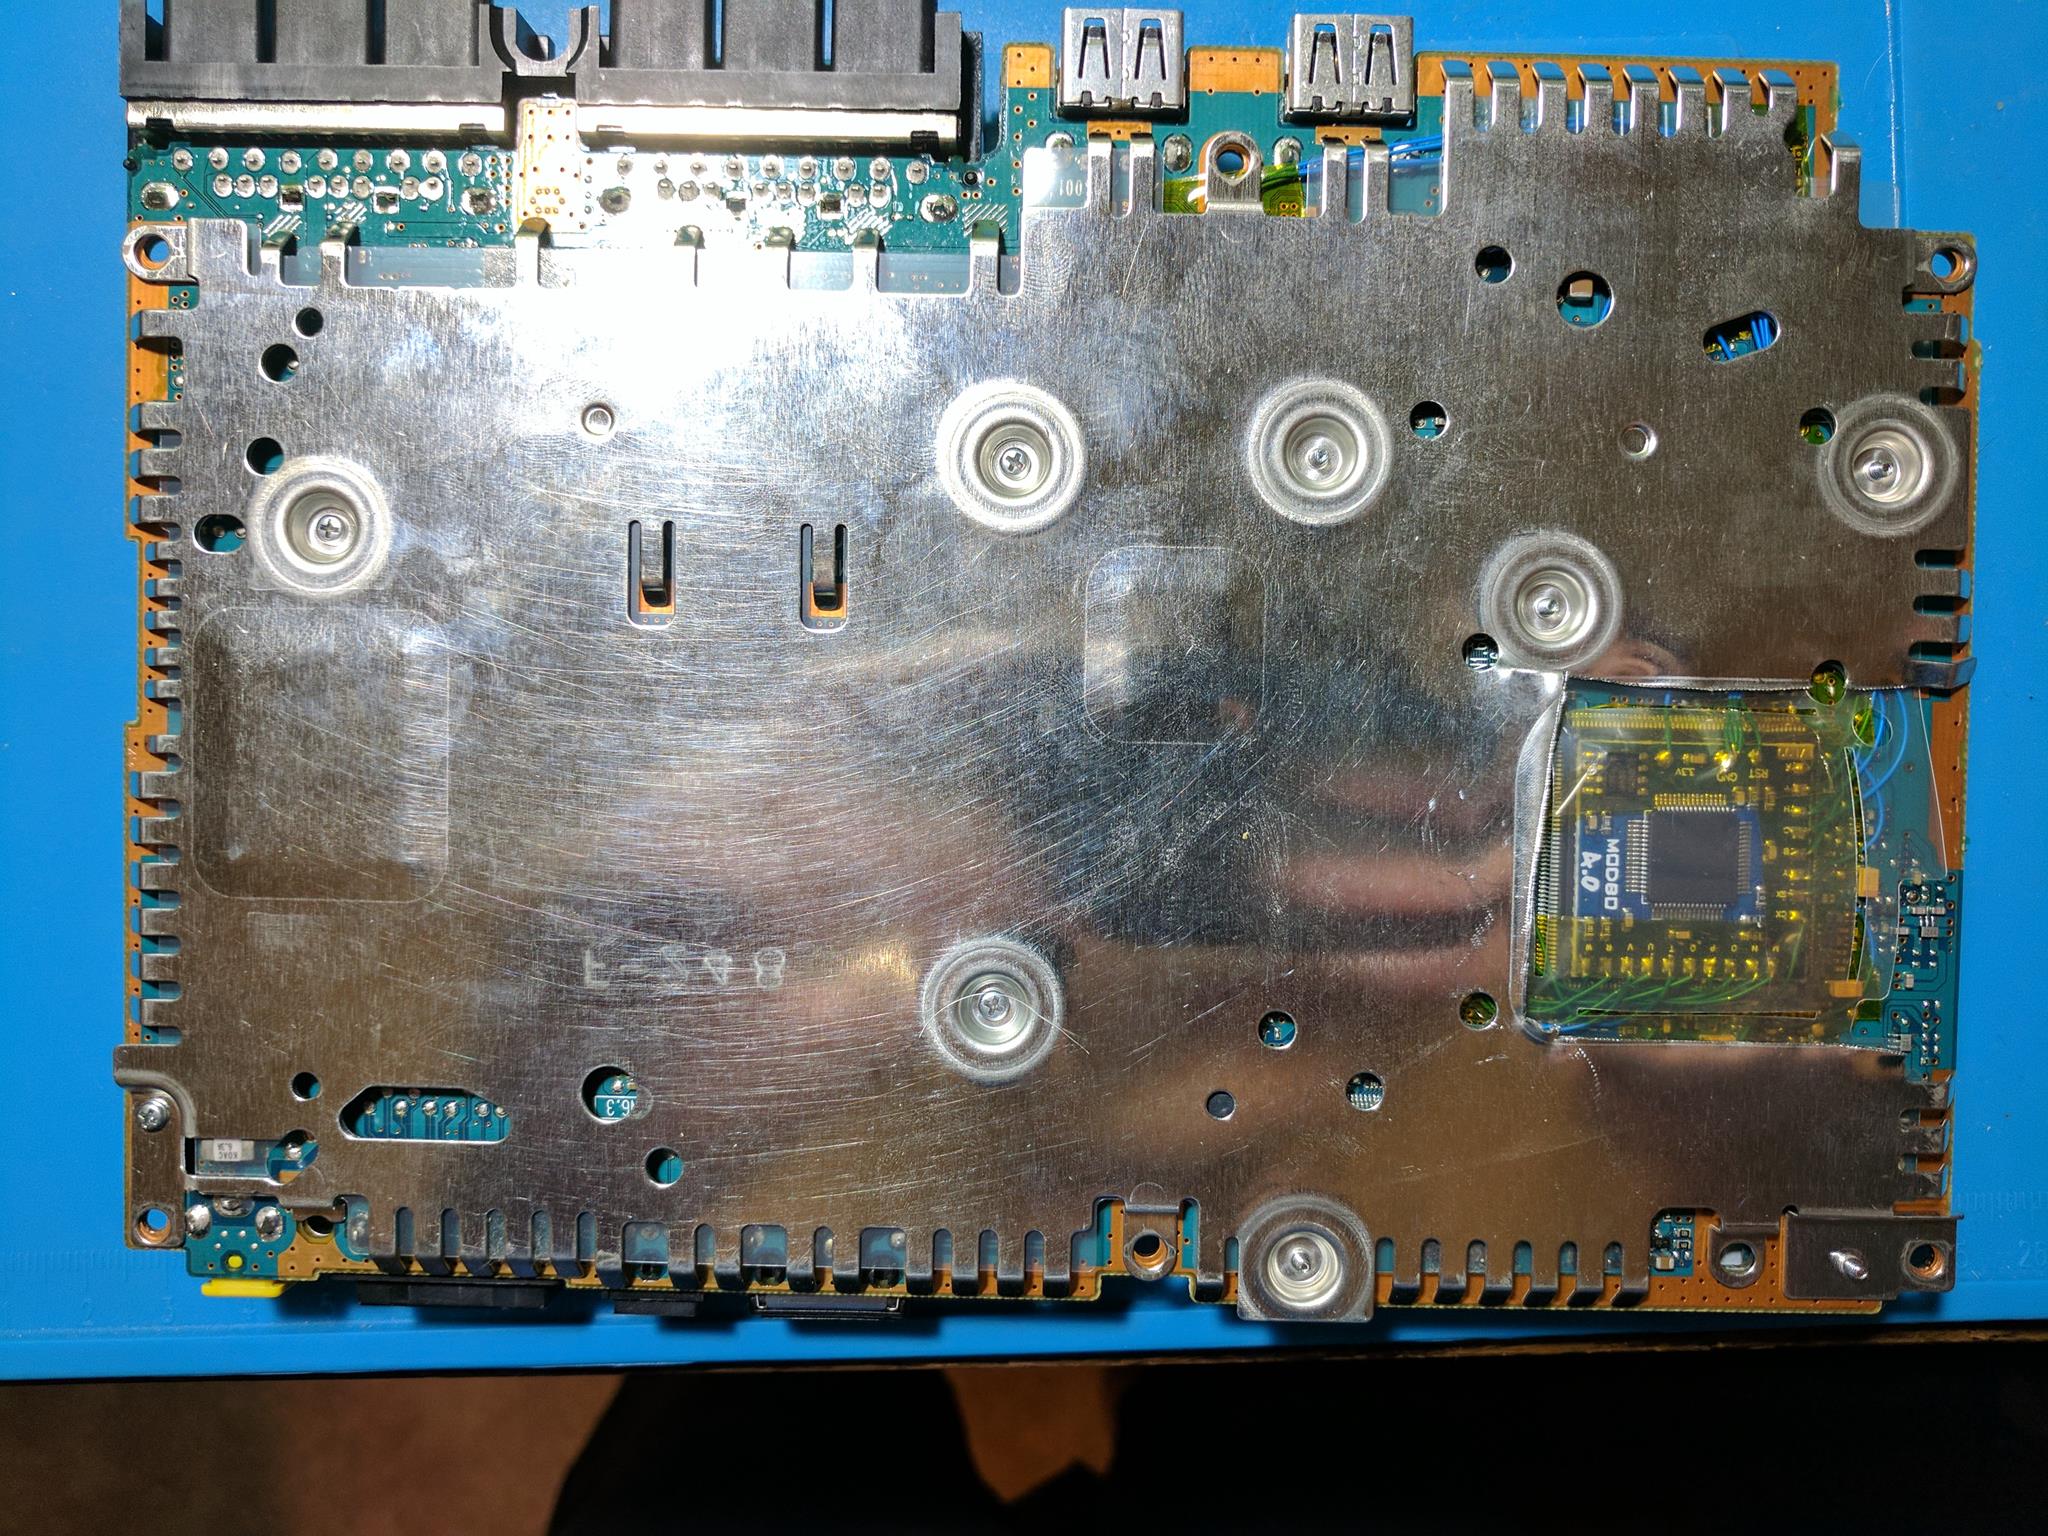
As I mentioned earlier, I didn’t choose the best position for mounting my modchip. I had to cut away some of the metal shielding to make room for the modchip. Removing the shielding still resulted in a very tight fit when putting everything back together.
Final thoughts
I was able to install my modchip my first try in less than an hour. I found the installation process to be more difficult than the installation of a modchip on a PS1, or soldering a Teensy to a PS3 Slim.
Laser failure is a problem with V12 PS2 slim consoles, which can be prevented through various methods. From my understanding the best methods are somm0ne’s fix, and the PIC fix.
I also read that later date code V12 systems don’t have the issue. My PS2 slim is a later date code, so I’m going to see if anything bad happens, and just replace the laser if I have to. I’ll update this post if anything happens.
Hello, is this still active or am i out of luck.
I need some guidance on how to mod a v18
I would appreciate your help.
Here are the v18 diagrams I have:
[…] this month I installed a Modbo 4.0 modchip into my SCPH-70012 PS2 slim console. Since I also own an SCPH-39001 PS2 fat, I decided to install a modchip into it. Modchips for the […]
I have same ps2 and looking to do this. If you had to do it again, where would you recommend best placement of the modchip?
Here’s what my installation looks like on a second PS2 slim: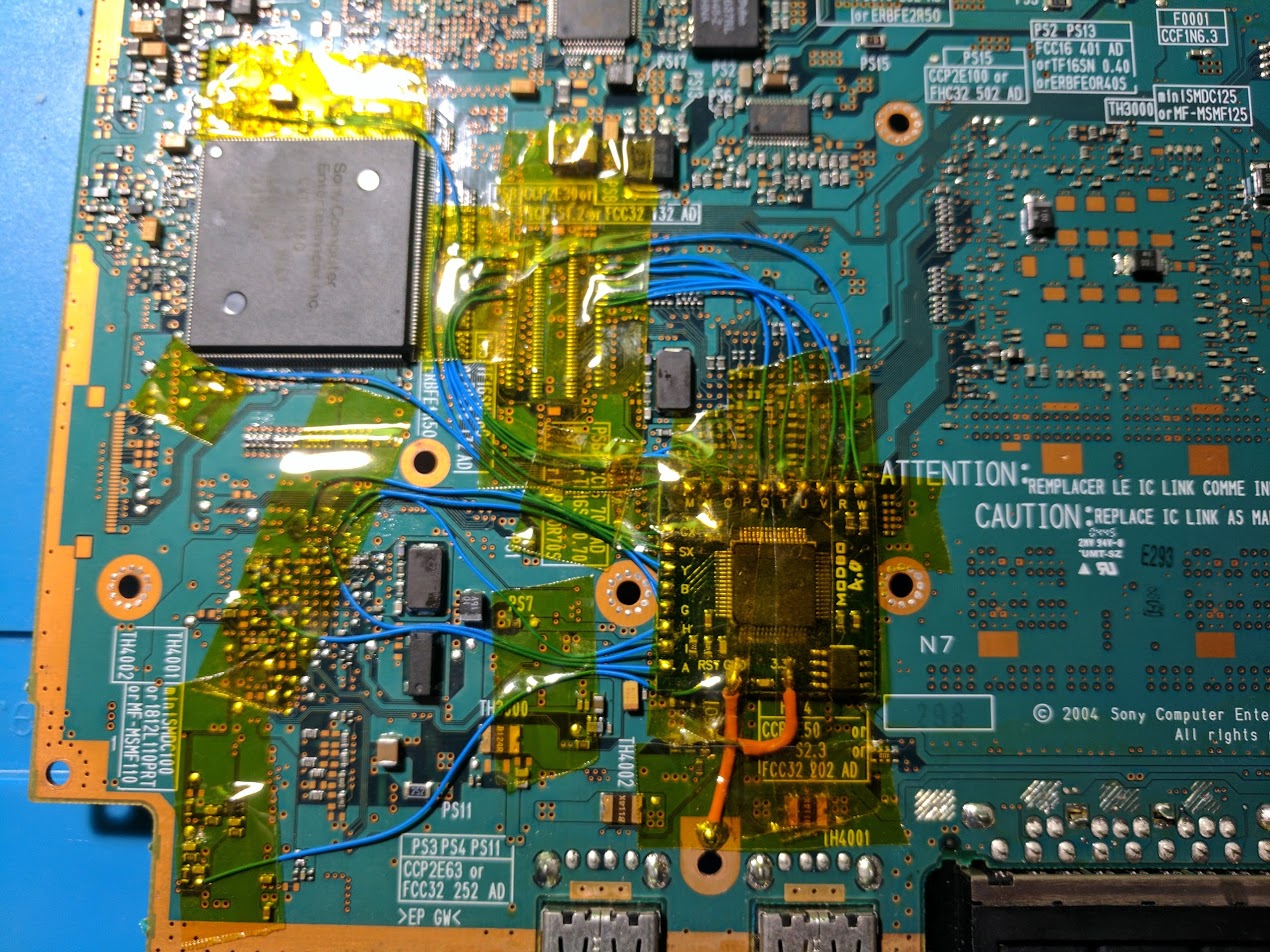
In that position it fits perfectly without needing to modify the metal piece.
Question: I am beginning to do this soldering project. For the pins on the motherboard for P,O,N,M and others in that same area, what is best way to apply solder? Do I need to scrape the top of that copper like pad surface and/or add flux, or can I just put the tip of my soldering iron there and add the solder?
Hi there I have a PS2 V12 PAL do you have a diagram for that or is the pal the same as this USA ntsc on this tutorial?
Thanks
The diagram in the post is the same as the PAL V12 diagram. Here’s an image of a cleaner installation I did earlier this month where the metal shielding doesn’t need to be cut. I also applied summ0ne’s fix.
Where did you buy the 2 resistors? Can you send the link? I found one on Amazon ” 25EP514560R 560 Ohm Resistors, 1/4 W” , but I don’t know if it is the right on or not. Please send the link to buy 2 resistors like yours. Thanks
See this updated guide for the resistor values you need, it isn’t the same for every system: https://quade.co/ps2-modchip-guide/modbo/v12/
But after that as long as the ohms are the same it’s fine (lower wattage ones will be easier to work with since the leads are smaller). It’s probably cheapest to order from some place like Digikey.
So yesterday I install a mod chip on my ps2 but I accidentally removed a small resistor I don’t know what was the info to replace it is there any way to find out how would I find out the value to replace it It’s the sx point it completely remove that resistor the pads are still there though all I need is to know what is the value so I can buy a replacement the model I did it on is a scph-70012 can some please tell me what this resistor is so I can replace it
That’s a 4700pF capacitor (X7R, 16V, 0402).
This should work (buy more than one in case you drop one or something): https://www.digikey.com/product-detail/en/wurth-electronics-inc/885012205029/732-7524-1-ND/5454151
Thanks you one more question do you know any where I can get a pack of diagrams for ps2 mod chip install every Tim I mob a ps2 it’s hard to find a diagram
There’s a link to diagrams for every model at the top of the post: https://quade.co/ps2-modchip-guide/modbo/
Hey bro could you help me find the 4700pF capacitor (X7R, 16V, 0402) on AliExpress or something because the site you gave me is to expensive I tried looking it up but I have no luck
What do you mean too expensive? If you order through that link you can add 10 to your cart for $0.13 (thirteen cents). USPS First Class shipping would likely be less than $3 on top of that.
It’s shows 8 bucks for shipping I only have 2 buck at this time
Make sure you select USPS First Class Mail shipping at the bottom of the ship method screen, it shows $3.75 for me (it defaults to FedEx Ground for me which is $8).
You can also find some on Arrow. They do free overnight shipping: https://www.arrow.com/en/products/vj0402y472kxjcw1bc/vishay
Ok thanks you so much bro