NB Miata project – Engine out work: Rear main seal, coolant reroute, and more
One of my goals with my NB Miata over the winter was to pull the engine to fix a few lingering issues I have been having. With just a single one of these issues it probably wouldn’t make sense to pull the engine, but the combination of these issues makes it worthwhile to just pull the engine to make the rest of the work easier. In this post I cover pulling my NB Miata engine along with what all I did while it was removed from the car.
Here are the factors that lead me to pulling the engine:
- Leaking rear main seal that was slowly getting worse.
- Stripped oil pan drain plug.
- Desire to install a coolant reroute to improve engine cooling performance.
- Needing to replace the two coolant lines that are hard to get to with the engine in the car.
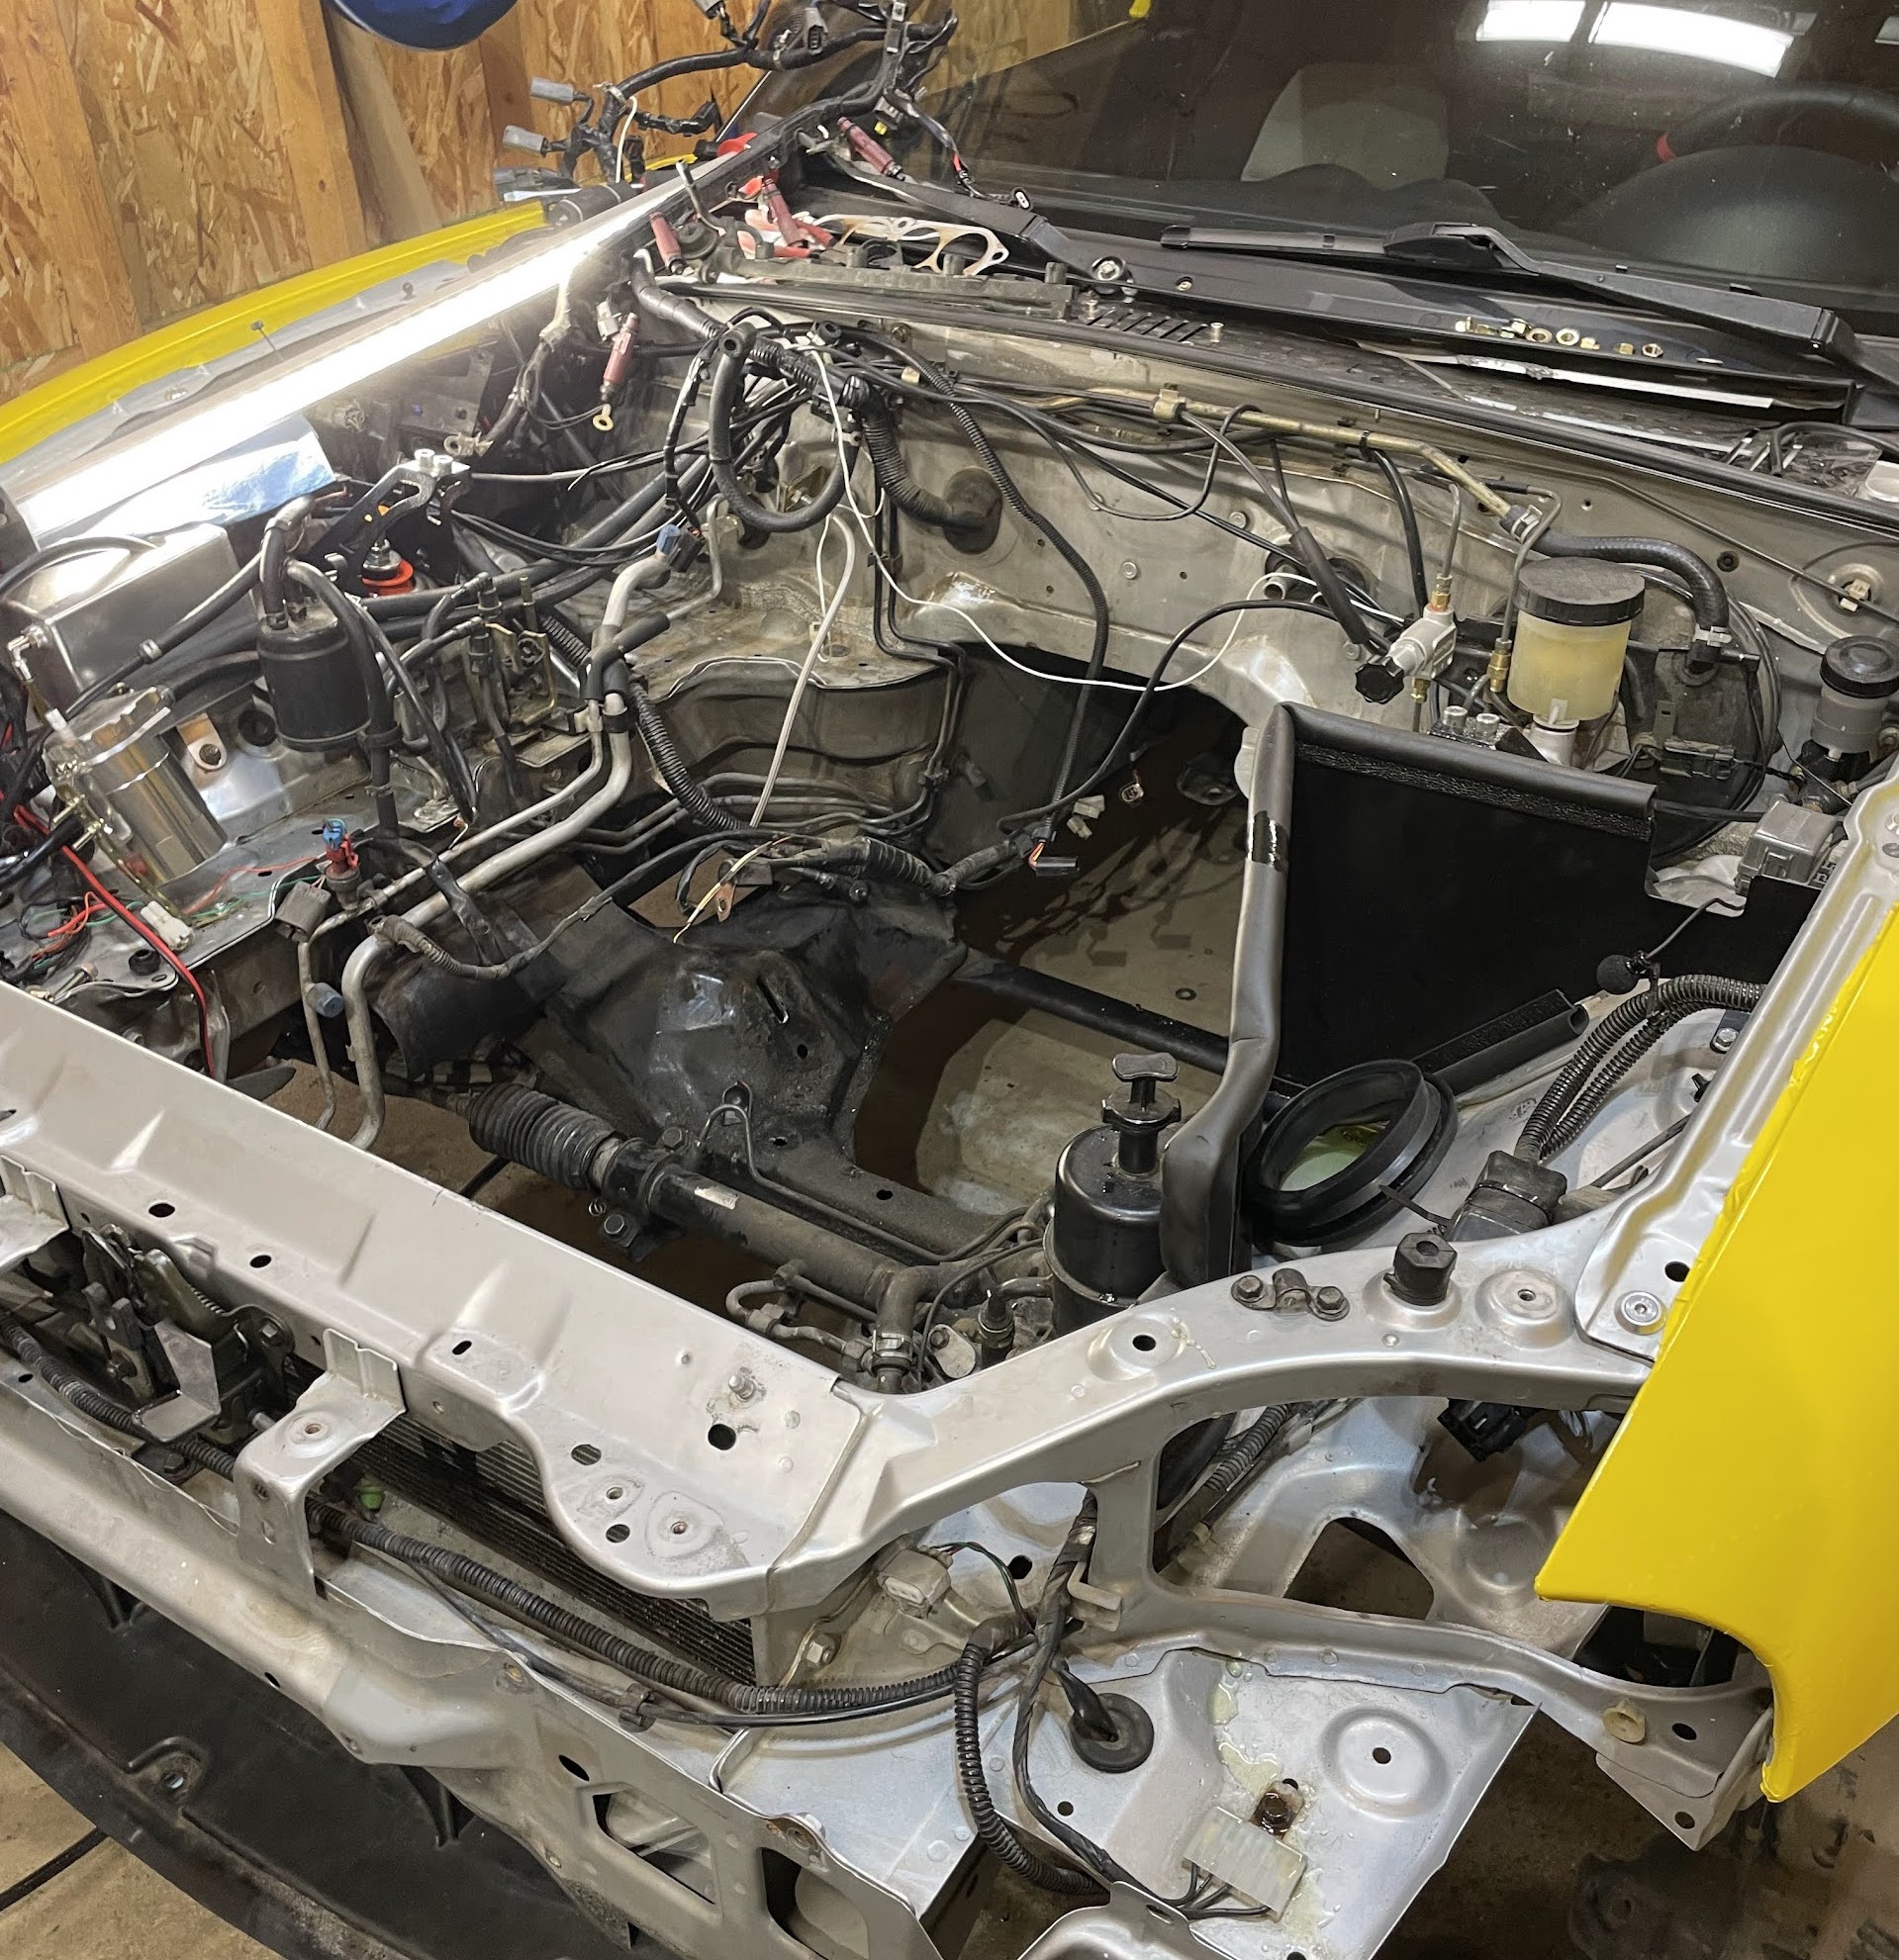
Pulling the engine

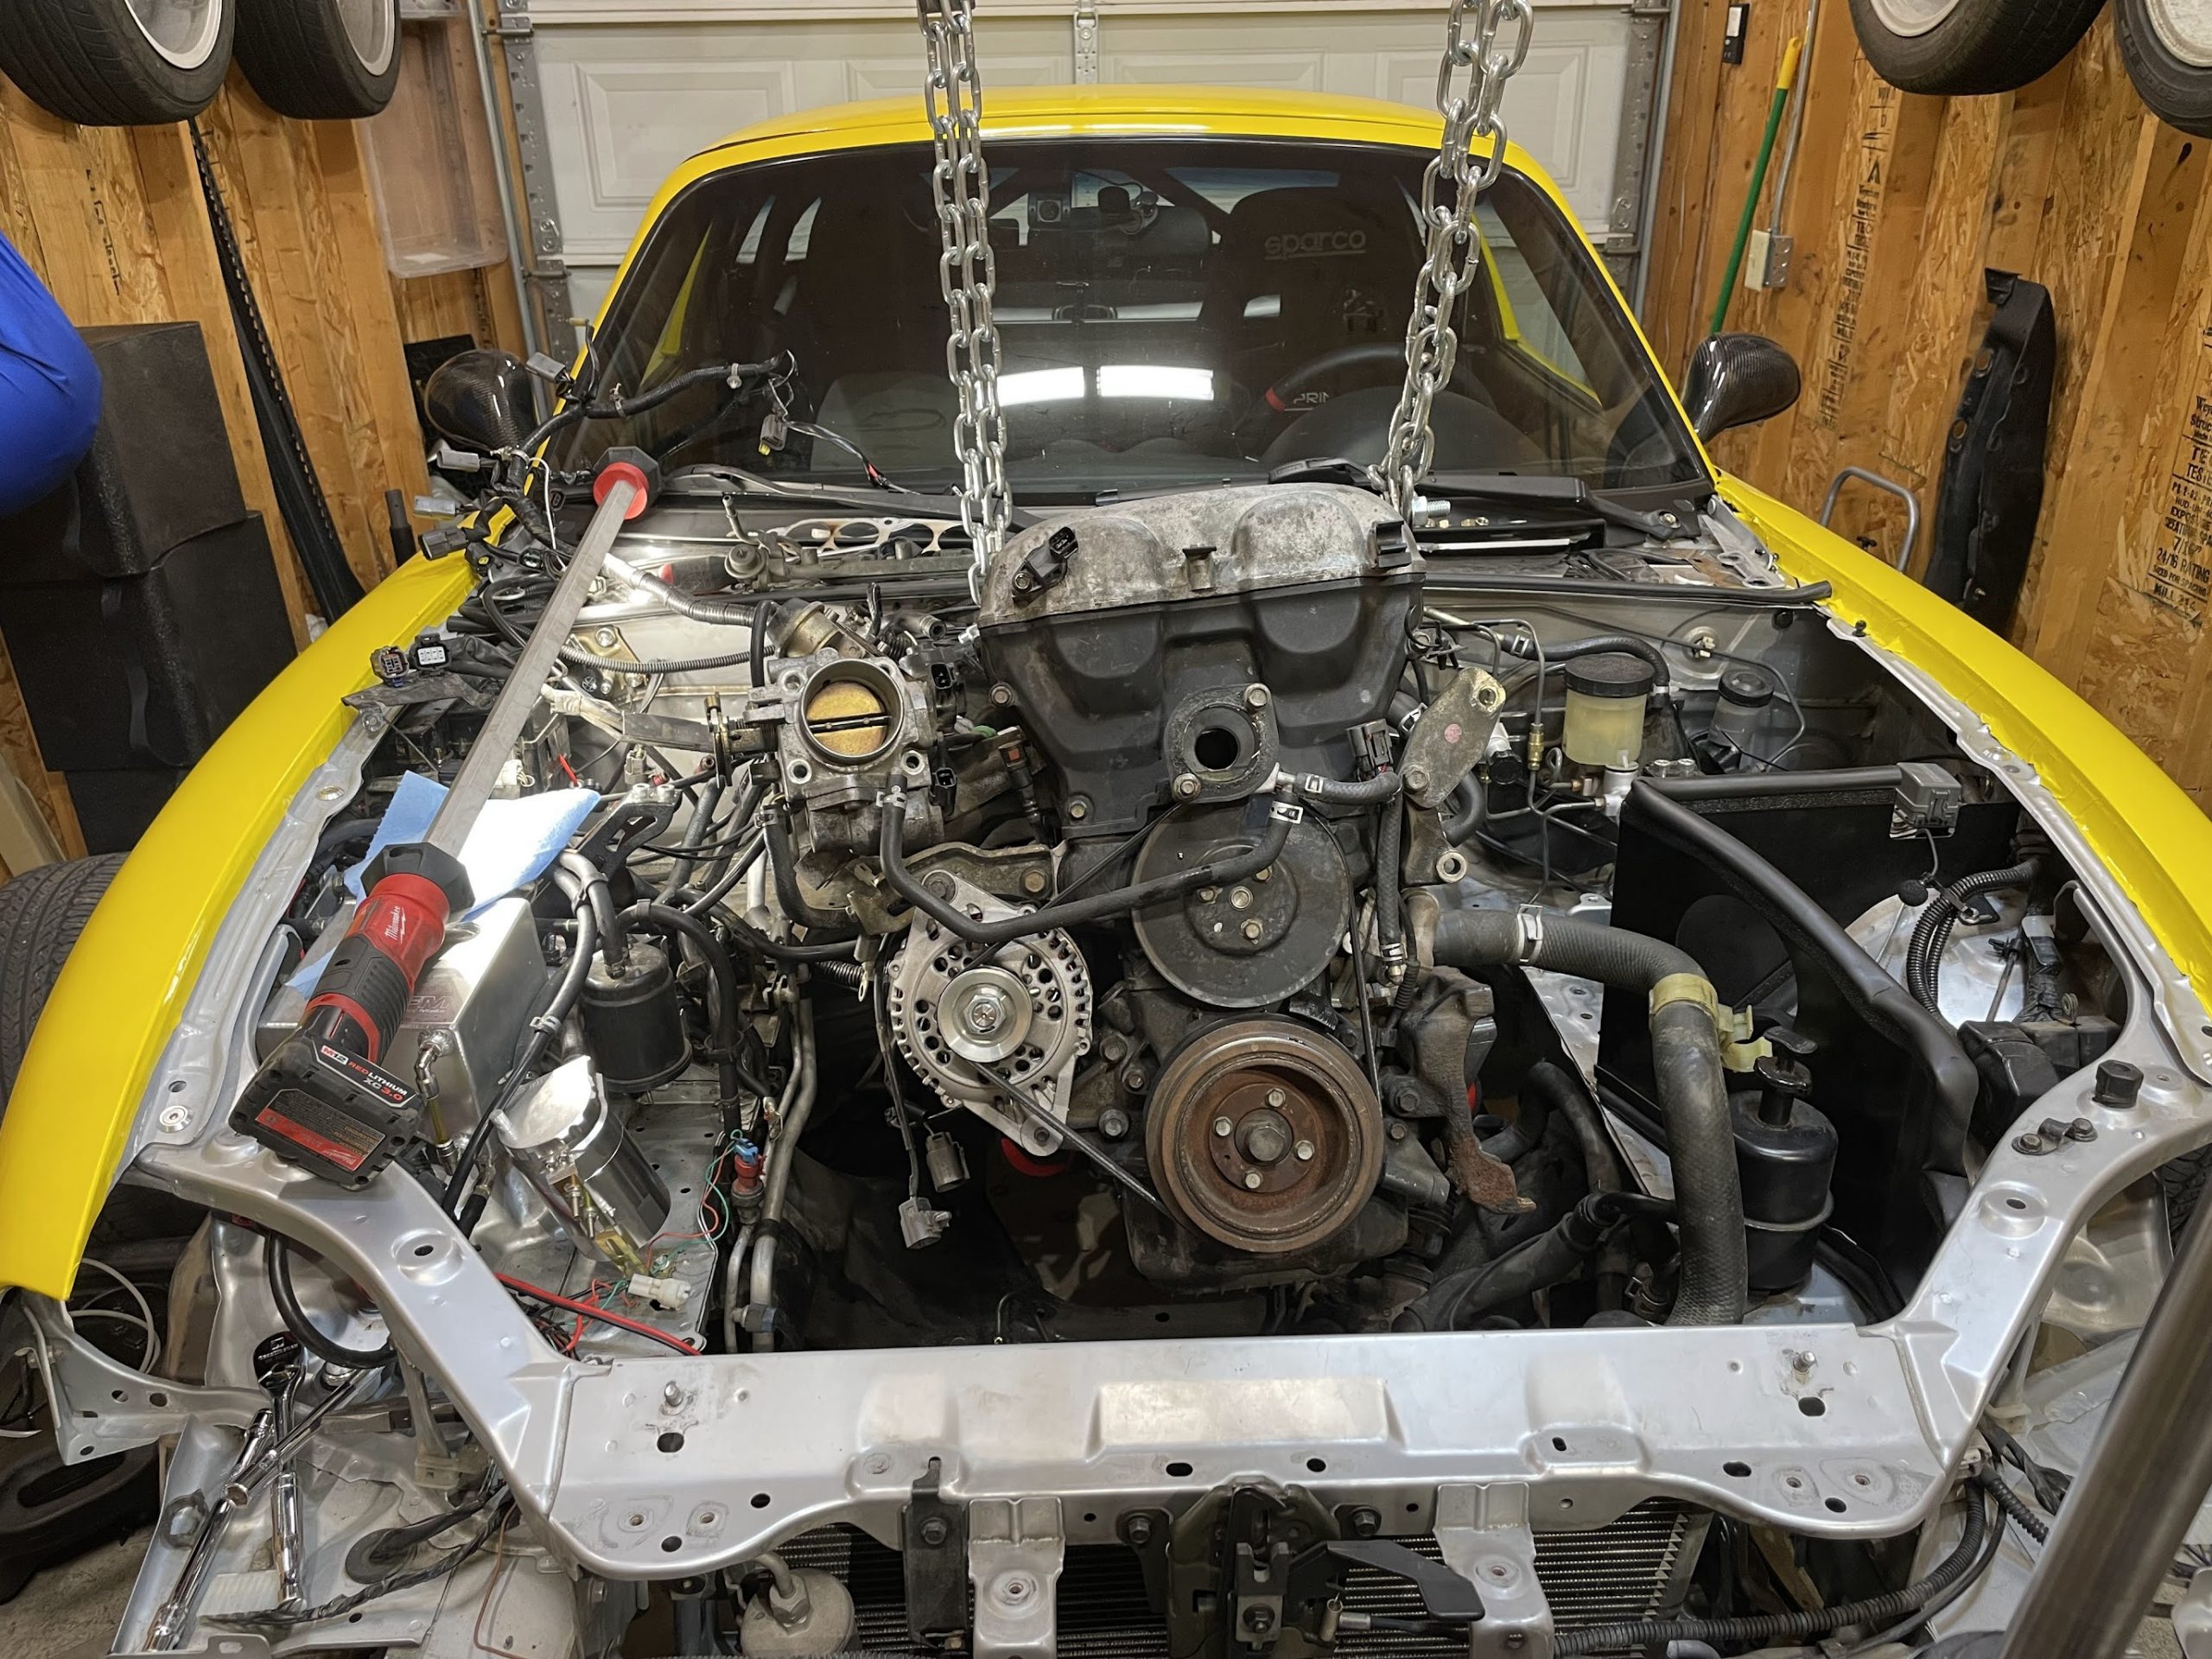
I was able to remove and reinstall the engine in my Miata by myself without too much difficulty. Removal was super easy, you really just need to disconnect everything and lift the engine out of the car. Installation was a little trickier since the engine needs to be aligned correctly for the engine mounts to slide into their mounting points, but it was still doable.
There are a few things I’d like to mention that will make things easier the next time I do it. I pulled the entire transmission and engine assembly all at once from the top.
- Remove the PPF (power plant frame). It’s easy to remove and makes it a lot easier to remove and reinstall the engine without the PPF in the way.
- I recommend removing the hood and bumper. It might not be necessary, but I felt much more comfortable knowing I couldn’t scratch the bumper on accident.
- Remove the coil pack before removing or installing the engine, it gives you a little more room.
Rear main seal replacement + transmission seals
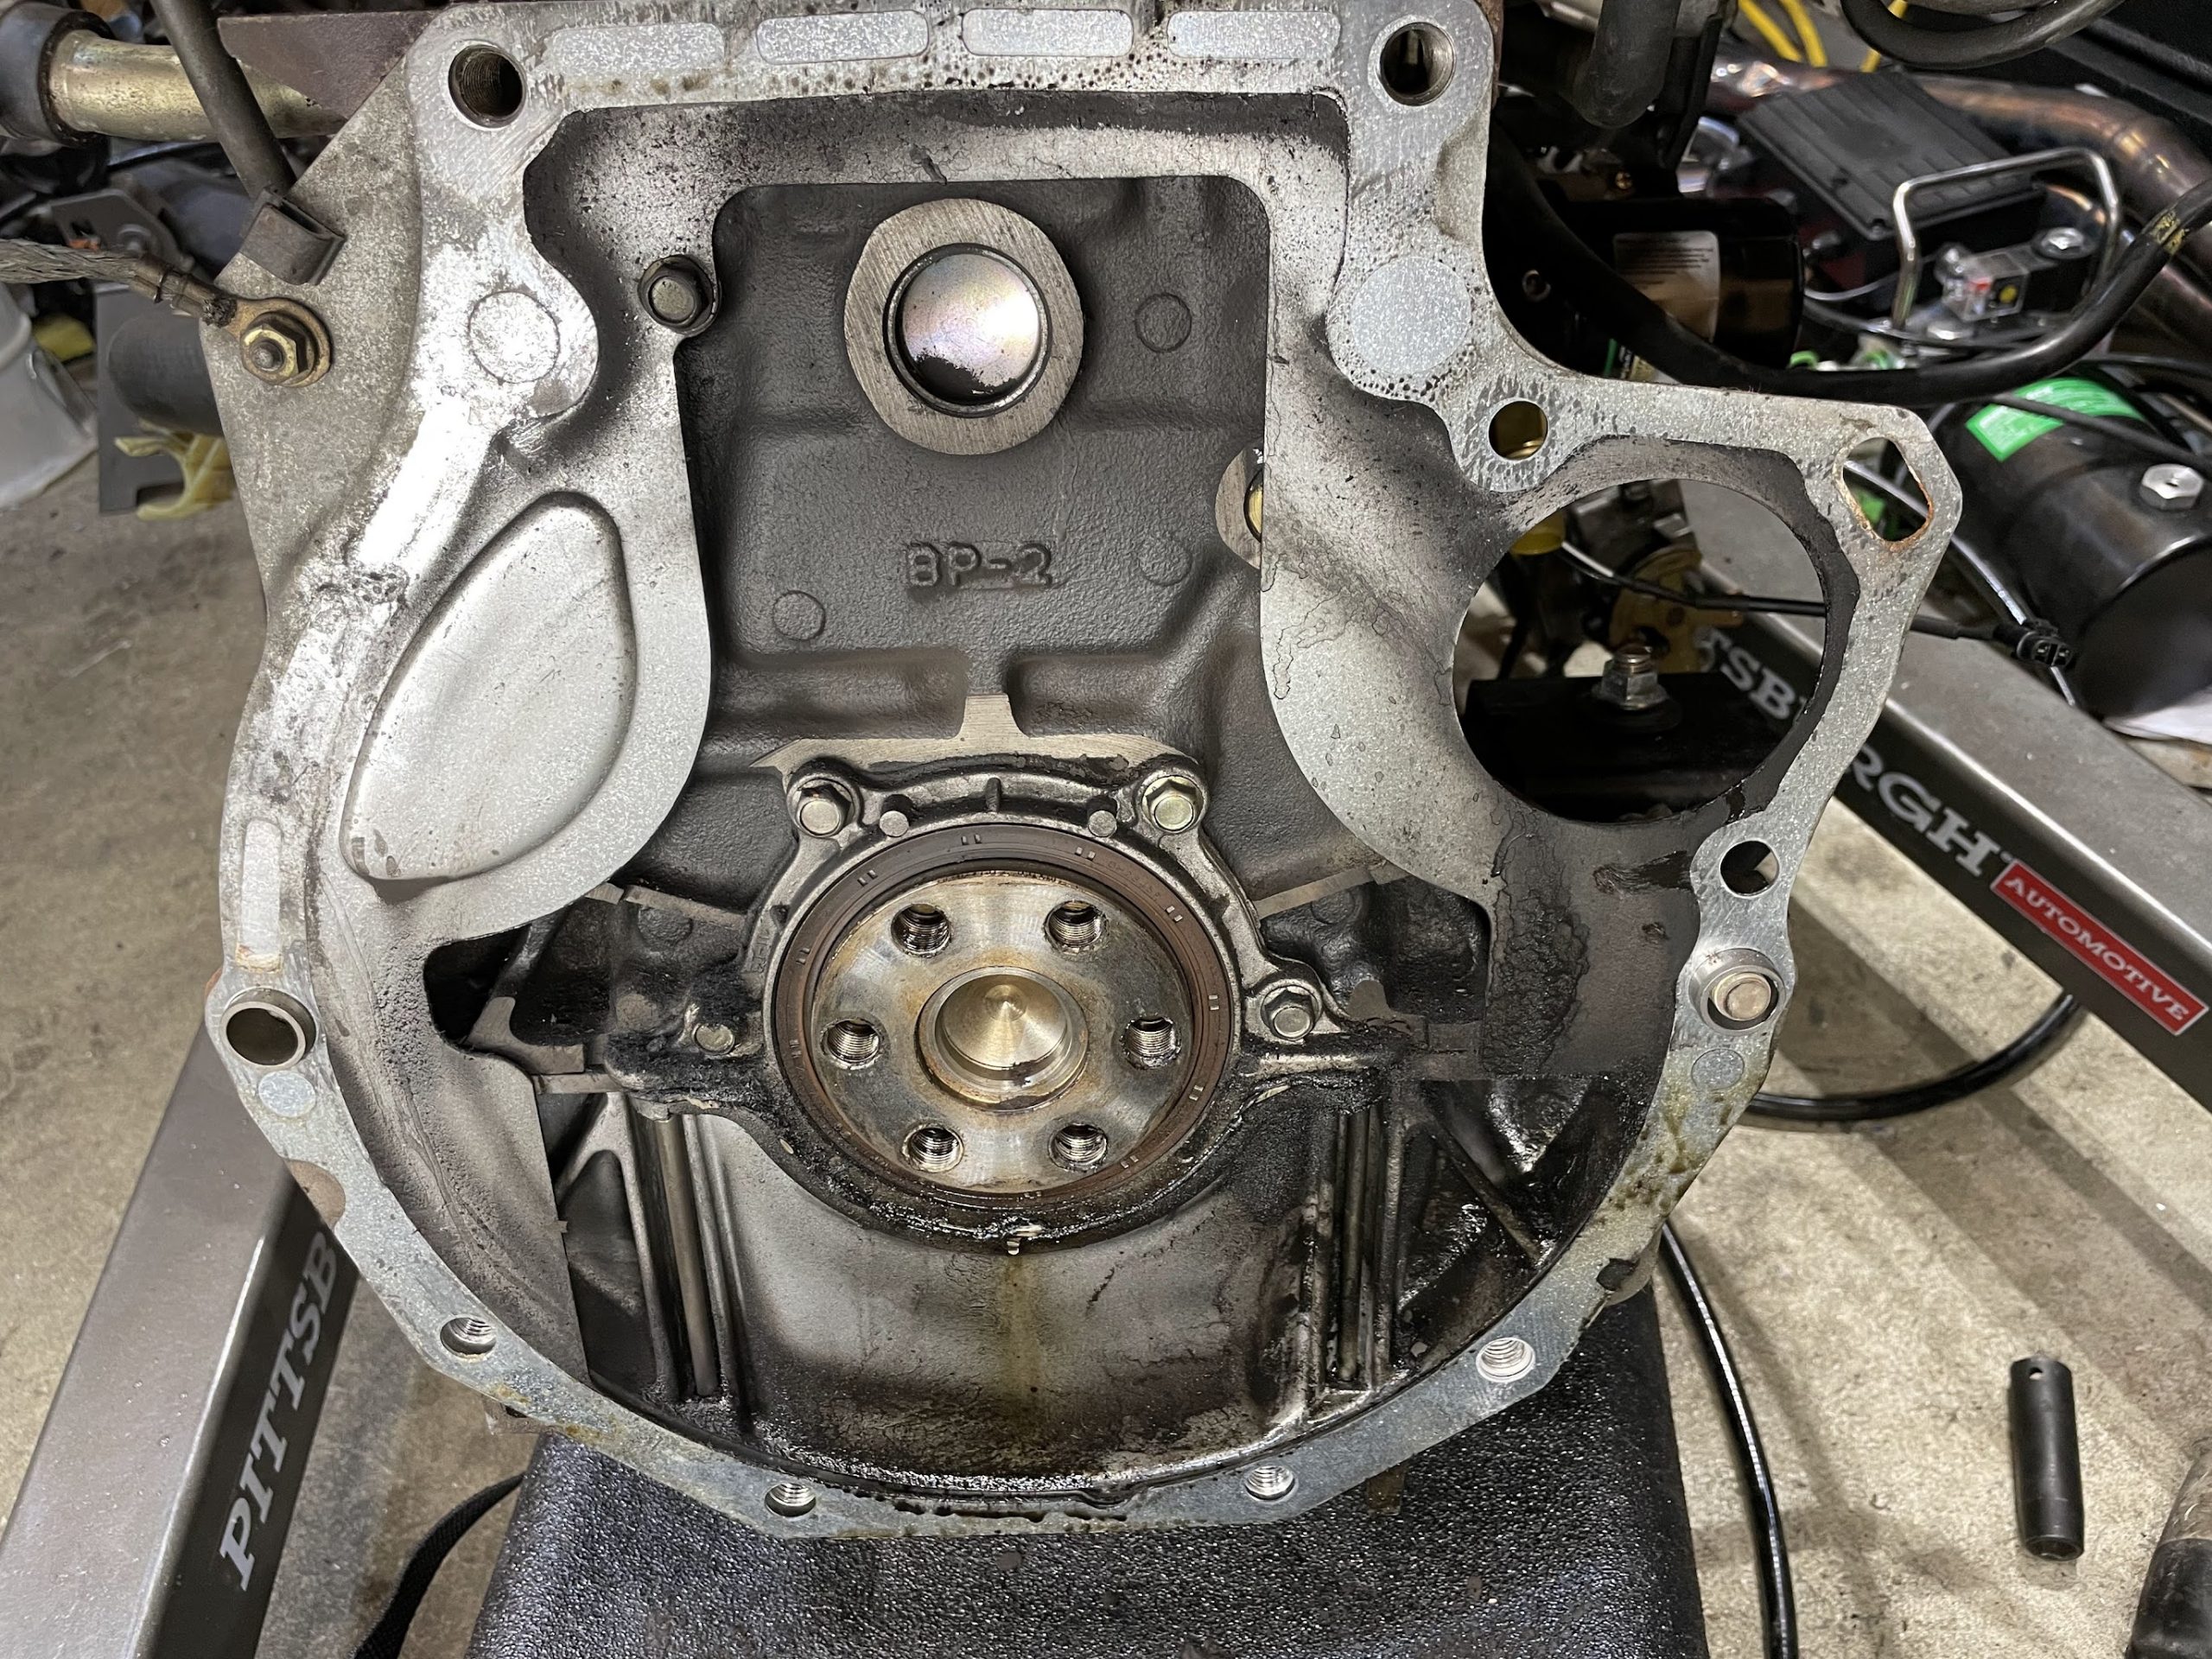
My rear main seal was leaking a good amount of oil, and it was slowly getting worse over time. In order to know how much oil I’m burning I first need to fix any oil leaks. When it comes to the NA/NB Miata engines Mazda really did try to recreate the engines old British roadsters with how many places they can leak oil.
I made sure to seal all of these areas on the engine:
- Replaced the rear main seal.
- Installed a new paper gasket between the block and the rear main seal carrier housing.
- Blue thread sealant on the flywheel bolts (these also seal oil, and at least one of mine was leaking).
- Blue thread sealant on the AC compressor bracket bolt that goes to the oil pump.
- New oil pan half moon seals.
- Black RTV to seal the oil pan.
Additionally I replaced the input and output transmission shaft seals since they are easy to access. I did notice that the rear transmission output shaft had a small leak.
I really recommend the Flyin Miata rear main seal installer tool. Using the tool made installing the rear main seal to the correct depth super easy. I plan on getting the rest of their seal installer tools for the next time I need to replace the seals on the front of the engine.
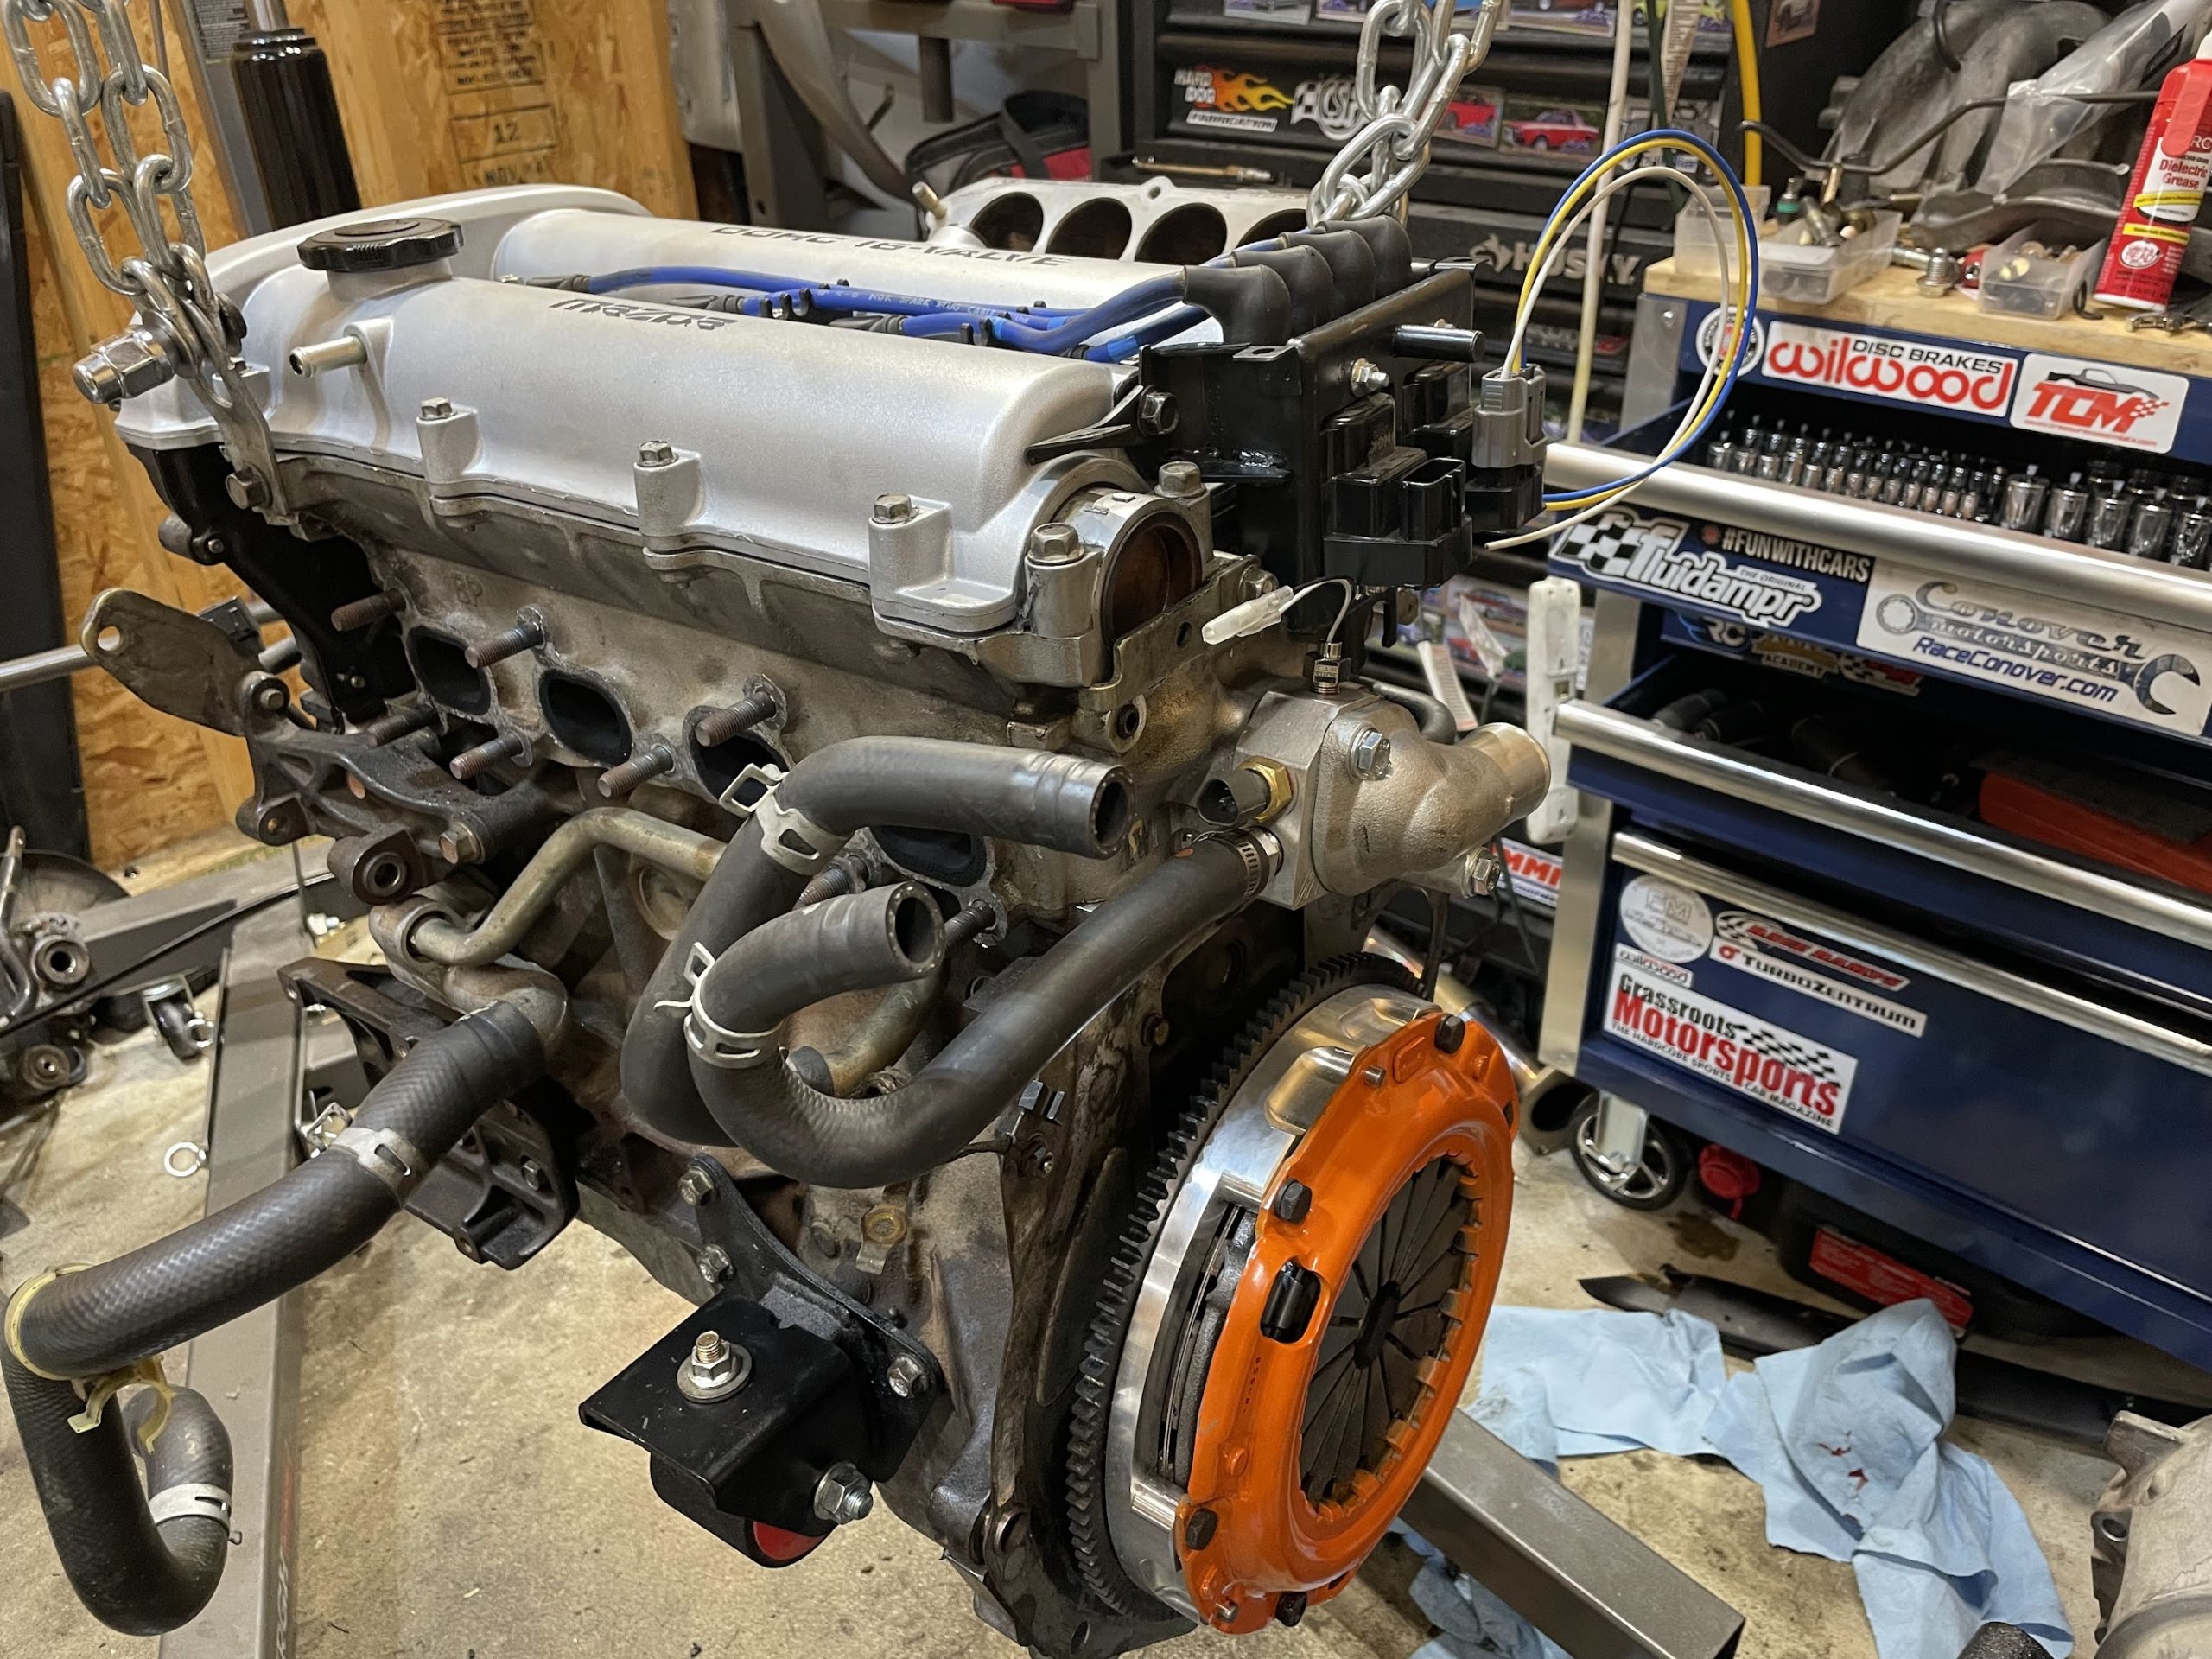
Supermiata sport clutch + lightweight flywheel
When you spend the time to remove an engine from the car to replace the rear main seal you might as well replace the clutch and flywheel if you don’t know how old they are. You don’t want to put everything back together and then notice your clutch starting to slip a few months later and have to do all the work again. I’m fairly sure the clutch and flywheel in my Miata are both still the original ones installed from the factory.
There are a lot of clutch options for the Miata. I wanted something that could handle any power adding mods that I may do within the next several years, while also being easily drivable on the street. Supermiata has an organic sport clutch that behaves just like an original clutch while being able to handle more power than the 5 speed in my Miata can handle. It seemed like the perfect clutch for me. I also installed their 9lb aluminum flywheel. The lighter flywheel saves a little weight in the car, while allowing the car to rev quicker, very useful for rev matching.
Initially the clutch released very low and was hard to slip, but after the first drive with the clutch it behaves pretty much just like my original clutch. It’s slightly stiffer, but just as easy to shift and modulate. The flywheel makes downshifting even easier.
My only concern right now is that the clutch is very smelly (or at least I’m pretty sure it’s the clutch). Hopefully it finishes breaking in and doesn’t smell anymore, and it isn’t an issue with my installation. It seems to slowly be getting better with time.
Oil pan replacement

My Miata’s oil pan was stripped, and a conical drain plug was installed to seal the pan. It works, but I really wanted a regular bolt. While my engine was out I went ahead and installed a used oil pan without damage to the drain plug threads.
Removing the oil pan is tricky. There is a baffle plate sandwiched between the block and the pan. The oil pickup tube also bolts onto the baffle plate. I ended up bending the baffle plate trying to get the oil pan off. Be sure to separate the baffle from the pan before lifting it off, don’t try forcing it. There will be RTV on both sides of the baffle plate where it touches the block and where it touches the pan. With the oil pan removed I cleaned everything really well, then put it all back together. Don’t forget to replace the oil pickup tube gasket if you removed the oil pickup tube.
After I had reinstalled the engine into the car I noticed a small crack on the front oil pan flange area where it mounts to the block. This caused a very small oil leak when the car was running (it’s high enough that the resting oil level is well below the crack). I don’t know if the crack was always there, if it happened while installing the pan, or happened while putting everything back in the car. For the time being I sealed the crack with some epoxy, which has so far completely stopped the leak. I did purchase another used replacement oil pan in case the epoxy doesn’t hold up.
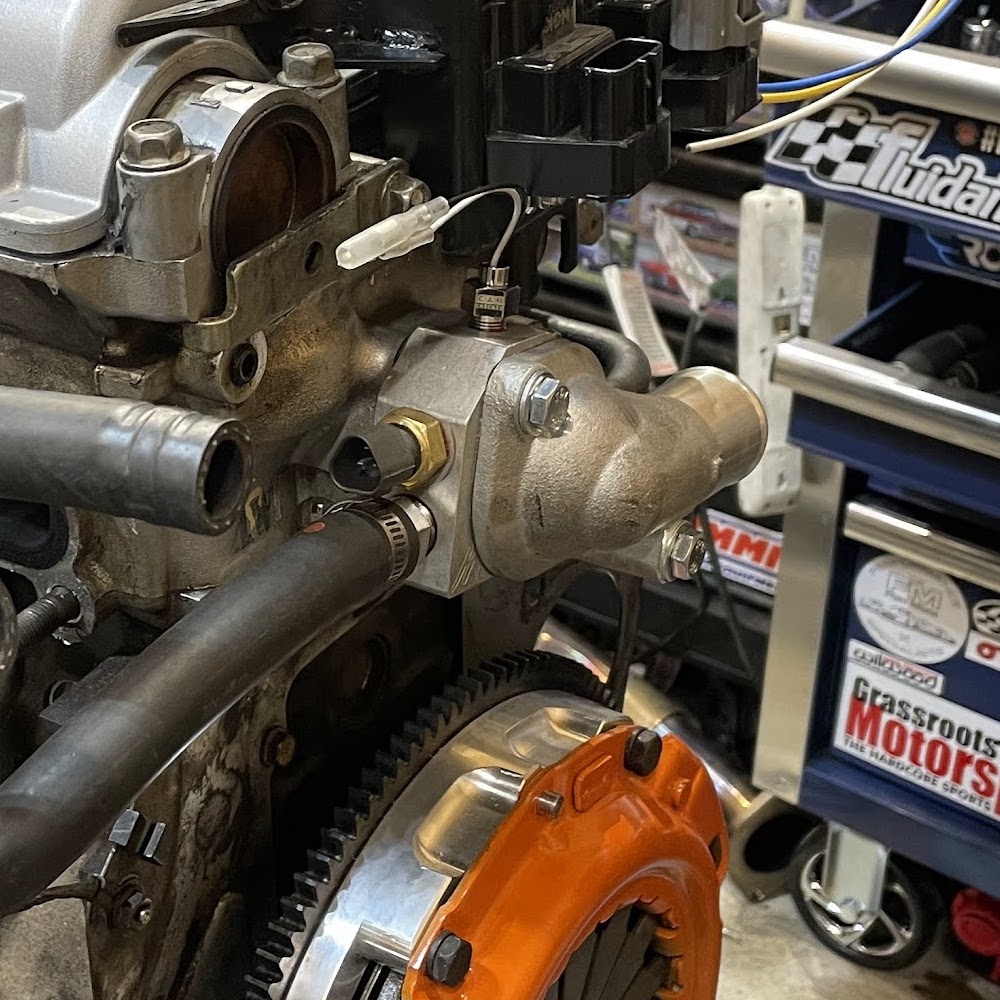
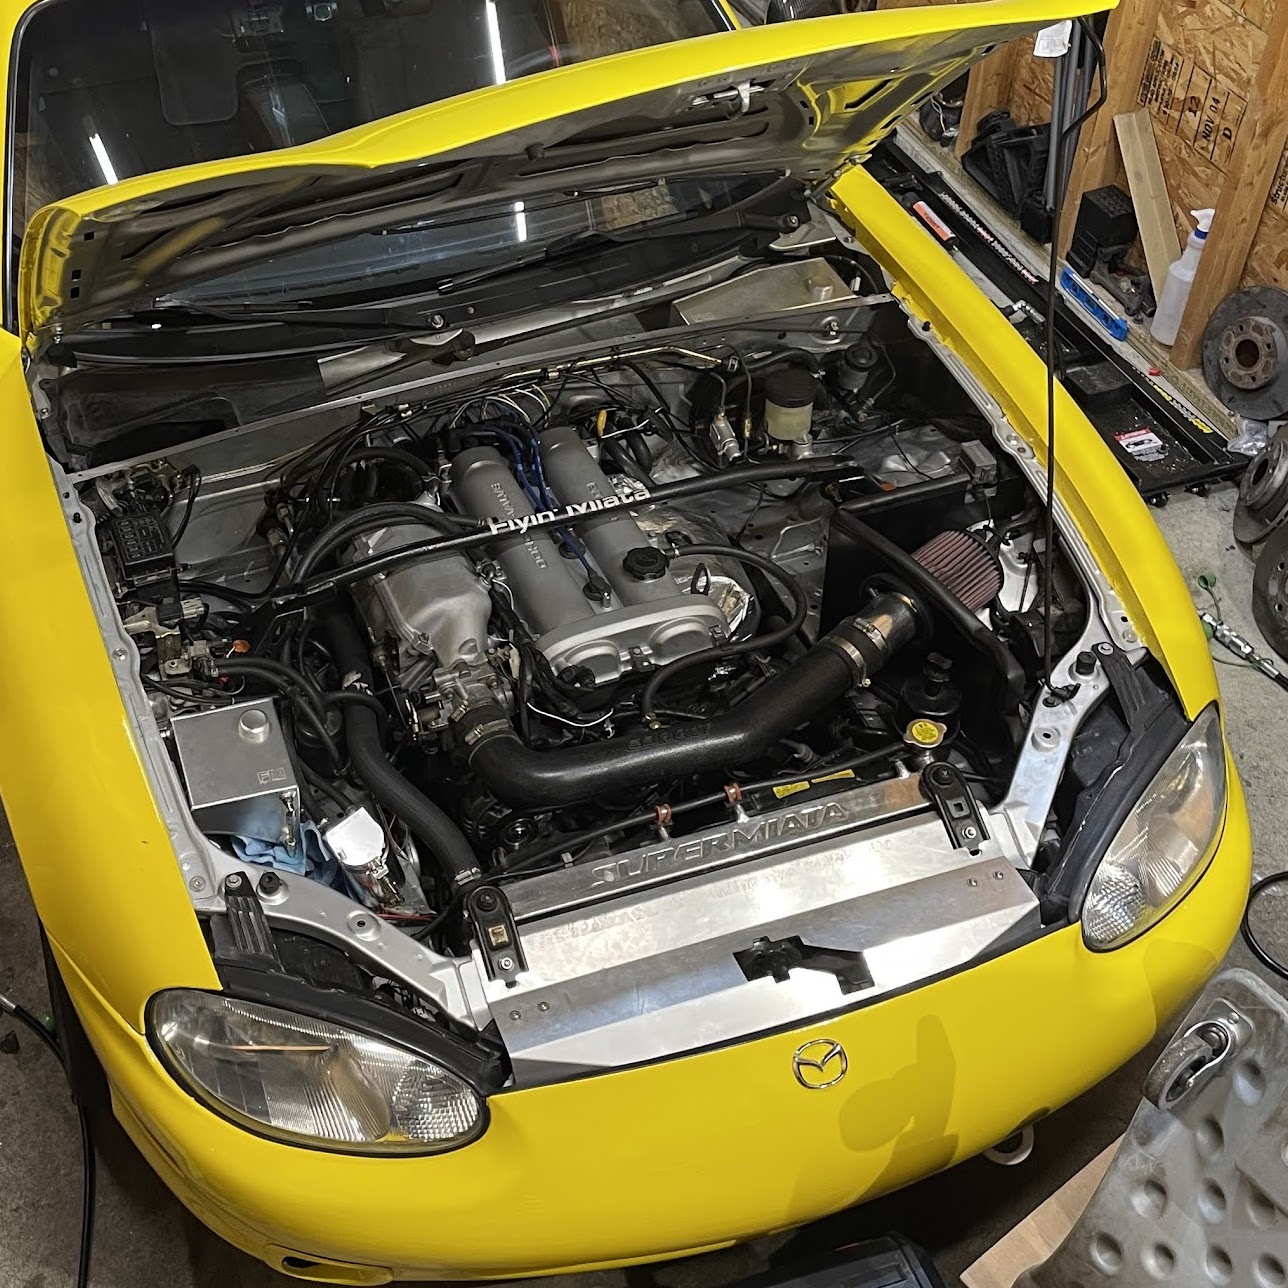
Hawley Performance coolant reroute
The Mazda B6/BP engine found in the Miata was originally designed for transverse mounting in front wheel drive cars. In that application the thermostat is mounted on one side of the engine, and the water pump is on the other side of the engine. When Mazda put this engine in the Miata they put the thermostat and water pump on the same side of the engine. This was probably because if the thermostat was at the back of the engine it would be very difficult to change the thermostat or hoses because they’d be right up against the firewall.
For street cars this isn’t really an issue, the engine cools well enough. The problem is when you start adding power, or you start driving the car hard on the track. Cylinders in the back of the engine don’t get cooled as well as the cylinders in the front, leading to extra engine wear. The solution to this problem is installing a coolant reroute, which moves the thermostat to the back of the engine.
I ended up purchasing a Hawley Performance coolant reroute kit. Someone at a track day recommended it because it was so much cheaper than some of the other options out there. It uses all off the shelf parts, other than their middle plate. Installation was easy and I haven’t had any issues with it. I definitely see why Mazda didn’t put the thermostat back there, you really have to pull the engine forward a bit to get access to that area.
Coolant temperatures have been lower, and so have oil temperatures. I haven’t yet had a chance to drive it on the track, so I don’t know how well it helps there. I plan on also installing an oil cooler if the oil temperatures aren’t low enough with the reroute. My only real complaint at this time is that the cooling system was a bit harder to bleed all of the air out of. I used one of those elevated “spill proof” funnels which did eventually clear out all of the air.
If I were doing this again I’d probably spend the extra money and get the Supermiata Qmax reroute. It’s more of a one piece design which should be easier to work with once it’s in the car. Their reroute kit also has a bleeder nipple for making it easier to bleed the air out of the system. The more expensive kits also usually have more ports for sensors which is useful.
EUDM/JDM flattop intake manifold
There were three different intake manifolds that Mazda used on NB Miata’s:
- 1999-2000: VICS (Variable Inertial Charging System) manifold. Has internal butterfly valves that can adjust the length and volume of the intake runners. It adds a little bit of extra power after a certain RPM.
- 2001-2005 USDM: VTCS (Variable Tumble Control System) manifold. Is purely for improving cold start emissions.
- 2001-2005 EUDM/JDM: Flattop / squaretop manifold. A more open and simple design that flows better. It adds power at the upper RPM range at the expense of low RPM power.
Since my car is a 2000 it has the VICS manifold, which doesn’t really have any issues. I got a good deal on a EUDM flattop manifold and installed it. My main reasoning behind this is that at the track the higher RPM power is what you are most interested in, since that’s where you try to run your engine for maximum performance. It’s also simpler (no need to hook up the VICS electronic control to my standalone ECU and tune the switchover for maximum power).
With the engine out of my Miata I cleaned and painted my valve cover and intake manifold. I went with a simple aluminum color finish that makes them look like new OEM parts. An advantage to the stock color is that scratches, chips, and other imperfections in the paint don’t look quite as bad. I was originally going to polish these parts to a mirror finish, but that’s a very long process.
Conclusion
If you haven’t ever pulled the motor out of a Mazda Miata but are considering it, then you should know it’s a pretty easy job if you have an engine hoist. Miata engines are known to leak oil, and it’s certainly a lot easier to install the rear main seal and seal the oil pan with the engine out of the car.
Unfortunately after driving the Miata for approximately 500 miles after pulling the engine it is leaking oil again from the rear. It’s less of a leak than before, but this means I’ll have to take things apart again. I haven’t decided if I’m going to try separating the transmission with the engine still in the car, doing this would allow me to verify the source of the leak, since some things can be fixed with the engine still in the car.
If the leak doesn’t get any worse I’ll just continue to keep an eye on it for the time being. I put in a deposit for a healthy used BP4W motor from Prestige Spares in the UK. The motor is expected to arrive in early April. With the spare motor I’ll be able to fully rebuild one of them, and be able to swap in the spare more quickly if the leak gets worse.
Upcoming posts include a recap of the first year of ownership of my Miata and a post about the safety improvements I’ve made to my Miata.